Caramel biscuit slices

Hi all! Christmas week is upon us, the winter solstice has passed by and now we can look forward to lengthening daylight in the coming weeks. I love it when the end of January creeps up on us and we realize “Wow it’s not getting dark at 5 pm any more!”

I’m easing back into life and want to share these delicious cookies with you. This Scandinavian recipe is compliments of Brontë Aurell’s book “Brontë at Home - baking from the Scandi Kitchen”. The word biscuit is used in Great Britain and Northern Europe for what we Americans think of as cookies. Tea and biscuits anyone?

One of this recipe’s ingredients is golden syrup which is made from cane sugar. Buuuut . . . . for my trial run I used honey since I didn’t have any of said golden syrup in my larder. That first batch of biscuit slices was a big hit, much enjoyed by those who were around to accept the role of samplers.

I ultimately got my hands on a couple of bottles of Lyle’s Golden Syrup, a brand that’s been around a long time and an ingredient that I often see in baking recipes from the Brits and “Scandis”. Made by the British company Tate and Lyle, the story began in 1881 when businessman Abram Lyle built a sugar refinery on the Thames in East London. The golden syrup was a by product of refining sugar cane to create sugar. He started selling it from wooden casks and was soon supplying large quantities to London businesses weekly.

It’s an inverted sugar syrup, the golden end result adding caramel (almost on the verge of being burnt, in a good way) and honey notes to baked goods. It can also withstand higher baking temperatures and helps prevent crystallization.


On to the task at hand! Making the dough is a straight forward process, As a plan ahead step, I like getting it shaped into planks then wrap and fridge (or freeze) them until I’m ready to bake.

Here’s the recipe. For general baking I use unsalted butter such as Challenge or Land O’Lakes, but for cookies I’ve been experimenting with European style butters which contain a higher amount of butter fat. There are a number that I can find locally - Land O’Lakes Extra Creamy (salted or unsalted, black box), Vermont Creamery (salted or unsalted), Danish Creamery (salted - made by Challenge), Kerry Gold (salted and unsalted). So far I’m enjoying the flavors in the cookies I’ve baked with the salted versions, finding that the salt adds a certain je ne sais quoi. If you opt to use salted butter in a recipe that includes salt as an ingredient, simply reduce the recipe amount by half.


I often replace a quarter to a third of a recipe’s all purpose flour with whole wheat pastry flour, (WWPF) particularly in my shortbread cookies and pâte brisée. Pastry flour is softer with less gluten than all purpose, giving a more tender end result. Plus I like the flavor the whole wheat imparts.

Buuuuuuuut! This year I had a hard time finding Bob’s Red Mill WWPF which is the one I’ve been using for some years now. Luckily I found some at a local specialty market here in Grand Rapids, but sadly I’ve just learned that all of Bob’s pastry flours have been discontinued. Oh man!

Mise en place (FYI - my mise here is for a larger batch of dough than the base recipe)

The dough process is a familiar one - cream butter and sugar (lately I’ve been using golden granulated cane sugar from Costco); add in golden syrup (or honey) and vanilla and blend; mix in flour and baking powder until it all comes together. Here’s the recipe again.

Once the dough comes together, divide it in three portions about 215 g each. To create the dough strips I place them on plastic wrap and get a rough shape going. You’re looking for a final sized strip of approximately 2” wide by 14” long for each portion of dough. Of course you can play around with size variations - I’ve done some where I cut the strips in half lengthwise for nice mini bites. Yummy.


Fold the plastic wrap up around the pre-shaped dough, leaving a bit of room for rolling it to it’s final dimensions. At this point you can proceed with baking or stash your strips in the fridge or freezer for later.


When ready to bake, heat the oven to 350º and place two strips on a half sheet pan. Sprinkle flaky sea salt on top.


Bake about 8-10 minutes - you might need a few minutes more. You’re looking for the dough to appear set and golden in color. Remember every oven is different.

Pull the sheet pan and drizzle caramel in squiggles across the surface. Pop the sheet pan back in the oven for 3-4 minutes to set the caramel. Top with finely chopped blanched almonds and pearl sugar if you’d like. I’ve been keeping most of my batches pristine with caramel and sea salt. So good!

Let the strips cool on the sheet pan for 5-10 minutes, then cut into slanted strips with a sharp knife or pizza cutter. I gently push them apart with a small offset spatula and let them cool fully before enjoying.

They store well in a covered container for several days at room temp or in the freezer for several weeks. Simply take them out and place at room temperature for 20-30 minutes before enjoying.

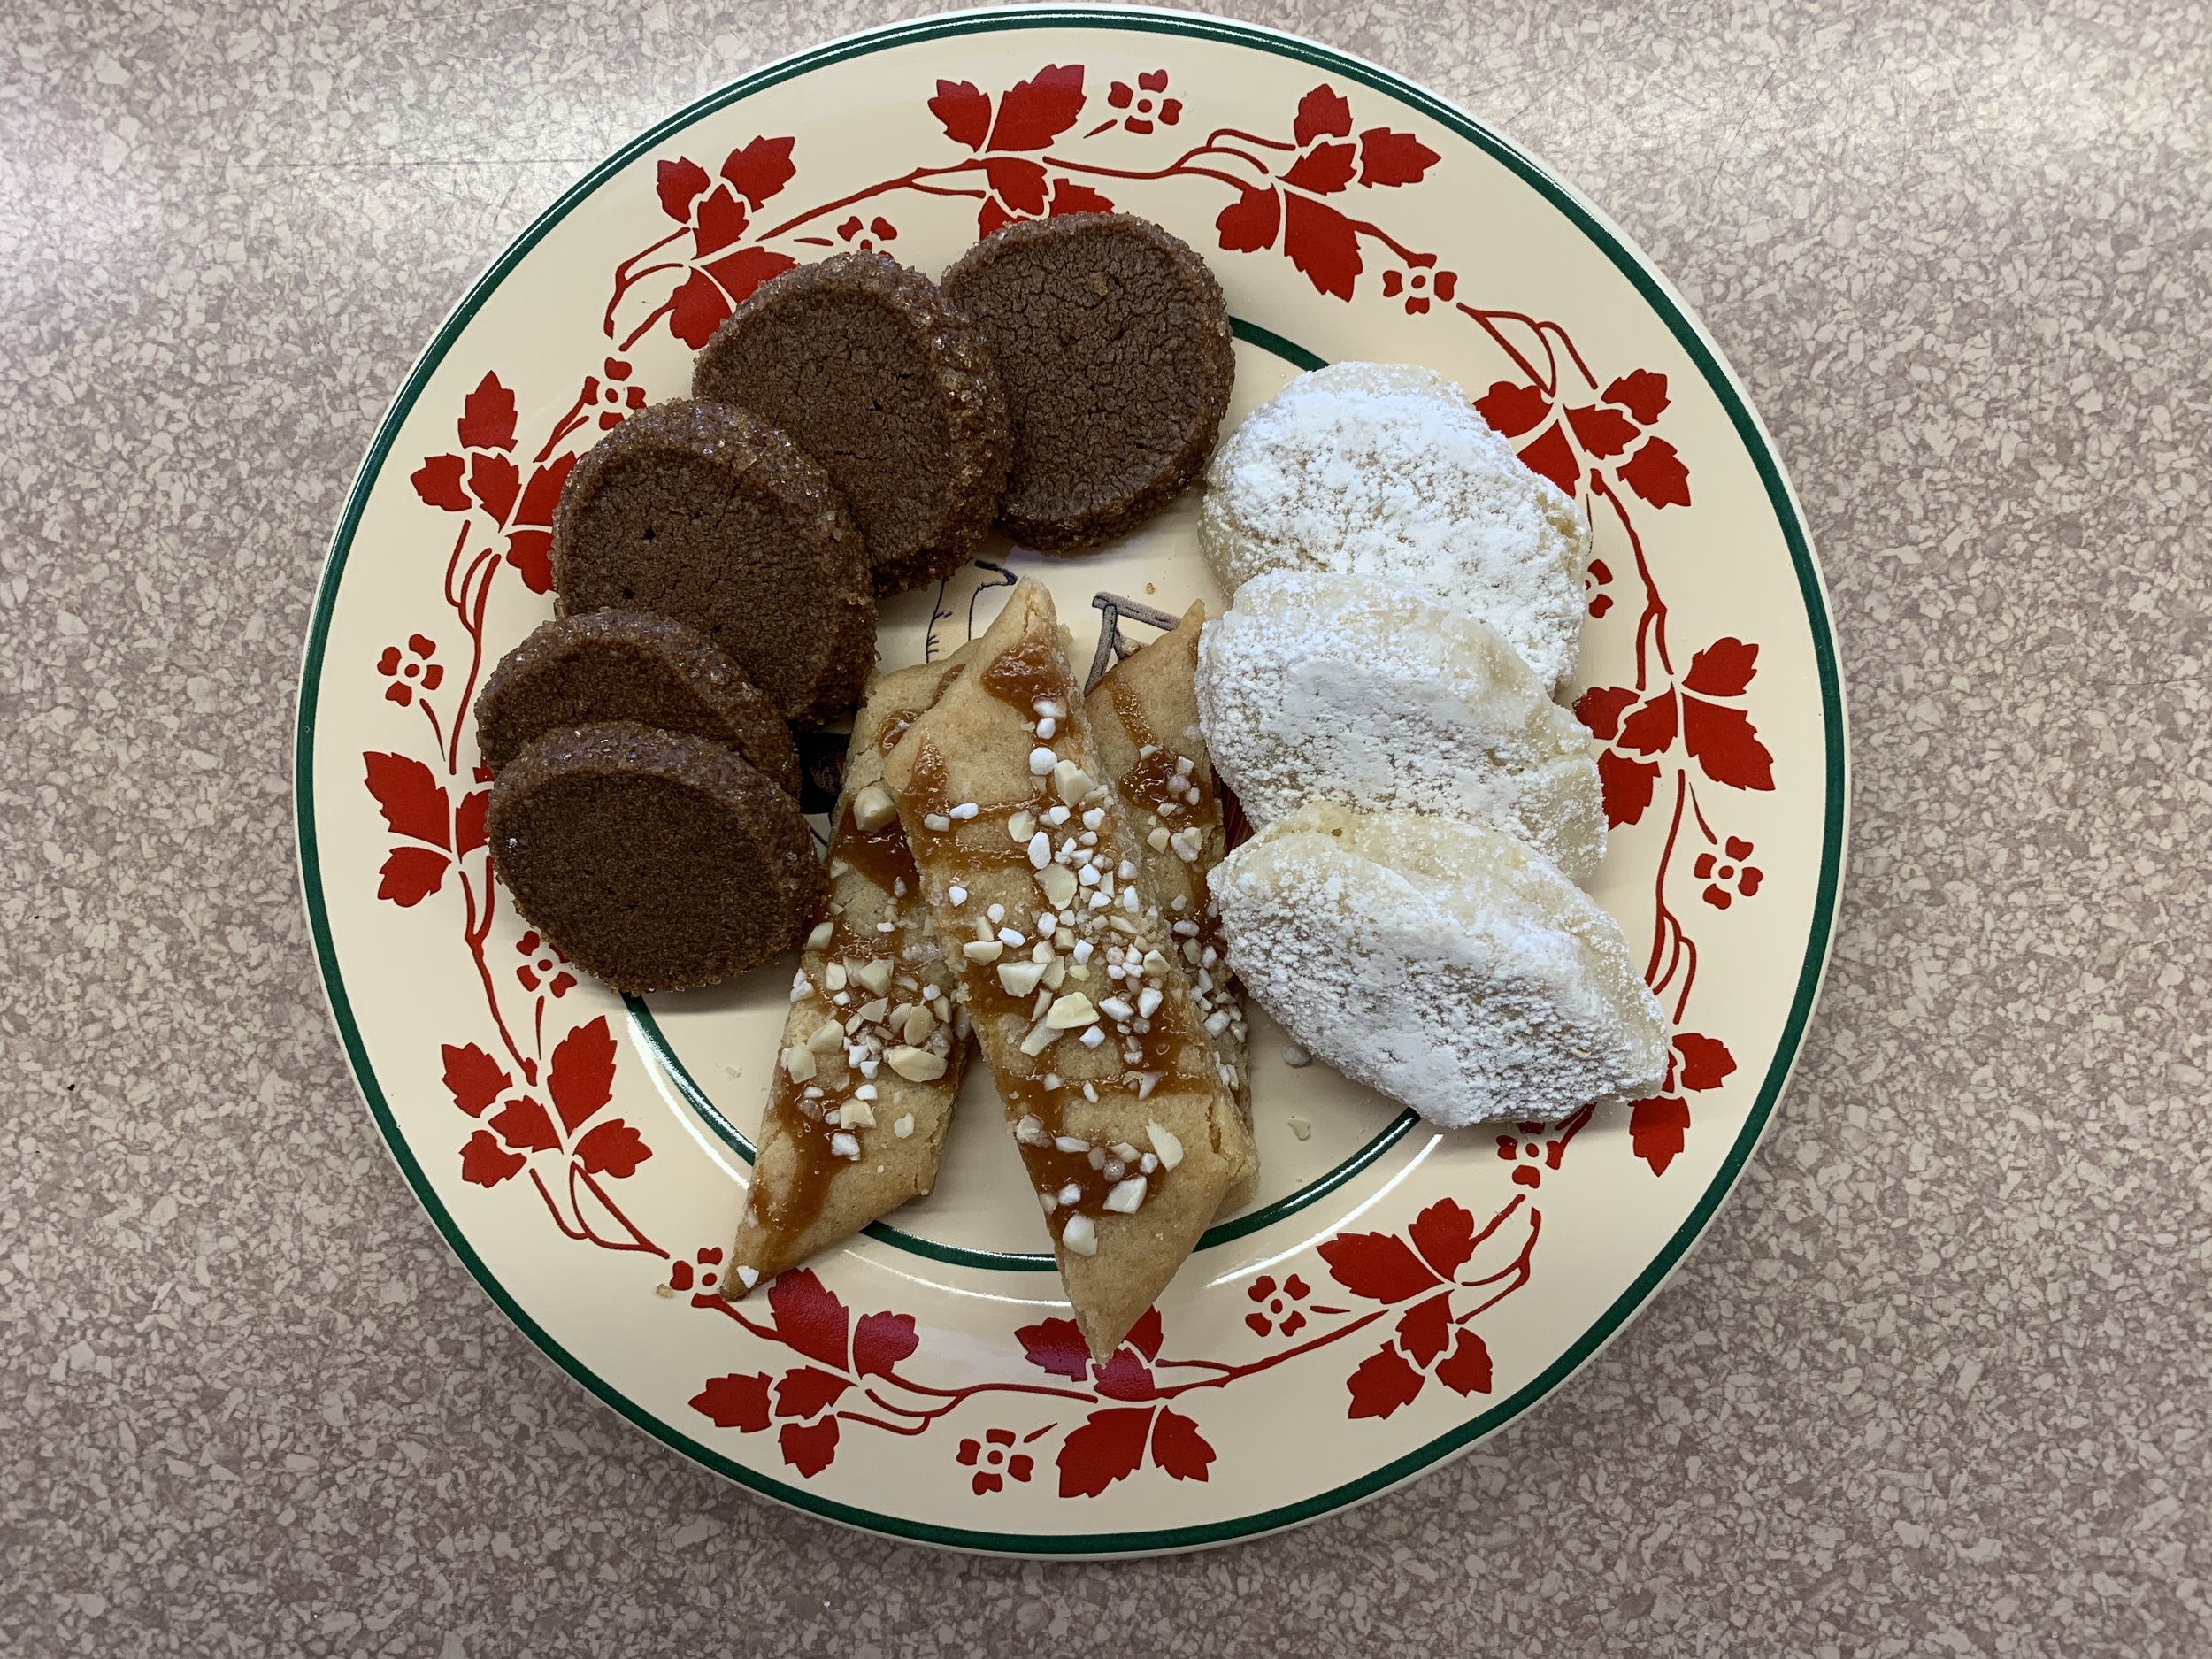
Chopped almond/pearl sugar version

I made these for several demo sessions I did for a local seniors group and they were a big hit. Below is a holiday cookie trio of these slices along with ricciarelli (delicious Italian almond meringues) and diamant au chocolat (classic French sablés).


Here’s a plate of the mini versions. One or two are simply perfect with my afternoon cup of coffee.

Give these a try - you’ll love them!

Wishing all of you a very Merry Christmas, peace, calm and all things bright.

Holiday Light show at nearby Meijer Gardens after a snowfall; Photo courtesy of Connie B.

Classic plum torte

Hi again! This one will be a quicky. Just wanted you to know about this if you aren’t already familiar with it. Perfect for fresh summer fruit nestled in a buttery cake. The recipe comes from Marian Burros and was published in the NYT every September from 1983 to 1989. Then readers were so bummed when it went AWOL that the Times makes sure the recipe is easily available for everyone. Play around with different fruits - I shared a peach/blueberry version with you back in an autumn update in 2022. You can add spices, sub in different flours - make it your own.

Here I’m using a mix of red and yellow plums from Nyblad, my favorite fruit vendor at the Fulton Farmers Market here in Grand Rapids. Now’s the time!

All mised up

It couldn’t be simpler and the results are delicious. You can choose an 8”, 9” or 10” pan such as a springform or round cake pan. Some folks double the recipe and bake it in a 9”x13” pan. I like to use my 8” springform - the end result is so pleasing to me. The coriander and ginger are my choices. You could add cinnamon if you’re of a mind.

Here goes. Heat oven to 350ºF. Butter the bottom of your pan, place a round of parchment in the bottom then butter/flour bottom and sides of the pan.

Cream 150 g / 3/4 cup sugar with 113 g / 4 ounces softened unsalted butter. Blend in 130 g / 1 cup unbleached all purpose flour (I do half all purpose and 1/2 whole wheat pastry flour), 1 teaspoon baking powder, 1/2 teaspoon coriander, a pinch of ginger, a pinch of salt and 2 large eggs. Beat well.

Transfer batter to the prepared pan, smooth top and place plum sections skin side up on the batter. Sprinkle top with granulated or turbinado sugar, 1/2 teaspoon coriander and a little lemon juice.

Marian’s original recipe calls for 24 halves of pitted purple plums. I eyeballed it, cut mine into narrower slices and had plenty for my needs. I like the mix of red and yellow skins.

Oooooh boy! Going in . . . .

Bake about one hour. Remove from oven, let cool about 10 minutes then release the springform ring. I carefully slide a long offset spatula underneath and slide the cake off the parchmented pan bottom. Cool fully on a wire rack.

Enjoy as is or top with a scoop of vanilla ice cream or Chantilly. The cake freezes well for some weeks - be sure it’s well wrapped. Thaw at room temperature and warm briefly at 300º if desired.

More fun coming up - I’m on a roll!

Here’s a natural beauty I’m seeing along my walking route. Enjoy nature - it’s the best.

Elderberry bush

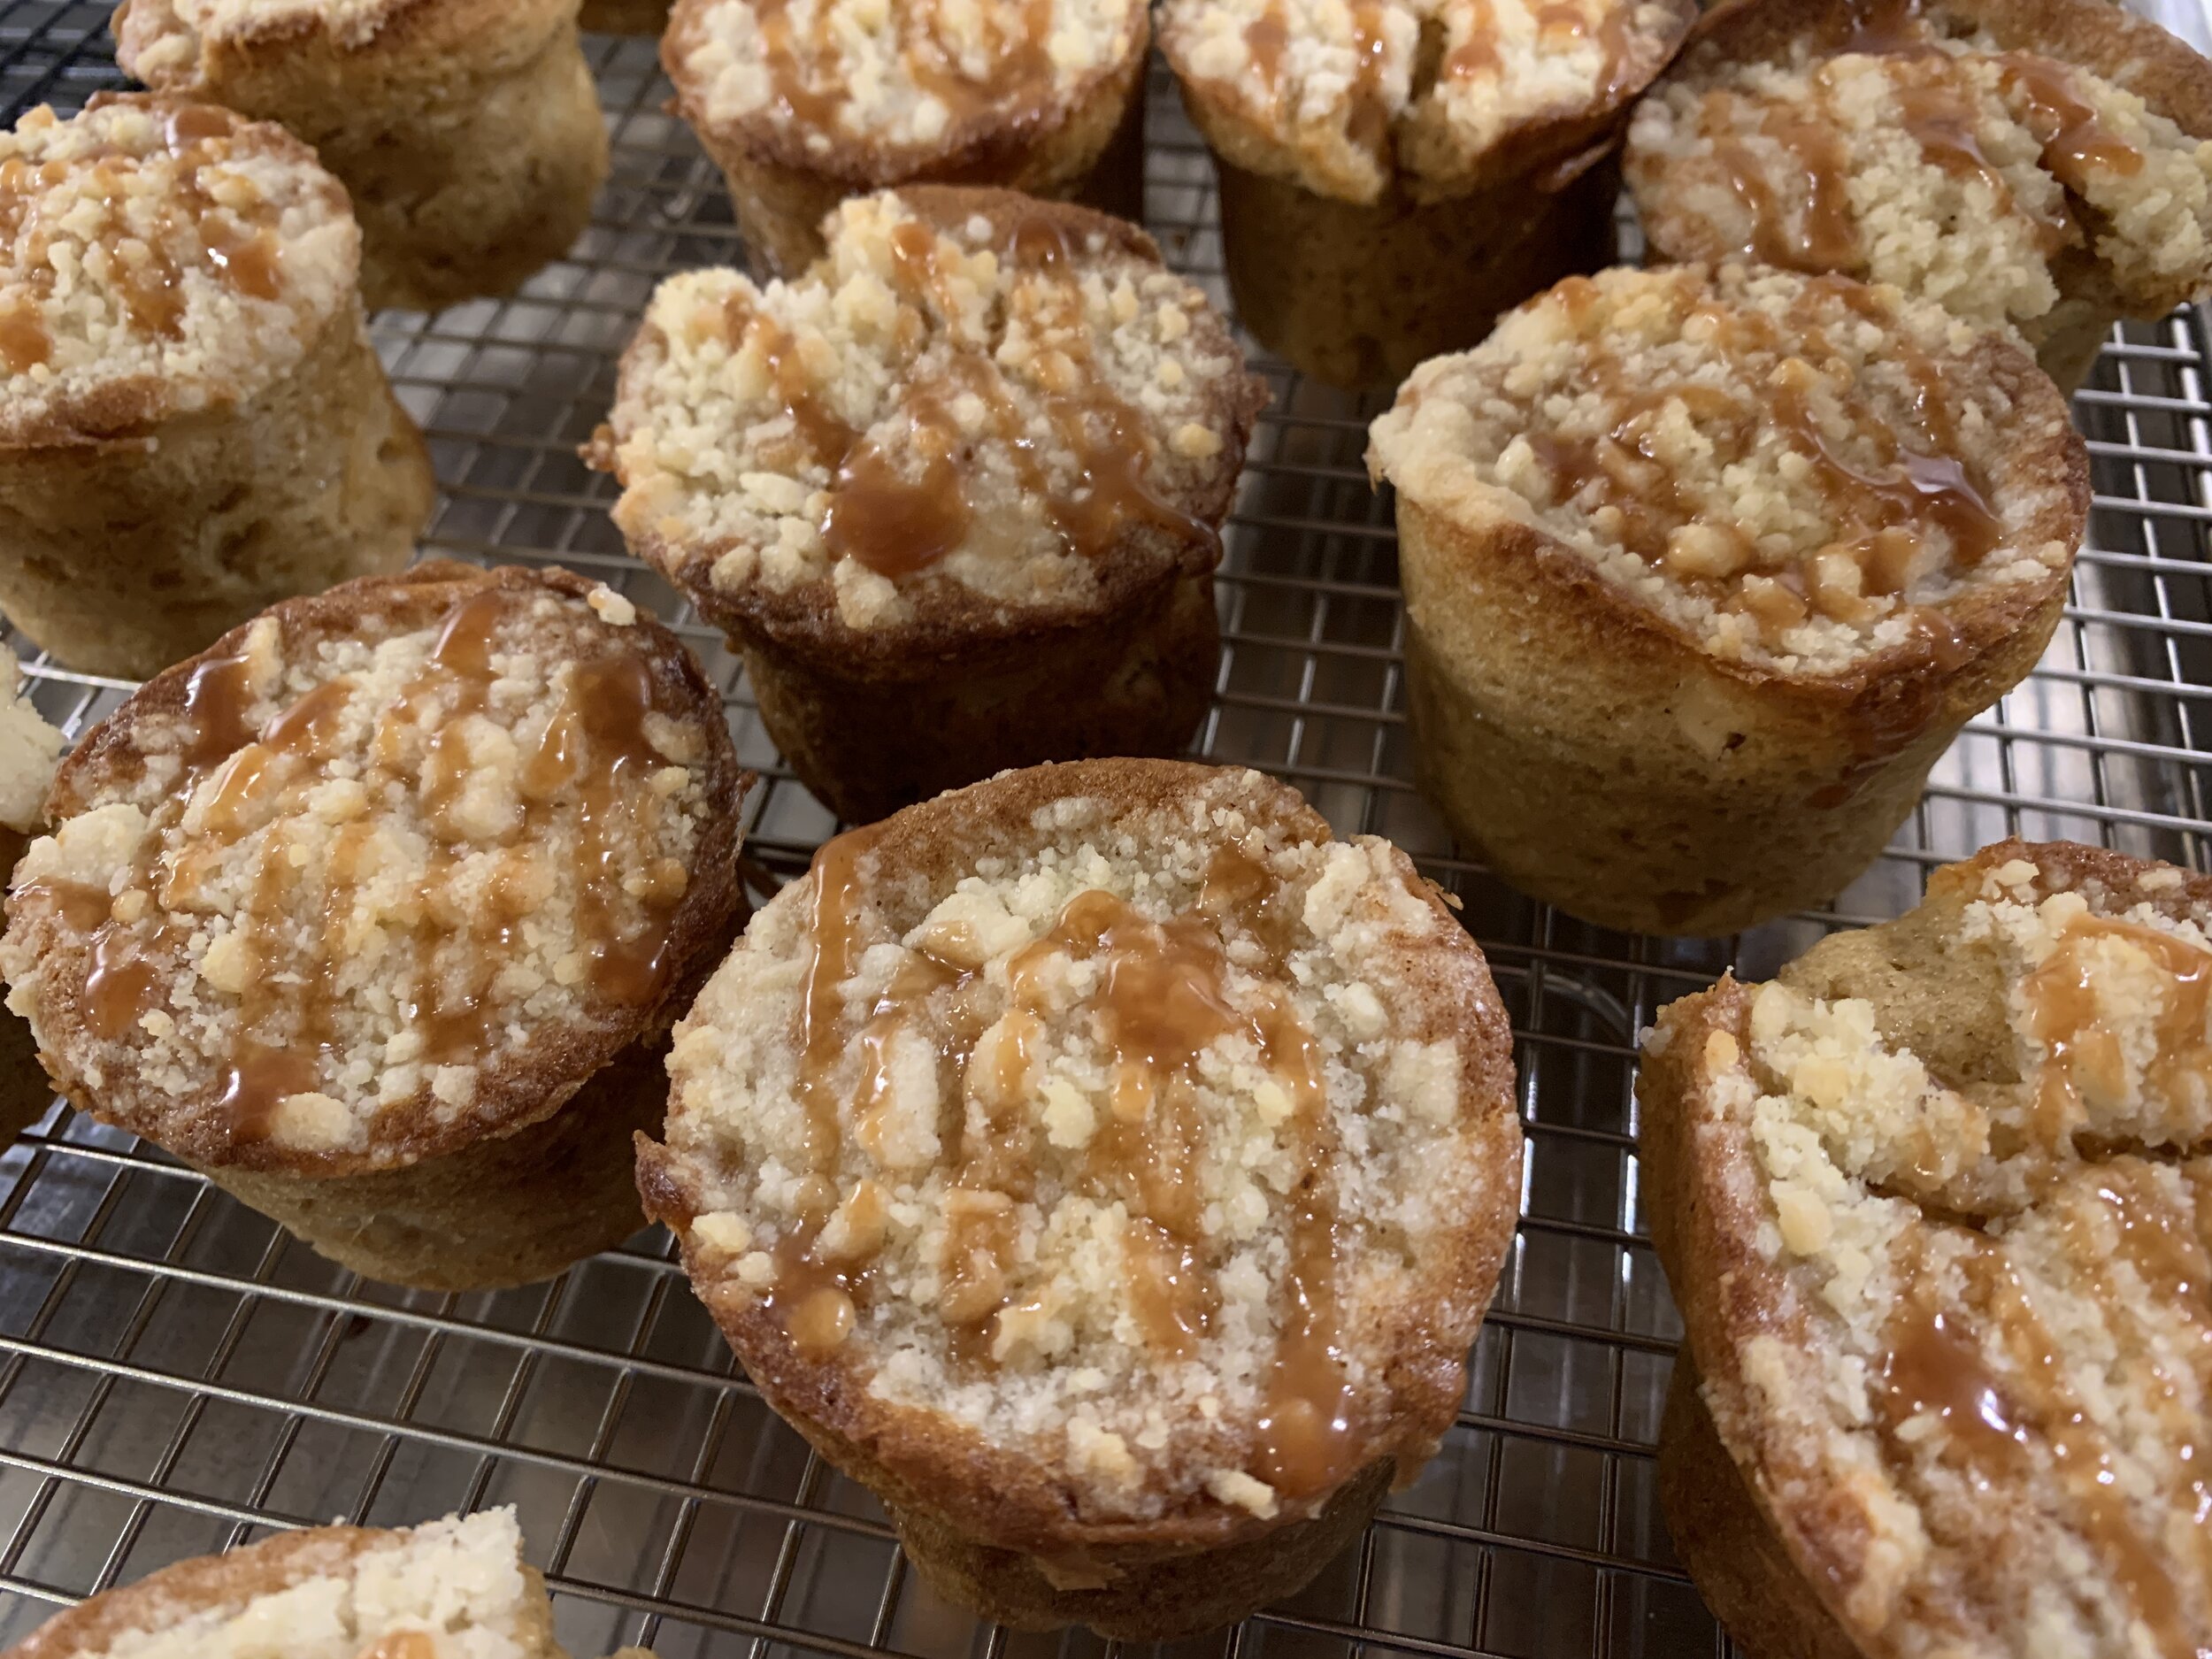
Caramel apple (or pear) streusel cakes

0724C3FB-64B0-4148-846A-A1D300905C13.jpeg

Isn’t it great when you come across a recipe to which you add your own touches, make many times over and never seem to tire of? This is one of those.

This recipe is my take on an apple sour cream cake from Genius Kitchen, a recipe I came across a couple of years ago. It’s not unlike a blueberry muffin recipe I used to make in days of yore. I’ve made it as the apple version a number of times and it’s always a pleaser but then I thought - hey, how about pear?? Why sure!

4D86E29B-E1E3-40AF-8469-A15C7064620D.jpeg

Heat the oven to 350ºF. Grease a 9x13 pan OR line muffin tins with papers OR have ready small silicone molds of choice. As some of you know, I’m a huge fan of smaller portions so the latter two options appeal to me.

For the base recipe, prep 2 cups apples or ripe pears (about 2 large) by peeling, coring and chopping them. I often have Fujis around for general eating so I’ll use those but I also like Jonamacs, Jonagolds, Galas or Golden Delicious for this type of baking. Bosc is my go to pear.

In a separate medium bowl blend 260 g/2 cups all purpose flour (you can replace 20-25% of that with whole wheat pastry flour or spelt) with one teaspoon baking soda, one teaspoon baking powder and 1/4 teaspoon salt. You can add cinnamon or spices as well, although I usually save my spice for the streusel.

In the bowl of a stand mixer fitted with the paddle, cream 113 g/4 ounces unsalted, room temperature butter with 175 g sugar (I like a mix of 75 g dark brown sugar and 100 g granulated cane sugar or ground raw sugar) for 2-3 minutes. Scrape down the bowl and add 1 teaspoon vanilla, 2 teaspoons boiled cider (optional) and 2 large eggs. Blend and beat well to lighten the mixture.

Add the dry ingredients in three additions, alternating with one cup sour cream (or crème fraiche or full fat yogurt), beginning and ending with the dry ingredients and mixing just until combined. Stir in the chopped apples or pears.

You have the option for a streusel topping by mixing 1/2 cup toasted and chopped nuts of choice (pecans, walnuts, almonds or hazelnuts are all good in my book!) with a teaspoon of cinnamon or spice mix of choice, 1/2 cup light or dark brown sugar and 2 teaspoons melted unsalted butter - once blended, sprinkle it over the cakes.

Portion the batter into your chosen pan or mold. I made two different sizes in my flexis.

Bake about 20-25 minutes (for small cakes) or 35-40 minutes if making a 9x13 size.

6A7CD1CE-B5D1-4E67-BCB3-0BDB7D6D9A3F.jpeg

Give them a 5-10 minute cool before gently removing them from the molds, then set them on a wire grid to cool. I often drizzle some caramel on top once out of the oven.

5A1590E9-FBE5-4FAC-B869-940596789070.jpg

You can leave off the streusel if you plan to garnish the small cakes with your favorite Swiss meringue buttercream like caramel apple cider or a simple whipped caramel mascarpone cream. Yum. Truth be told, I’ve combined a streusel and buttercream garnish and love the combo of the light creamy SMBC with the bit of crunch in the streusel. Yup.

Happy baking. Stay safe, stay healthy and be at peace.

Blueberry tart with peach ice cream

IMG_4202.jpg

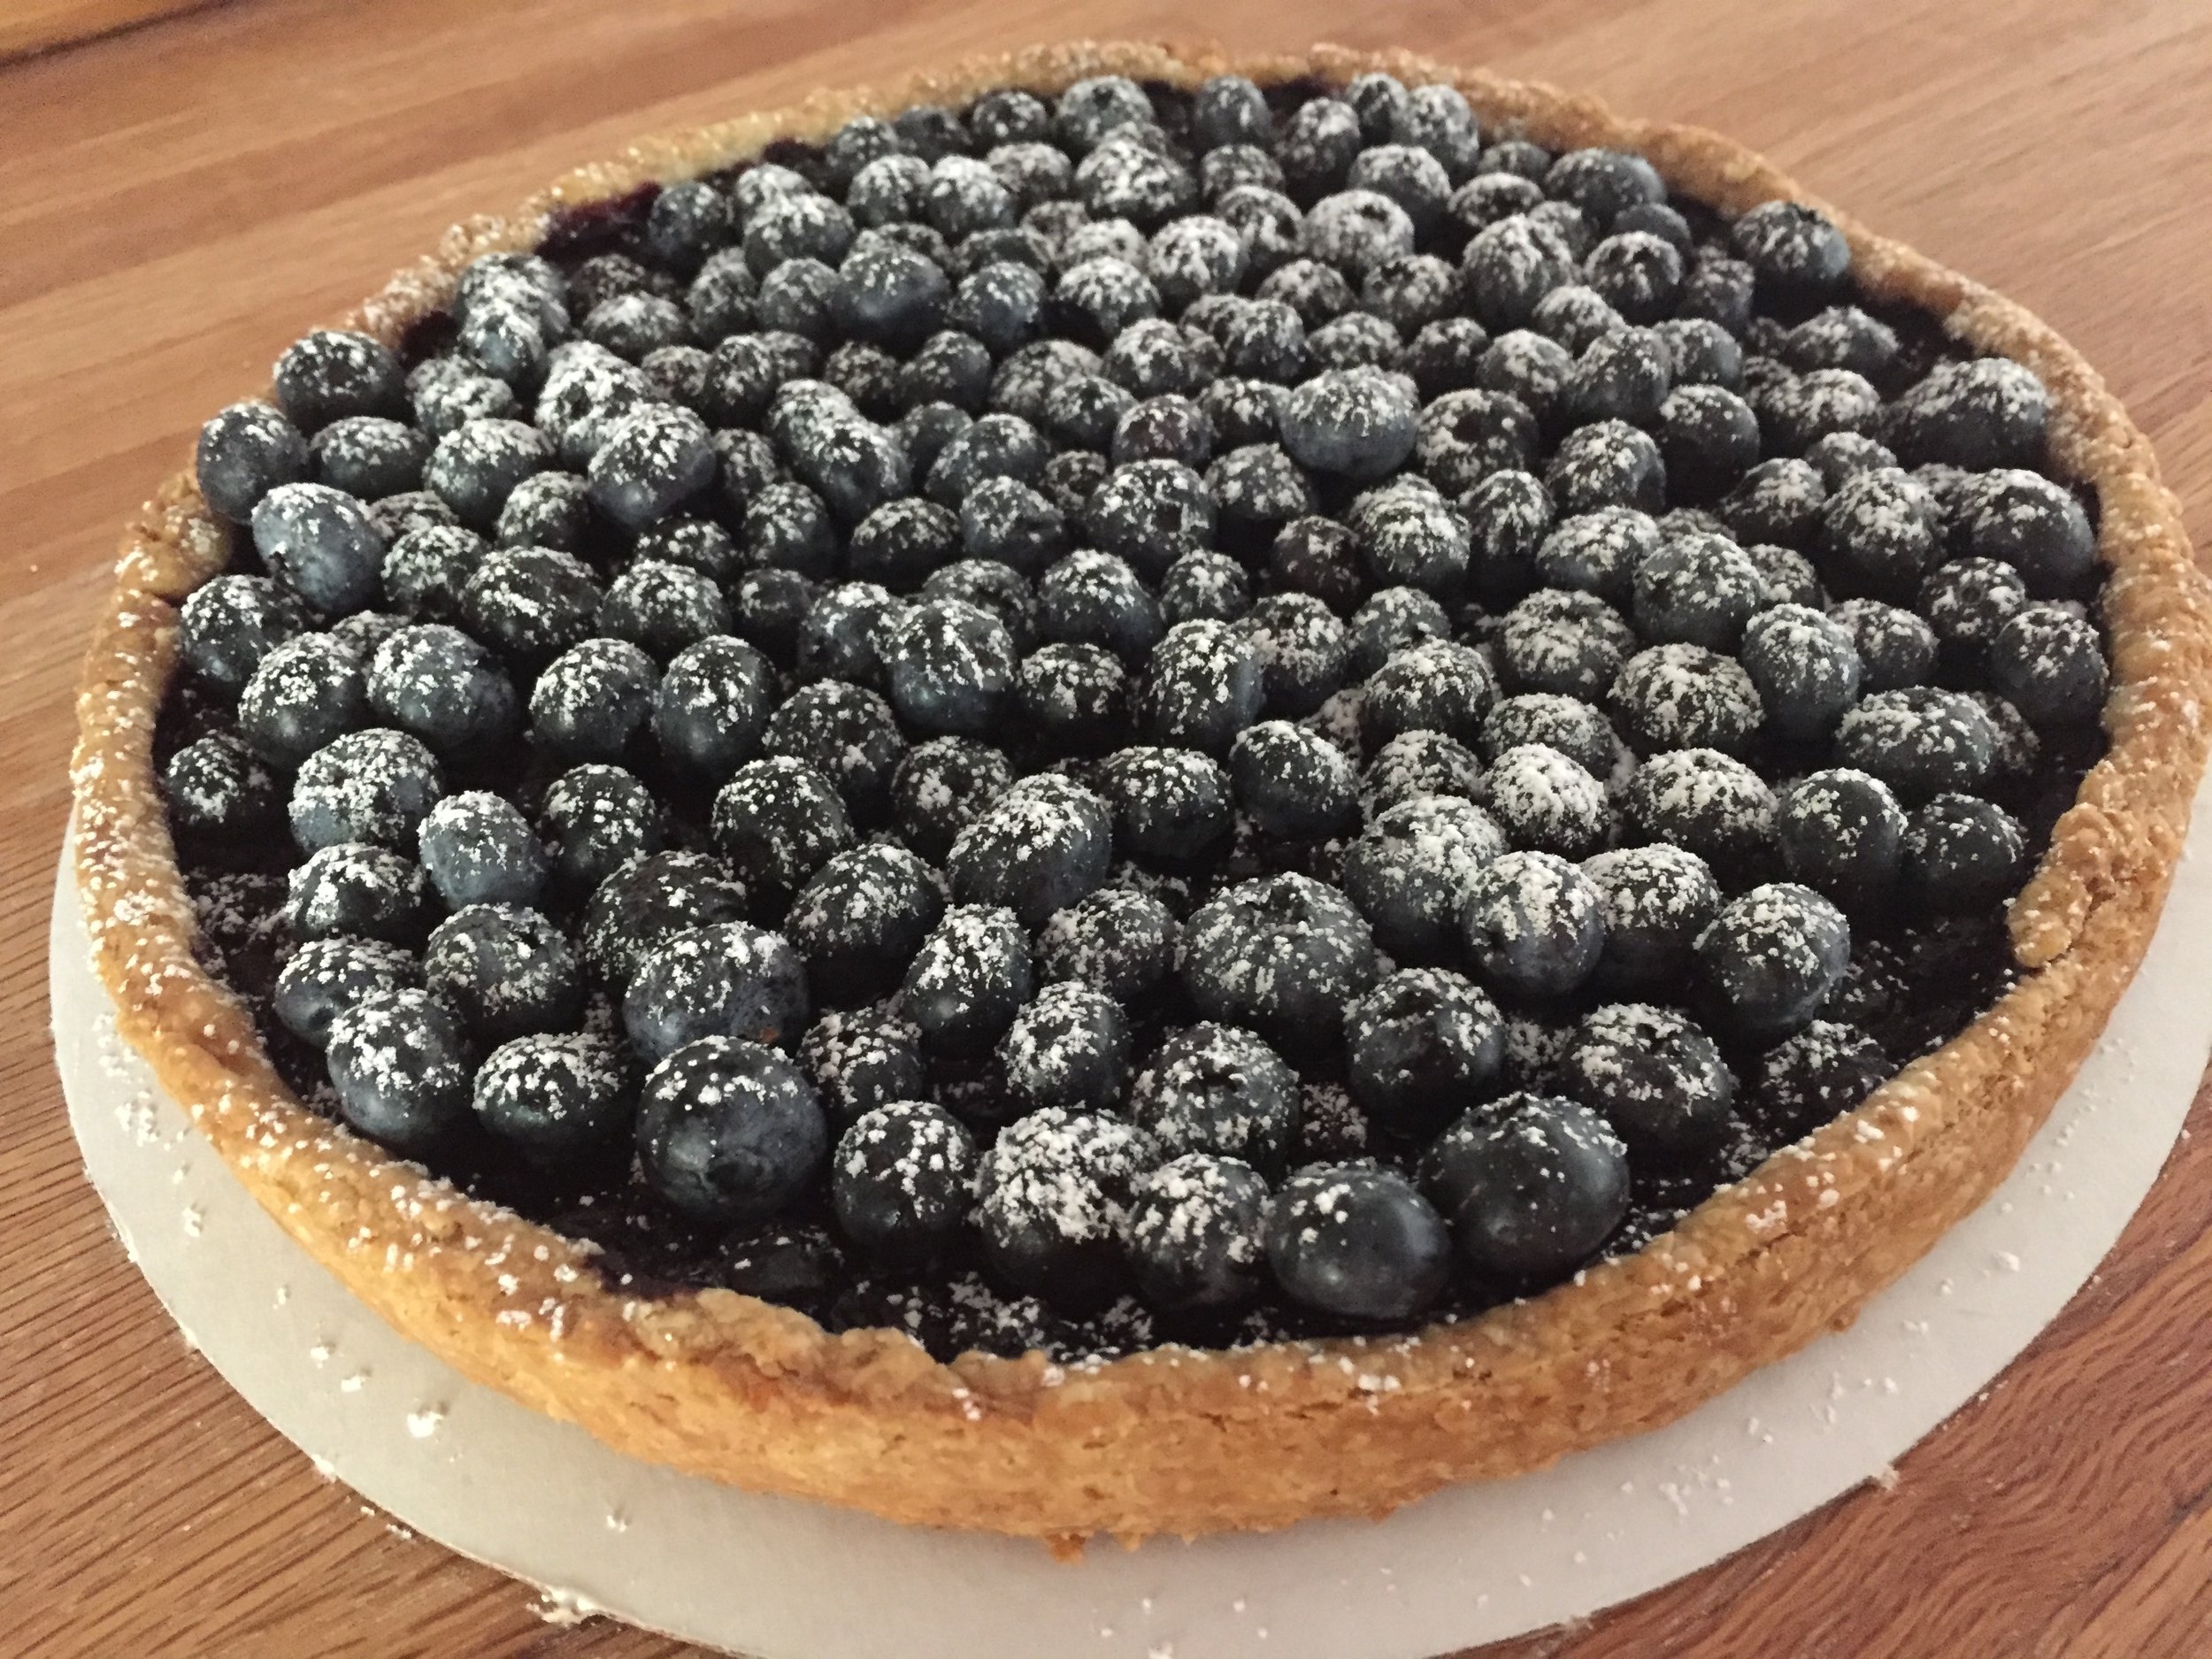
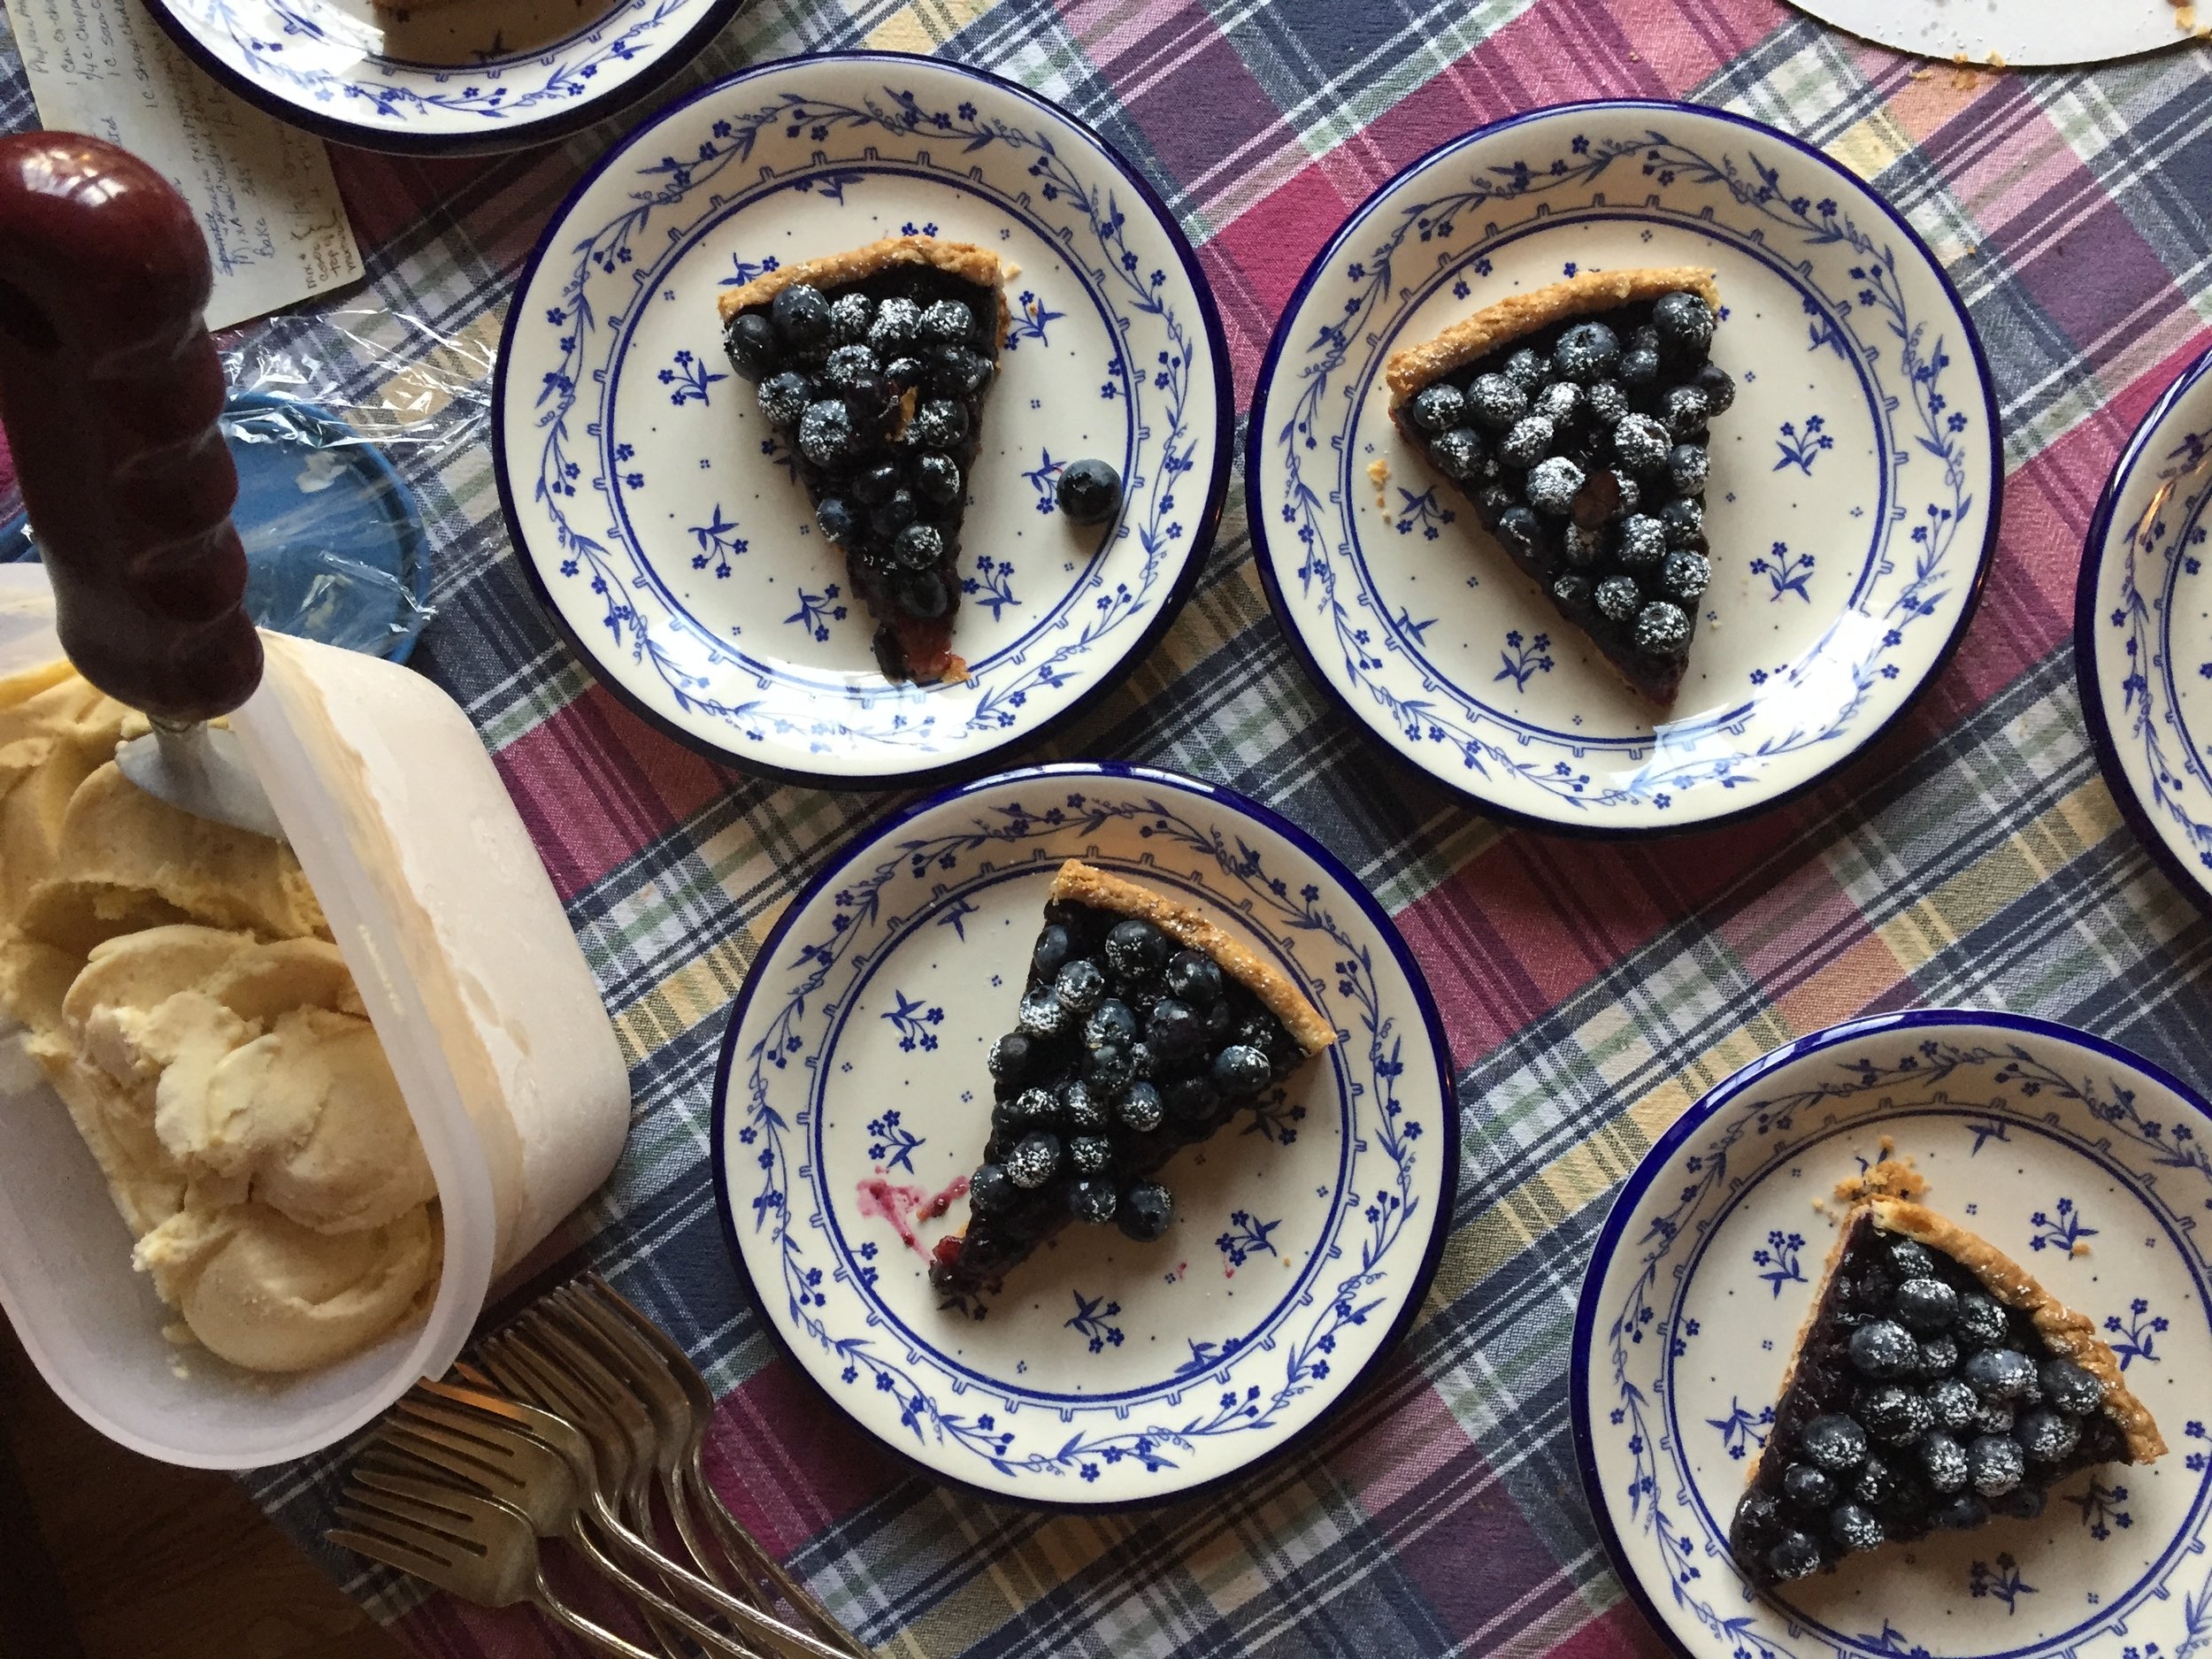
Even though autumn is creeping up on us, we’re still enjoying blueberry season, and it’s time for a straight forward blueberry tart. This one is based on the “Double Blueberry Tart” recipe in Food52’s “Genius Desserts” - a book I purchased a couple of months ago and find so enjoyable and illuminating. Not only does it offer so many great recipes but also tips and tricks from a number of talented baking and pastry professionals.

What better to pair with the tart but peach ice cream made with our delicious local west Michigan grown peaches. A match made in heaven.

For my crust I made an oat/whole wheat version of a basic pâte brisée using the food processor method. This makes plenty for two 9” tarts.

I rolled out my chilled dough and lined my 240 mm open tart ring. I can do this ahead and hold it in the freezer for a day or two before filling and baking. Love planning ahead!

IMG_4188.jpg

The idea here is to have a jammy baked berry filling that is ultimately topped with fresh blueberries. Double whammy delight!

Heat the oven to 400ºF.

I learned this tip from my mom years ago - sprinkle a mix of equal parts flour and sugar on the bottom of the unbaked crust. It helps protect it from soggy-ness. Gotta love it.

Stir together 75 g turbinado or blond cane sugar (I use Moreno), 2 tablespoons all purpose flour, a few grates of fresh nutmeg, a large pinch of cinnamon and 1/2 teaspoon coriander. Place a scant 3 cups fresh blueberries into the lined tart shell and sprinkle the sugar mixture over them. Dot with butter.

IMG_4233.jpg

Bake for about an hour until the crust is nicely browned and the berries bubbly. Ooooh - like blueberry jam!

IMG_4191.JPG

Once the tart has fully cooled, the only thing left to do is top it with 2 cups fresh blueberries and dust with confectioner’s sugar shortly before serving. Whoo-hoo!

IMG_4197.JPG

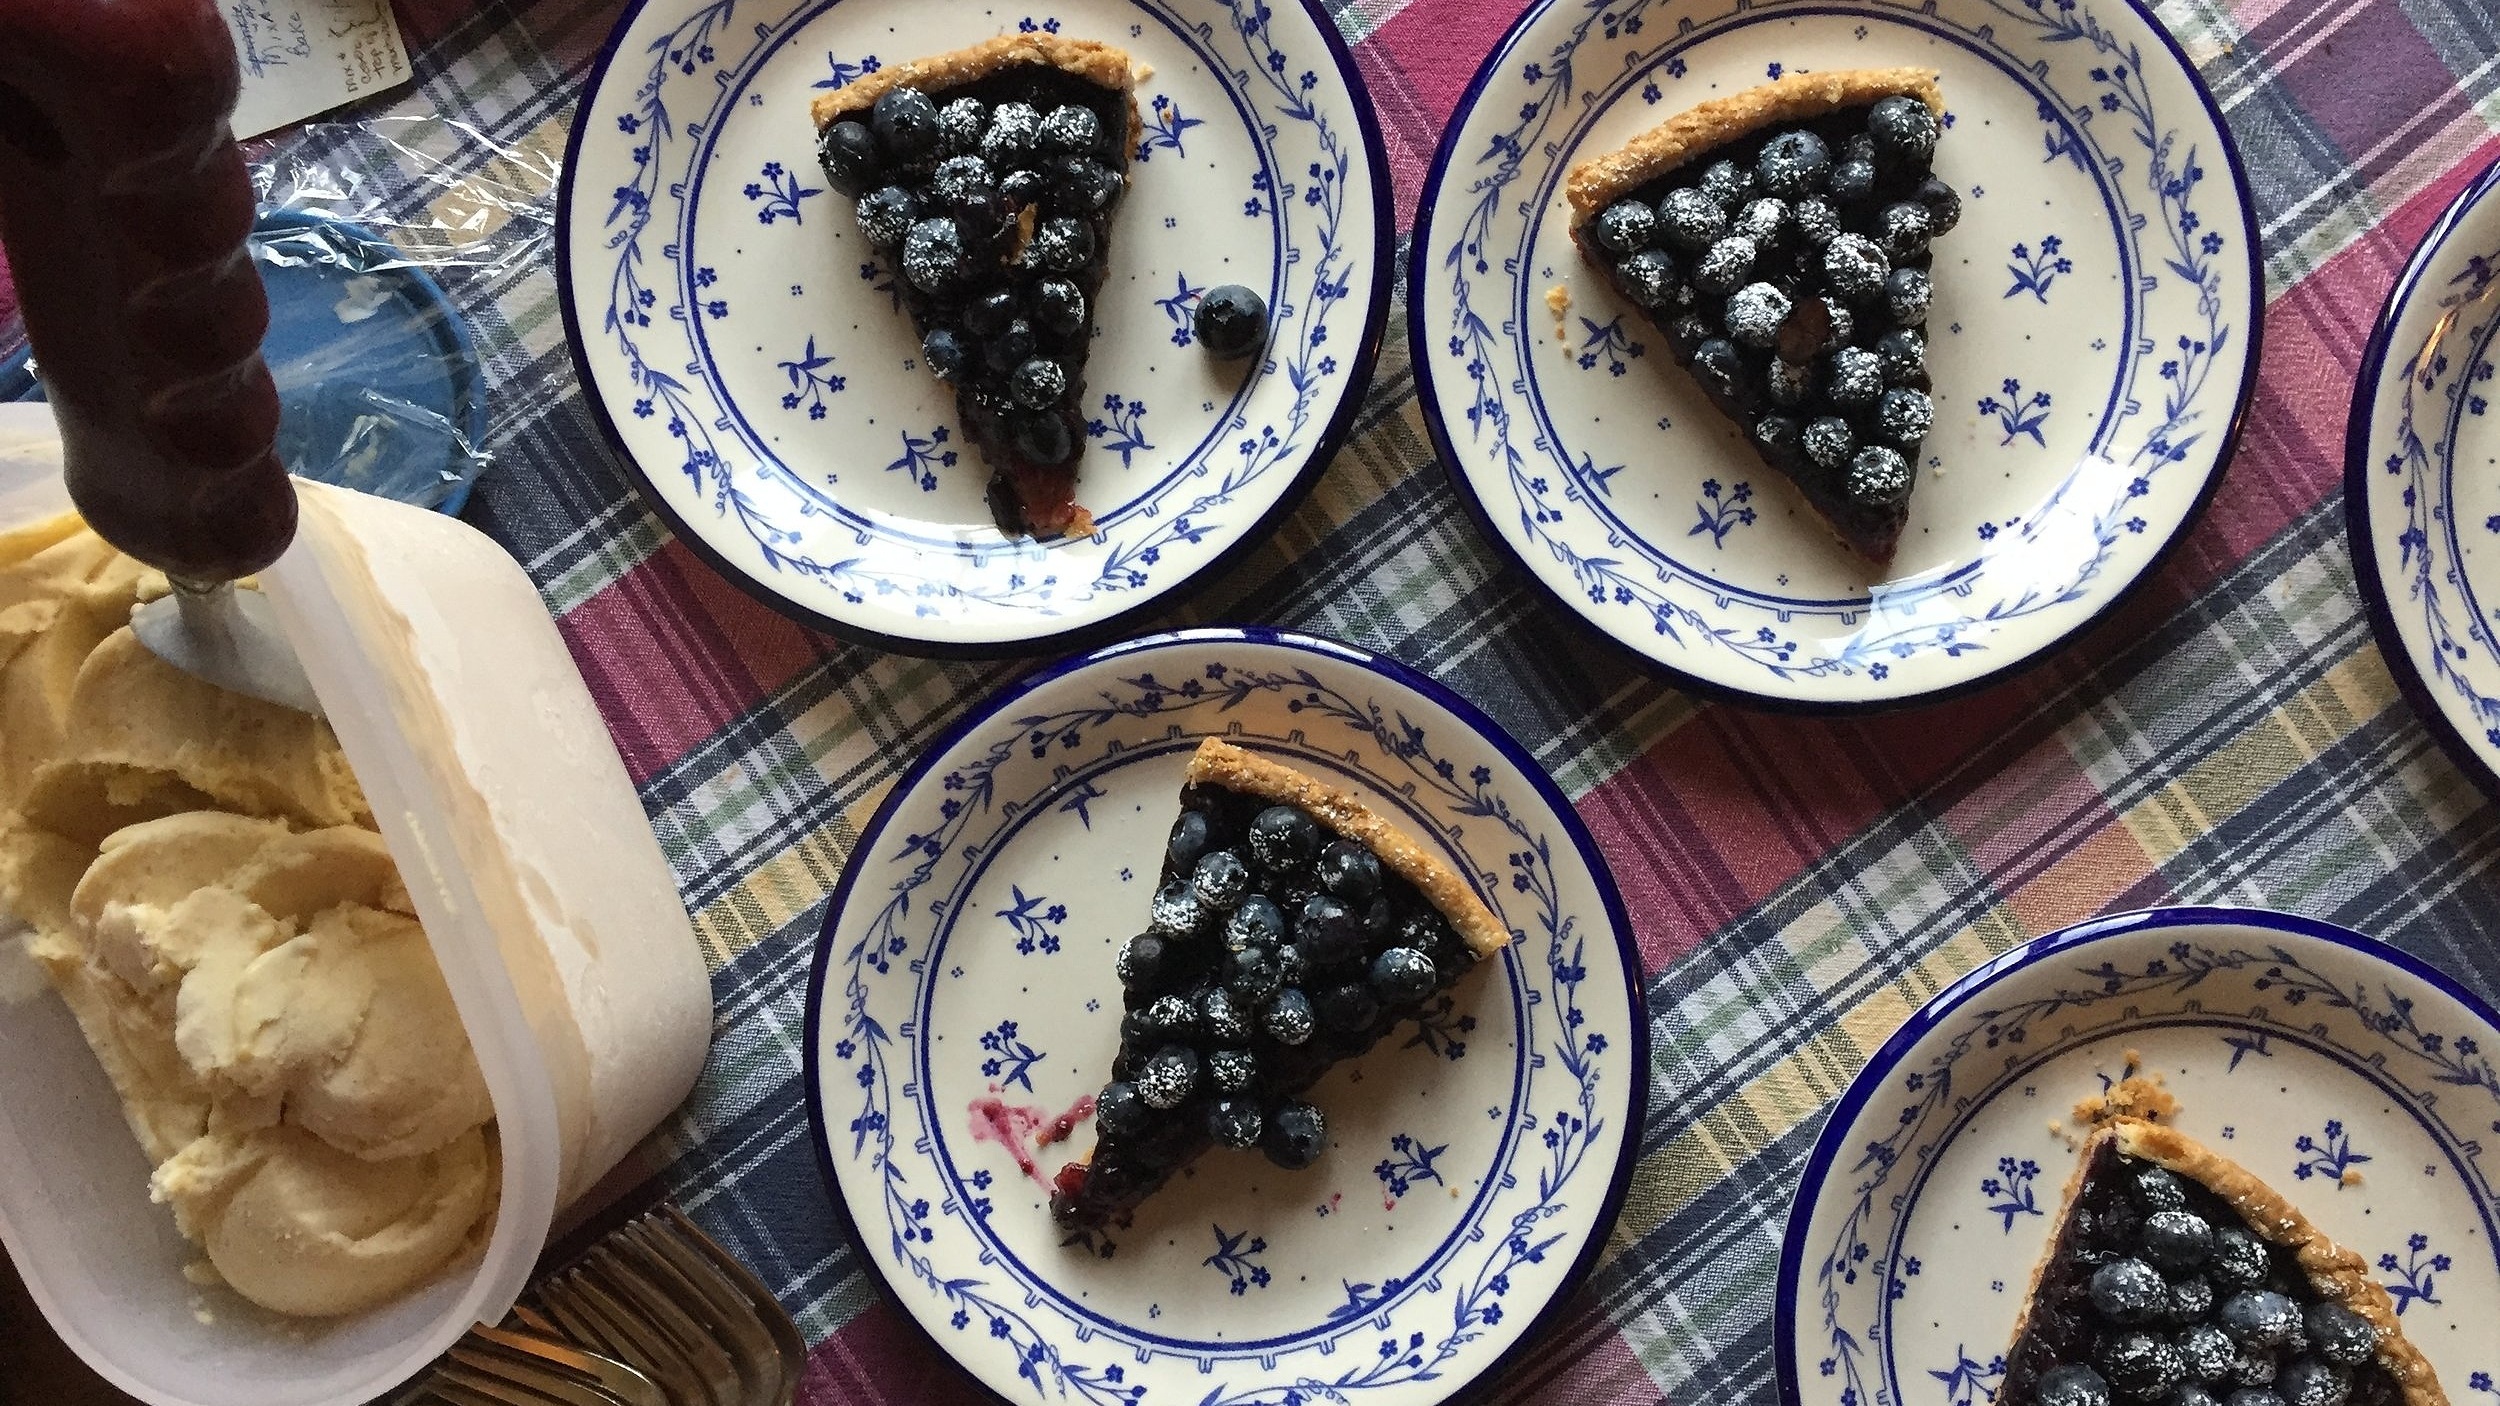
Slice it up, top with a scoop of your favorite ice cream (peach in this case) and enjoy this crispy, buttery delectable crust filled with oh-so wonderful Michigan blueberries. You can’t beat it folks!

IMG_4202.JPG


Salty chocolate chunk shortbread

IMG_3521.jpg

A big thanks to our Rhode Island friend Gigi for sending me the link to the NYT recipe from Alison Roman for these addictive buttery, crispy, chocolate chunky shortbread cookies. Right up my alley!

I did tweak the recipe a bit as I am wont to do, using dark instead of light brown sugar, reducing the total sugar a bit and subbing in some whole wheat pastry flour for a portion of the all purpose flour. I love the nutty, caramely-ness of the end result. Yummy.

IMG_3524.jpg

While Alison’s process involves shaping the dough into two logs, chilling then rolling in demerara sugar and slicing, I opted to wrap my dough in discs, chill then roll out and cut with my favorite fluted round cutter. A sprinkling of flaked sea salt and raw sugar on top adds a wonderful crunchy component.

IMG_3523.jpg

Here’s my version of the recipe:

Ingredients:
255 g salted butter, cool and cut into 1/2 inch pieces
80 g granulated sugar
50 g dark brown sugar
1 teaspoon vanilla extract
250 g all purpose flour + 75 g whole wheat pastry flour
170 g semi-sweet or bittersweet chocolate, chopped in chunks (I used a combo of Guittard 61% and 72%)
Raw sugar and flaky sea salt for sprinkling

  1. Beat the butter and sugars in the bowl of a stand mixer with the paddle on medium high for 3-5 minutes to lighten and fluff-en it up.

  2. Scrape down the sides of the bowl, slowly add the flour followed by the chocolate and mix until blended.

  3. Divide the dough into two or three portions, wrap in film wrap and chill about 2 hours. Note: hold the dough well wrapped in the fridge for up to a week or in the freezer for a couple of months.

  4. Line sheet pans with parchment and heat oven to 350ºF.

  5. Roll the dough out on a lightly floured surface and cut shapes of choice. Sprinkle tops with raw sugar and flaky sea salt. Continue to roll/cut scraps or wrap and freeze any leftover dough for later.

  6. Put sheet pans in the freezer for 10-15 minutes before baking.

  7. Bake until lightly browned, 12-15 minutes. Cool and enjoy!

IMG_3520.jpg

Whole wheat croissants

IMG_3564.JPG

As I experiment more and more with whole grain flours, I just had to do a trial of croissant dough with a couple of variations on using whole wheat flour. Just can’t get enough of the laminated dough thing, or so it seems. Oh well, there are worse things to be fixated on, don’t you think?

IMG_3515.jpg

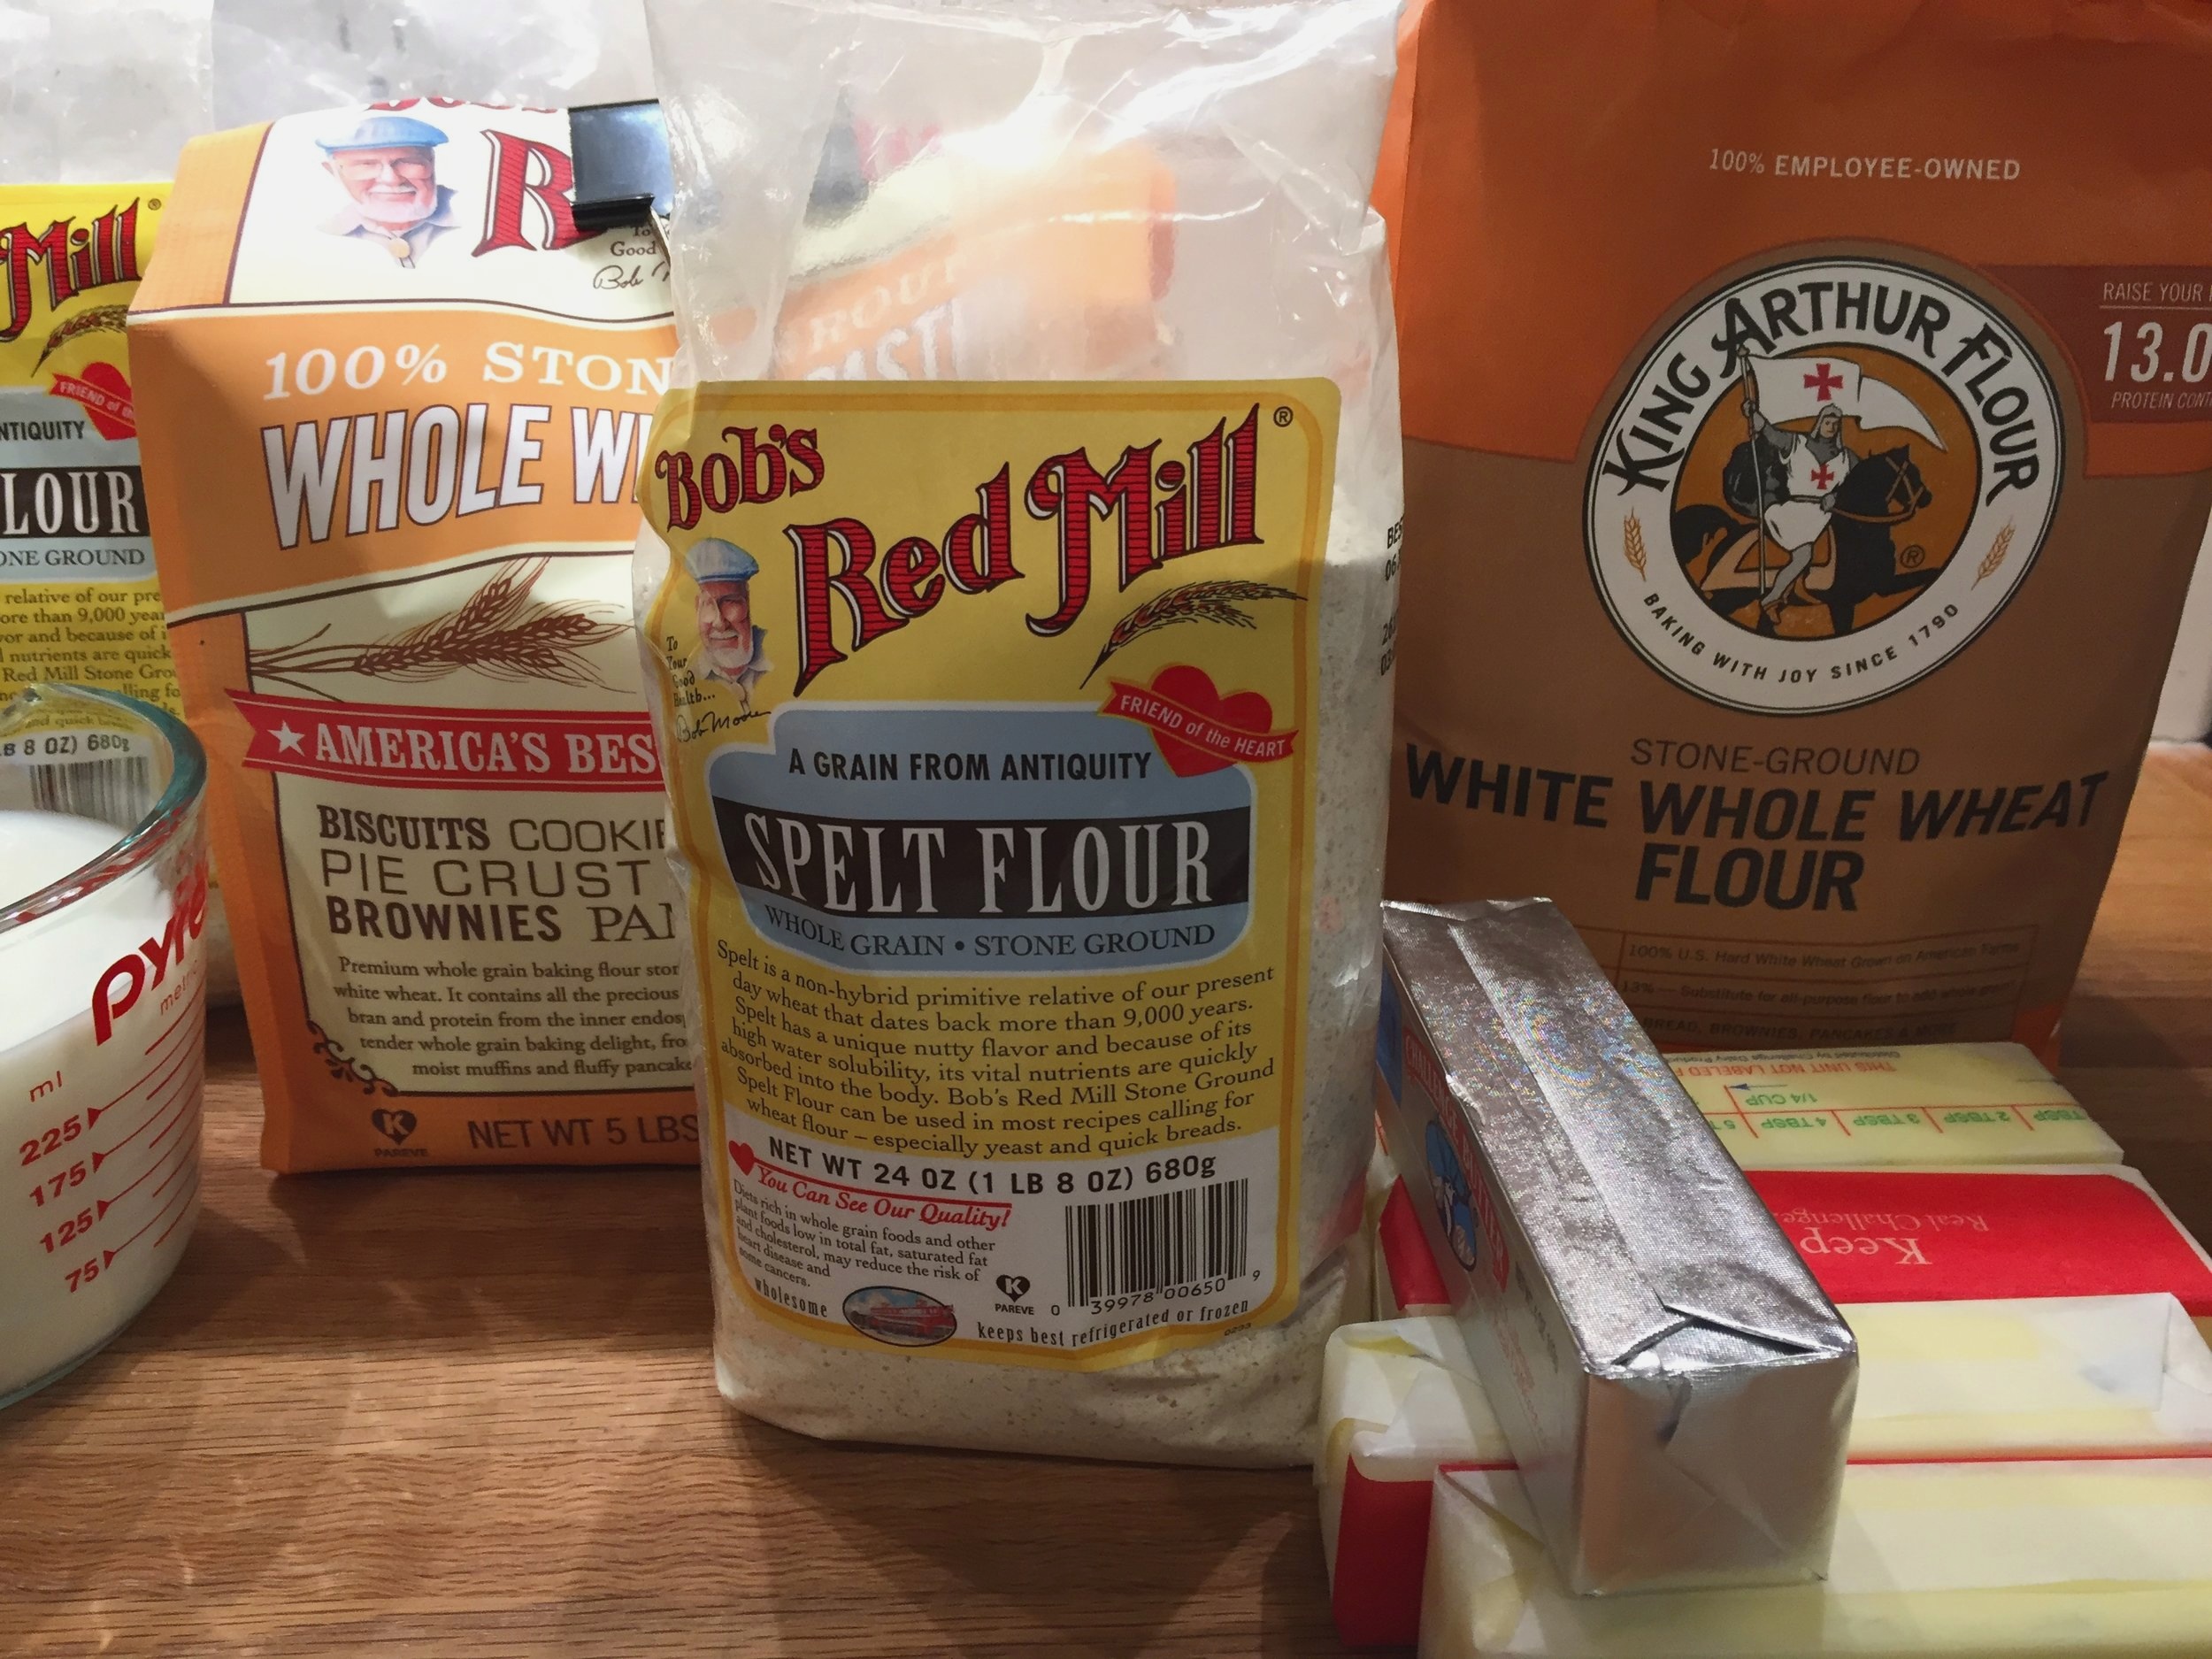
The first version adjusts my base recipe from 450 g all purpose flour and 50 g bread flour (recipe coming at the end, I promise!) to a mixture of 300 g spelt flour and 200 g whole wheat pastry flour, both from Bob’s Red Mill. The spelt I used is a coarse grind and gave my dough a speckled look. I was hoping that my choice of those two flours would sort of balance each other out in terms of gluten content, giving me something closer to all purpose but with the nutritional benefits of using whole grain flours. Kinda winging it here.

The second version uses a mixture of 300 g white whole wheat flour from King Arthur (a finer grind than the spelt and a softer flour from soft white wheat) and 200 g whole wheat pastry flour from Bob’s Red Mill (another softer flour), yielding a smoother appearance with less speckling. Again - wingin’ it.

I normally use whole milk for my liquid but this time I replaced about a third of the milk with water, thinking that the final, slightly less enriched, nutty-wheaty croissants would lend themselves to more savory uses like ham/cheese or chicken salad sandwiches. I know, I know - this isn’t a very scientific study since I’m changing a number of variables, but why not play around? It’s what I love.

My two dough versions and butter blocks ready to go

My two dough versions and butter blocks ready to go

I put both versions through the usual steps of beurrage followed by three business letter folds (or 3-folds) and a final rest in the fridge before rolling out. I divided each batch into halves so I could create two different pastries with each version.

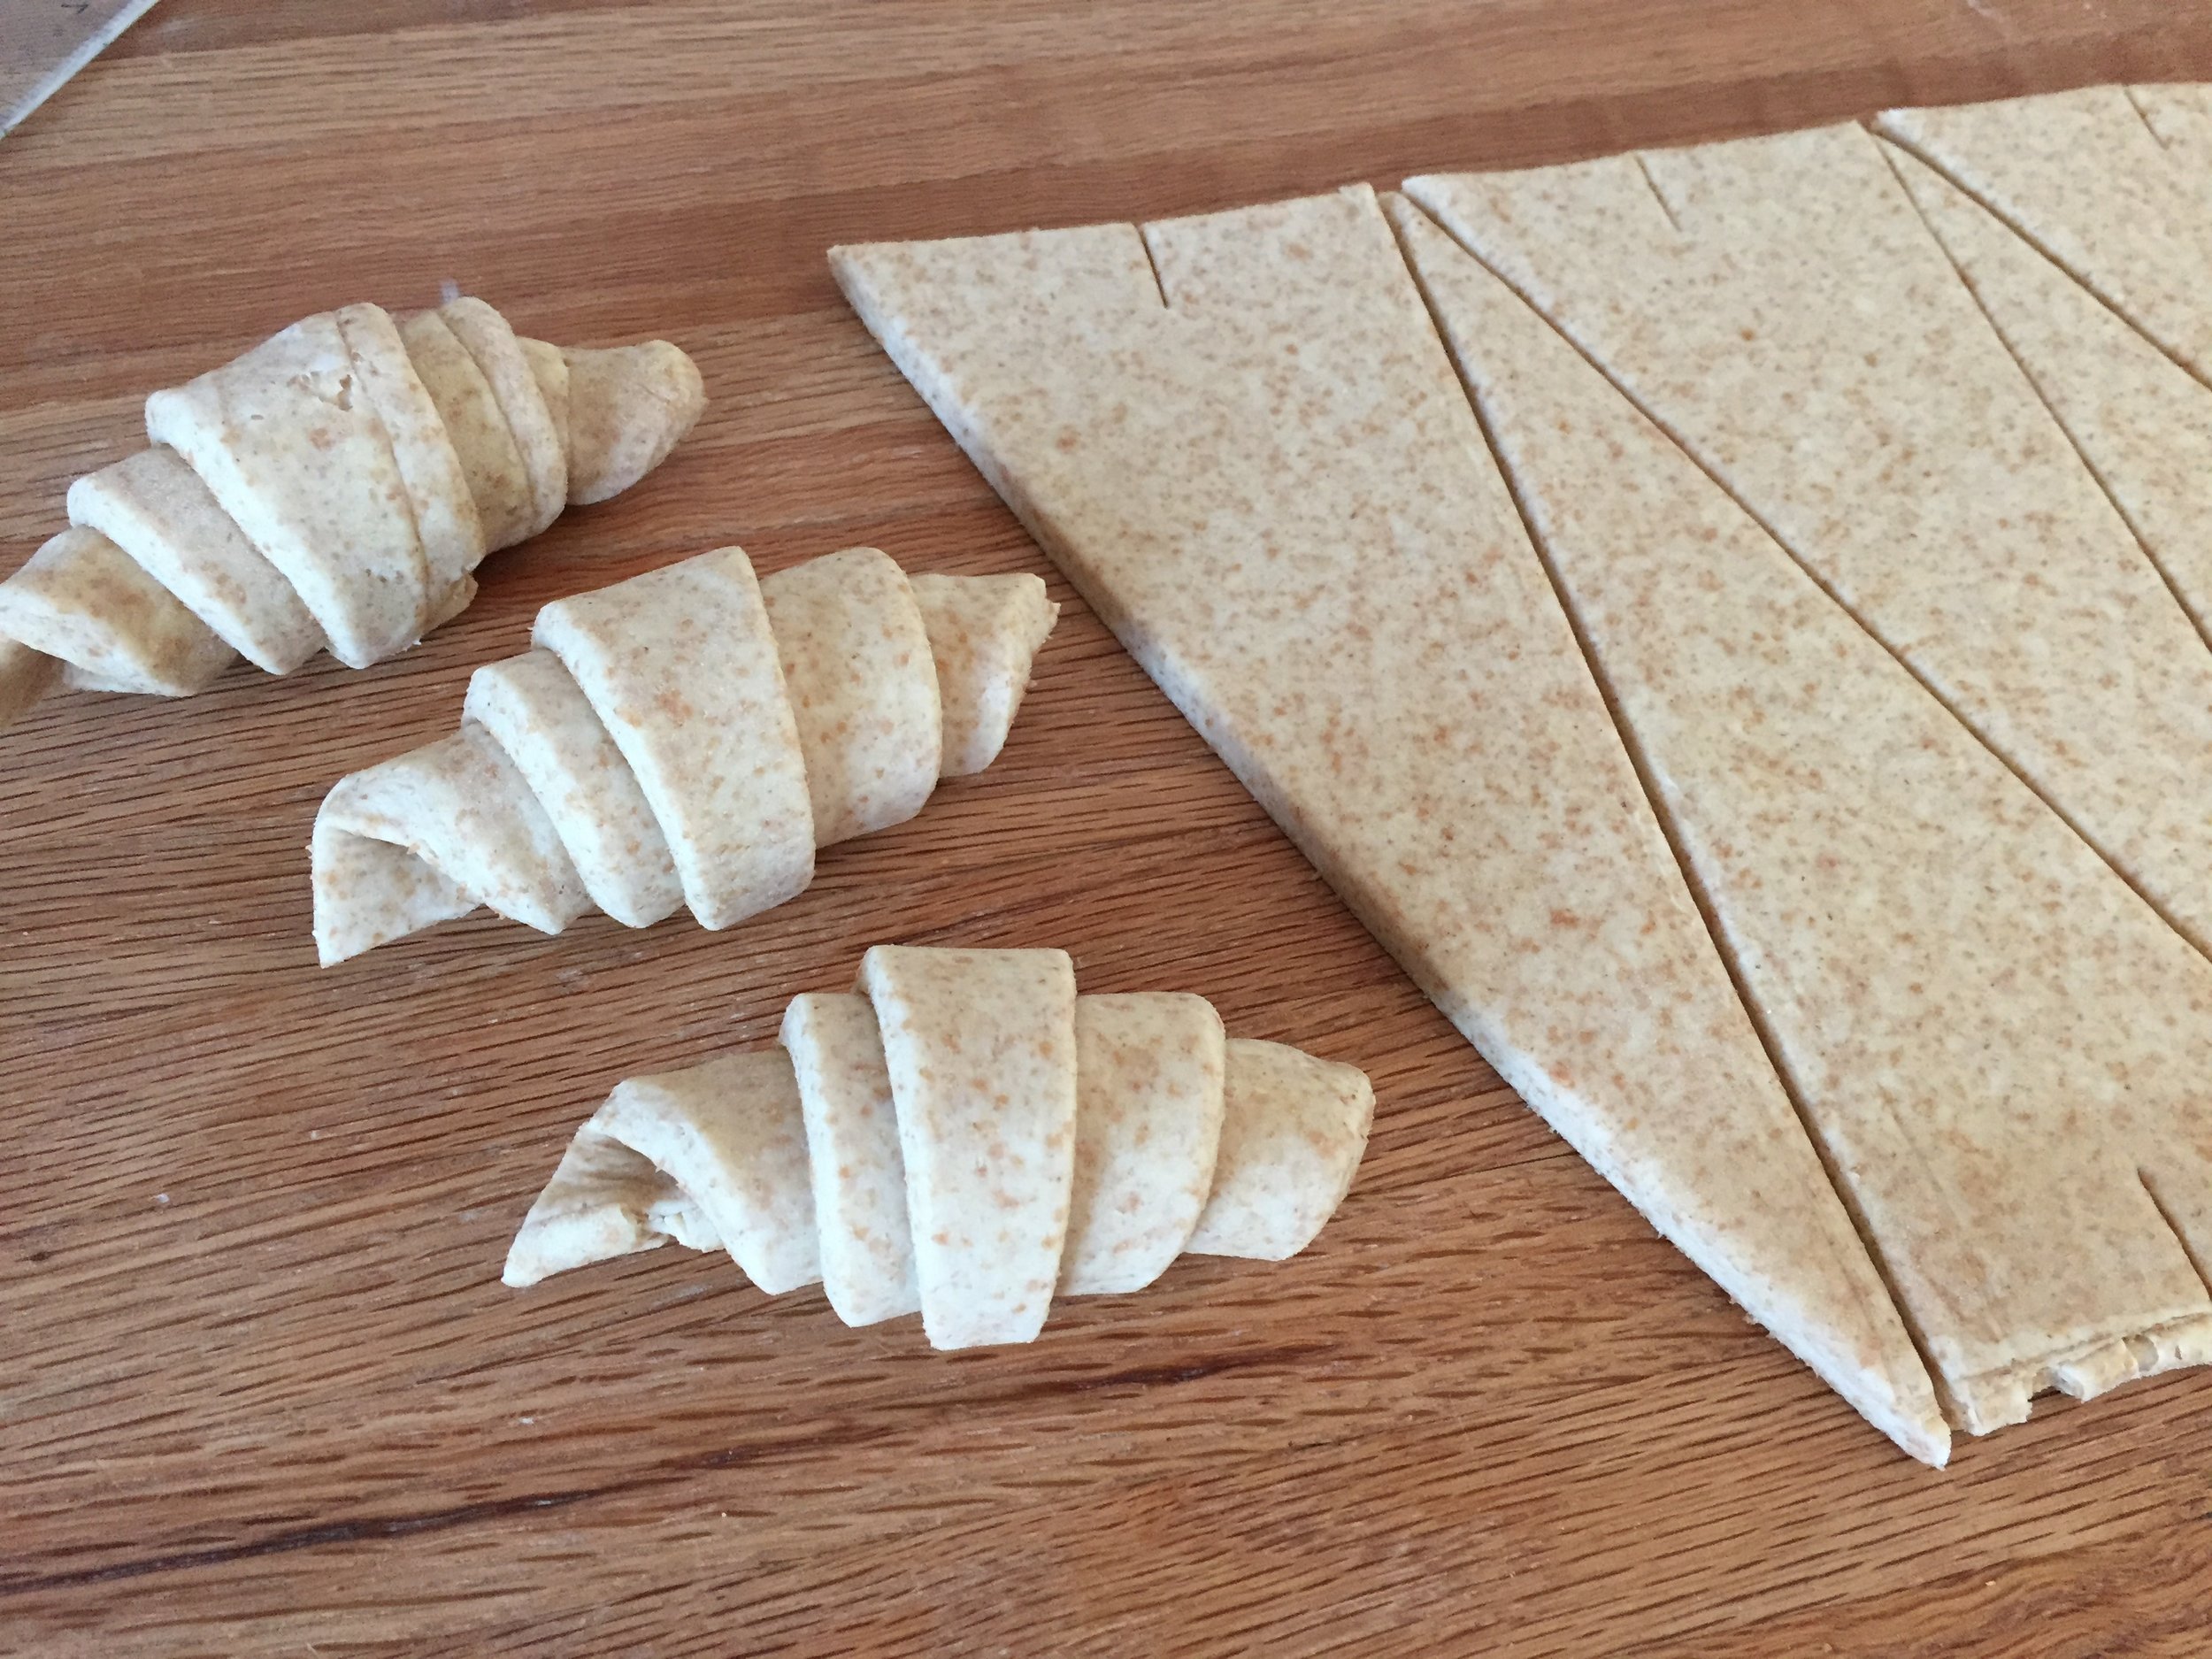
The spelt dough rolled nicely but when it came time to cut and shape the croissants, the dough felt drier and was not quite as sturdy, tending to tear when being stretched a bit.

Shaping the spelt croissants

Shaping the spelt croissants

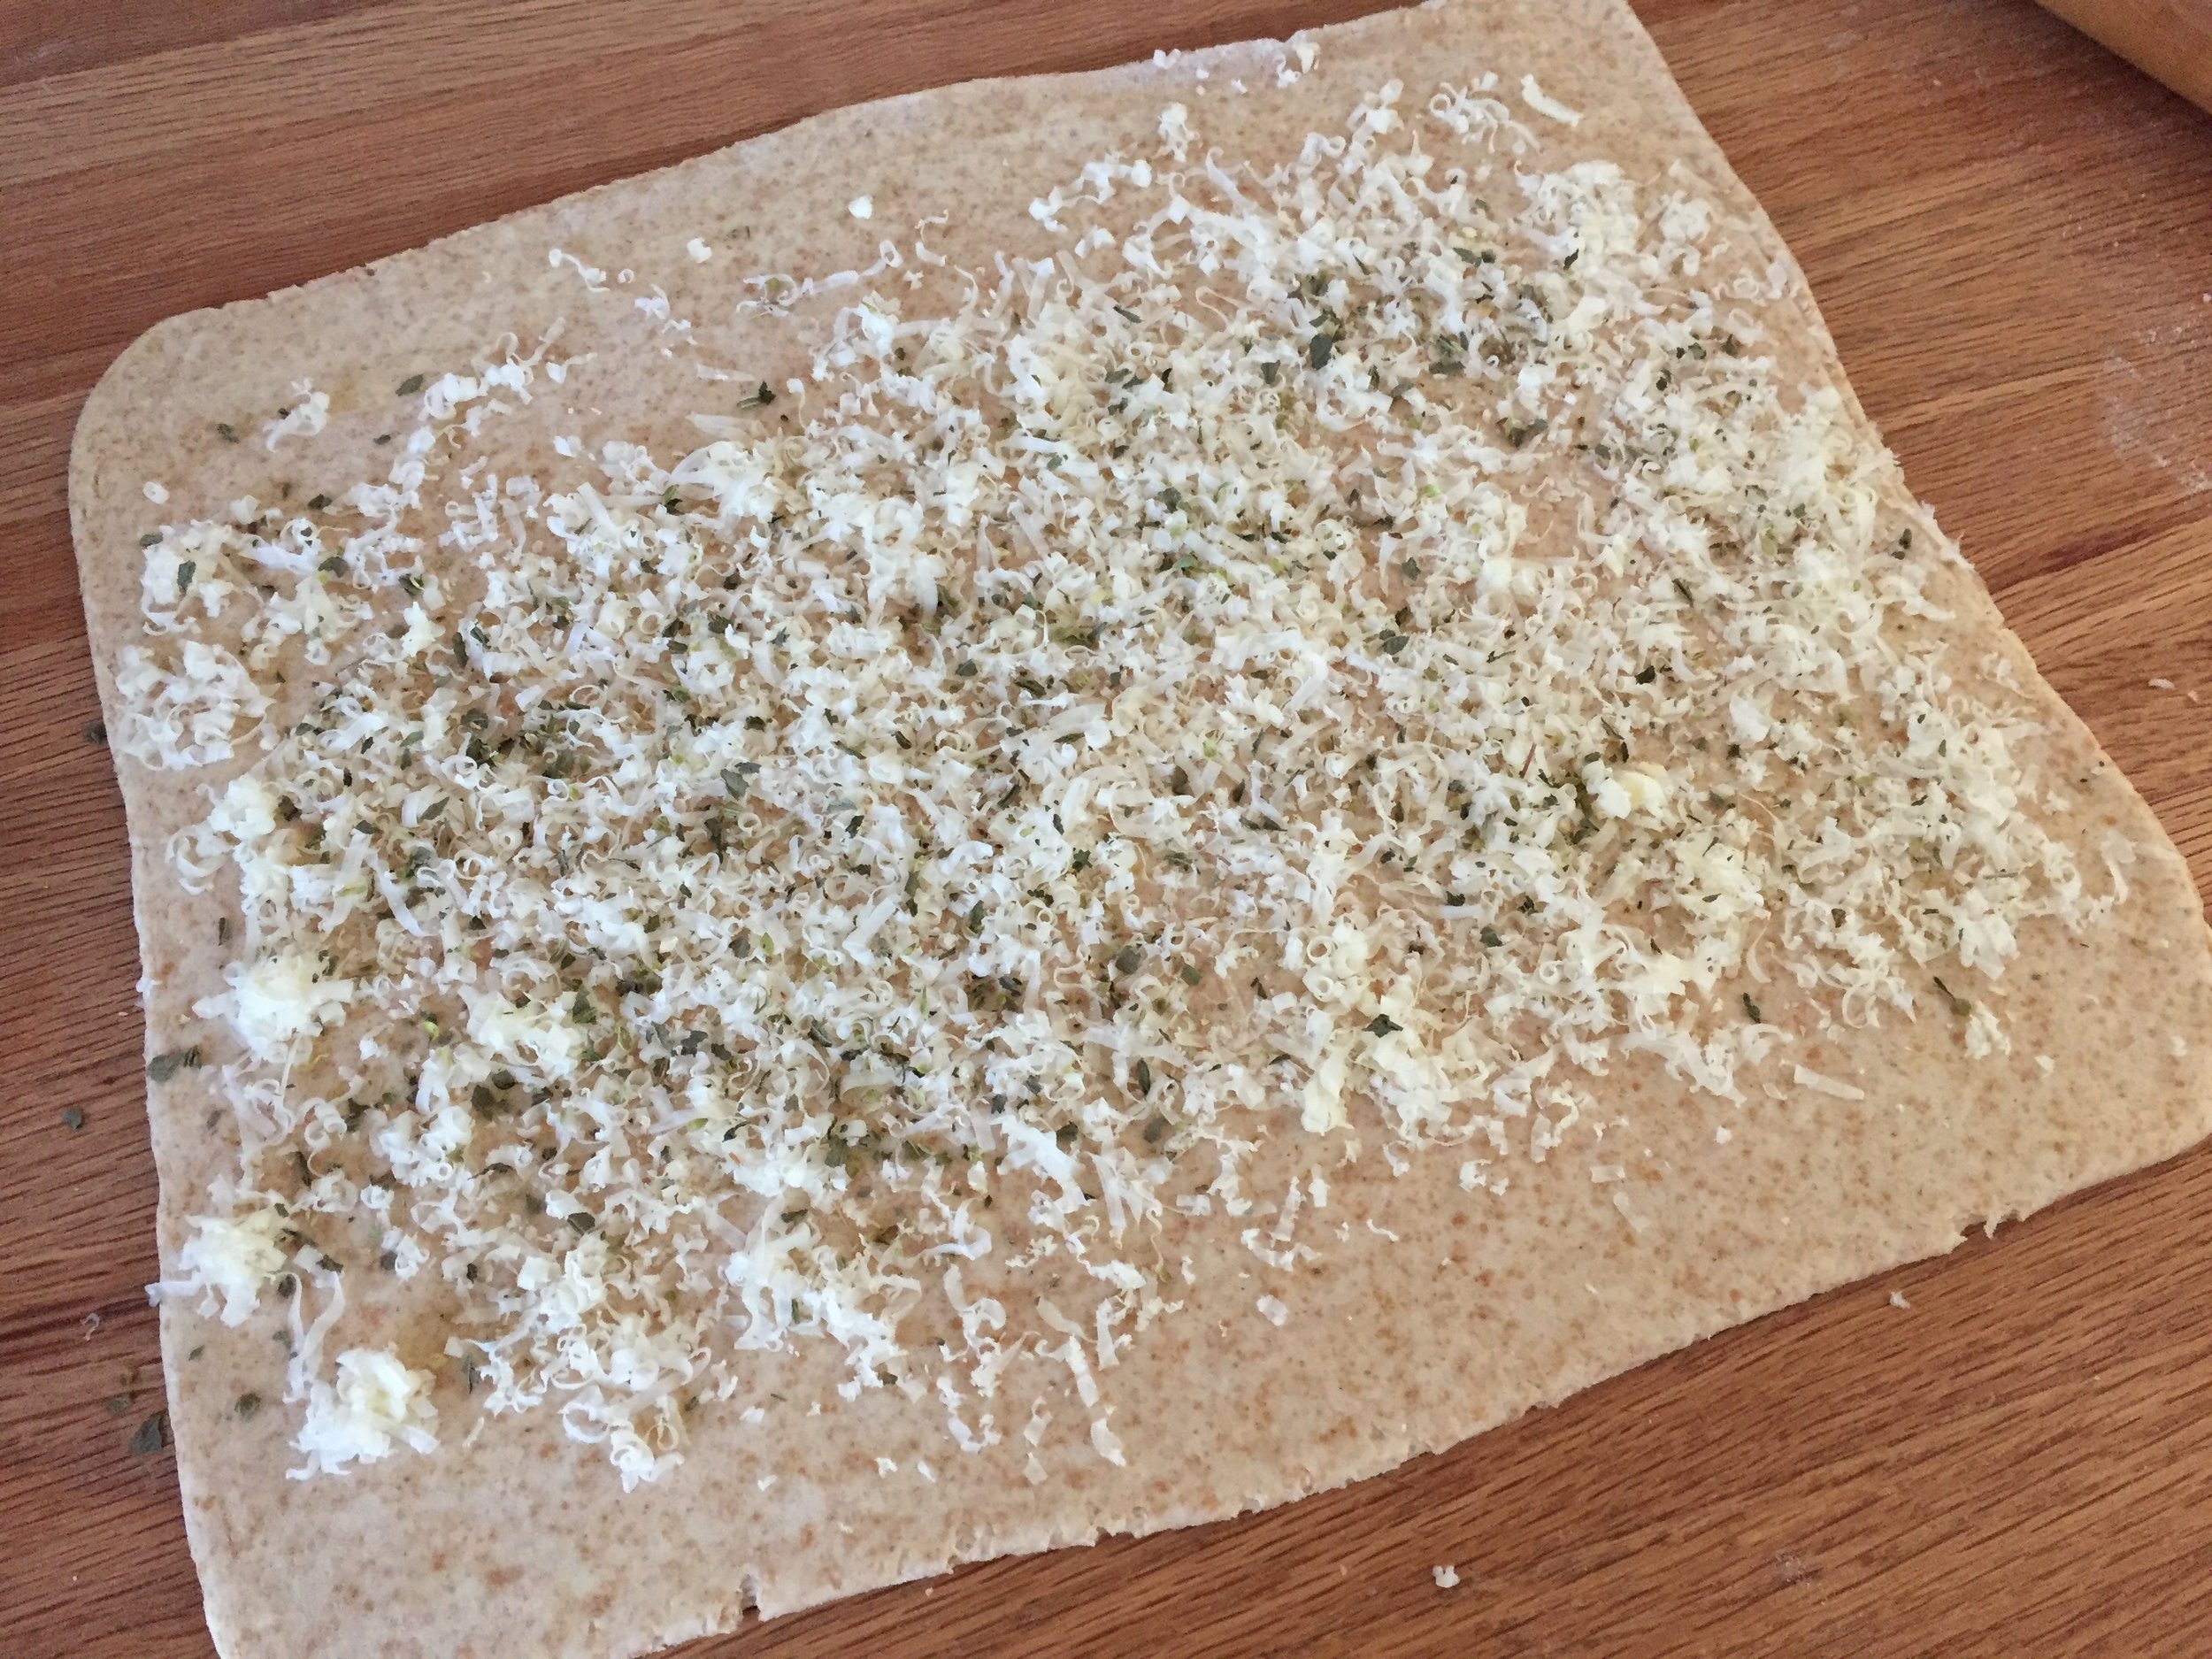
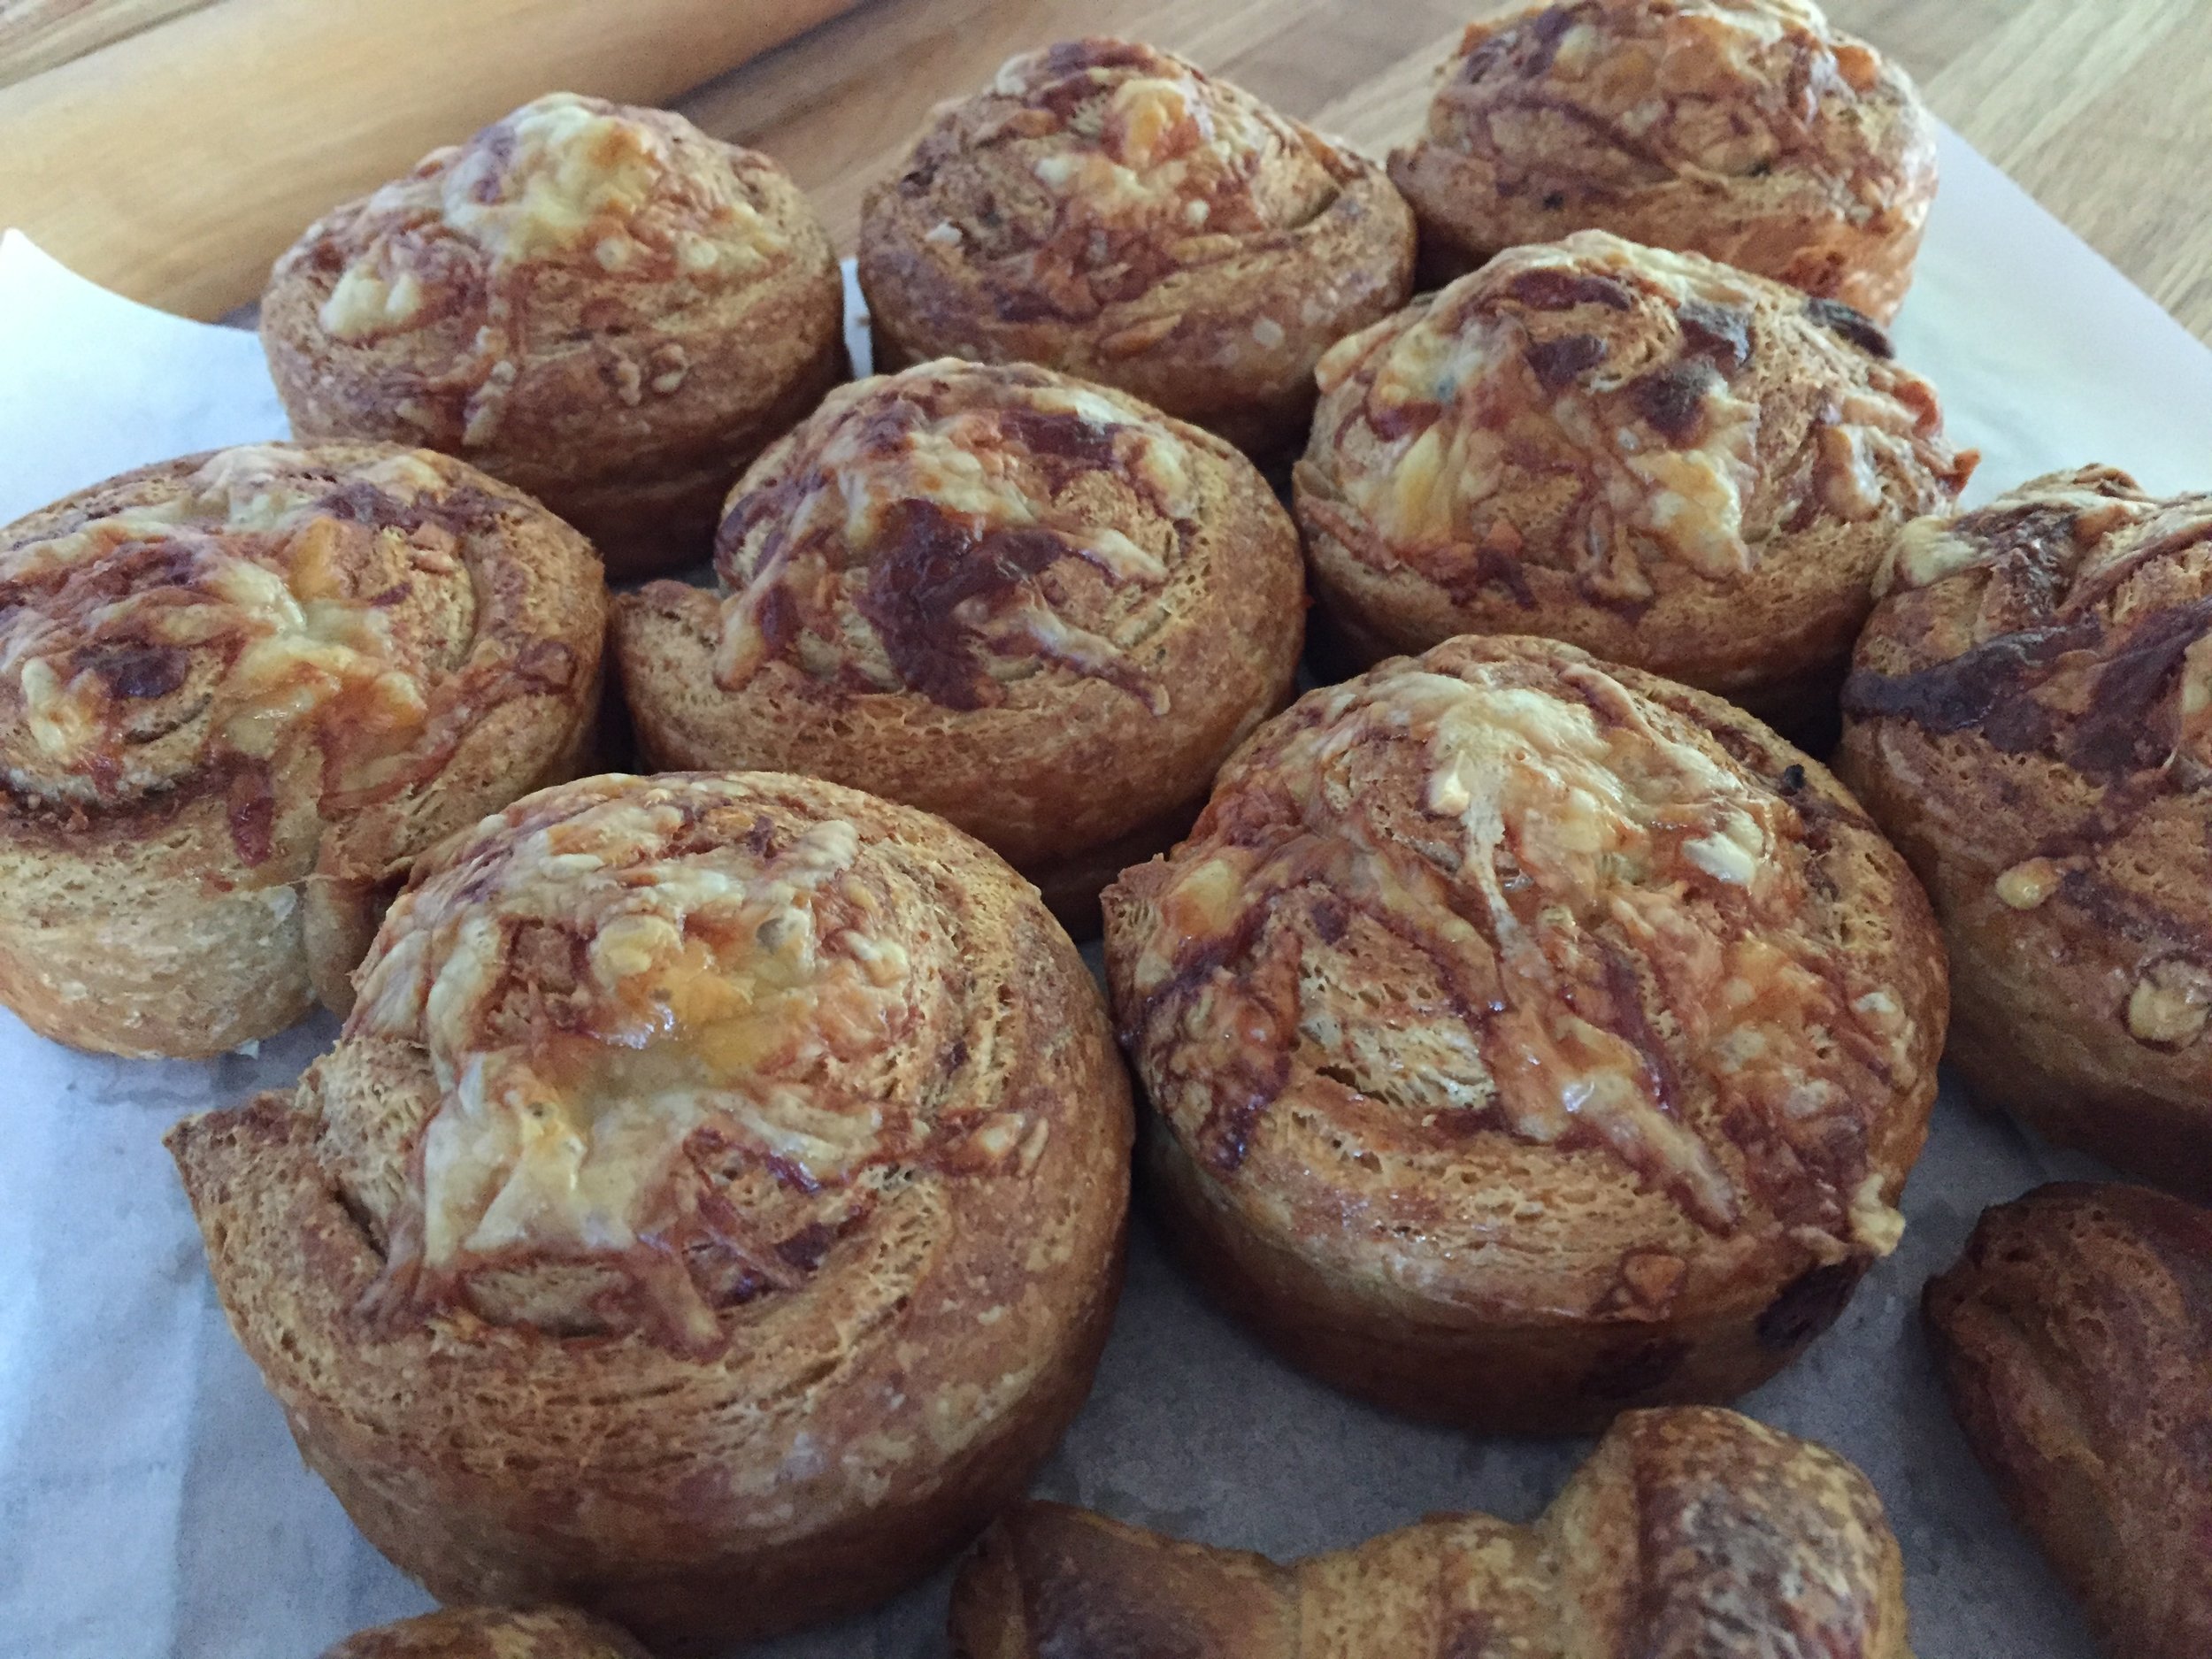
With the second half of the spelt dough I did a savory spiral - rolled it out into a 10”x12” rectangle, brushed it with egg wash and sprinkled on mixed Italian herbs and grated gruyère cheese . . . .

IMG_3534.jpg

rolled it up into a log and sliced ~1 inch slices.

IMG_3535.JPG

The slices went into buttered 80 mm rings to proof.

IMG_3551.JPG

The white whole wheat version also rolled out easily and was less inclined to tear when being stretched and shaped.

IMG_3540.jpg

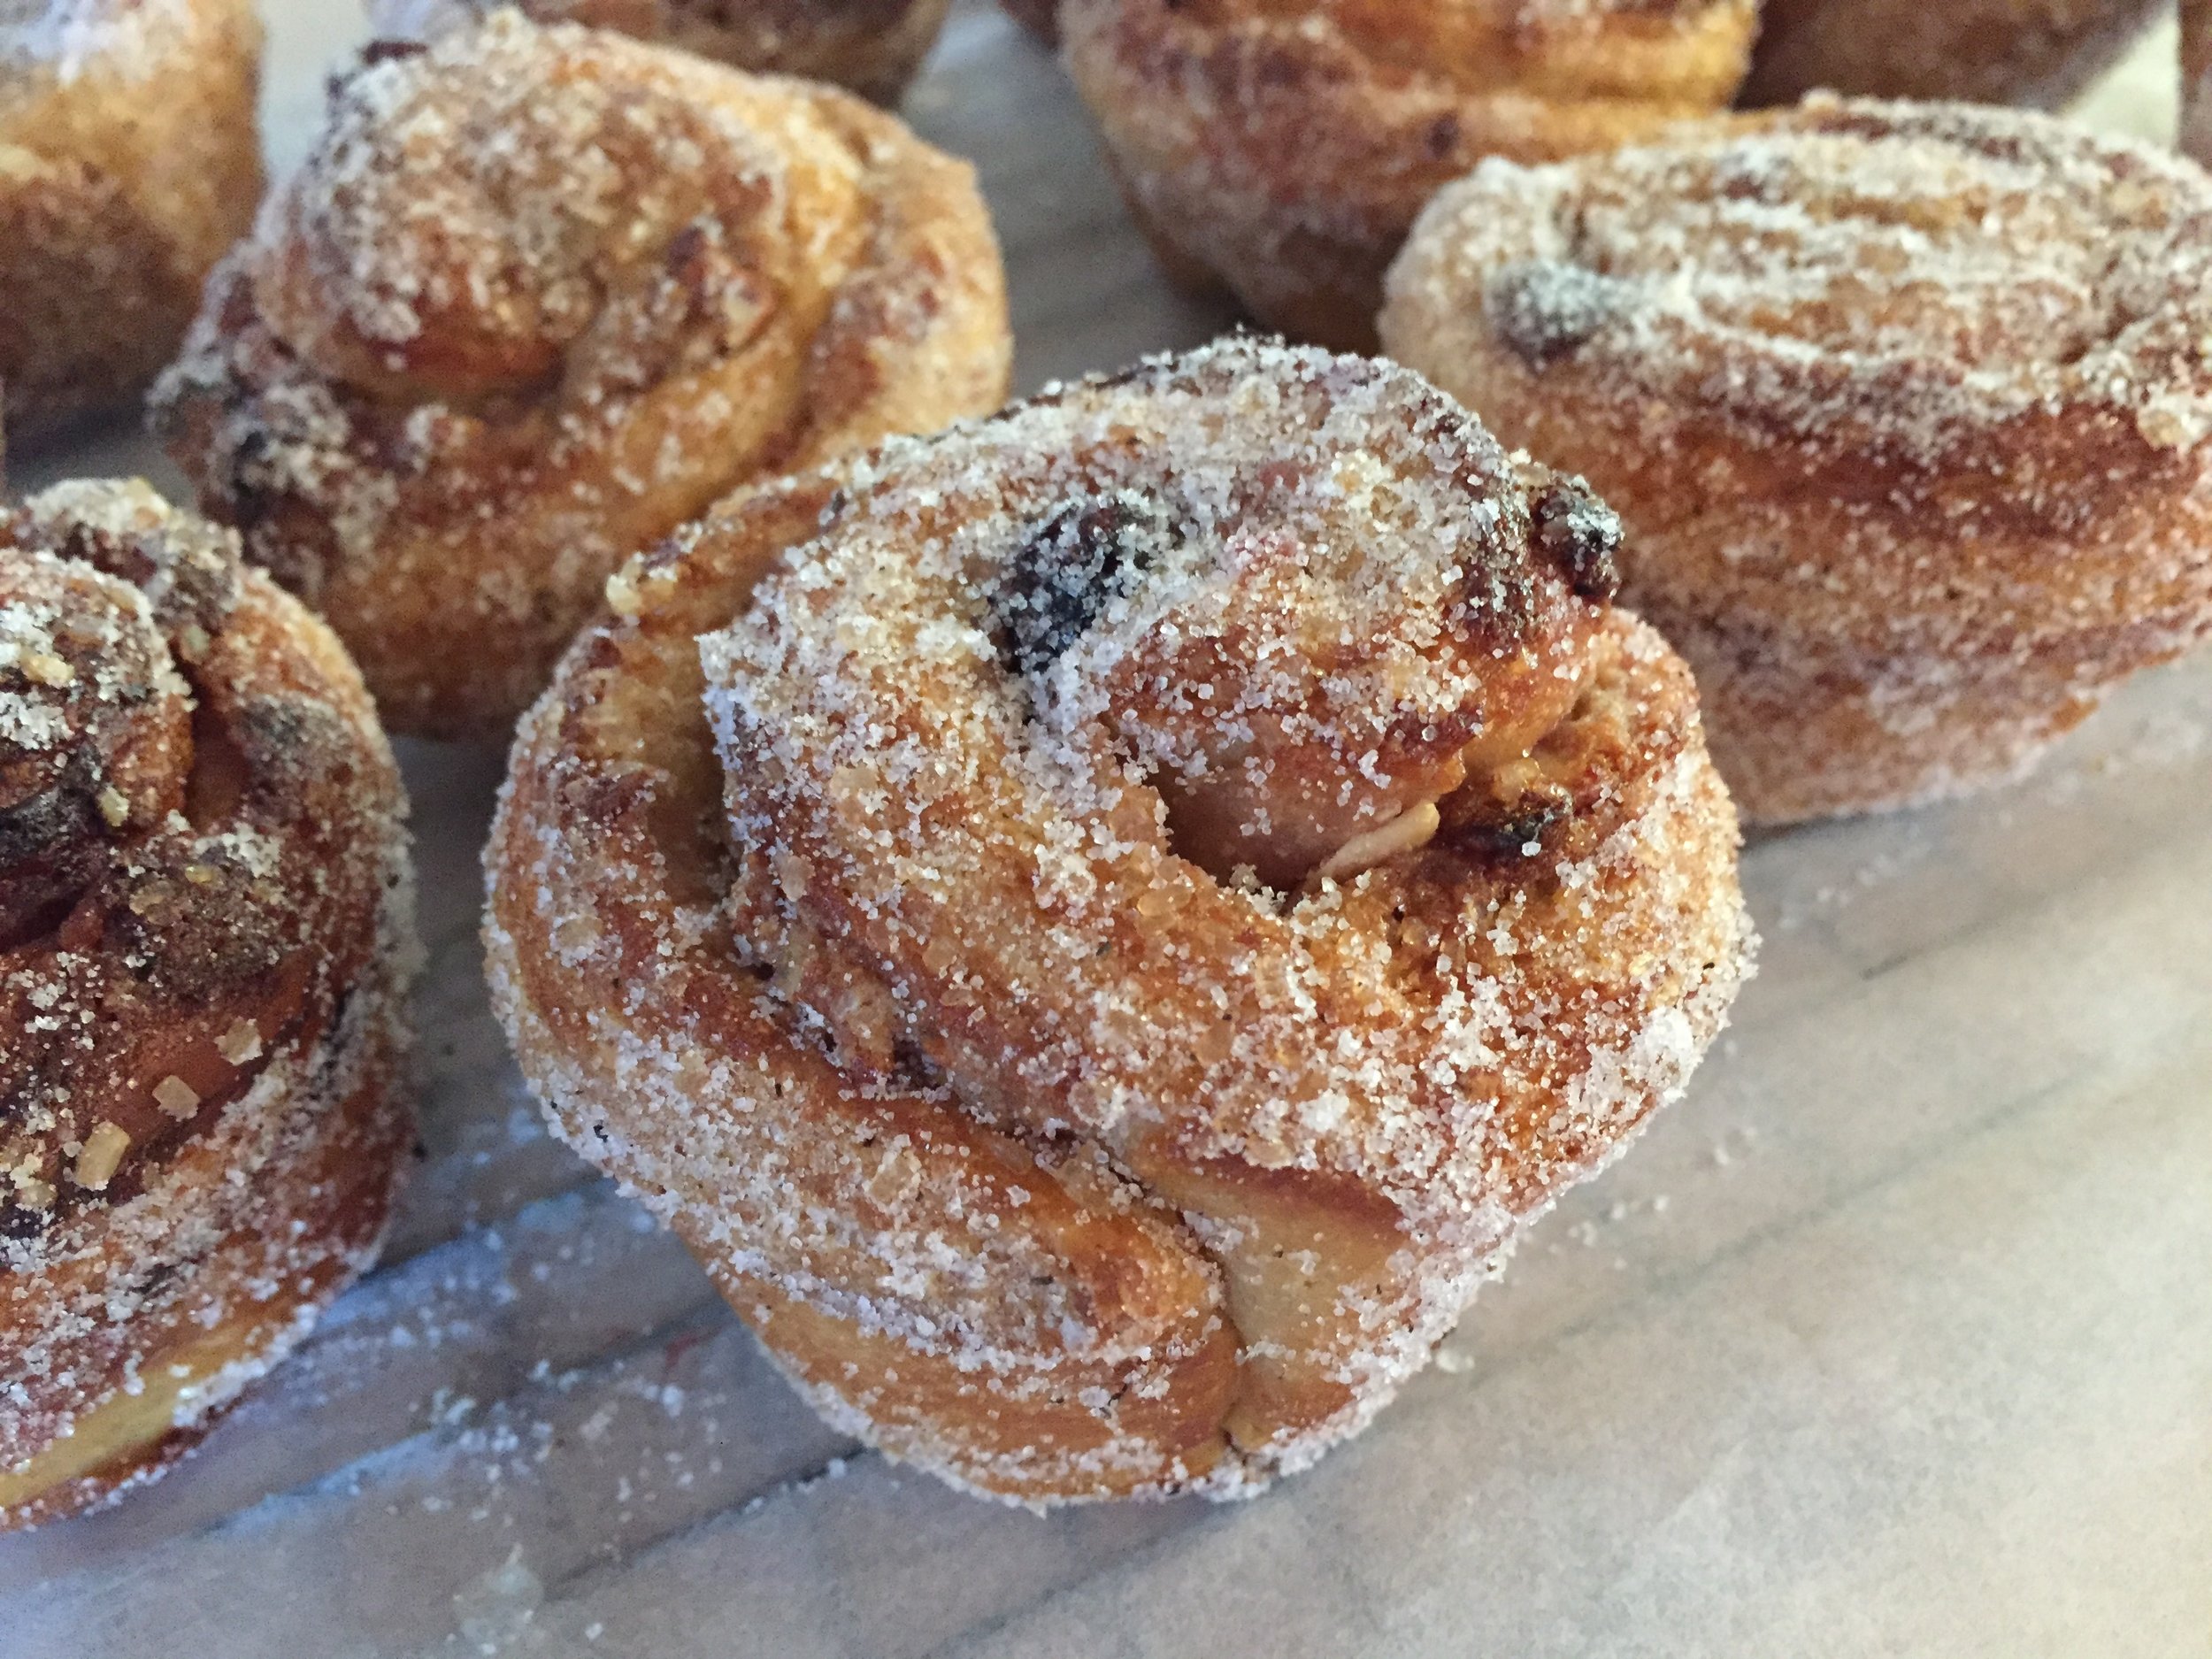
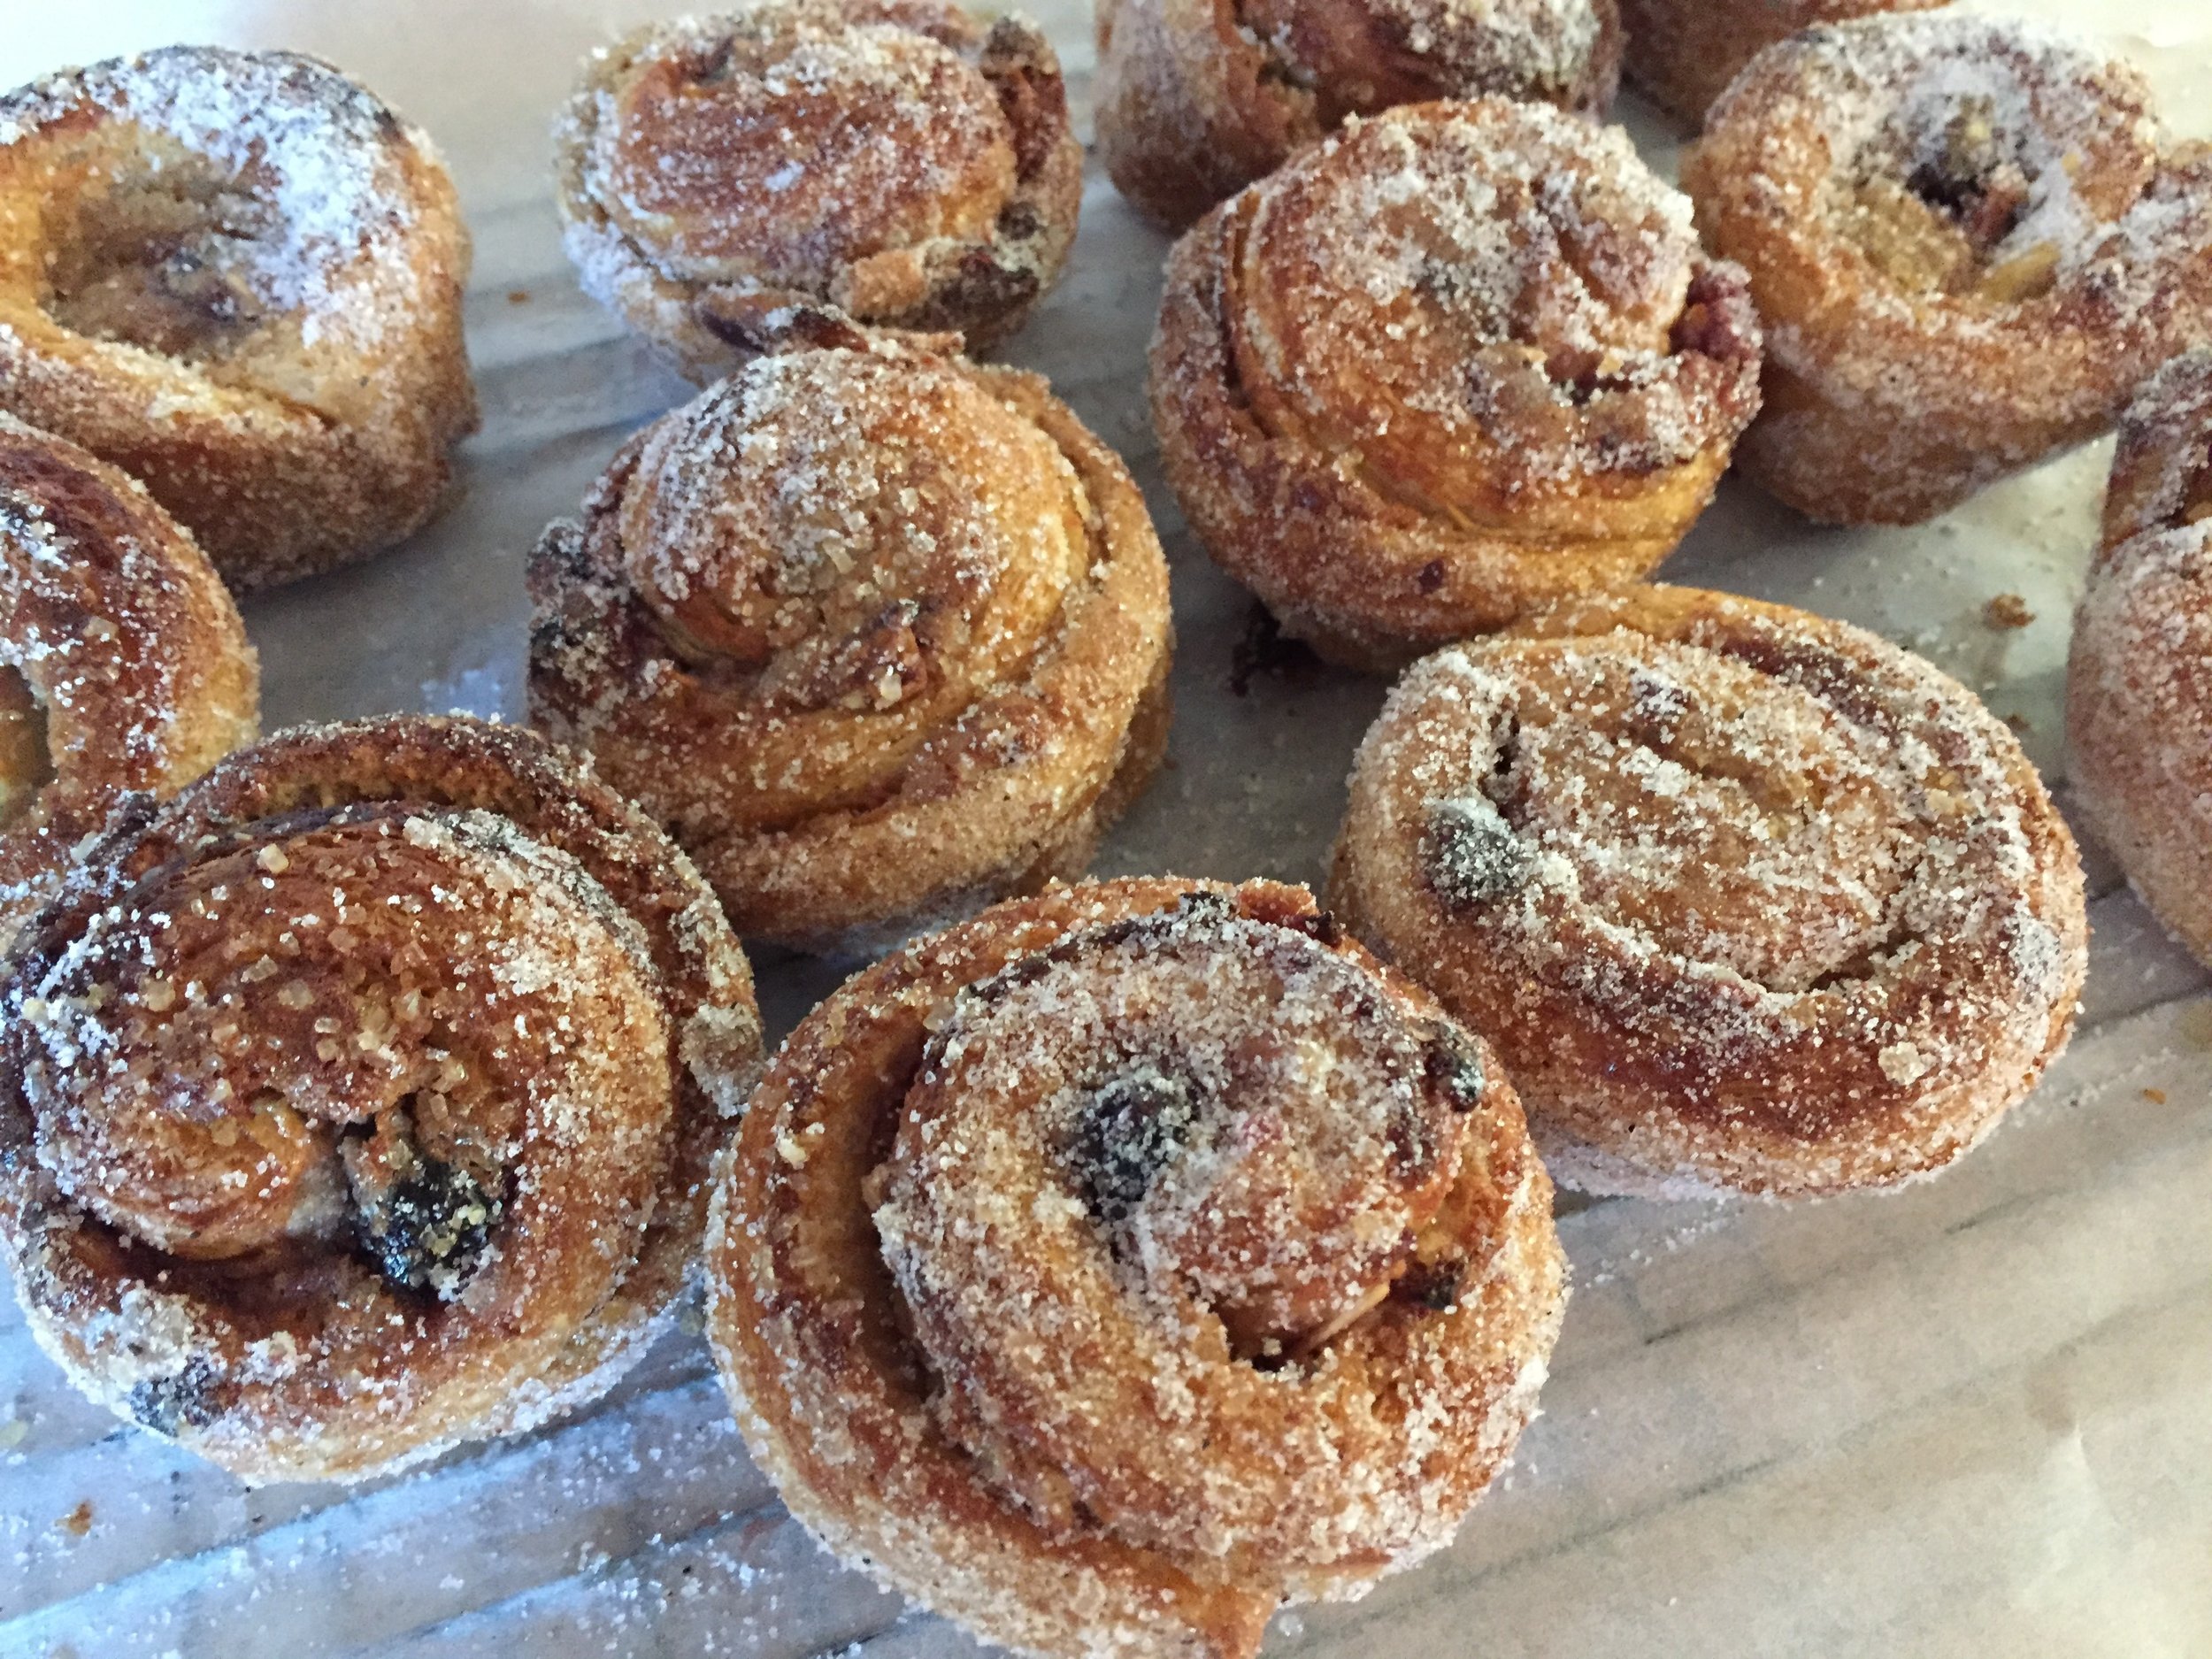
The second half of this dough became cherry-almond spirals - same idea as the cheese/herb spirals above - spread on a mixture of almond flour, egg white and brown sugar and topped it with cherry preserves and sliced almonds.

IMG_3545.jpg

Rolled up and sliced, these went into buttered muffin tins to proof.

IMG_3546.jpg

I gave the croissants a good 2-2.5 hours to proof and the spirals a bit less. Then on to the bake!

Proofed spelt version

Proofed spelt version

Out of the oven

Out of the oven

I gave the proofed cheese spirals a sprinkling of more cheese . . . .

IMG_3553.JPG

and here they are all baked up!

IMG_3557.JPG

I gave half of the egg washed white whole wheat croissants a sprinkling of KAF’s Artisan bread topping, a delicious mixture of sesame, flax, sunflower, black caraway, poppy and anise seeds.

Proofed

Proofed

all baked up

all baked up

Cherry almond here we come! A sprinkling of raw sugar and into the oven.

IMG_3567.JPG

Once baked I rolled them in some vanilla sugar for the pièce de résistance.

IMG_3575.JPG

Steve and I did a thorough sampling of all four versions. We thought the flavor was deelish and the texture pretty decent. Personally I love the nuttiness and whole grain sense of these doughs and would definitely make whole wheat croissant dough again.

I froze a good portion of the baked and cooled end results, and we were able to enjoy the croissants and cheesy spirals thawed and oven warmed with a delicious chili Steve made for a family supper out at cousin Jen’s. Everyone enjoyed them immensely. Who says you can’t have a croissant for supper eh?

So what did I learn from all of this? Truth be told, I had done some reading before the project but had neglected to consider the need for some increased hydration when using all whole wheat flour. Duh. Hence I did a thorough read through of very helpful tips and suggestions from the Whole Grain Council/KAF - so much information out there kids!

Going forward I now know to add an additional 2 teaspoons of liquid per cup of whole wheat flour used. It’s also important to work the dough more gently and shape more loosely since the germ and bran in the whole wheat flour can actually shred the gluten strands in the dough, weakening it (it was very clear to me with the spelt version that it was drier and much more prone to tearing).

Whole wheat doughs generally ferment a bit faster (more nutritive stuff in them for the yeast to munch on) but don’t achieve quite as much volume. I did give my dough the same amount of rising time that I normally give my regular croissants but did note that the rise didn’t appear quite as full. Yet I was very happy with how they baked and tasted in the end. YES indeed.

IMG_3563.JPG

Here’s my standard base croissant recipe with adjustments for whole wheat:

450 g all purpose flour + 50 g bread flour (option 300 g white whole wheat flour/200 g whole wheat pastry flour)
44 g sugar
10 g salt
50 g soft unsalted butter
8 g instant yeast
317 g whole milk, can be cold or room temp (add 35 g additional liquid if using whole wheat flour - may be a mix of water and milk)
283 g unsalted butter for the butter block

  1. Blend flours, sugar, salt and yeast in the bowl of a stand mixer.

  2. Stir in milk (milk/water if using) with a rubber spatula or dough whisk to roughly combine. If using whole wheat flour let the mixture sit for 20 minutes to hydrate before proceeding.

  3. Mix with the dough hook on “stir”, adding the 50 g soft butter to incorporate.

  4. Increase to speed 2 and knead for 3-4 minutes (2-3 minutes if using whole wheat flour).

  5. Place on a lightly floured work surface, cover with plastic wrap and let the dough rest for 30-40 minutes.

  6. Shape into a ball, wrap tightly in plastic wrap and place in the refrigerator for at least 8 hours or overnight.

  7. Shape the 283 g butter into a 4-5 inch square (I do this between two layers of plastic wrap). The butter should be cool and malleable for the beurrage.

  8. Perform the beurrage followed by three business letter folds, resting the dough 30 minutes between each fold. Let the finished dough rest at least 2 hours or up to 12 hours before final shaping.

It’s not my intention here to review all the steps and nuances of making laminated dough, proofing and baking croissants but primarily to share the dough recipe. Now it’s time for you to experiment on your own. Go for it! You can do it.

IMG_3576.JPG

Nutty apricot tea cakes

apricotcake

Some of you may realize by now that I'm always reading baking and pastry books and lately have been thinking of ways to increase my use of nuts, seeds and whole grains in my baking endeavors. Often my projects come about as a way of using up ingredients I happen to have in my fridge or cupboard. What's not to like about that, eh?

This time I was intent on some apricot purée that's been in my freezer for a few months - time to make something tasty! And, to top it off, I had some buttermilk in the fridge that simply HAD to go into something hearty, healthy and delicious.

apricotteacake

This is my take on a pretty basic tea cake recipe that turns out deliciously moist with a bit of crunch from nuts and pumpkin seeds. It actually reminds me of both date nut and Boston brown bread that we used to eat when we were kids - hard to describe the fruity side of those, but if you've eaten those particular goodies, you know what I'm talkin 'bout.

For this project I used both whole wheat pastry and all purpose flours, along with some of my favorite spices, coriander and ginger, plus a dash of cinnamon. I generally tone down or don't use cinnamon at all in my baking, since the Steve-meister holds an odd aversion to that particular spice.

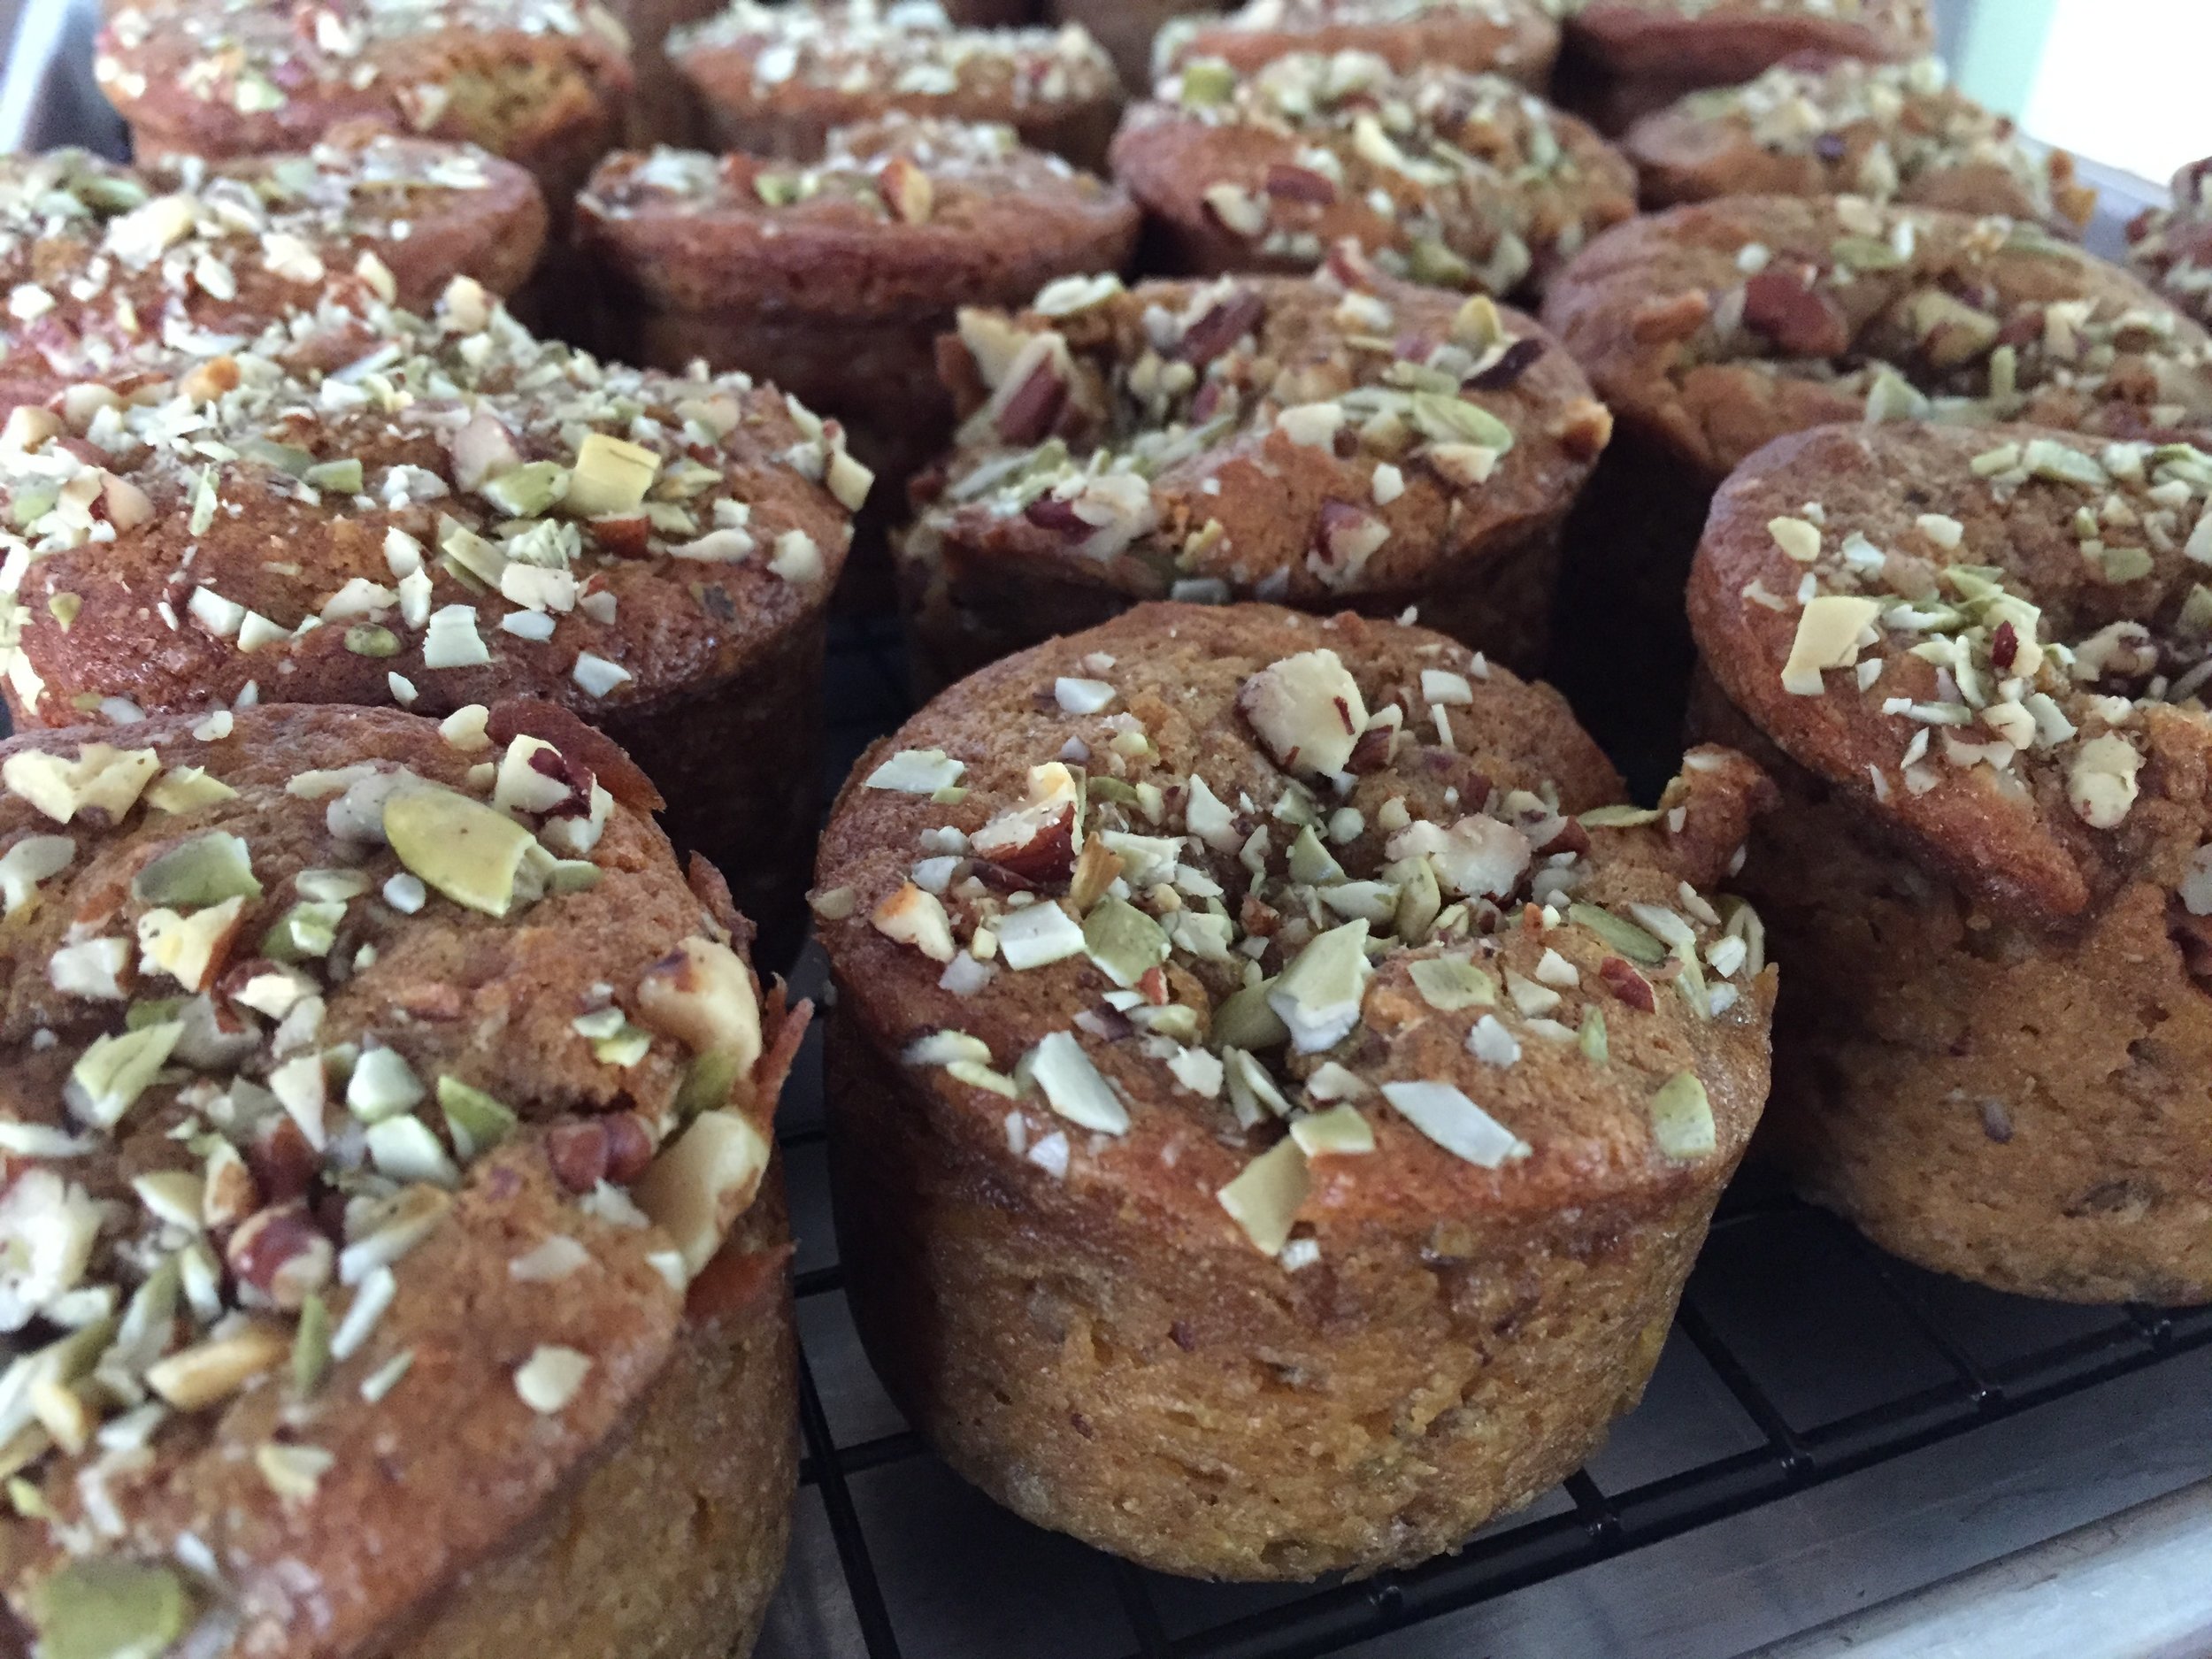
It's a straight forward cake process - whisk together the dry ingredients in a separate bowl, cream the butter and sugars, add the fruit puree, add the eggs, then alternate the addition of the dry ingredients and buttermilk. Pretty basic. With this one, some of the chopped walnuts, pecans and pumpkin seeds are added to the dry ingredients and a small portion are set aside for garnish before baking.

Two of my favorite straight-sided Silikomart flexi-molds were given the honor for the baking process - one smaller/taller and one wider/shorter - both muffin style and shapes I find just so right for tea cakes.

Ready for the oven

Ready for the oven

All baked up

All baked up

These babies baked up moist and dense from the presence of the apricot purée, and the nuts and pumpkin seeds added just the right crunch.

nuttyapricot

Here's the recipe PDF as well as outlined below. This makes two 9"x5" loaves or many small cakes, depending on the size mold you choose.

  • Approximately 45 g (1/2 cup) each walnuts and pecans (or choose your own nuts)

  • 85 g (scant 3/4 cup) pumpkin seeds

  • 290 g (2 1/4 cup) all purpose flour

  • 150 g (1 1/4 cup) whole wheat pastry flour

  • 2 teaspoons baking soda

  • 2 teaspoons baking powder

  • 1 1/2 teaspoons salt

  • 1 teaspoon ground coriander

  • 1/4 teaspoon ground ginger

  • several fresh grates of nutmeg (you decide - I prefer my nutmeg on the subtle side)

  • a pinch of cinnamon (or more to your taste)

  • 227 g (8 ounces) unsalted butter, room temperature

  • 185 g (scant well packed cup) brown sugar (I used light but try dark if you'd prefer)

  • 200 g (1 cup) granulated sugar

  • Approximately 350 g (~12 ounces) apricot puree (or try pear or pumpkin!)

  • 4 large eggs, room temperature

  • 180 ml (3/4 cup) buttermilk, room temperature

1. Heat the oven to 350ºF.
2. Spread walnuts, pecans and pumpkin seeds on a sheet pan. Toast for about 10 minutes until fragrant. Once cooled, do a medium-fine chop.
3. Reduce the oven to 325ºF. Have your silicone molds at the ready (no buttering necessary), or, if using two 9"x5" loaf pans, butter and flour them.
4. In a separate bowl whisk together the two flours, baking soda, baking powder, salt and spices.  Stir in the chopped nuts and seeds but reserve a few tablespoons for garnish.
5. In the bowl of a stand mixer fitted with the paddle attachment, combine butter and sugars and mix on medium high until will blended. Scrape down the sides of the bowl.
6. Add apricot purée and mix for a couple of minutes until incorporated. Add in eggs, one at a time, mixing each until blended before adding the next.
7. Now add the flour/spice mixture alternating with buttermilk, beginning and ending with the flour. Mix until just combined and finish off by hand with a spatula.
8. Pour the batter into your chosen molds or pans, smooth tops, sprinkle reserved nuts/seeds on top and pop into the oven.
9. Bake small cakes around 20 minutes - remember - it's your job to keep an eye on things! You're looking for a tester inserted in the center to come out clean. Large loaves bake 50-60 minutes.
10. Let your cakes cool on a wire rack for 15-20 minutes before unmolding, then let cool completely before storing in an airtight container. These will keep at room temp for several days, or wrap and freeze them for up to two months.

Enjoy!

nuttyapricot