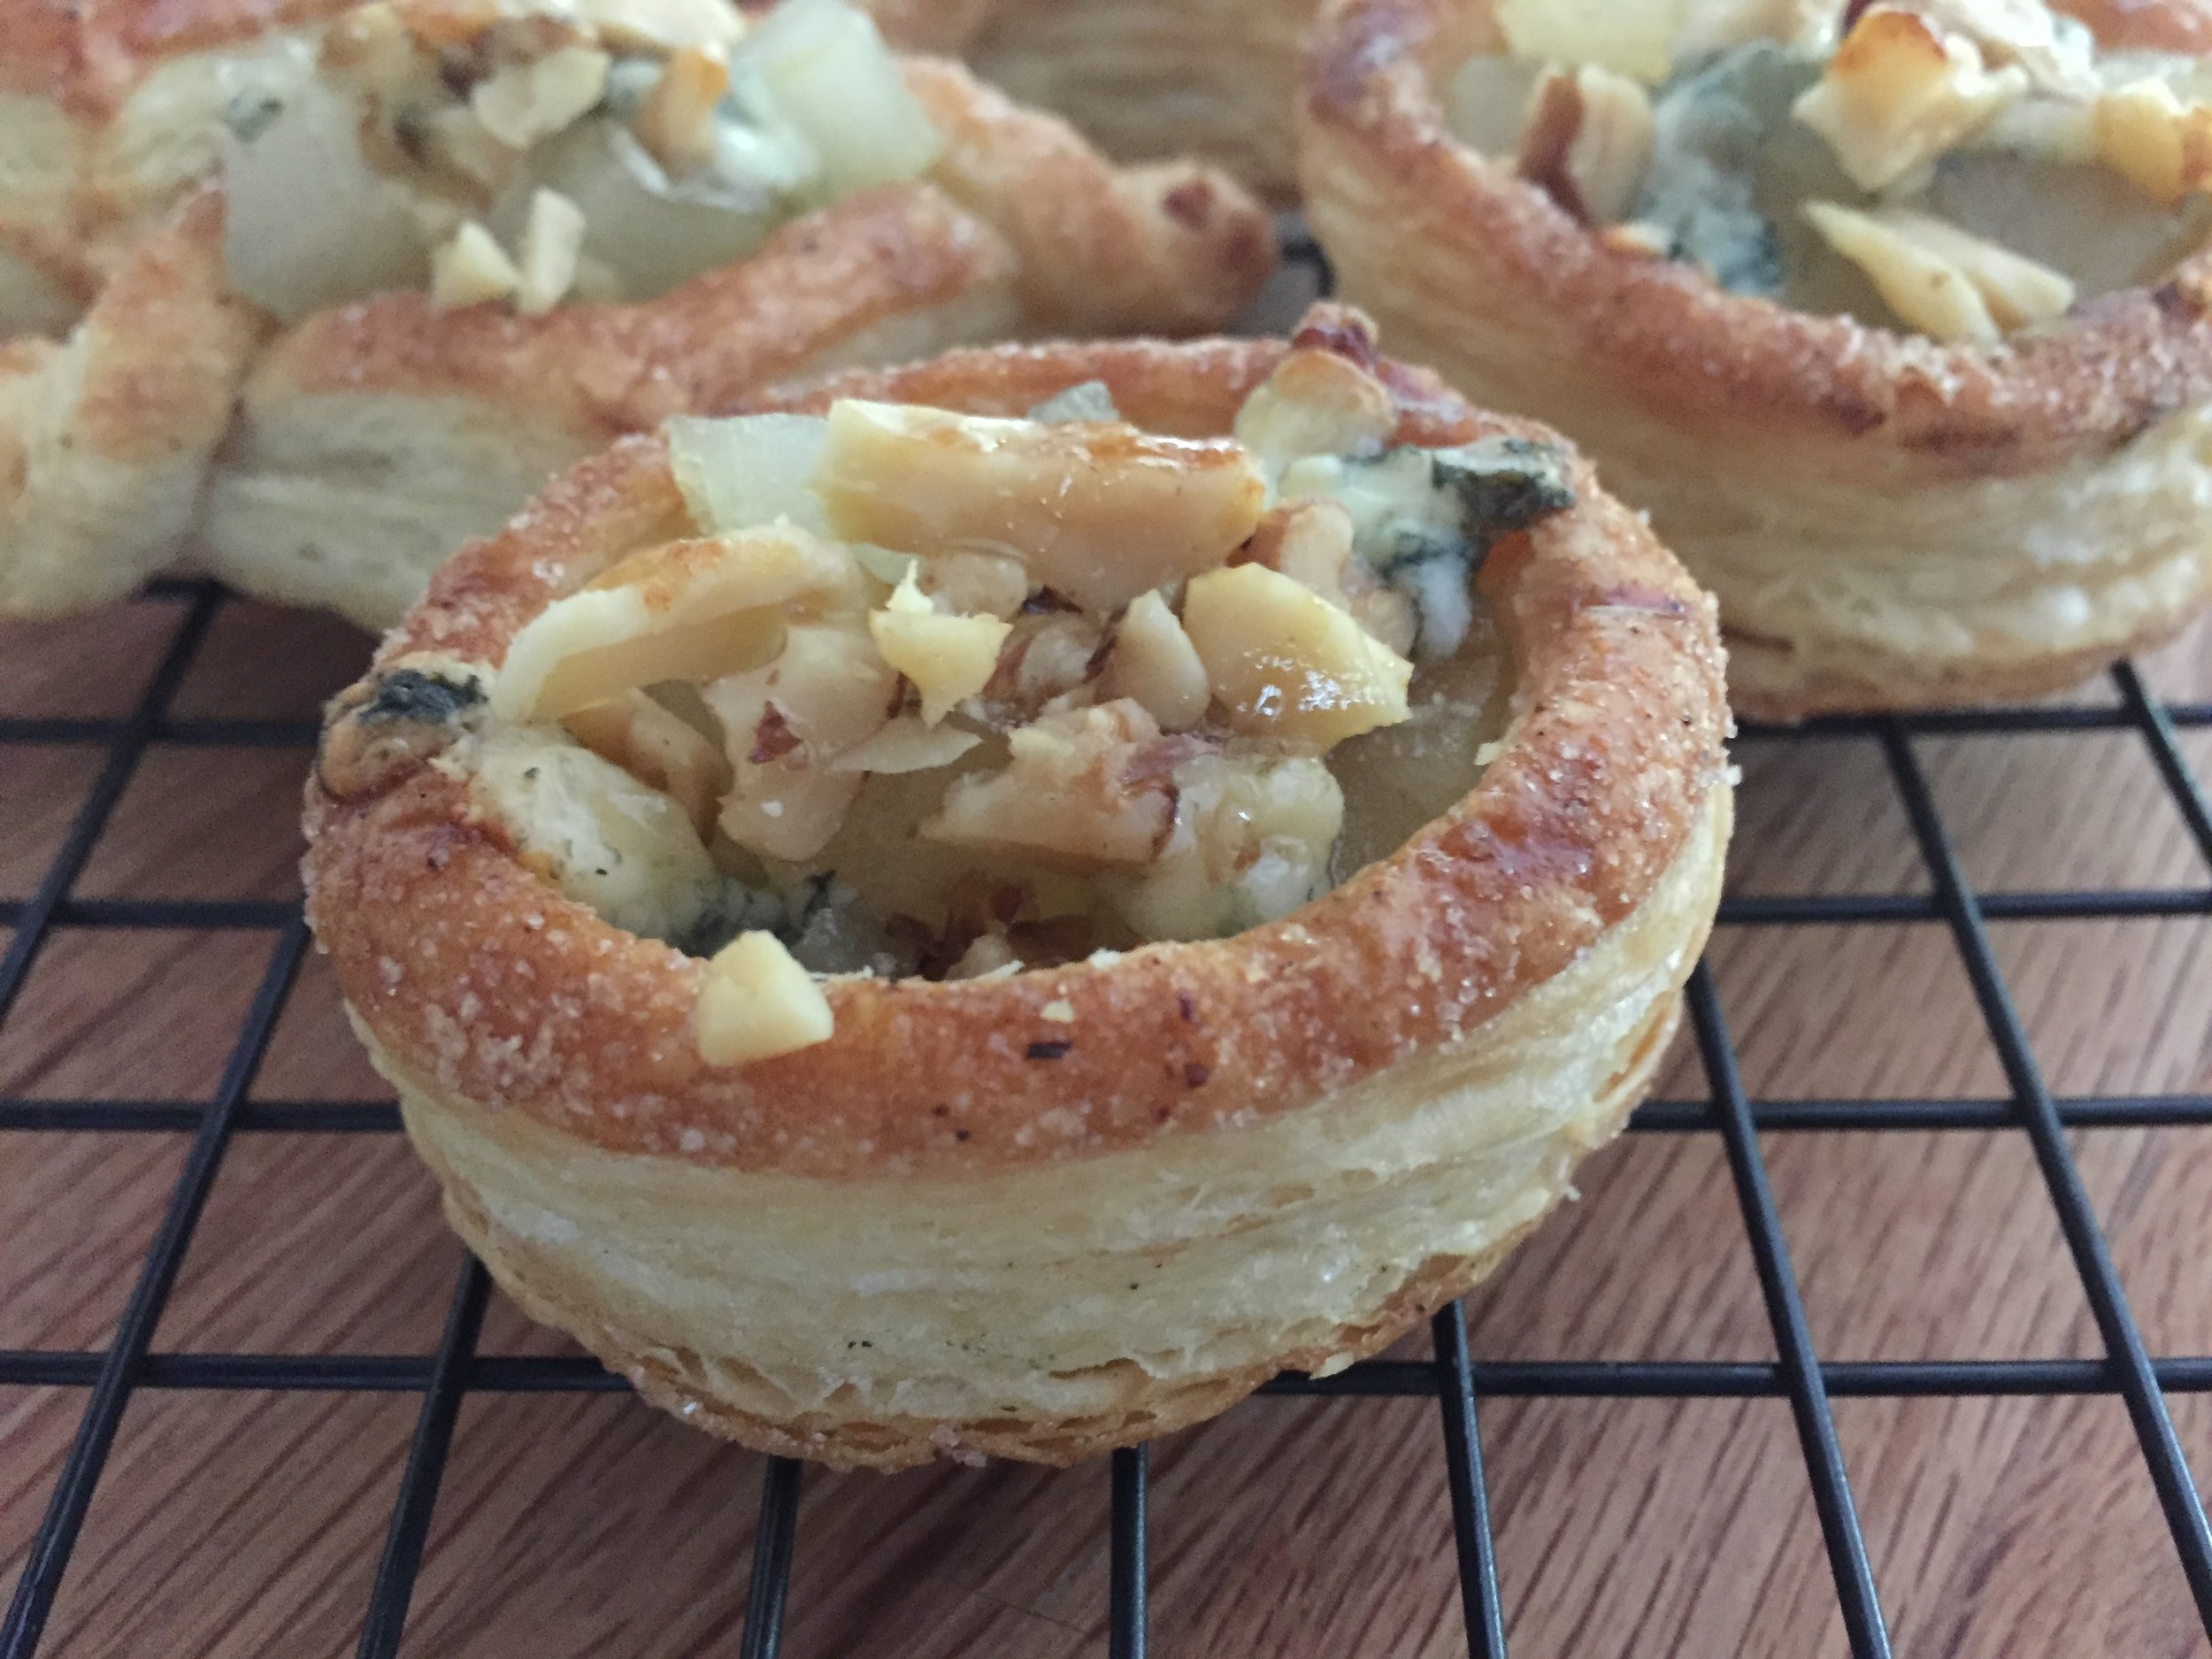
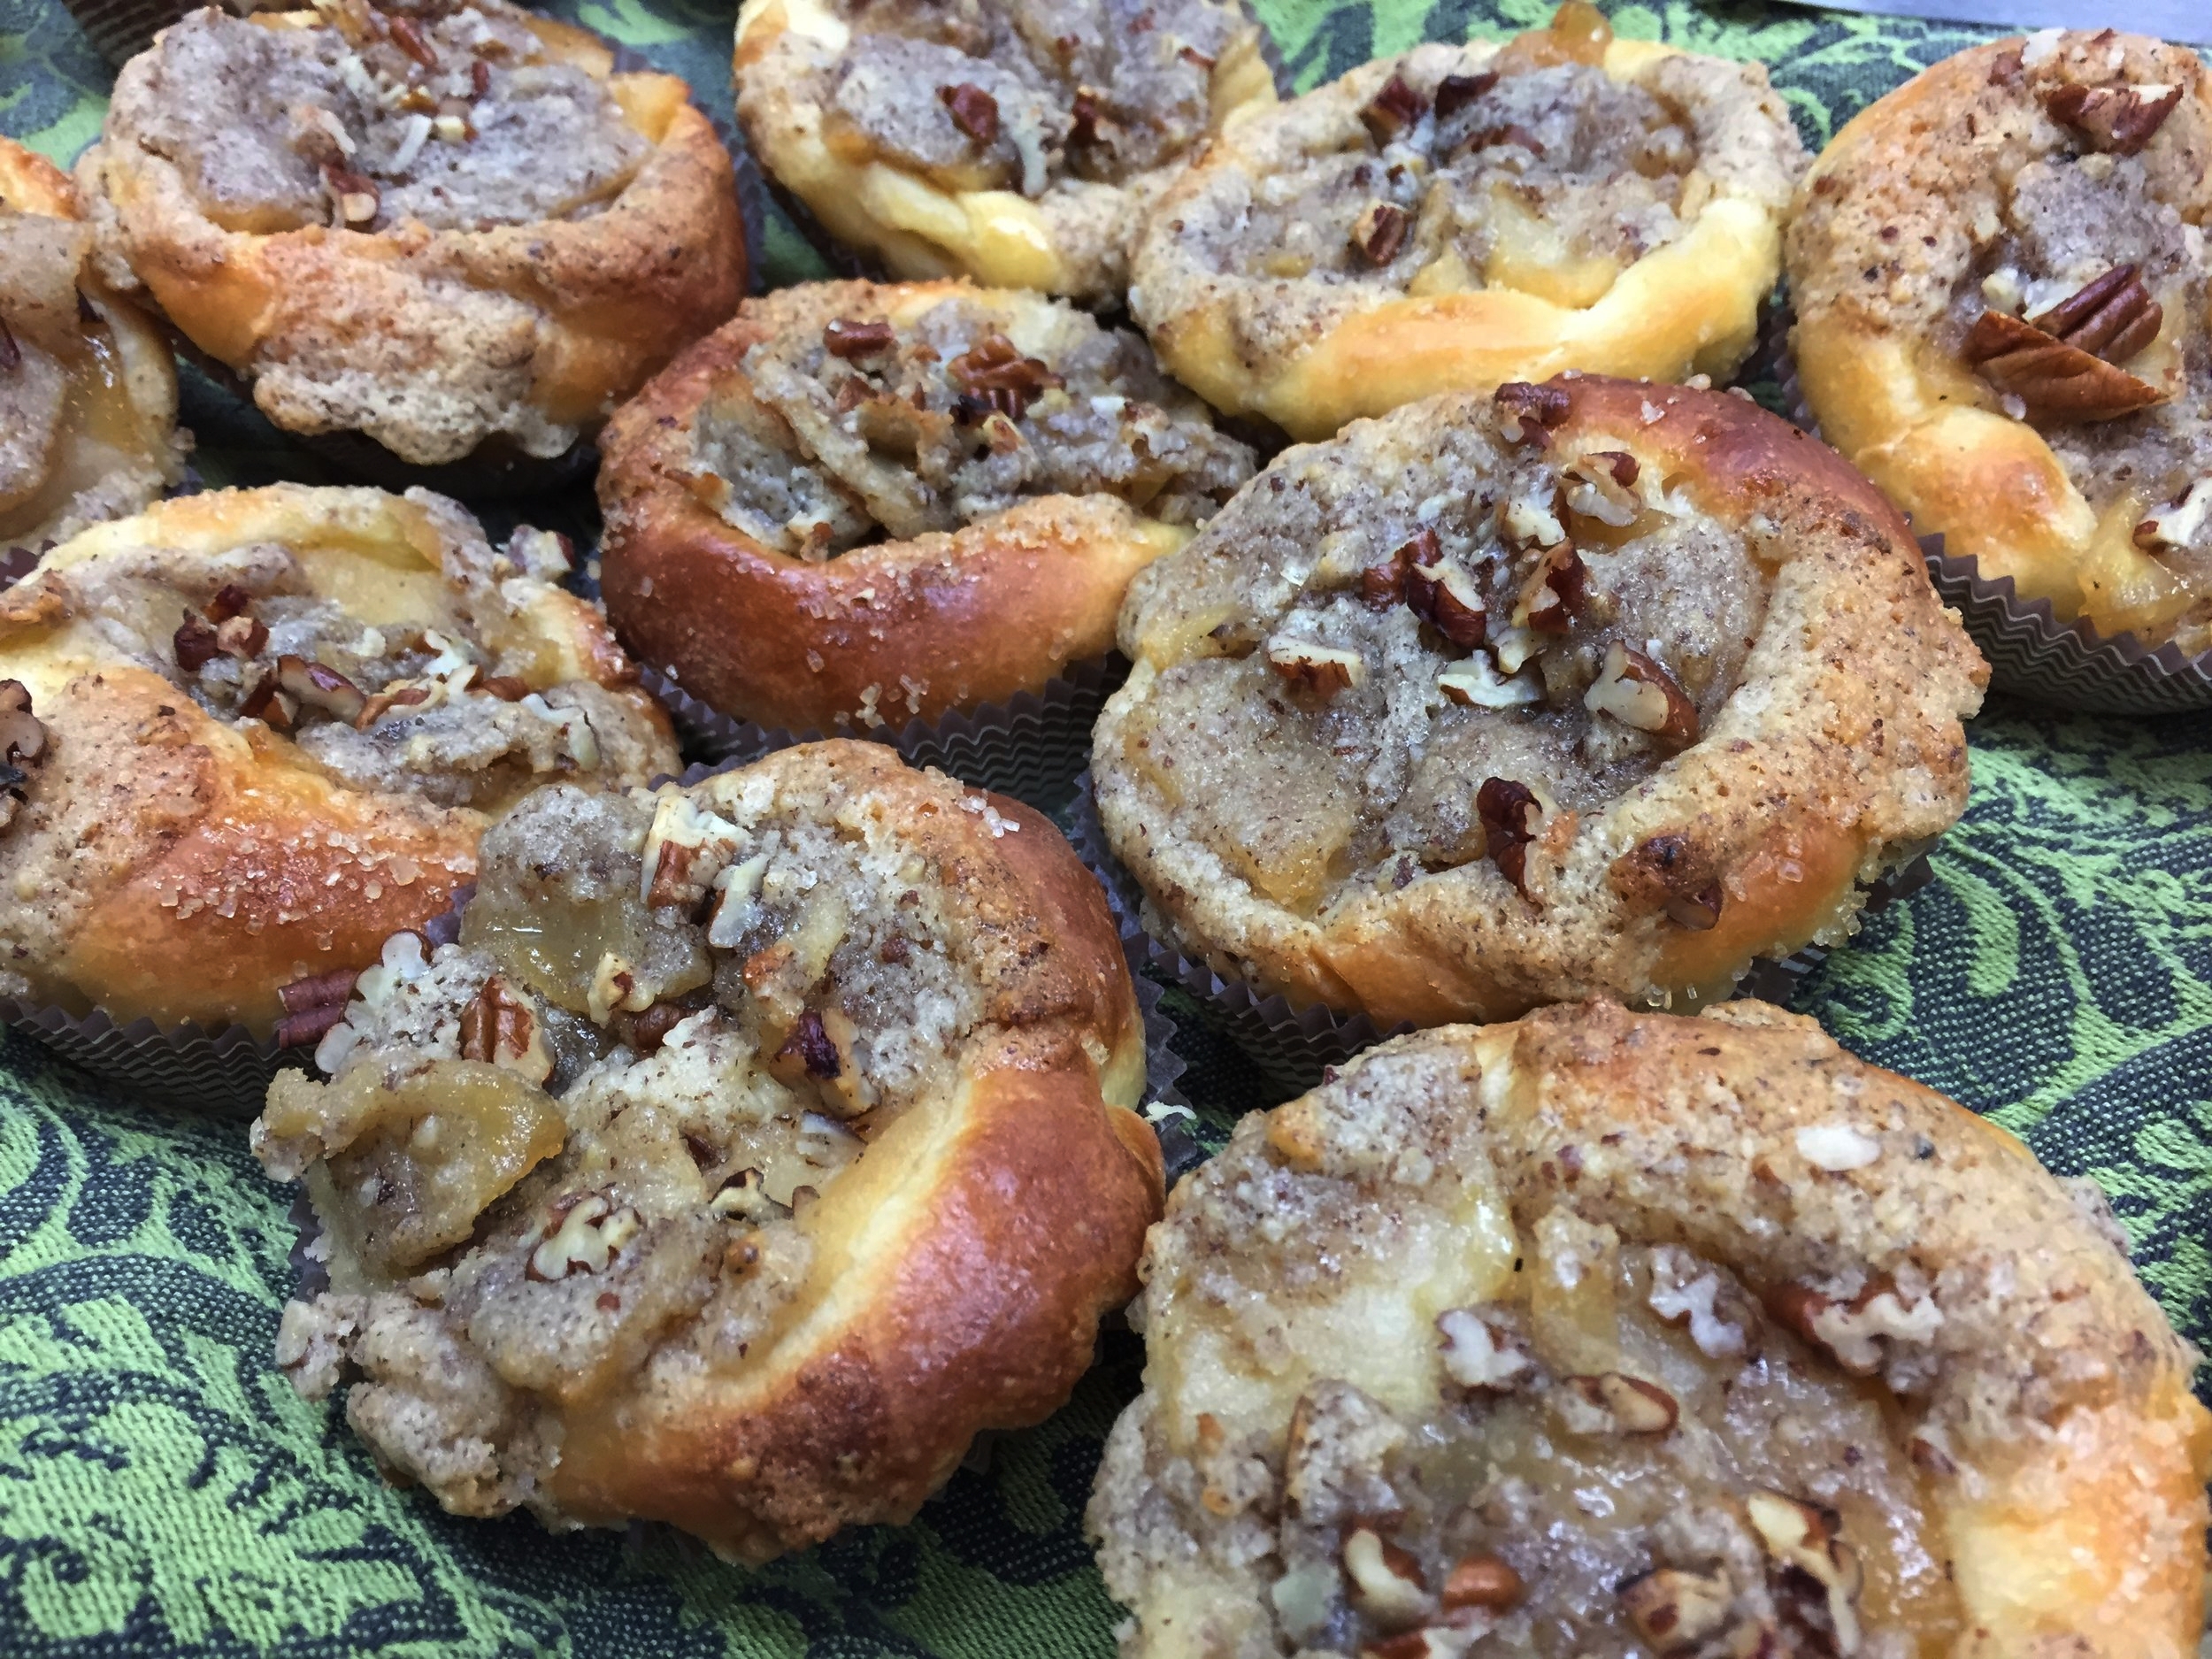
Honeyed pear/Cashel blue/walnut puffs

IMG_3195.JPG

Here’s a wonderful way to use puff pastry. Make vol au vent (puff pastry cases) in desired shapes and create your own sweet and/or savory fillings for your supper buffet or dessert table. While making your own puff pastry is a rewarding experience, the good news is you don’t have to! All butter puff pastry (Dufour is a well known brand) is available in the frozen food sections at many local supermarkets, allowing you to take one task off your holiday prep to-do list.

Before you know it, Thanksgiving and Christmas will be upon us, so start planning now.

This version of vol au vent (also referred to as feuilletée) marries sweet and savory tastes and, since I’m still on the trail of baking with cheese projects, I chose Irish Cashel blue cheese from The Cheese Lady as a lovely accompaniment to pears, walnuts and honey.

IMG_3308.JPG

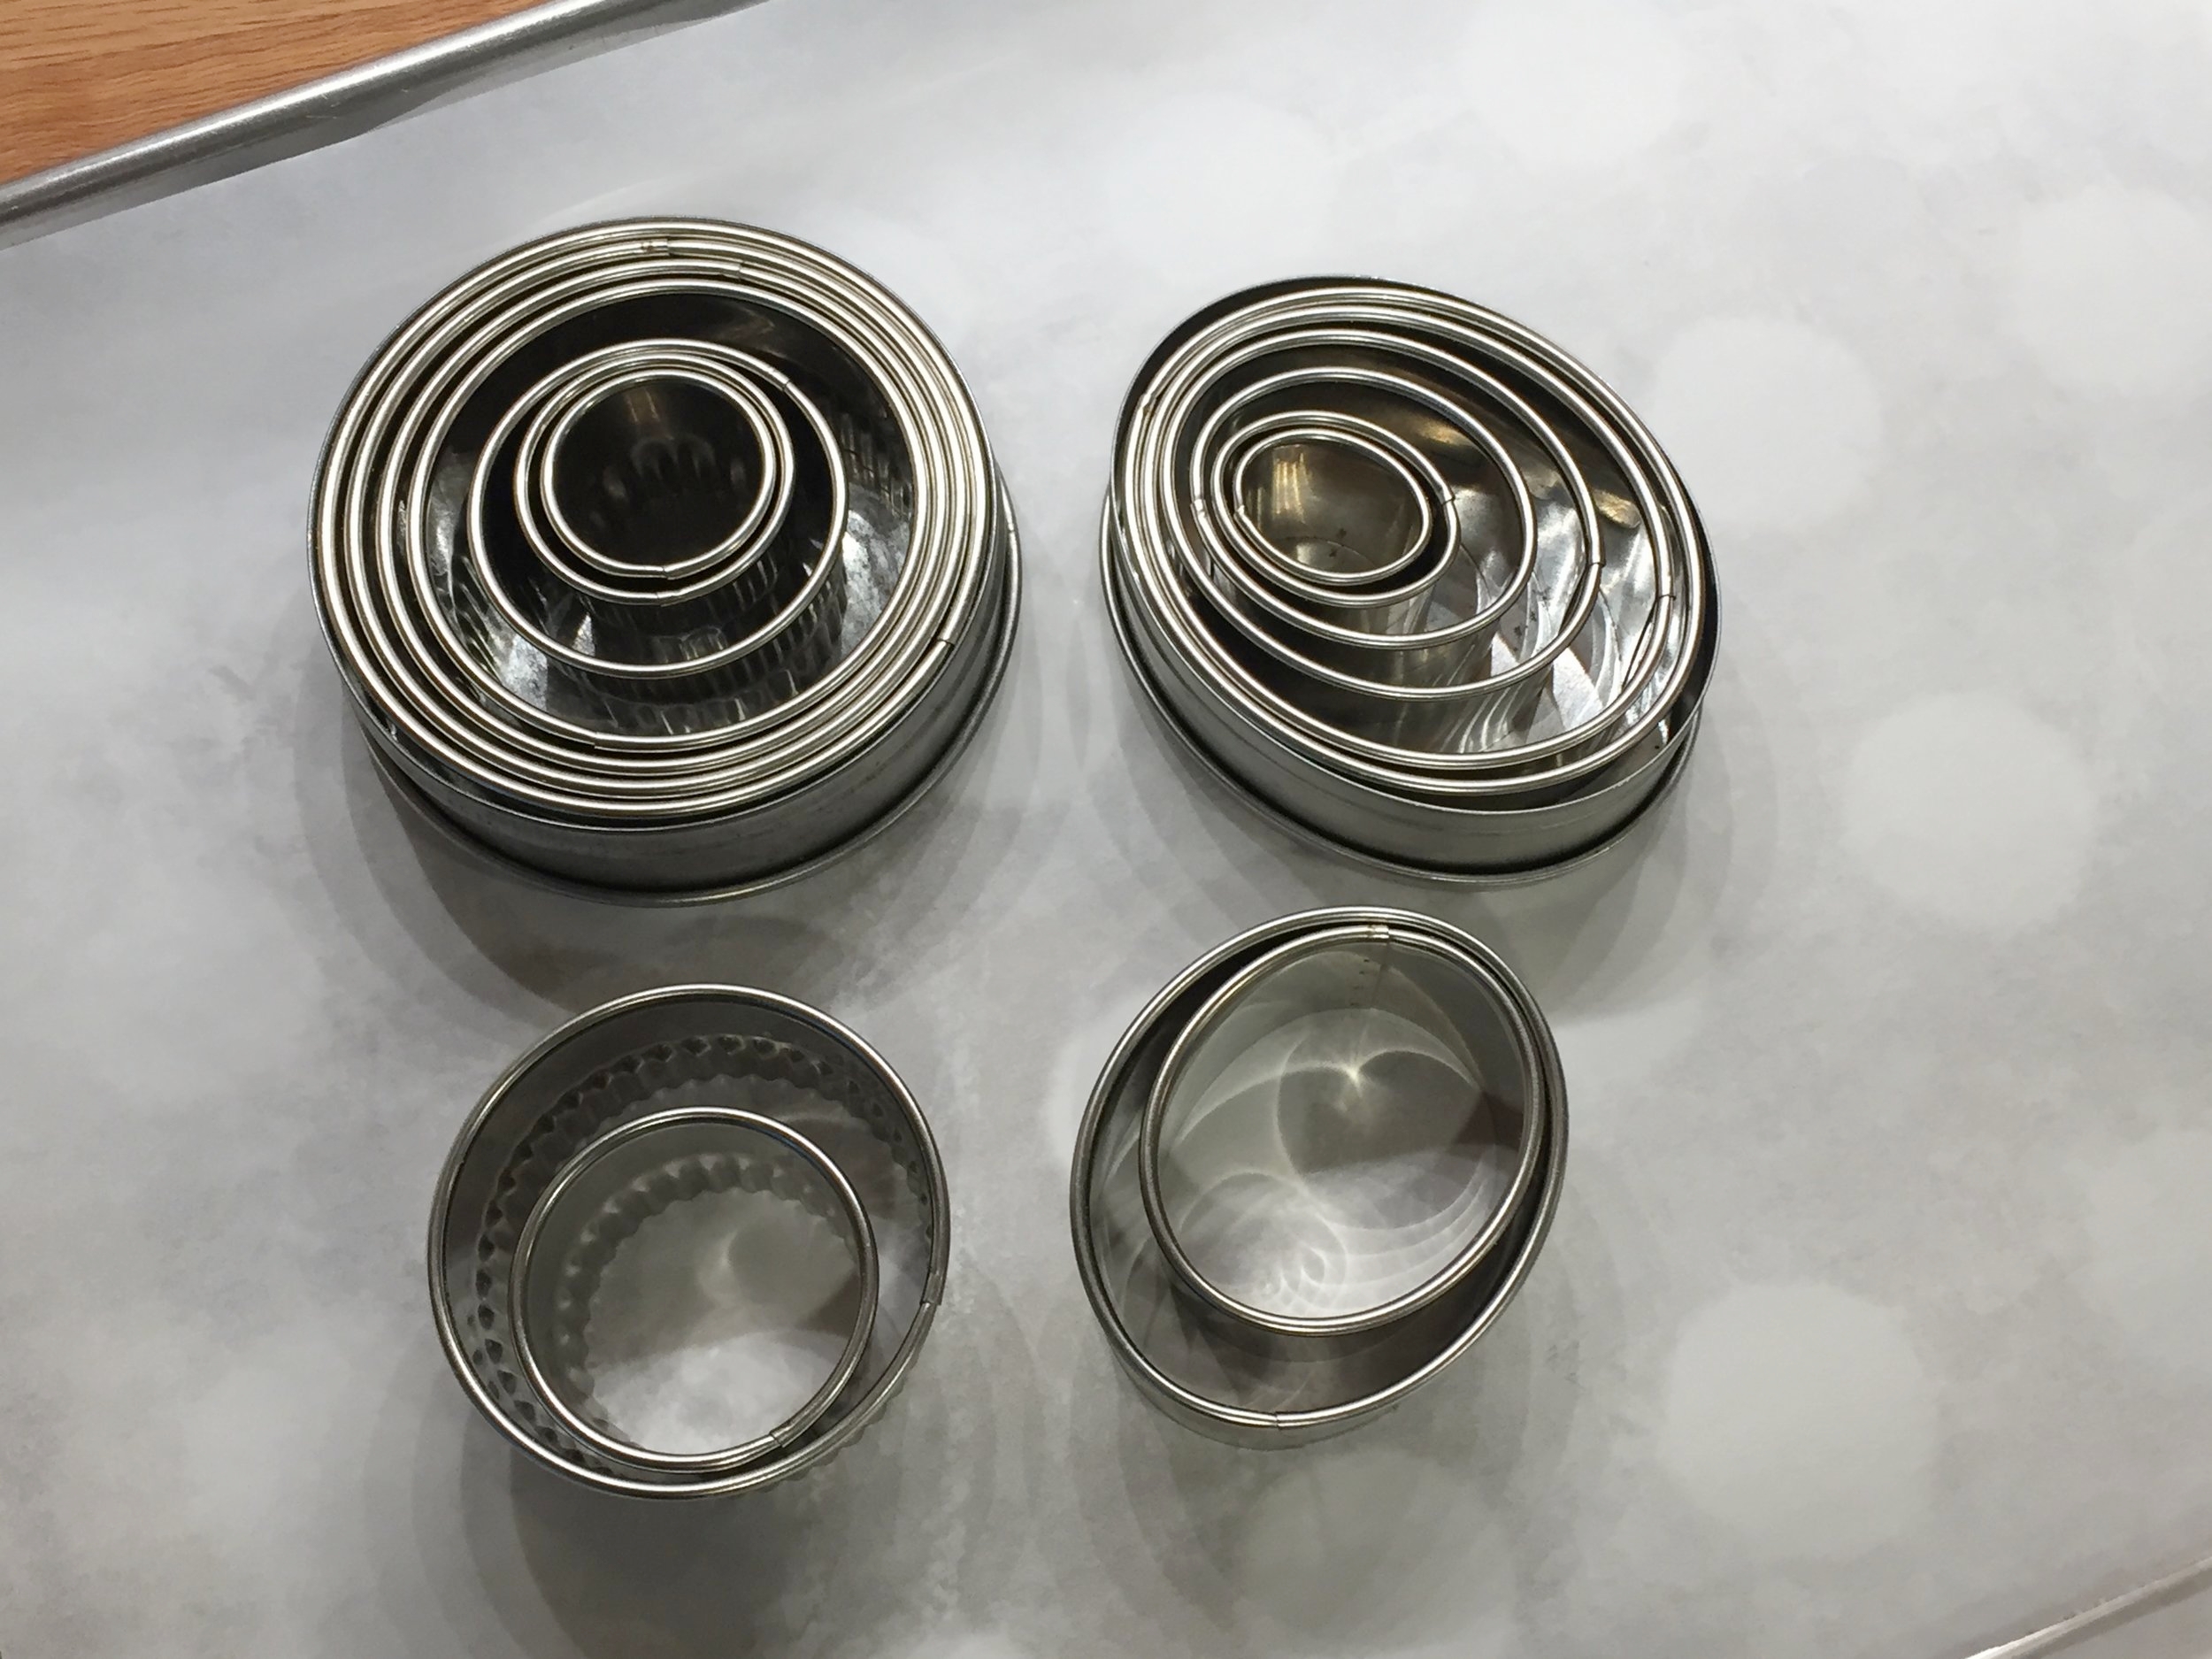
If you happen to have a stash of different shaped cutters, choose your favorite shapes (I like ovals, squares, hearts and fluted rounds) and use cutters that are two sizes apart. For each puff you’ll cut two shapes with the larger of the two and then cut the center out of one of them with the smaller. Once you do it, you’ll know what I’m talking about.

IMG_3335.JPG

Here’s a heart version which should help you visualize the process. Brush a little water along the edge of the solid shape then lay the cut out on top of it. Just press gently to stick them together.

IMG_9210.jpg
IMG_9212.jpg

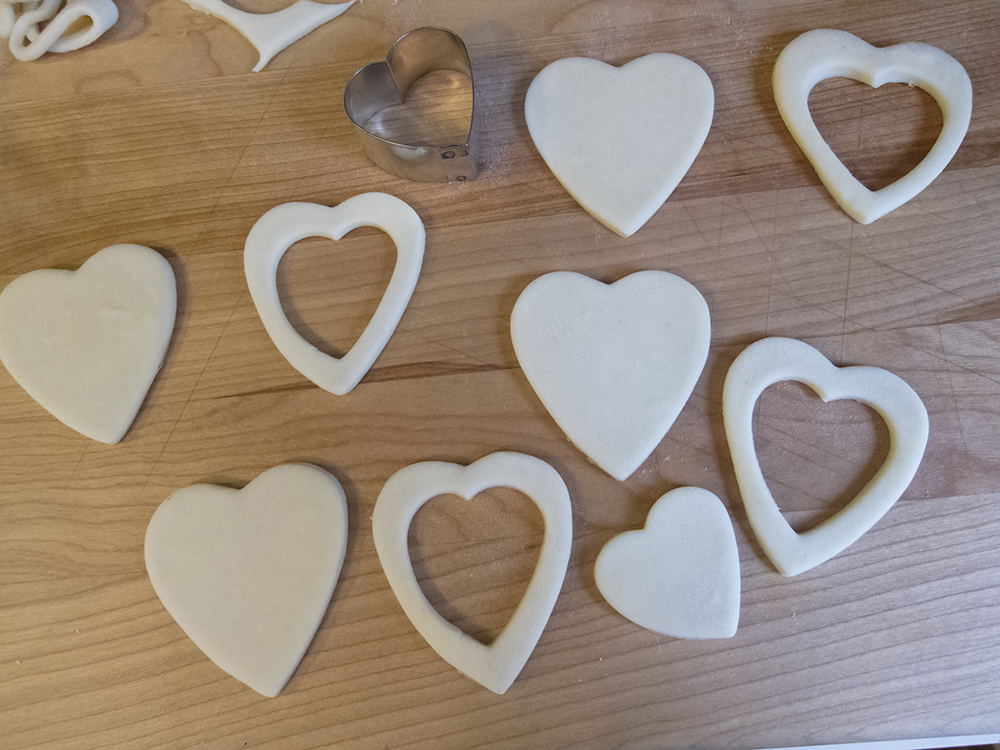
The top layer serves as a border for the puffs. You can save the cut out shapes and bake them along side - they make cute “hats” on your finished creation or you can just eat them plain.

These bake at 400ºF for 15-20 minutes until golden brown. Let them cool a bit, push down the center layers that have puffed up to give yourself room for the chosen filling.

IMG_9225.jpg

NOTE: Another plan-ahead perk is you can bake your puffs a week or so ahead and freeze them. When you’re ready to start your filling project, take them out of the freezer, place them on a parchment lined sheet pan and heat the oven to 325ºF. Pop them into the heated oven for 5-10 minutes to crisp them up then set on a cooling rack while you prepare your fillings.

I’ve created these delights with poached Bosc pears on hand in the fridge, but another approach is to roast pear slices drizzled with honey for the pear portion of the program.

IMG_3332.JPG

Peel, core and slice the pears, drizzle them with honey and roast them in a 375ºF convection oven for 10-20 minutes. Stir them up a bit half way through. You want them turning golden but still holding their shape. Once the pears have cooled you can store them in a covered container in the fridge for several days.

When you’re ready to fill your puffs, cube the pears to allow them to fit in nicely. Have some toasted walnuts, crumbled up Cashel blue and honey at the ready. First put a bit of crumbled cheese in the bottom. (Note the twisted corner diamond shapes below - they’re great although difficult to explain on paper - maybe some day I’ll have a video to post to show how they’re done!)

IMG_3193.JPG

Then tuck in the pears (don’t be afraid to mound them up!) and top with a sprinkle of walnuts, more cheese and a drizzle of honey.

IMG_3194.JPG

Then pop them back into the oven to melt the cheese a bit and warm things up. They can be served warm or at room temp and are delicious as an appetizer or a dessert, particularly if you’re doing a broader cheese board for the end of your meal.

Use your imagination and fill your puffs with anything savory or sweet. Crab or chicken salad, roasted root veggies with caramelized onion, lemon curd and fresh berries, whipped chocolate ganache and candied nuts. The sky’s the limit.

Only you can decide!

Happy baking and here’s to the holidays!! More on that coming your way.

IMG_3196.JPG

A couple of autumn tarts

IMG_3305.JPG

Apples! Pears! Berries! What better way to celebrate autumn, eh?

On the prowl for a couple of Sunday desserts, as well as a way to use some of the local Michigan pears and apples I had on hand, tarts were definitely on my mind. Natch! This project involved two versions of tart, one apple/pear/blackberry with classic brown sugar crumble topping and one apple/pear/raspberry with crunchy almond topping. Ooooohhh how delicious.

IMG_3297.JPG
IMG_3291.JPG

I’ve been a fan of Bosc pears for some years now, and, on the apple side of things, this season I’ve taken quite a shine to Jonagolds too.

I typically poach my pears soon after purchase as a way to avoid the ripening wait as well as to hold them in the fridge for use when needed. But after reviewing some of my numerous pastry books I opted for the slice/dice/sauté in a little butter and sugar approach. Works like a charm!

For a couple of full sized tarts I peeled, halved, cored and thinly sliced about 4 pounds of apples. That would normally be a decent quantity for one tart, but, since I was mixing in pears and berries, it worked very nicely for two.

Then on medium heat melt 2 ounces/56 g unsalted butter in a sauté pan or Dutch oven large enough to hold all of the apples, then stir in the slices until coated. Add 100 g dark brown sugar, a large pinch of salt, the zest of one lemon and a large squeeze (a tablespoon or so) of lemon juice, increase heat to medium high and stir about a minute.

Now here’s where I took Elisabeth Prueitt’s advice from her “Tartine all Day” book - cover the pan, reduce the heat to low and let the apples cook for about 10 minutes until softening and juice-releasing has happened. Then scoop the apple slices out with a slotted spoon (I placed them in a large strainer over a bowl to allow dripping then transferred them to a clean bowl) and cook down the juices for a few minutes until very thick - apple caramel! Mix the thickened juices in with the apples and you’re good to go. You can add a little cinnamon and nutmeg here if you’d like - I kept mine au naturel. Set aside to cool until you’re ready to fill your tart shell.

For the pears, again using about 4 pounds, I peeled, halved, cored and diced them into 1/2 inch cubes then followed a similar sauté approach in butter and sugar. For these, simply cook them over medium high heat until they start to soften and become lightly caramelized (maybe 5-8 minutes) then set them aside to cool until ready to fill the tarts. No juice reduction here.

I used two of my favorite tart doughs - pâte brisée for the blackberry version and pâte sucrée for the raspberry - blind baking them before filling. Once baked I brushed the bottom with egg white and popped ‘em back in the oven for a couple of minutes to “dry”. That provides a seal to the dough and reduces the chance for a soggy crust.

Pear apple blackberry waiting for assembly

Pear apple blackberry waiting for assembly

I mounded the apple/pear mix in first then tucked my blackberries into the various nooks and crannies. These were plump frozen berries that I broke up into pieces for more efficient cranny-ing.

IMG_3294.JPG
 

The brown sugar crumble is equal weights flour, brown sugar (you can use light or dark, whichever you prefer) and diced cold butter sanded into the dry ingredients. I usually make a bunch and store it in a zip-top bag in the freezer to use at a moment’s notice.

Loaded with crumble!

Loaded with crumble!

Since the crust is already baked and the fruit “cooked”, the primary task here is to brown the crumble and get the fruit to juicy-up. Bake at 350ºF for 20-25 minutes until the crumble is golden and some juicy bubbling is visible.

IMG_3296.JPG
 

The approach to the raspberry version is pretty much the same. Fill the blind baked crust with the pear/apple/raspberry mix.

IMG_3288.JPG
 

But this time the topping is made with 2 large egg whites, 100 g/1 cup confectioner’s sugar and 125 g/1.25 cups sliced almonds all mixed together and spread over the fruit.

Ready for the oven

Ready for the oven

This one also bakes at 350ºF for about 25-30 minutes until the nuts are browned and have taken on a certain luster and there’s some fruit juiciness visible around the edges.

IMG_3290.JPG
 

Talk about a treat! Whether it’s crunchy toasty almonds or a more classic crumble that melts in your mouth, both of these tarts delivered with the lovely fall flavor of pears, apples and berries. And a side of vanilla ice cream doesn’t hurt either!

Now don’t hesitate to make your own version of a delicious autumn tart.

Happy baking!

IMG_3302.JPG

Roasted garlic cheese bread

IMG_3223.JPG

Ooooh I loved this baking adventure! Not only did I use Fontinella, a delicious bread-worthy cheese from The Cheese Lady, but added in some roasted garlic that the Steve-man has recently been providing in spades.

IMG_3208.JPG


I’ve been wanting to experiment more with different ways of filling and shaping bread dough and am often inspired by ideas I absorb from King Arthur Flour’s “Sift” magazine and/or their website which is chock full of wonderful tips, tricks and ideas.

In addition, I’m learning more about the ways to tweak one’s bread recipe from a straight or direct dough to a pre-ferment approach to build more flavor into the final result. Not only is it fun but appeals to my scientific bent.

In addition to KAF’s website, my go-to resources for bread baking include Rose Levy Beranbaum’s “The Bread Bible”, Peter Reinhart’s “artisan breads every day” and Jeffrey Hamelman’s “Bread”. So much to learn.

For this project I married ideas from a provolone bread recipe from CIA’s “Baking and Pastry” that I’ve been making for some years now with a KAF recipe for a cool looking twisty cheese/sundried tomato/herb number. I wanted to do a poolish this time and found some great tips on the “Weekend Bakery” blog, written by a Dutch couple who bake at their home. Lots of good stuff there too.

I’m not here to slog through the calculations but, in a nutshell, a poolish is equal weights of flour and water taken as a percentage of the whole from the base bread recipe you’re using. Based on my understanding of how one goes about this, I created my poolish with 200 g bread flour, 200 g water and 1/8 + 1/16 teaspoon of instant yeast, looking for a 6 hour room temperature fermentation. NOTE: the amount of yeast you add will vary depending on how long you wish your poolish to ferment.

Here’s my poolish after about 5.5 hours - nice and active and bubbly!

IMG_3210.JPG

To make the final dough I combined the poolish with 510 g bread flour, 7 g instant yeast, 235 ml tepid water/milk mix, 71 g olive oil, 20 g butter and 16 g salt.

IMG_3209.JPG

Using the dough hook I mixed everything for 4 minutes on low speed and then 2 minutes on medium speed. Then a 30 minute bulk fermentation followed by a fold-over then another 30 minutes before dividing.

After the bulk fermentation

After the bulk fermentation

I divided my dough into two 740 g portions with a plan for two different shaping approaches.

IMG_3212.JPG

The first shape involves rolling the dough into a rectangle and sprinkling it with 227g grated cheese (fontinella in my case). Then I took 6-7 cloves of roasted garlic and smooshed and pieced them up, scattering the pieces over the rectangle. A light sprinkle of Penzey’s salt free pizza seasoning mix, then roll up a snug log.

Starting the log roll

Starting the log roll

Once the log is complete, pinch the seams, place it seam side down on a parchment lined sheet, slit it down the middle to a depth of about an inch, leaving the ends intact. The log will open up to expose the filling.

IMG_3215.JPG

Then shape it into an “S” and tuck the ends under. Pretty cool.

IMG_3216.JPG

My second shape followed the method used for babka in which you roll up the log as already described, then slit the log entirely down the middle yielding two separate pieces filling side up.

IMG_3218.JPG

Begin at one end and twist the two pieces over and under each other, continuing to keep the filling side up as best you can (I could use some more practice on this one!). In this case I then went for a couronne or crown by forming it into a ring and tucking the ends under.

IMG_3219.JPG

Cover and let rise in a warm place for about 45-60 minutes, heating the oven to 350ºF during the last half of the rise.

Bake for 35-40 minutes until nicely browned.

IMG_3225.JPG
IMG_3226.JPG

The fontinella and roasted garlic went a long way to making this one a truly delectable bread experience.

IMG_3232.JPG
IMG_3231.JPG

For a family supper we sliced it, drizzled some melted butter over it, loosely wrapped it in foil and warmed it for about 10 minutes in a 325ºF oven. Oh my.

Yup. I’d make this again.

World egg day!

Maple pot de crème

Maple pot de crème

How many of you knew that October 12 was World Egg Day? I wouldn’t have known if it hadn’t been for Kim, the activities director at Heron Manor/Woods just down the street from our home.

It all started in 1996 when the International Egg Commission set the second Friday in October as World Egg Day to increase awareness of the benefits of eggs and how important they are in human nutrition. Who knew?

Needless to say, eggs are utilized in many different ways in the baking and pastry world. For a morning event this past Friday, October 12, I decided to really go for it in the egg department.

Never one to turn down pot de crème, I thought others would enjoy a maple version of this unctuous delight, topped with maple mascarpone cream, a sprinkle of walnut praline crumbs and a petite maple walnut shortbread cookie on the side. So lovely and so delicious.

The base is essentially a crème brulée type custard made with cream, yolks and sugar (maple syrup here). I used 3 ounce ramekins which I find to be a perfect portion for a just right taste.

To yield 14 portions, whisk together 9 yolks, 3/4 cup REAL maple syrup (don’t you even dare use “pancake syrup“!), 3/4 teaspoon salt and 3/4 teaspoon vanilla extract; heat 3 cups heavy cream to barely simmering and temper it into the egg/maple syrup mixture. Strain through a fine mesh sieve into a pouring measuring cup then fill the ramekins to 1/4” below the rim.

Bake in a water bath at 325ºF. I use a clear pyrex glass baking dish, set the ramekins in, pour hot water into the corner of the dish and fill to about half-way up the sides of the ramekins. Cover loosely with foil and bake about 30-35 minutes, checking it periodically - you want the custard just set with a hint of a jiggle in the center. Once out of the oven, lift them out of the water bath and cool to room temperature on a wire rack.

IMG_3255.JPG

Then refrigerate until chilled. Garnish with whatever you’d like! If not being consumed the same day, I cover them with plastic wrap to enjoy over the next few days.

IMG_3266.JPG

Now for a tart!

IMG_3253.JPG

As always, having some version of a tart in the mix is right up my alley and thus a ricotta custard raspberry tartlette was born - buttery blind baked short crust filled with a few raspberry pieces and an easy to make ricotta filling.

For the filling whisk together 2 cups ricotta/3 eggs/one tablespoon cornstarch/3/4 cup sugar/zest of a lemon/ 1 teaspoon vanilla. Et voilà, très simple!

IMG_3244.JPG

Bake at 350ºF until the filling is set and a bit puffy, about 20-25 minutes.

IMG_3247.JPG

To give these babies some panache I made a lightly gelled raspberry coulis and pooled it on the top.

IMG_3249.JPG

Then a nice string-of-pearls crème Chantilly rim and a fresh raspberry to top it off. Smooth and berry delicious !

IMG_3251.JPG

The World Egg Day table also held browned-butter pistachio crumb cakes (egg whites) . . . .

IMG_3263.JPG

. . . . and apple pecan brioche (we all know that has eggs!).

Note: more on revisiting brioche recipes later - it’s an ongoing task.

IMG_3264.JPG

An enjoyable egg day it was!! Can’t wait until next year.