Tarte aux fruits rouge pistache from Christophe Felder

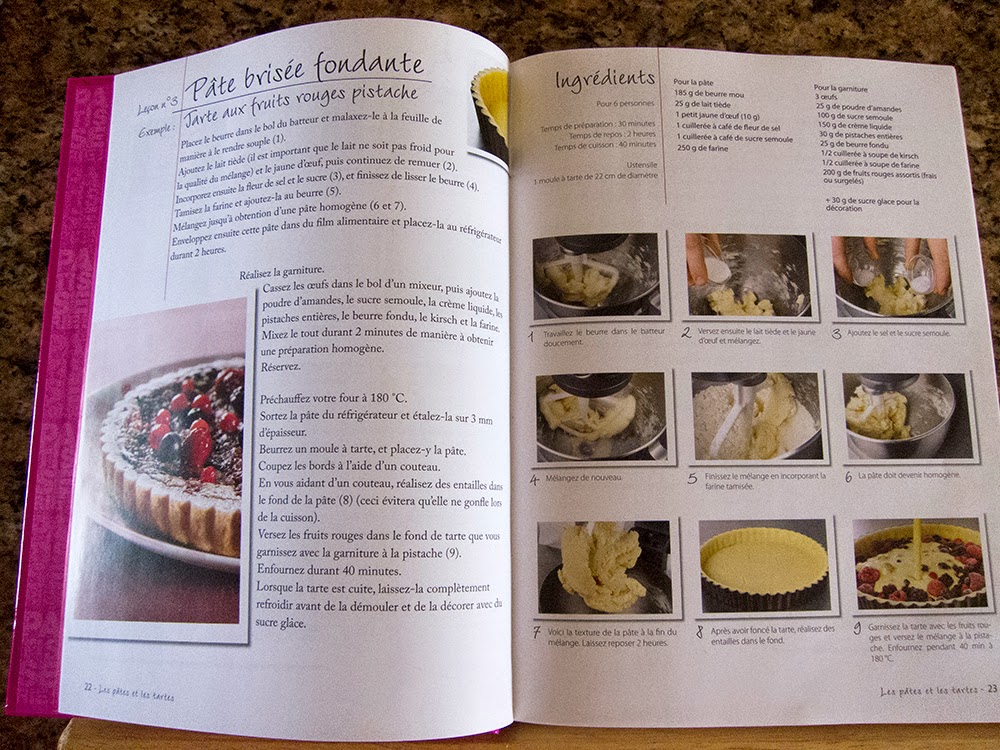
Lately I've been delving into Christophe Felder's book Patisserie! in search of new recipes to try. Tarts being one of my favorite things, I settled on the first section of the book (Les Pates et Les Tartes)  and chose this one primarily because it uses a tart dough that I've never made.


Mmmmmm!

Even though I arrived at my list of favorite and regularly used tart doughs long ago, I can't resist trying a new one every now and then.  Just gotta' do it.

The array of tart dough recipes one can find is overwhelming, with so many variations on the theme, whether it's pâte brisée, pâte sablée, pâte sucrée or sablé Breton!  More butter? Granulated or confectioners sugar?  Greater butter to flour ratio?  Eggs, yolks?  Nut flour? A splash of cream?  The possibilities go on and on.

Felder's book has a great table at the beginning of the tart section giving an overall look at certain doughs' characteristics, how easy they are to make, what types of fillings work well with them, what oven temperature at which to bake them, etc.  Check it out if you get the chance.

Now on to the recipe for pâte brisée fondante and tarte aux fruits rouges pistache.  Let's go!  

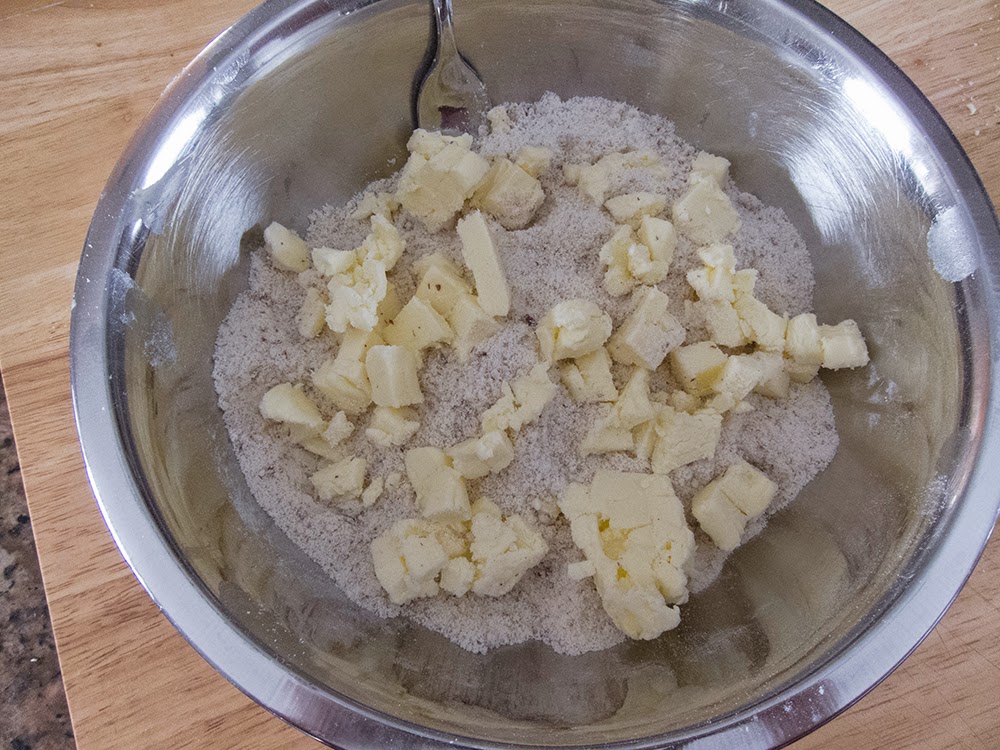
The word fondante means "melting" which certainly gave me a clue as to how this might come out.  I compared the ingredients with a standard pâte brisée (flour, butter, water, salt and sometimes a little sugar) and found a higher ratio of butter to flour, plus a bit of egg yolk and milk in the fondante version.  And more butter definitely means "melt in your mouth".

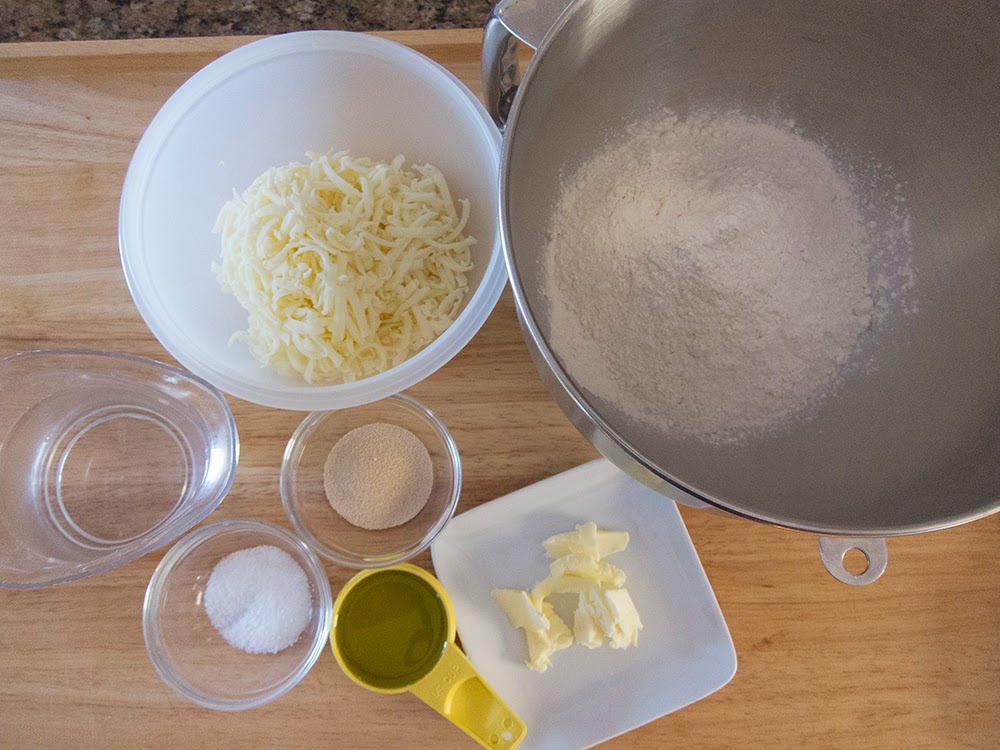
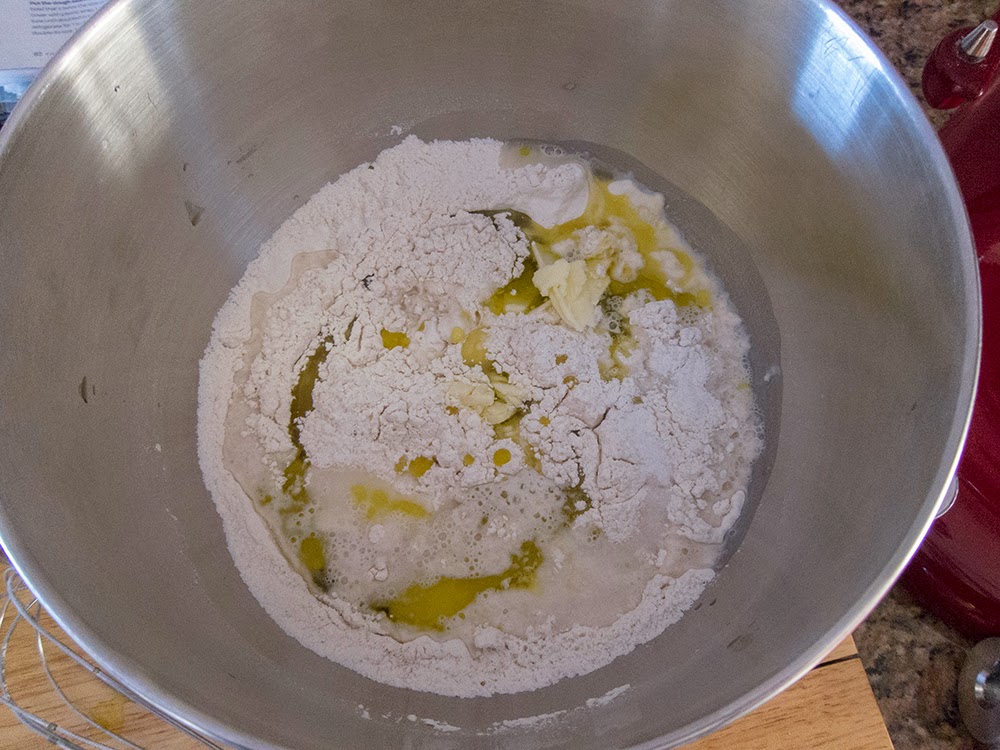
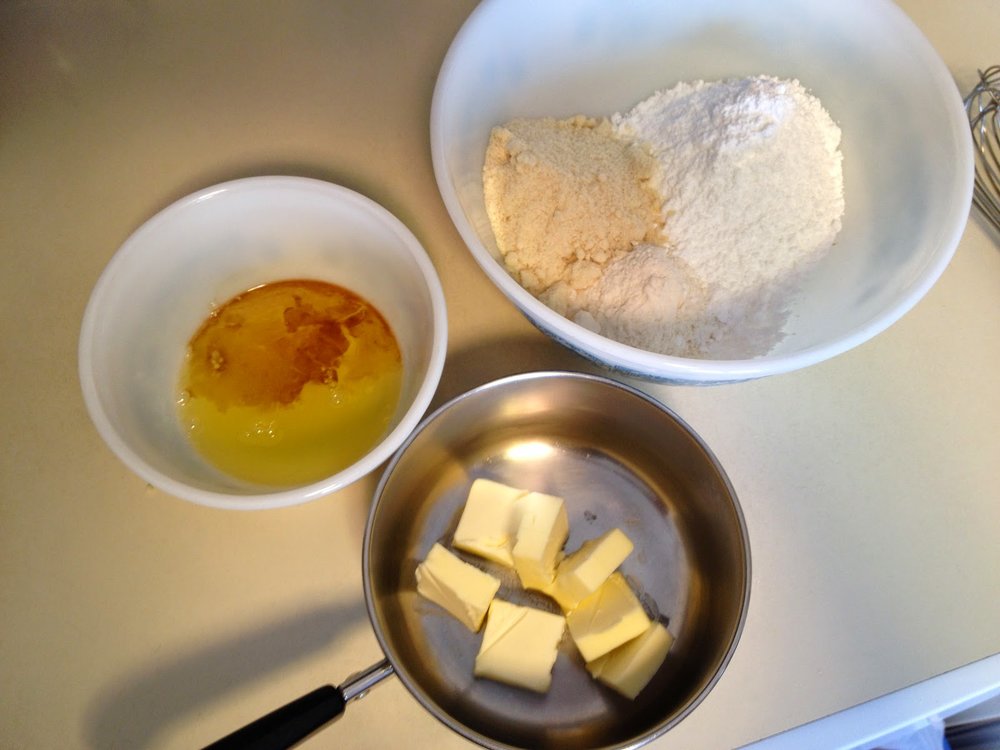
Here's the dough:  mix 185 gm soft butter with 25 gm warm milk and 10 gm egg yolk; add a teaspoon fleur de sel and a teaspoon sugar; add 250 gm flour and mix just until it comes together.  Wrap the dough and chill it for a couple of hours.  (Note:  this dough amount was plenty for two 180 mm/7" tarts, plus probably one more).

When I took the dough out of the fridge and tapped it with my rolling pin to render it more malleable, I could appreciate the firmness of the buttery dough.  It rolled out pretty easily, although it was more stiff and breakable than other standard pâte sablée or pâte sucrée doughs I've used.

I lined the tart ring carefully (I made a 180 mm tart this time), pricked it with a fork and popped it into the freezer while I prepared the filling.

Now's the time to heat the oven to 350º.


I made 2/3 of the filling amount which turned out to be perfect for my 180 mm ring.


les ingredients

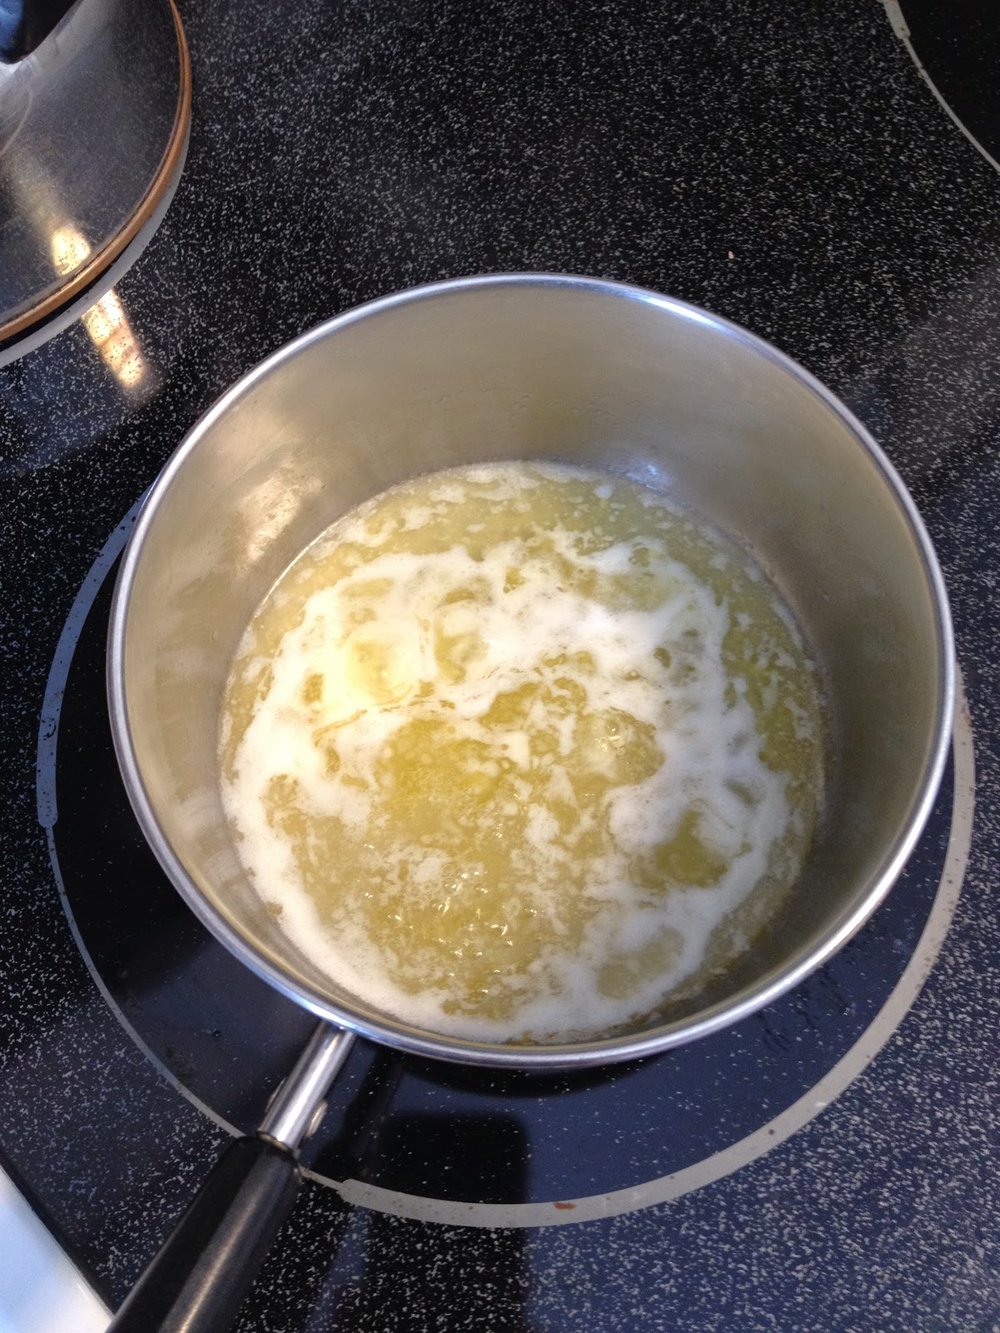
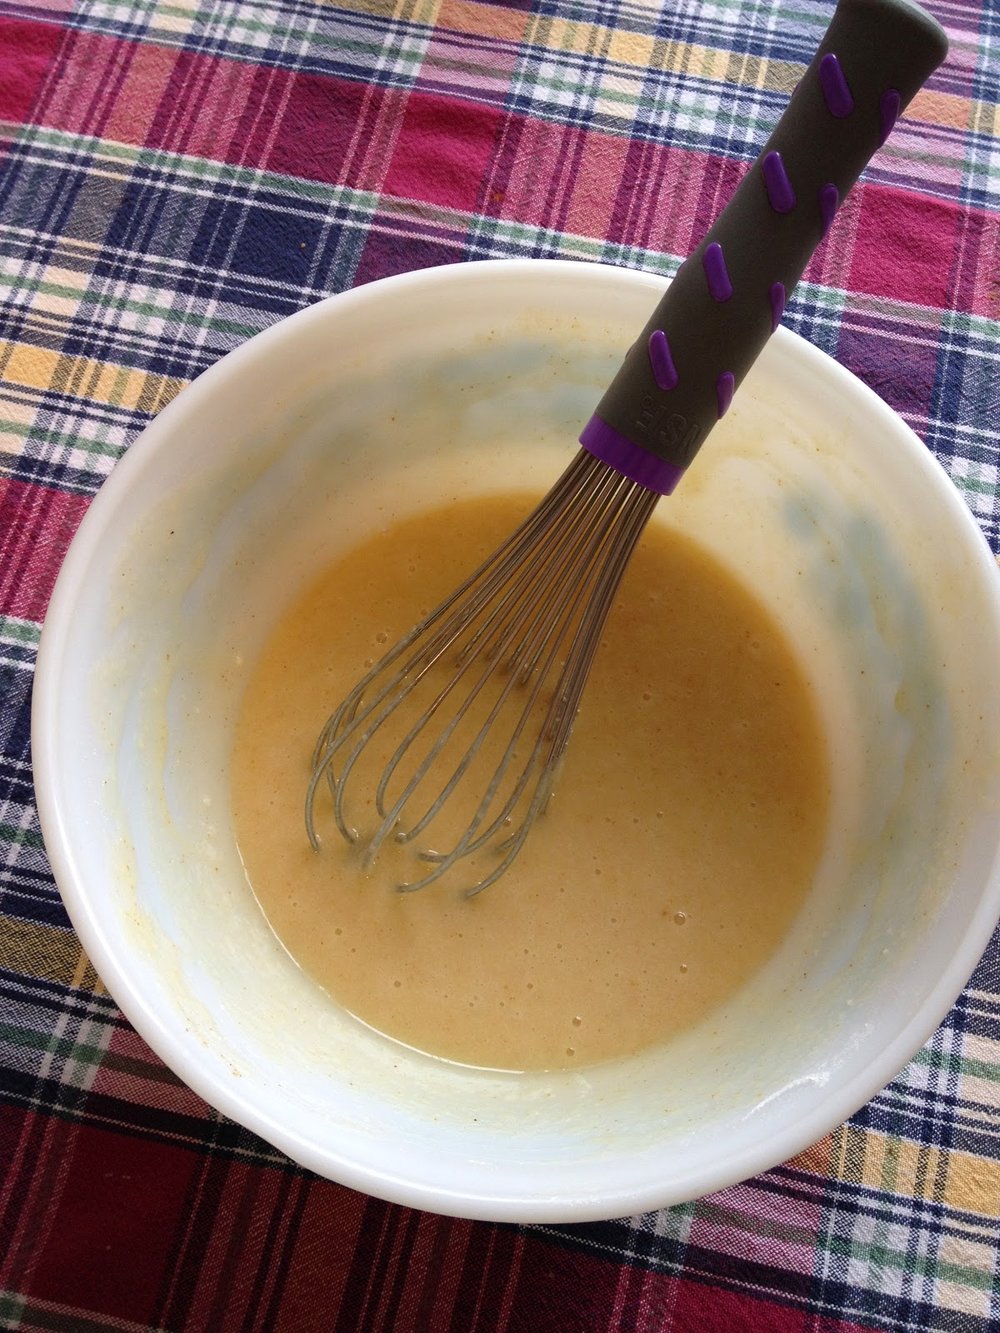
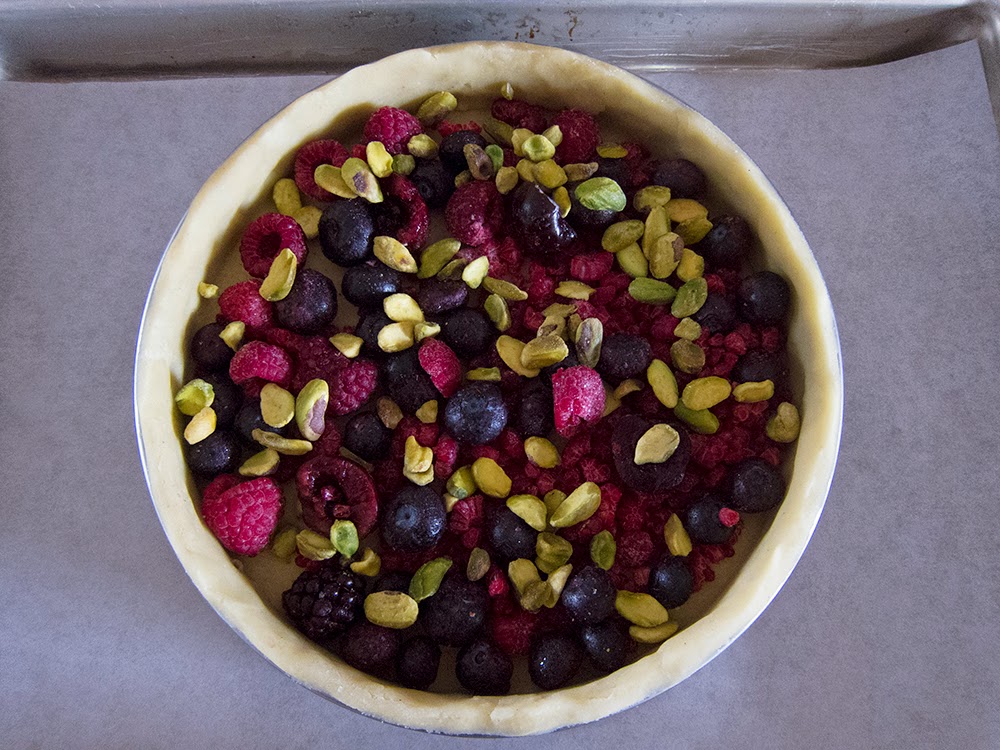
This is VERY easy!  For  2/3 recipe mix together 2 eggs, 16 gm almond flour, 66 gm sugar, 100 gm heavy cream, 16 gm melted butter, a splash of vanilla (the recipe actually calls for kirsch, but I don't keep that around) and a scant teaspoon flour.  In addition have 20 gm pistachios and 166 gm fruits rouges assortis ready to go.  I used a mixture of IQF raspberries, blackberries, blueberries and cherries.  Yum.


filling all mixed up

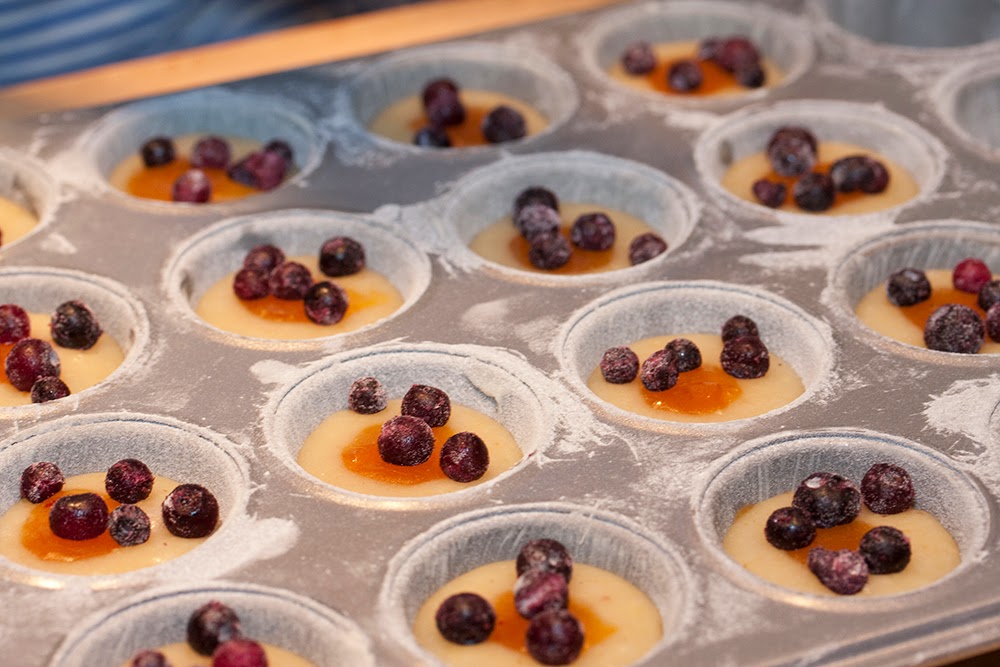
Sprinkle the pistachios and fruit into the shell (note - UNbaked shell!) . . .


love the colors

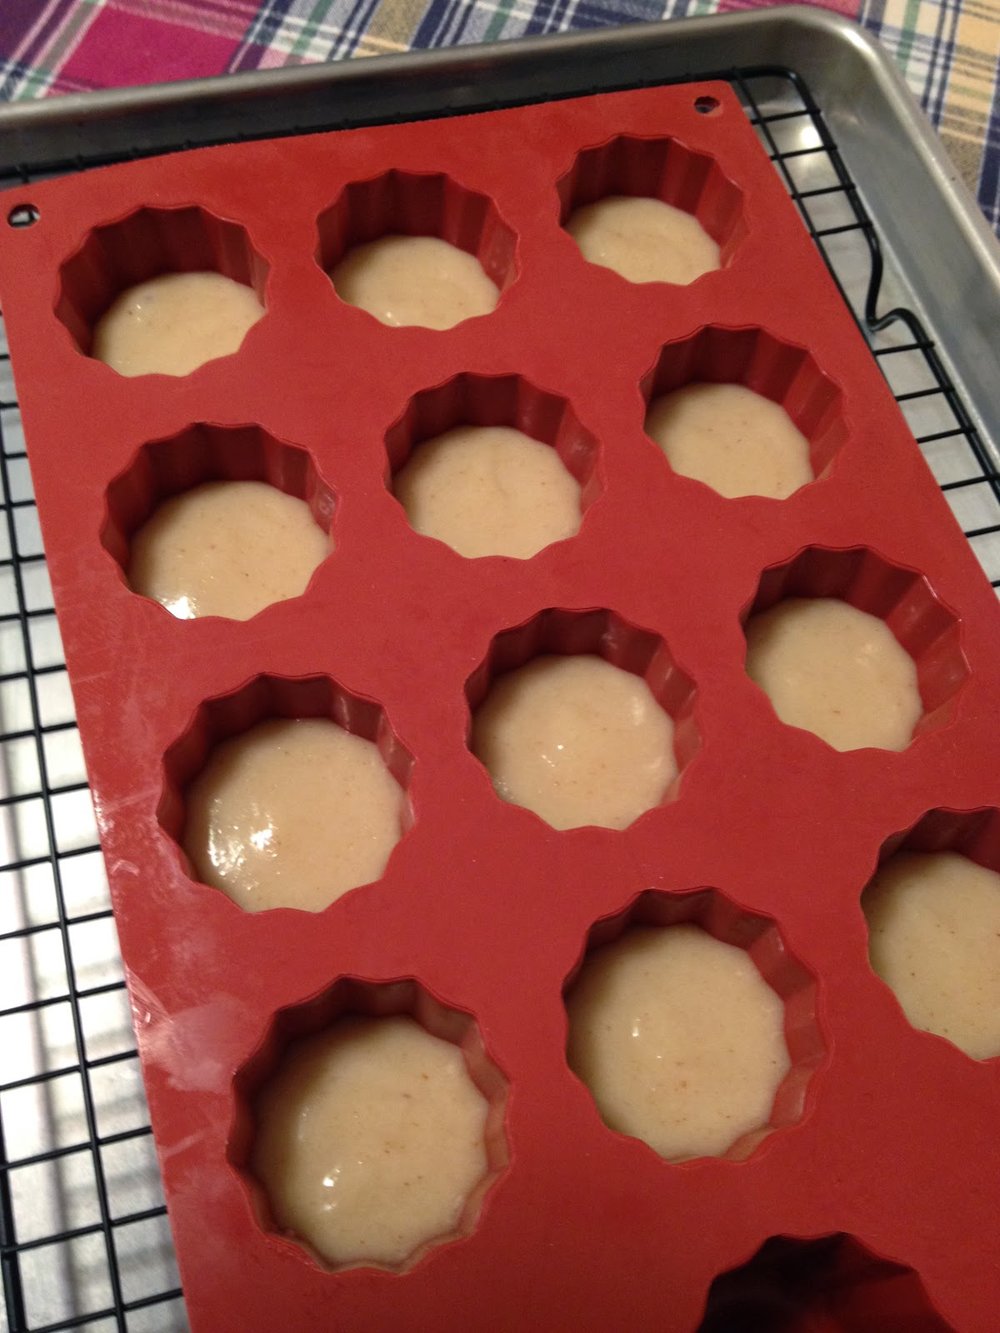
and pour the filling over.


ready for the oven

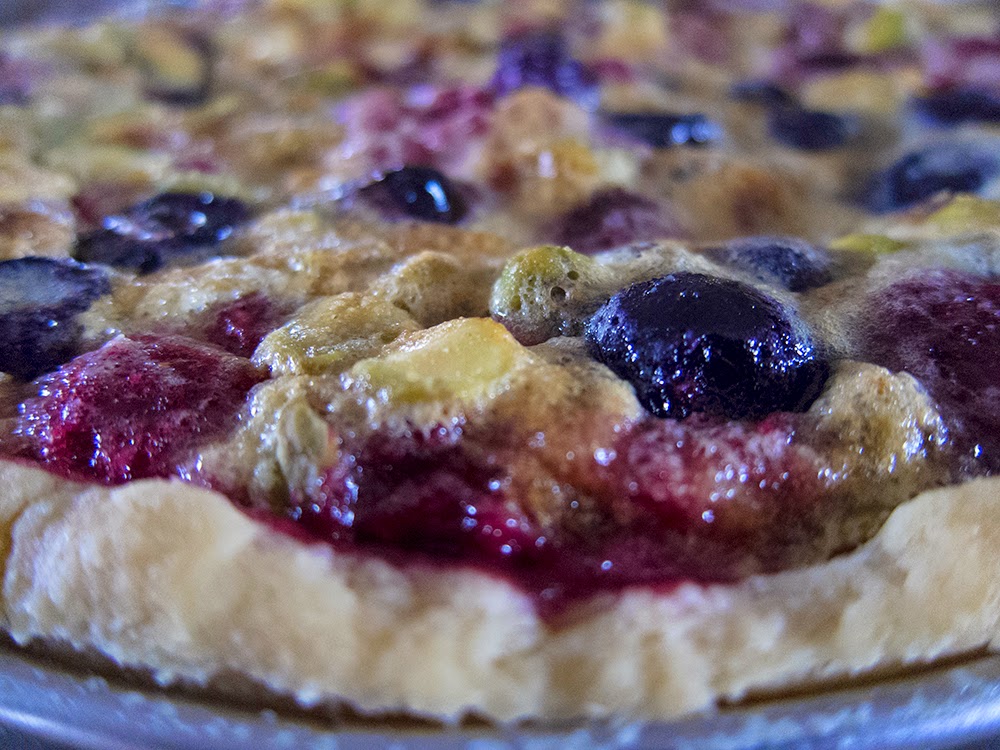
This baked about 40 minutes, pretty much on target with the recipe instructions.  You can tell it's ready when it nicely browned on top and the filling doesn't jiggle any more.


Once it's cool dust with some powdered sugar and serve it up!


Imagine my disappointment upon finding an unbaked center with a big dimple on the bottom - yuck!  That is one of my biggest pet peeves when baking tarts.


eeeuw!

When I read this recipe over the first time, I had a niggling sense in my brain that blind baking the crust was in order with this very liquid filling.  But Christophe Felder is a seasoned professional with an impressive resumé, so I decided to follow his lead.  Not.

The good news is that, in spite of the unbaked center, the tart was deeelicious and the crust definitely a "melt in your mouth" experience.

Not to be thwarted, I decided to take one more go at this one but with a blind baking approach.  Particularly with the lining step, one has to be very gentle and careful with this dough.

I started the bake with weights, but when I removed them there was a crack in the bottom crust.  I took a small piece of raw dough to patch it and finished off the blind bake.  Whew!  Is this really worth it??


Then, just to be sure, before putting the filling in, I brushed the bottom with egg white to seal it.  No leaks allowed here, folks.


c'est fini!

The crust developed a nice light golden color, although you can appreciate some cracking in parts of the periphery.

The good news is a well done, non-dimpled center bottom crust.  Now we're talking.


And it's still "melt in your mouth" delicious.

Moral of the story - blind bake first if you have a really loose, liquid filling!

Yes, I would make this again.


Mille-feuille chocolat - chocolate puff and other stuff

Before I start on the topic at hand, here are some pics of the delectable chocolate bread pudding I made using the left over chocolate croissant spirals from my last post.  I diced up the spirals, poured a basic chocolate custard over the pieces in my favorite square C&B ramekins, sprinkled on some vanilla sugar and baked 'em in a water bath.


just out of the oven

Just imagine one served warm with a scoop of vanilla ice cream.  Yes, indeed.

Now on to the task at hand.  What most of us know as napoleon, mille-feuille (literally "a thousand leaves") is that classic combination of puff pastry layered with vanilla pastry cream.  Of course, as is true of pretty much any classic you can think of, there are a multitude of ways to create variations on the theme.

Years ago, before pastry school was even a gleam in my eye, I made versions of this dessert using good old Pepperidge Farm puff pastry sheets, cut into squares and baked, then simply layered with a cream or custard and fresh fruit and/or a fruit coulis.  Always good.

Once pastry school was under my belt and I experienced what Paris had to offer, mille-feuille was often on my tasting hit list.  During my stage at Pascal Pinaud's shop on rue Monge in the 5th, raspberry-lemon mille-feuille was offered as a special treat only on Sundays.

When done well, the combination of crisp, flaky, buttery puff and smooth and creamy custard can't be beat.

Flash forward to the spring of 2013 when I took a class at Christophe Felder's school in Paris on mille-feuille chocolat.  I purchased his pastry tome Patisserie! and have been drawn into it lately to refresh myself on the classics as well as get inspiration for some new ideas (new tart coming up soon!).  My eyes lit up at the recipe for mille-feuille chocolat and off I went on a trip down feuilletage chocolat lane.


This recipe calls for cocoa powder added to the détrempe, just as in my recent chocolate croissant experiment.

les ingredients

I made half a recipe:  250 gm flour, 30 gm cocoa powder, 130 ml cold water, 43 gm melted butter and 5 gm salt mixed together just until everything is incorporated.


the creature from the Black Lagoon!

The détrempe felt dry, and it looked a lot more blotchy than when I make regular puff pastry.  I gave it a couple hour rest in the fridge and prepared the 168 gm butter block.


ready for the beurrage

Once I completed the beurrage and started the folds/turns the dough in general started to look a little better, but still blotchy.


after the first two turns - yikes!

But once all the turns were complete the dough looked and felt better - there was hope after all.


after six turns

I held the dough in the fridge overnight for use the following day.  Otherwise I would typically pop it into the freezer for another time.

When rolling out the puff for mille-feuille, it's important to roll it about 2-3 mm thick.  I divided the dough in two and rolled each piece to fit a quarter sheet pan.

It's important to let the dough rest - otherwise it shrinks when baking (as you'll see in the upcoming pictures).  It's also a good rule to freeze the rolled out puff for 10 minutes or so before baking to help stabilize the dough.


ready to bake

For comparison I baked one quarter sheet with a cooling grid over the pan (seen above) to help limit the puff's rise and the second one topped with a piece of parchment and a second sheet pan to weigh it down (the generally recommended method to keep puff under control).

I did NOT prick either one with a fork, having found instructions on line with and without (Felder's approach) fork pricking.

What really happened in the oven?  The weighted down version puffed anyway, and I actually pushed it down a couple of times during baking to try and keep it flat.

The one with the grid over it puffed up to the limits of the grid, but it ended up more irregular with undulating waves across the surface.

And both of them shrank.


Having chosen the weighted down piece for my assembly, I trimmed the edges and cut it into thirds,


and then a dust of powdered sugar and under the broiler for a couple of minutes to caramelize.


On to the assembly!

I made a simple whipped ganache filling using 250 gm heavy cream and 70 gm chocolate.  While I was piping the first layer I was reminded of the radiatore pasta Steve and I had just eaten a couple of nights before - ruffles!


first whipped ganache layer


second puff layer


second whipped ganache layer


completed layers

Once all the layers were assembled I popped the whole thing into the fridge for 30 minutes before topping with a basic 1:1 ganache.


getting ready to spread the ganache

used a decorative comb for design

The result looked pretty cool, but the flavor of the puff was disappointing - rather boring and not terribly chocolatey.  I also felt the puff layers were too thick and should have been more crisp and flakey.

What would I do differently next time?  Use standard puff pastry (not chocolate), roll it more thinly, let it rest longer so as to reduce shrinkage, and prick the dough with a fork before weighing it down and baking it.

Steve's reaction?  "What's so special about mille-feuille?"

OK, OK - back to the drawing board!


Ahhhhh croissants - old favorites and a chocolate trial

I held a croissant class recently, and, in preparation for that event, I baked a couple of croissants and pains au chocolat for class tasting purposes.

Just imagine that flaky, crisp exterior and lovely airy, not-quite-bready interior.  So good.


And for a special treat I had to do croissant aux amandes, bien sûr.  A big hit with the group.


In addition to the classics, I'm periodically on a path of discovering different things to do with croissant dough.  On one of my morning walks I started thinking chocolate, and, since I had recently finished a batch of chocolate pâte feuilletée, it seemed only natural to try croissant dough with a chocolate twist.

I made a half batch of my usual recipe, adding in some Dutch process cocoa powder (10% by weight of my flour amount) with the dry ingredients.  I increased the milk just a bit, since I find that cocoa powder tends to have a drying effect on dough.

the détrempe

In addition I worked some hazelnut flour into my butter block hoping to give it a nutty flair.  Yup!  Definitely wingin' it!!


hazelnut butter block


Ready for the beurrage . . . .


Finished dough after the three turns . . . .


Not long ago I added a new flexi-mold to my Silikomart collection and was itching to use it.  I had visions of dough spirals dancing in my head.  Even though these silicone molds are non-stick, I brushed them with soft butter so I could coat them with vanilla sugar before placing the spirals in to rise.


I rolled the finished dough out to allow for shaping a couple of typical croissants . . . .


plus a block of dough topped with vanilla sugar and mini chocolate chips . . . .


that I cut into 3/4" strips, rolled up into spirals and popped into my buttered/sugared molds.


I gave them a 1.5 hour rise . . .


after the rise

after the rise

and then on to the bake!  One thing's for sure - the chocolate makes it much more difficult to assess whether they've baked long enough, but I could appreciate some browning and the croissants had the "feel" of being fully baked (once you've felt it, you just know).


rather interesting, eh?


 I wanted to give the spirals a bit longer in the oven to make sure the interior layers were done.  I took them out of the molds, drizzled them with caramel, baked 'em another 5-10 minutes and called it a day.


Taste test time!!

Cutting into the croissant resulted in the hoped for shower of crispy exterior shards.  The inner laminations looked OK and the texture was good, but the taste wasn't much different from a regular butter croissant (although Steve thought it on the dry side).  And this is the key for me - minimal (if any!) chocolate flavor and no hint of hazelnut.  So much for that.


The spirals, however, offered a pleasant, crispy caramelized texture and flavor, and the mini chips added just the right touch of chocolate.


.


In the end, this attempt at chocolate croissant dough was not worth the effort.

Perhaps an increase in the amount of cocoa powder, or adding the chocolate to the butter block rather than the détrempe might make a difference, but at this point I'll stick with the classic dough from here on out.

Chocolate bread pudding here I come!


Golden raisin toast apple tart, thanks to Janet and Dorie

There are some occasions when I buy an ingredient that I wouldn't normally keep on hand for day to day use.  Golden raisins are one of those.  I purchased them awhile back when I was preparing to make biscuits fondants amande et fruits épicés for my 1/14/15 post.  I used only a portion of the box and was eager to finish it off.  But what, pray tell, might I make?

It was thus that I turned to a book that Steve and I have owned for a number of years - "The Cheese Course" by Janet Fletcher.  While I don't pull it off the shelf very often it offers some great ideas for accompaniments to cheese, including breads, salads with light and simple vinaigrettes, fruits, nuts, honey, olives and more.


I recalled that it contained a recipe for golden raisin bread, so I decided to go for it.  The bread is meant to be toasted and served with Bellwether Farms' crescenza, described as a yeasty, creamy cheese, similar to Italian stracchino.  But I digress - on to the subject at hand.


Besides chomping at the bit to bake more bread, I've been wanting to make a not so run-of-the-mill tart - something with a Parisian twist.  I had my eye on an apple tart recipe in Dorie Greenspan's book "Paris Sweets" (one of my faves) that calls for toast points to be tucked in between apple slices before baking.  I was on my way to a new adventure.

First the bread.  Soak 2 cups of golden raisins in 2 cups warm water for an hour or so.  Drain them, reserving 320 ml (1 1/3 cups) of the raisin water (add additional water if you don't have quite enough).  I wanted a bit of je ne sais quoi, so I added the zest of an orange and pinches of nutmeg, allspice and coriander to the dry ingredients.


les ingredients

Weigh out 488 gm (3 3/4 cups) all purpose flour, holding 98 gm (3/4 cup) aside; whisk 390 gm (3 cups) flour with 8 gm (1.5 tsp) salt, 15 gm (1 TBSP) sugar, 8 gm (~ 2.5 tsp) instant yeast; stir in the tepid raisin water and 10 gm (2 tsp) soft butter.

When it becomes too stiff to stir, turn it out onto a floured surface and knead, adding in the remaining flour as you go.  Knead about 5 minutes until the dough is firm, smooth and elastic and shape it into a ball.


after the knead, ready for the first rise

Place in an oiled bowl, cover with plastic wrap and let rise about 1.5-2 hours.


after the rise

Pat the raisins dry and toss them in 3 tablespoons of flour.


Without punching the dough down turn it onto the work surface and pat it firmly into a 14" circle.  Top it with 1/3 of the raisins, pressing them gently into the dough.


Fold the sides of the dough toward the center (I folded it into thirds, just like with a laminated dough) and then roll into a cylinder.


the first cylinder

Again flatten the dough into a circle, add another 1/3 of the raisins, fold the sides into the center and roll again into a cylinder.  Cover and let rest for 15 minutes before you do the same thing a third time, finishing up the raisins and forming the final cylinder.


kinda rough and tumble I'd say
 
Now divide the dough in two and shape each half into a loaf about 12" long (mine came out shorter).


ready for the final rise

I will say these are not the most attractive loaves I've ever shaped.  The raisins made them all lumpy-bumpy, plus you have to keep the raisins tucked into the dough so they don't burn during baking.

Cover with a towel or lightly oiled plastic and let rise for an hour or so.  They look like some kind of funky subterranean creature!


after the rise, ready for the oven

Heat the oven to 400º, bake for 5 minutes, then lower the temp to 375º and continue baking about 30 minutes more.  They should be nicely golden brown and have that tell-tale hollow thump of doneness.


the end result

Once cooled, I sliced one for a taste test and was pleased with the hint of orange and spice, the plump raisins and the not too chewy texture.  I ultimately used about 1/2 loaf for the apple tart and froze the rest - lots of breakfast raisin toast coming up these next few weeks.  Yes!


So let's move on to the apple tart.  Dorie G's "Paris Sweets" recipe is an adaptation from Lenôtre and calls for the following components.

1.  Caramelized white bread (in my case golden raisin) toasts:  slice the bread, cut off the crusts, spread one side with a mixture of soft butter and light brown sugar (made by mixing 30 gm/2 TBSP butter with 30 gm/2 packed TBSP brown sugar) . . . .


then pop under the broiler for 2-3 minutes, flip over and broil another 2 minutes or so.  Pay close attention so they don't burn (if necessary, just scrape off any black edges with a sharp knife).


2.  A blind baked crust (I used my 240 mm / 9.5" tart ring and my favorite pâte d'amande dough) . . . .


waiting for weights and ready to blind bake

3.  Peeled, cored, cut-in-eighths Golden Delicious apples (4 of 'em) sautéed in butter, sugar and vanilla pulp . . .


4.  A custard mixture made by whisking together one large egg, 3 large yolks, 70 gm (1/3 cup) sugar and the pulp from 1/2 vanilla bean until somewhat thickened and pale.

Then boil 300 gm (1 1/4 cups) heavy cream (stovetop or microwave - you decide) and pour the hot cream over the egg mixture bit by bit while whisking constantly.  Try not to be too vigorous - you don't want a lot of bubbles (tapping the container on the counter will help dissipate any bubbles that may have formed).


On to the assembly.  Heat the oven to 325º.  Place the blind baked tart shell on its parchment lined pan onto a second sheet pan (this provides some insulation and more gentle heat).  Slice the toasts.


everything at the ready  

This was definitely the clunky part.  The idea is to line the apple slices up in the tart shell, then tuck the toast triangles (or in my case, more like rounds) decoratively between the apples slices.  Easier said than done.


I had a few gaps into which I tucked smaller pieces of apple, and I did my best with the toast placement.  Pretty rustic.

Dorie calls for sprinkling a couple tablespoons each of walnut pieces and raisins over it all, but, since I was using raisin bread, I left them out.

Carefully pour about 1/3 of the custard over the apples, letting it find its way into the crevices.  Bake for 10 minutes to settle the custard a bit.  Then pour additional custard over until it reaches the tart rim - not too much or it will spill over (I didn't use all of mine).


the custard poured in


Bake for another 40-45 minutes until the custard is set.


interesting look, eh?

one more view

I served this for dessert that same evening, garnished with a dollop of chantilly and some nut crumble.  Despite my skepticism going in, this turned out to be one delicious tart!  Dick, Dor, Carl and Steve all thought so too.  And I still have golden raisin bread in the freezer - cool!

And next time?  I'm already envisioning thinner apple slices and a rectangular tart pan to allow for more attractive rows of apples and toast.  Yes, I would do this again.

And now for something completely different - Provolone rolls

As I gear up for more bread baking this year I like to play around with some of the variables involved in the process - refrigerated slow rising doughs, proofing and resting times, scoring patterns, creating steam in the oven, high heat "hearth" baking - you name it.  Lots to learn.

I have a recipe for prosciutto and provolone bread from the 2004 edition of CIA's "Baking and Pastry:  Mastering the Art and Craft".  I've made it a number of times over the years without the prosciutto, finding the sensa carne version made with a sharp provolone to be just the ticket with a hearty chili or beefy soup or stew.  The base recipe has a huge yield of almost 15 pounds of dough, so in previous preparations I've paired it down and made only a quarter recipe, dividing that amount of dough into four torpedoes or batards of about 370 gm (13 oz) each.

This time, since Steve was making a big pot of chili over the weekend, it seemed oh so right to make smaller provolone rolls to serve along side.  Based on the weight of my chunk of provolone (200 gm) I adjusted the recipe down even more with the plan to make ~60 gm size (a skosh over 2 oz) rolls.  This also brought the dough quantity into the perfect range for my 6 qt Kitchenaid.

This is a direct dough - no starter, preferment, poolish, biga or what-have-you - ingredients are combined, kneaded, given a bulk rise, then divided, pre-shaped, bench rested, final shaped, final proofed and, last but not least, baked!  Whew!

I've been drawn more and more to recipes that call for a longer, slower bulk fermentation in the refrigerator, so I decided to take that approach this time.


les ingredients

The recipe calls for bread flour, but this time I substituted all purpose flour for about a fourth of the flour amount.  I wanted to see how that would ultimately affect the crumb of the final roll.

So here's the recipe I ended up with:  combine 370 gm bread flour, 100 gm all purpose flour and 6 gm instant yeast; add 290 ml tepid water, 47 gm olive oil, 13 gm soft butter, and 11 gm salt.


ready to start mixing

Mix with dough hook on low speed for 4 minutes then medium speed for 2 minutes . . .


then add 200 gm grated provolone and mix 1 more minute on medium.

go provolone!

The dough looked and felt great - here it is in its early boule form.


My plan involved a short 30 minute room temp bulk ferment with a fold halfway through, then into the fridge in a lightly oiled covered container overnight.

On baking day I took the dough out of the fridge and let it hang out on the counter for about 30 minutes to acclimatize itself.  Then I divided it into seventeen 60 gm pieces which I then preshaped into boules.


After all the boules were preshaped I covered them with lightly oiled plastic wrap and gave them a 20-30 minute bench rest.  Then I "re-bouled" them into their final shape.  I could tell a difference in the feel of the dough after that bench rest - more relaxed and easier to manipulate.  I like that.


ready for final proofing

I put the sheet pans in my oven at the 85º proofing setting and gave them a solid 1.5 - 2 hours to rise.  I went for a simple crossed scissors snip on the top of each.


they feel just right!


With the oven heated to 425º I threw a splash of water in to create some steam and popped those babies in.  They baked about 20 minutes, looking nice and golden brown and offering a sign-of-doneness hollow thump when tapped.


can't wait to try 'em!

Next time I'd be a bit more aggressive with my scissor snips, but I was pretty happy with the final result.

I brushed a little melted butter on the warm rolls . . .


and lined them up to cool on a rack.


They were indeed the perfect accompaniment to a bowl of chili.  The texture was superb - I think the all purpose flour gave them a less chewy and somewhat gentler crumb, if you will.  While the exterior still had a hint of crustiness, it was easy to tear or bite into.  The provolone offered a subtle presence, so next time I'd add more of a sharper version than I had on hand for this go-around.  A delightful, well rounded roll.

Yes, I would make these again!

Semifreddo and a one dish composed dessert

On the prowl once again for a weekend supper dessert idea I decided to make a semifreddo to pair with something warm and fruity.

cherry berry pistacho crumble with vanilla almond semifreddo

Semifreddo is Italian for "half-cold" and is a molded, creamy dessert that's in the "still frozen" category, meaning it isn't churned like ice creams and sorbets before freezing.  There are numerous flavor possibilities with coffee, chocolate, citrus or a fruit purée of one's choosing among the many.

Its base is similar to an Italian zabaglione or French sabayon in which egg yolks, sugar and a liquid like Marsala (the classic in Italy), Champagne, Prosecco, red or white wine, citrus (or other fruit) juice or a liqueur are whisked over a bain marie until lightened, foamy and thickened.

In this case I whisked 80 ml (1/3 cup) vanilla simple syrup (essentially combining my sugar and liquid before hand) with 3 egg yolks until thickened and lighter.


at the start of cooking

thicker and more pale

zabaglione or sabayon in its pristine form is often served warm just after preparation, perhaps with fresh fruit, but in this case I cooled it over an ice bath in preparation for the next step.

When you take a zabaglione/sabayon to the next level and fold either whipped cream or a meringue into the chilled base, it becomes a semifreddo (or a French parfait - confused yet?).
  

whip cream to nice soft peaks

all blended together


The mixture can be placed in one large plastic-wrap-lined mold such as a simple loaf pan or a fluted bowl, or can be portioned into small silicone molds, available in an appealing assortment of shapes and sizes.


cover with the plastic wrap and pop into the freezer

Freeze for a number of hours until firm.  Well wrapped it can sit in the freezer for several days, allowing at least that portion of the dessert to be made ahead (it's all about the planning, folks!).

A quick side note:  there are many terms in the cream/custard lexicon, and the word mousse is one that I've always found it a bit confusing.  The word literally means "froth" or "foam" and refers to a dish in which an aerator like whipped cream or meringue is folded into a base.  That base can be a fruit purée, a crème anglaise or crème pâtissiére, pudding or custard, curd, sabayon, or pâte à bombe (yet another French base made with just yolks and sugar).  However a mousse isn't necessarily frozen, so I guess that's one distinction from a semifreddo.

Just had to throw that in there!

As I was mentally concocting my composed dessert I knew I wanted some crunch.  The words crisp and crumble always speak to me of American desserts, yet, truth be told, the French are all over the crumble thing.  They're sold in many pâtisseries, and one can find books devoted solely to the subject of the crumble in librairies like Gibert Jeune et Librairie Gourmande in Paris.

I turned to my recipe binder from Pascal Pinaud's shop on rue Monge and resurrected a crumble recipe which calls for both almond and hazelnut flours (I was on a nut roll with this dessert).

A basic crumble is equal weights sugar, butter and flour.  You can add the same weight of a nut flour or even just chopped nuts.  The idea is to mix the dry ingredients, then sand in cold diced butter to create coarse crumbs.  For this batch I used 120 gm each sugar, butter and flour, plus a total of 120 gm of almond and hazelnut flours (I used 30 gm almond and 90 gm hazel - you can decide your own ratio).


les ingredients

bake it now or freeze it for later

Now you have a choice.  Your crumble can be baked ahead and used later as a crisp, buttery topping for whatever - a tart, a custard, some ice cream or fruit, or even your morning oatmeal.  Keeping the crumble separate and adding it as a topping just before serving keeps it from getting soggy.

Or you can bag up the raw mixture, freeze it and have it at the ready to simply throw on top of fruit, cake batter or anything else you can think of and bake it - it melts in a bit yet still provides a crispy baked topping to your dessert.

When I bake my crumble ahead, I do it at 350º for about 20 minutes, stirring it up every 5 minutes or so until lightly browned and set.

use a bench scraper to toss and separate the crumbs

all baked up

Mmmmm!

There is another option for a crumble which allows you to create coarser crumbs or even larger chunks to use as a garnish on a larger entremet type of dessert.  This one involves blending softened butter with sugar, then blending in the all purpose and nut flours, pretty much like a cookie dough.  Then shape the dough into a 1/2" (or so) thick square or round, cover and chill.  Then you can cut it or break it up into chunks and bake it as described above.  And they're not a bad pop-in-your-mouth snack either!

Now onto the fruit part.  So it's still winter, after all, but I was going for cherries and berries for this dessert.  That's the beauty of IQF (individually quick frozen) fruit that's available in the grocery stores all year round.

I have these great little square ramekins that I bought at Crate and Barrel some years back.  They hold just the right amount for a not too generous dessert portion.  To fill six of them I used 340 gm (12 oz) frozen pitted sweet cherries and about a cup and a half of mixed blueberries and raspberries.  I tossed them in a mixture of 85 gm (generous 1/3 cup) sugar, 10 gm (~ 1TBSP) cornstarch, the zest of half a lemon, a pinch of freshly grated nutmeg and 1/8 teaspoon coriander.  Topped with some pistachio crumble that I had in my freezer (told you I was on a nut kick), they're ready for the oven.


Bake at 325º for about 40-45 minutes until the crumble is lightly browned and the fruit is bubbly.

When it came time for dessert, I scooped some semifreddo onto the still warm fruit, sprinkled some hazelnut-almond crumble on top and drizzled a bit of caramel over it all.

Delicious!


So use your imagination and create your own composed dessert.  Having the contrast in textures (creamy, fruity, crunchy) and temperatures (warm and cool) is oh so wonderful.  And remember -  it doesn't have to be fussy, difficult or fancy - just tasty!

Let's talk financiers

medleyfinancier.jpg

NOTE: recipe link below is an updated version as of 04/23/23.

Financiers are one of my favorite things, both to make and to eat.  The classic base is made with egg whites (you don't even have to whip them!), almond flour, all purpose flour, powdered sugar and browned butter (which gives these delectable treats a lovely nutty taste).

I've been using the recipe from Le Cordon Bleu in Paris for a number of years now, although, as is true with sooooo many things, you can find all sorts of recipe variations in pastry books or online.

The story goes that, back in the late 1800's, a pastry chef in the financial district in Paris (la Bourse) created a small rectangular (think gold ingot-like) cake that could be easily carried back to the office or eaten out of hand without any muss nor fuss.

The petite cake is classically baked in a shallow rectangular mold (lots of images available on the web), but I love the fact that it can be baked in any shape or size your little heart desires.  And the base batter can be made ahead and refrigerated for several days, allowing you to bake different flavor variants throughout the week if you're so inclined.  It's a true artistic palette for the creative baker.

Substitute ground hazelnuts, pistachios or walnuts for the almonds?  You bet!

Add your choice of citrus zest?  Bien sur!

Fold in or top with almost any fruit imaginable?  Absolument!

Garnish with ganache or mascarpone cream?  I think you know the answer!

The preparation is simple, with the most difficult (not really) step being browning the butter.  I can freely admit that I had never browned butter until making financiers in class at LCB.  I have since come to understand how it works, having done it over and over and over again.

For me the key is listening - yes, you heard me - lis-ten-ing.  When you're working in a pastry kitchen and have a bunch of things going on at one time, your senses are your friend.  Use them all!

Put the butter in a saucepan over low heat to start, then crank it up once the butter has melted. I keep a silicone spatula on hand to stir periodically particularly as the browning progresses.

Essentially the water in the butter evaporates off and the milk solids fall to the bottom of the pan and start to brown. As the butter cooks the bubbles will start to become more foamy, take on a finer appearance and start rising up in the pan.  Even if you're on the other side of the kitchen, you should be able to hear a change in the sound of the bubbling.  Once you hear it, pay attention!

Now I use my silicone spatula to stir and scrape those brown bits off the bottom, remove the pan from the heat and transfer the butter to another container. Remember the butter can continue to cook even off the heat and you don’t want burned butter, no sirree!

Now on to the preparation!

When making financiers, the amount of batter I make depends on the egg whites I have on hand.  Typically, if I'm making a custard or crème pâtissière that calls for egg yolks, I save the whites with the singular goal of making financiers.  You can keep the whites in the fridge for a number of days (remember, some macaron makers want their egg whites to be aging in the fridge for a week or so before using them).

What could be more perfect?

A reasonable recipe uses 180 g/6 egg whites (you can use liquid pasteurized whites without any problem) and will give you two dozen or so small 30 g/1 ounce cakes.  You can adjust your recipe by dividing or multiplying your ingredients based on the weight of egg whites you have. Without getting too technical here, once you've gotten used to weighing ingredients and adjusting your recipe to suit your needs, you're golden.

So, here goes.  Place 180 g/6 egg whites in a bowl, add a splash of vanilla extract and set aside.  In a separate bowl, large enough to mix all the ingredients, whisk together 200 gm/2 cups powdered sugar, 125 gm/1 1/4 cup almond flour and 95 gm/3/4 cup all purpose flour.  Brown 200 g/15 tablespoons unsalted butter and pour it over the dry ingredients (I scrape all the brown bits into the mix too). Let it sit for a minute or two, then add the egg whites and blend it all with a whisk until everything is incorporated.  It may be a bit lumpy, but that's OK.

The batter should be refrigerated before use. I pour it into a container, place plastic wrap directly on the surface, cover and refrigerate for at least an hour or up to several days.

When you're ready to bake, be sure to stir up the batter before piping or pouring it into your molds. The longer the batter sits, the more the butter has a tendency to settle to the bottom, so just give it a good stir to reincorporate it.

I happened to have some silicone canelé flexi-molds with me during my recent visit with my mom and used those to bake up some financiers natures - just plain, no additions, no thrills, no chills, no frills.  Pipe the batter, filling the molds about 3/4 full.  Bake at 375º for about 15 minutes. Your baking time will vary depending on the size of your cakes (and your oven!), so, as always, pay attention to what's going on in there.

Here are just a few examples of what you can do with financier batter. Before I really got into using silicone molds I baked financiers in buttered and floured mini-muffins pans.  This version has a dollop of jam (peach, apricot or whatever) and some blueberries placed on top before baking.

Here you go!

The jam settles into the center and the berries stay on top - cool!

Here's a medley of pear ginger, pistachio orange crumble and matcha raspberry - some of my faves!

This one is dried cherry . . .

and this is cocoa hazelnut . . .

and I think this one is cranberry hazelnut.

Or you can bake the batter in loaf pans comme ça . . .  These are peach and blueberry mini-loaves.

I've also baked financier batter topped with plum slices and walnut crumble in a blind baked tart shell.  Or use peach slices or cherries. Delicious!

I could go on and on about financiers, but, alas, I must cease and desist.

But wait . . . just a few more parting thoughts.

How about adding lemon zest and berries (blue, black or rasp - you choose!) to the base batter, or drizzle finished cakes with caramel after baking and pop back into the oven for a few minutes to set the caramel.

Or fold in some pumpkin puree and spices like nutmeg, ginger and allspice to the base batter.

For some savory options fold in some grated cheddar and diced apples, or top with goat cheese and herbs of choice before baking.

OK enough.  Get in the kitchen and make your own special versions - you can do it!