Danish almond braids

1977E852-2388-46B1-BCCB-834C943537D7.jpg
637069C3-6987-4CE8-8AD2-538066C5AE95.jpg

It’s time for more Danish dough fun!

After I posted on Danish Kringle last spring, I knew I would return to this laminated dough and the wonderful things that can be made with it. I’ve been spending more time with Beatrice Ojakangas’ book “The Great Scandinavian Baking Book” (let’s call it TGSBB) and continue to be amazed at the array of dough and almond filling recipes she presents. Whoa.

I made two versions for this project so as to compare recipes from Ojakangas (BO) and one from Melissa Weller’s (MW) recently published book “A Good Bake”. She refers to it as her “laminated babka dough”. Their recipes are similar to mine although with variations in the amounts of sugar, egg and butter as well as how much butter is used in both the dough and the butter block. So many options in the baking world!

Here’s one of my favorite ways to compare recipes - hand written columns to show you just a few of the differences one might discover when researching different Danish (or any!) recipes. You see my recipe vs. the other two as well as the adjustments I made to those two noted in (parentheses). You can use the same mixing/kneading approach for all three - just look here. Each recipe is enough for two braids.

1433E2FC-9297-4D97-A7C1-1E21B8F690DC.jpg
Almond braid No. 1 (BO)

Almond braid No. 1 (BO)

Almond braid No. 2 (MW)

Almond braid No. 2 (MW)

Before we delve into the braid steps let’s talk briefly about almond paste. In my recent post on Bakewell tart, I mentioned frangipane and almond cream as commonly used fillings for baked fruit/jam/almond tarts. But almond paste is a biggie when it comes to making fillings for many pastries, particularly in Scandinavia and The Netherlands.

You may see the terms almond paste and marzipan mentioned in various recipes, some of which use the terms interchangeably. Technically they aren’t the same. Typically paste is at least equal parts ground almonds and sugar, with higher quality pastes (my preference) having an even higher percentage of almonds (e.g 66% almonds to 34% sugar). Marzipan is more often used for modeling and molding, available in an array of colors (or create your own), and is generally higher in sugar (e.g. 33% almonds to 67% sugar).

BB30E044-98A9-42A6-9710-D57D9BC6DE10.jpg

I’ve been using Mandelin premium almond paste for a while now (they have several “levels” of paste which are well described on their site). I’ve also been buying my blanched almond flour and sliced almonds from them too. Great stuff.

For the almond filling (enough for two braids) cream 56 g soft unsalted butter with 100 g confectioners sugar; blend in 1 teaspoon almond extract (I reduce that to 1/4 teaspoon since my premium almond paste has some bitter almond extract in it already), 100 g almond flour (or finely ground almonds), 85 g almond paste and 1 large egg white until smooth.

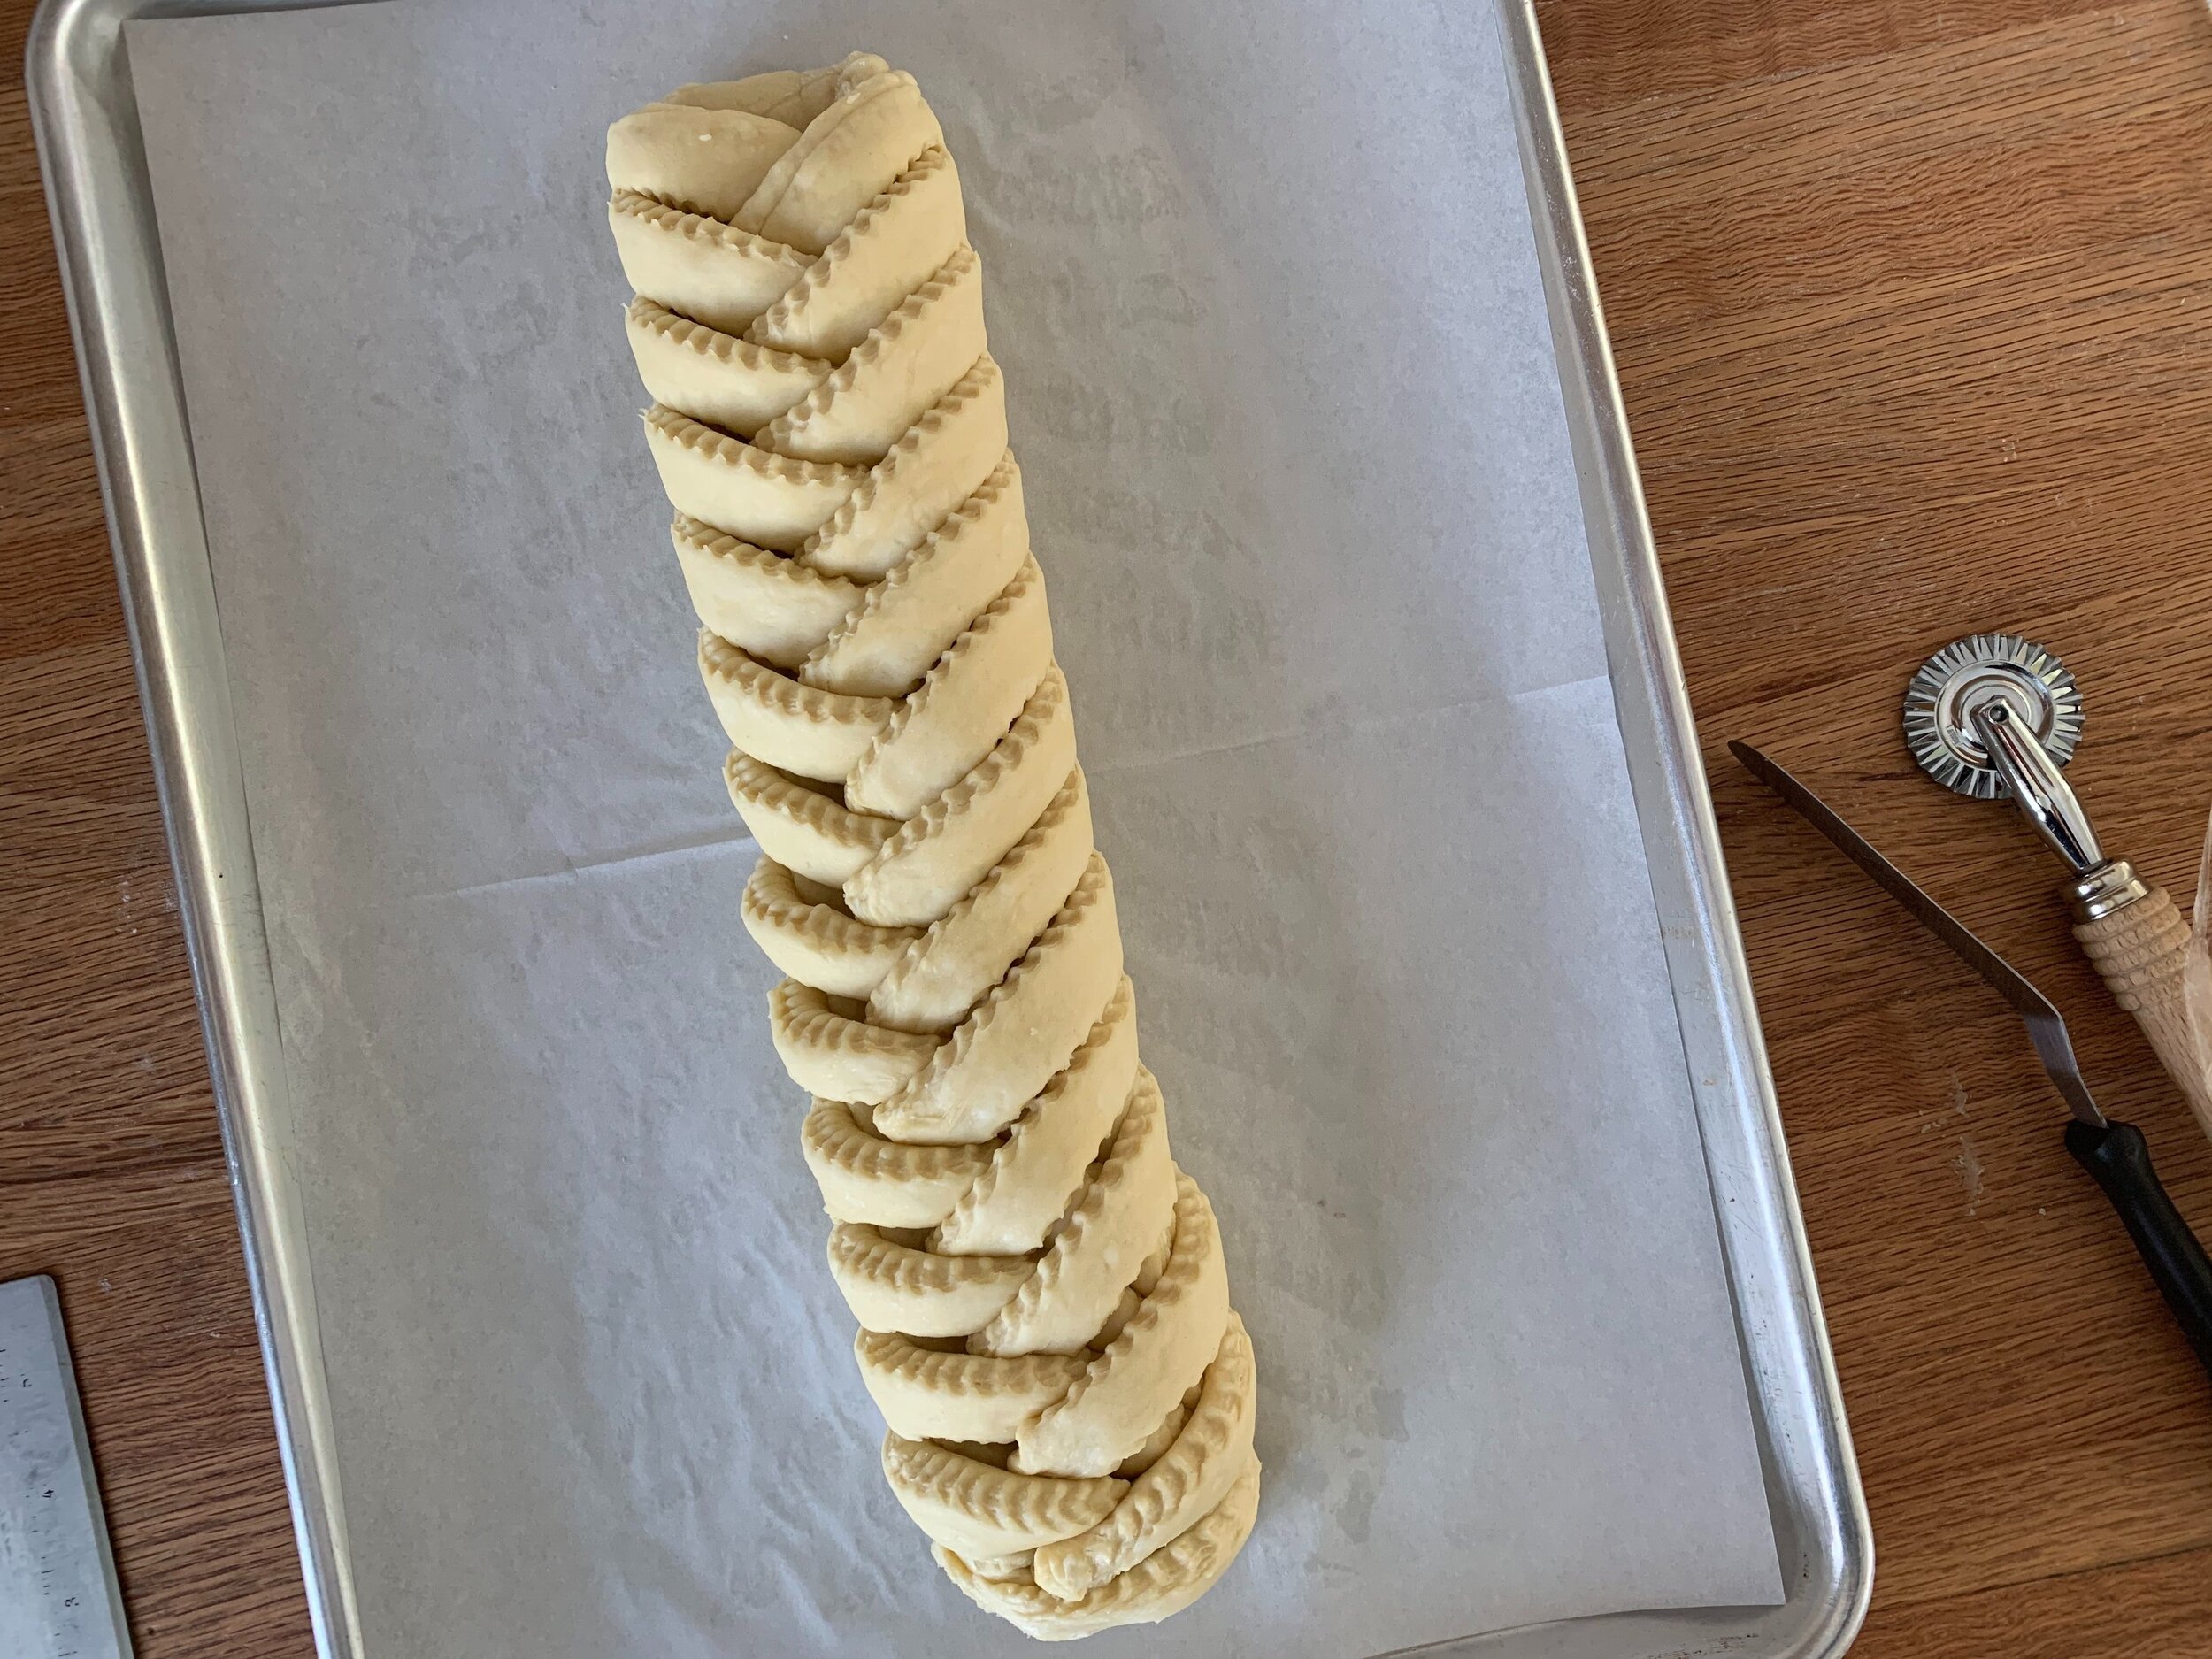
The process of forming this braid (not a real braid, truth be told) is what I find so pleasing - it speaks to my simple artistic bent and is so satisfying once completed. The braid in the following images is with MW’s dough.

Start with about 600 g of your finished laminated Danish dough and roll it out to a rectangle of about 9”x 15”. Have your filling ready to go.

D7296593-FACB-43D7-A6A1-CAE6DFCC2AF4.jpg

As seen in the image above, make light marks (don’t cut!) along the length to create three sections then cut the two outer sections at 45º angles about every inch or so. I find using 2 bench scrapers works well so you can match the cuts up as you work your way down. Cool!

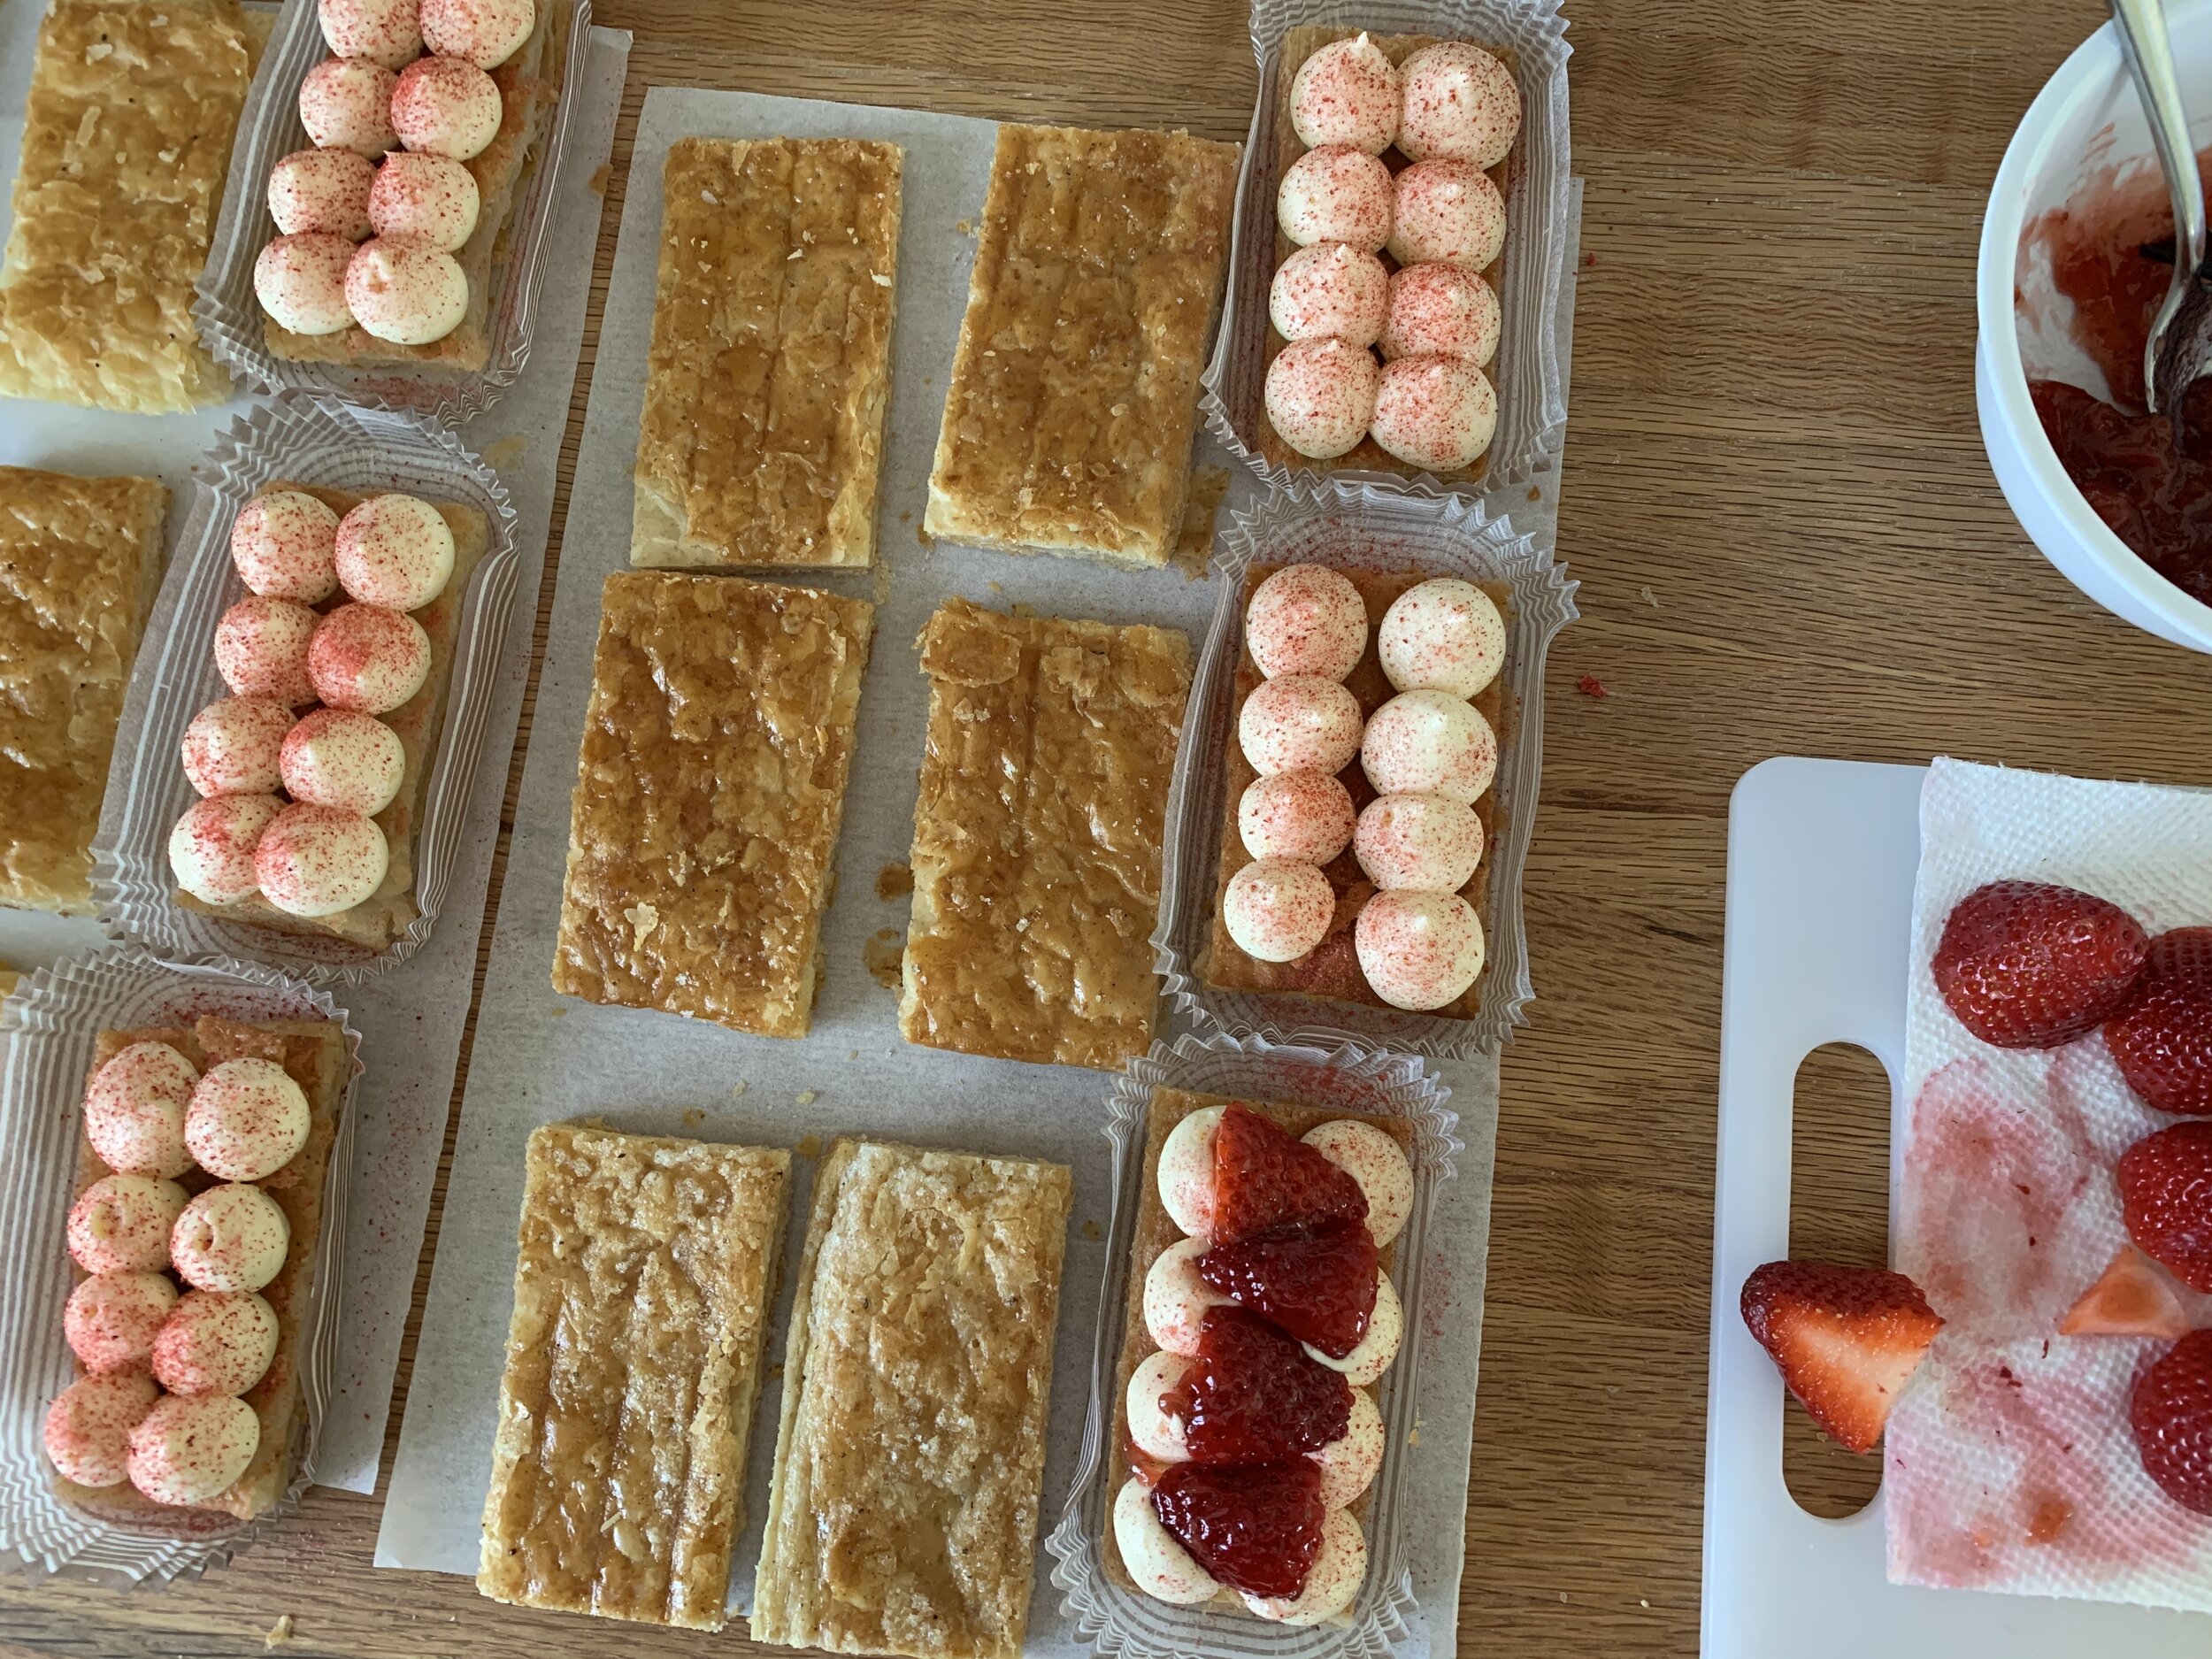
The almond filling goes right down the center. Remember you’re using a half recipe per braid. Here’s a tip - place the filling in a rough log shape in plastic wrap, use a rolling pin to lightly compress and shape it to the size of the dough center, keeping it in the plastic. Then gently turn it out of the wrap right onto the dough center. That way you don’t have to spread the filling directly on the dough and risk some smooshing of the laminated layers beneath. Call me crazy!

F2230CBE-E750-4489-A176-D2666EC11B13.jpg

Now start folding the strips across the center, alternating sides, to create a faux braid until you reach the bottom. Tuck the ends under.

Almost there!

Almost there!

Got it!

Got it!

Place the shaped pastry on a parchment lined sheet pan. Cover lightly with plastic wrap and let proof about 60 minutes until puffy. It won’t double but you should appreciate more prominence of the layers.

Just for comparison here’s an image of my first go at this with my version of BO’s recipe. I used a fluted pastry wheel to cut the sides to give it that certain je ne sais quoi, but my fold over pieces weren’t all quite long enough as I reached the end. That experience helped me pay closer attention to my cuts/strip lengths for the MW version.

CFA98446-E585-4D22-8BAE-7434B2CA31E7.jpg

While proofing, heat the oven to 350ºF (Weller’s version). I generally leave my baking stone on the bottom rack of my oven. Even if I’m not baking directly on it, I feel it helps keep the oven temp more even.

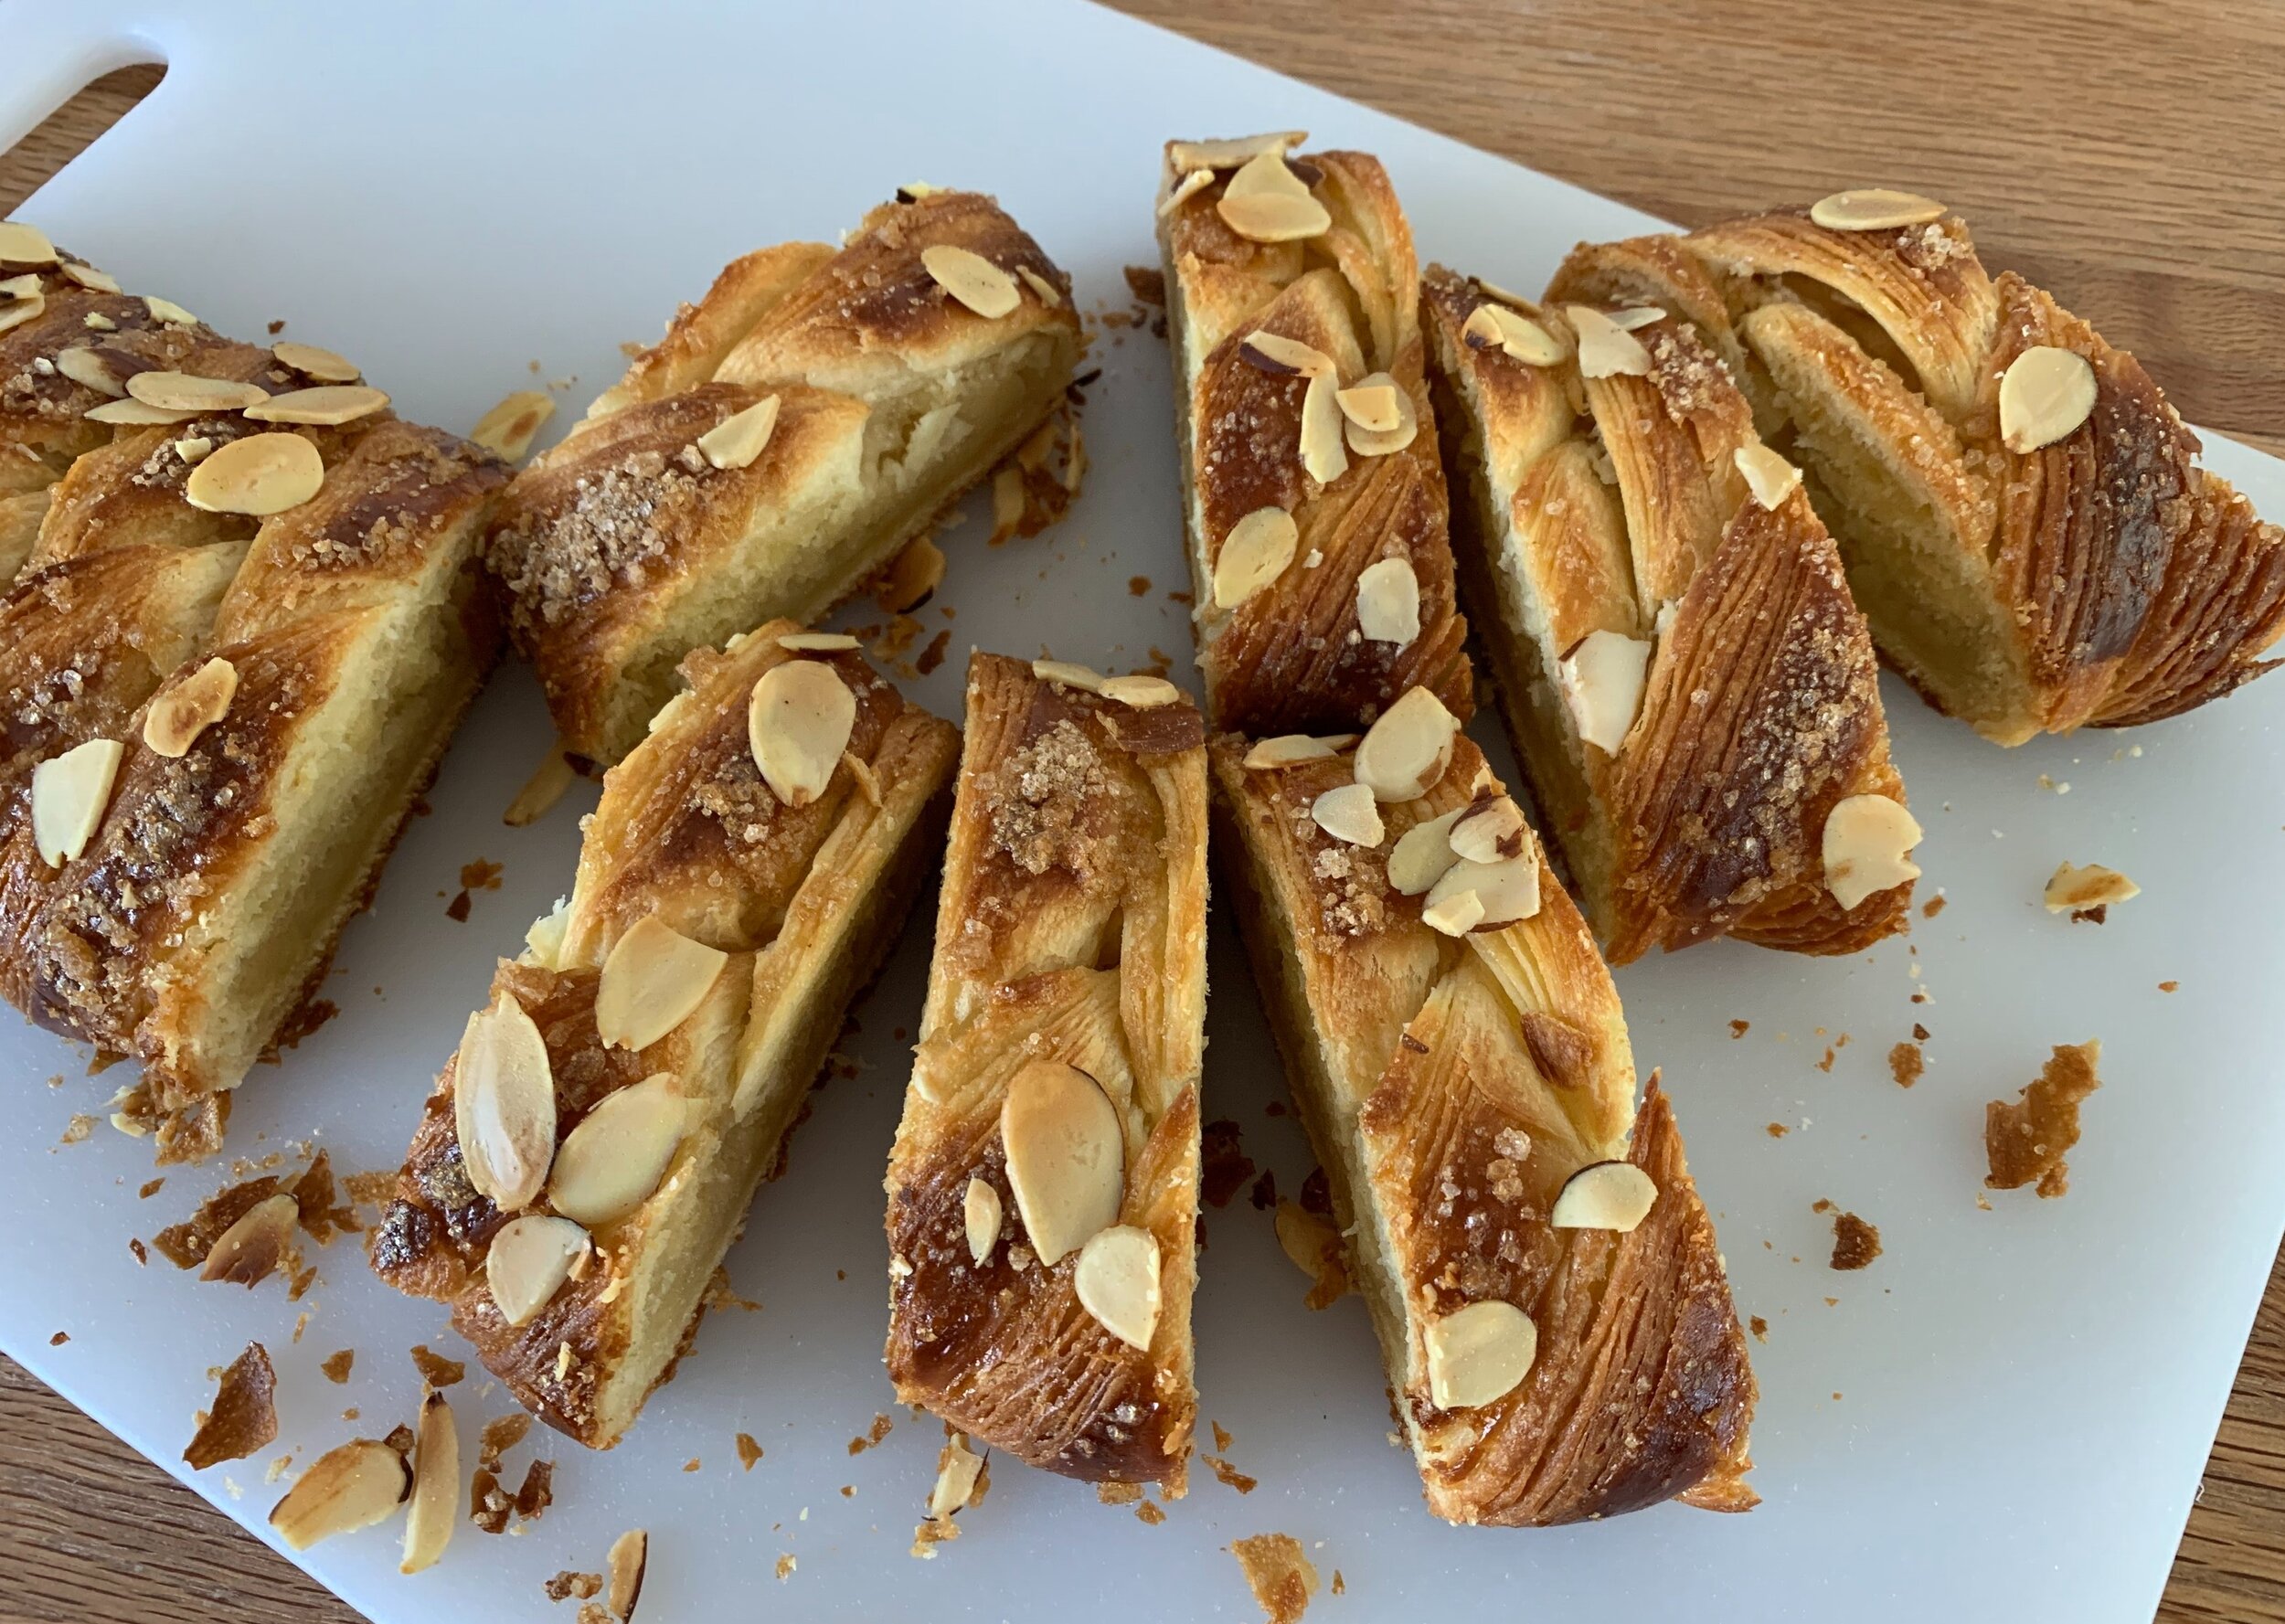
Egg wash, sprinkle sliced almonds and raw sugar or crushed raw sugar cubes on top, place on a second sheet pan (helps to protect the bottom from burning) then onto the center rack and bake about 30-40 minutes until nicely browned.

1E56797E-EB12-406F-8AD5-1B8BF089CC4C.jpg
657E865F-C24A-4DAD-BEC2-C0DDBA508643.jpg

For BO’s version heat the oven to 400ºF and bake about 15-20 minutes. Below is the baked version of BO’s - you can see how the fold over pieces pulled away, particularly at one end, exposing the filling. Still tasted good!

Let’s taste! Slicing into BO’s version, there’s a hint of doughiness to the bottom layers. The almond filling is deelish, although, in spite of the lovely flaky, golden and crisp exterior, Steve and I thought the pastry seemed a bit on the dry side and needed a touch more salt to punch up the flavor. The laminated layers are clearly seen (this one went through two 4-folds).

BO version

BO version

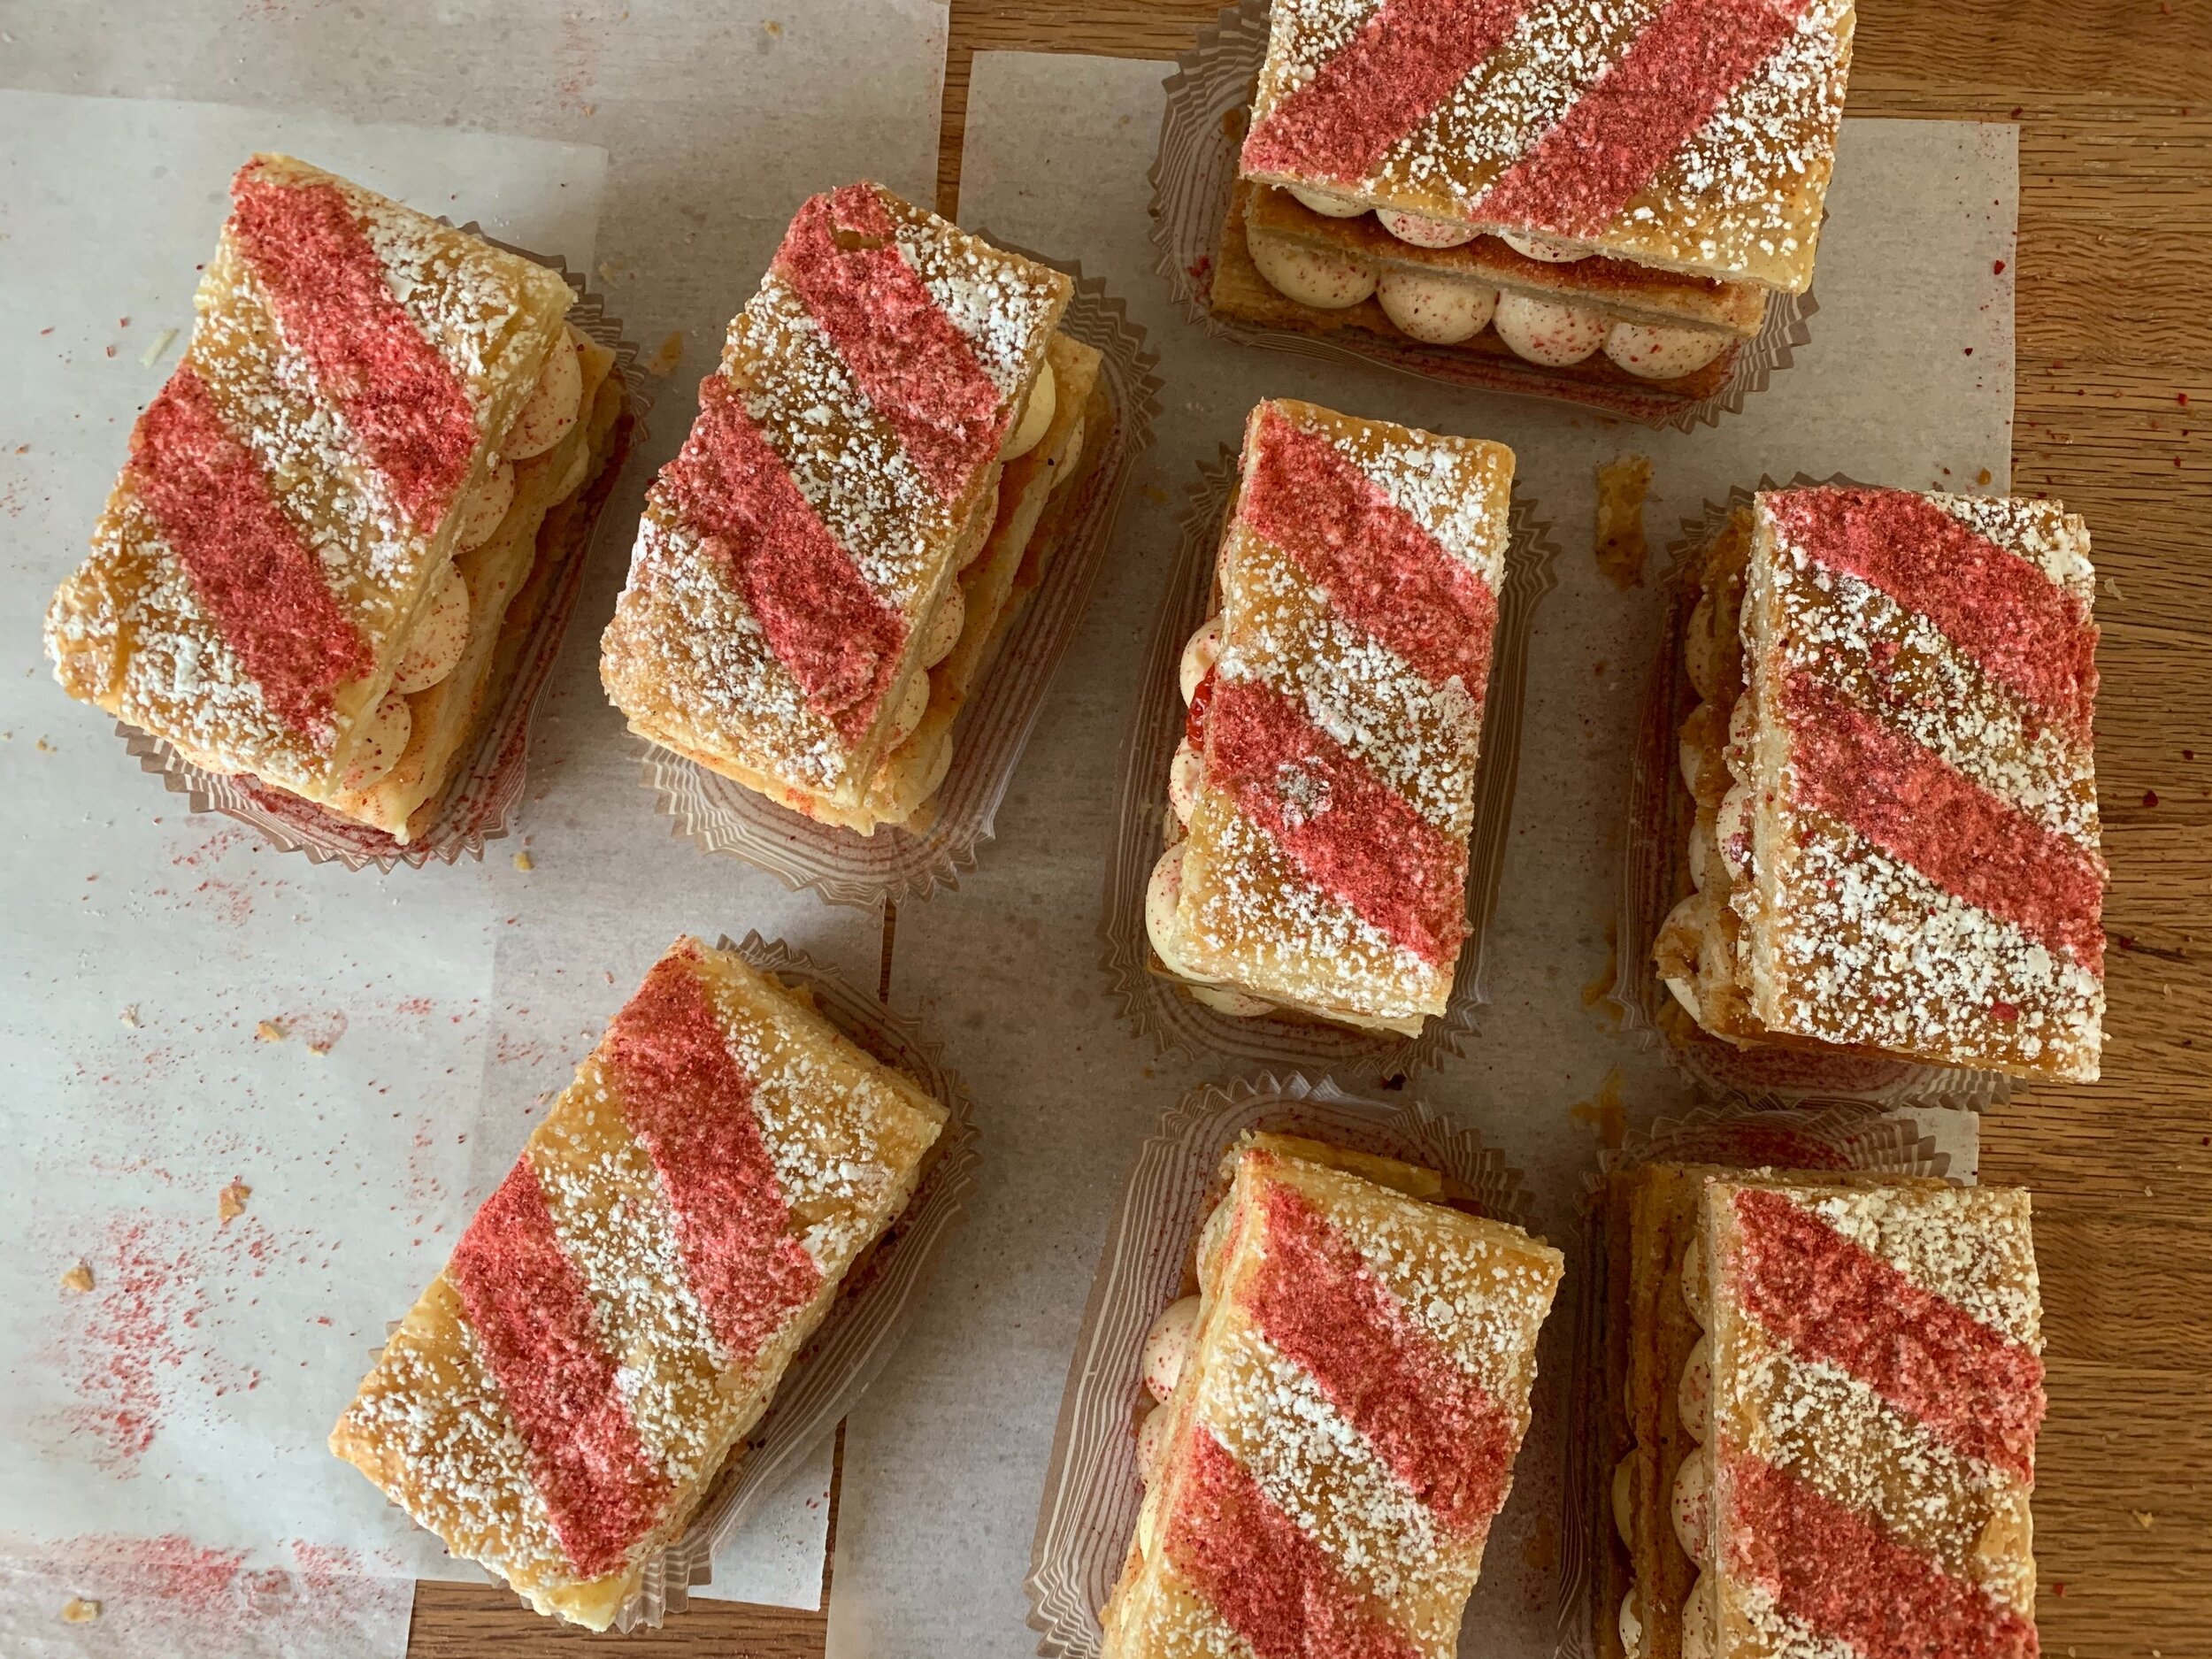
For MW’s version there was no doughiness at all to the bottom, and the top laminated layers look pretty good (this one went through only two 3-folds). The flavor of the pastry married with the almond-y filling is wonderful!! A big thumbs up.

MW version

MW version

Based on this project, I’ve tweaked my base recipe (NOTE the links above are for this tweaked recipe): hike up the sugar to 90 g, increase the butter in the dough to 113 g and make my butter block 227 g for a total butter of 340 g all told. I’ll stick with two 4-folds for my laminating for now but will most likely play with that too from batch to batch. The almond filling is a keeper for sure!

In the meantime stay healthy, remain prudent and enjoy spring! Aaahh, so beautiful.

EA093B08-6F52-4531-BC98-08910A35B795.jpg


Mille-feuille aux fraises

B6313D36-DA81-4EFE-813D-0CE12676FA61.jpg

It’s great fun to revisit a classic every now and then. It takes me back to 2006-7 to those pastry school/stage days in Paris. Chef Pascal of Pâtisserie Pascal Pinaud in the 5th arr. would offer a lemon-raspberry version only on Sundays as a special weekend treat. It’s best eaten soon after being assembled so it’s not one of those goodies that can linger in the pastry case for a few days. You want that puff flaky and fresh!!

Mille-feuille (often referred to as vanilla slice in Britain and Napoleon in the US) is truly one of those classics. Crispy, buttery, flaky pâte feuilletée layered with vanilla crème pâtissière is the usual combo but one has the option to change up the cream flavor or switch to something like a light whipped ganache or whipped mascarpone cream and add fresh fruit into the mix. Think chocolate raspberry or coconut mango and you’re off to the races to create your own version.

My project came about as the result of a request for a strawberry vanilla option for a small birthday gathering. Being pleased to accept, I opted for a crème légère au vanille (essentially pastry cream with a bit of gelatin to set and whipped cream to lighten). I had puff pastry in my freezer and kept a keen eye out at various markets around town for decent looking strawberries as the day approached.

731C61B7-B211-4B6F-B684-1E569ACD0841.jpg

If you aren’t up for making your own puff (rough or quick puff can also be used here), you can find decent all butter versions in most frozen food sections of well stocked grocery stores. Dufour is a popular brand.

The beauty of creating this dessert is the make-ahead-ability of the components. I baked my puff and cut my ~2”x4” rectangles 1-2 days ahead, then held them layered between parchment paper in the freezer until the day of assembly. I made the cream a day ahead as well. On assembly day it’s a matter of prepping fruit and having your puff layers and cream at the ready. It’s all about being organized. Not bad at all!

A few tips when working with puff: always work cool; roll the dough out close to your desired size then give the dough a “lift and fluff” to help it relax. Cover with plastic wrap and give it a 10 minute rest (at room temp if your kitchen is cool otherwise in the fridge) before a final roll out to desired size. Then place on a parchment lined sheet pan and pop into the freezer while you heat your oven. That helps relax the dough and reduce the amount of shrinkage that might occur during the bake.

palmierrollout.jpg

For mille-feuille I recommend baking puff in larger sheets and then cut to your desired sizes - that compensates for some shrinkage of the dough during baking and gives you the ability to cut neat edges. That also gives you the option to cut longer strips to stack that will then be cut into individual portions vs. cutting individual rectangles like I did.

I used about a pound / 454 g of puff rolled a scant 1/4” thick for a half sheet pan, baked two of those and had plenty for some test cases and tasting. Yup.

B8F1816D-482A-4A61-96CC-99FF074106BB.jpeg

I typically bake my puff at 425ºF to start. Most recipes you might see for millefeuille instruct you to place a layer of parchment paper or foil on the chilled rolled out puff and top it with another sheet pan or two to weight it and prevent it from rising too much in the oven. I’ve even added a couple of loaf pans on top to add to the weight, but . . . . . . . . .

I’m here to tell you that even with those measures, the puff will puff anyway! Since I want it nicely browned, I weigh it down for the first 10-15 minutes, pull off the extra sheet pan and parchment (or foil) and continue to bake with a wire cooling grid overturned across the sheet pan to allow the puff to bake/puff more evenly. It needs at least another 10-15 minutes to reach a beautiful golden brown-ess (which is difficult to achieve when it’s covered with foil). Don’t forget to keep an eye on it and turn the oven down as needed.

Once cool I gently press it down to flatten as I cut my rectangles. It works!

Then it’s a simple matter of matching up three pieces that seem to stack nicely together and identifying the one you prefer to be the top. In my case, since I decided to dust the tops, their surface appearance didn’t really matter. Some will coat their chosen top pieces with confectioner’s sugar and pop ‘em under the broiler to caramelize for a nice sheen.

I went for simple piped rounds of pastry cream and dusted them with freeze dried strawberry powder to add an additional hint of strawberry flavor.

14CE98F6-72A1-473F-BFBE-70DB0C349F82.jpeg

I was fortunate to find fairly decent strawberries at one our our local grocers, sliced ‘em up and coated them with a bit of strawberry jam for another flavor booster.

Let the layering begin. Puff/cream/strawberries/puff/cream/strawberries/puff. That’s it.

14CE98F6-72A1-473F-BFBE-70DB0C349F82.jpeg

For the top layer pieces I made a simple template so I could dust them with confectioner’s sugar then lines of strawberry powder. I buy freeze dried strawberries at Trader Joe’s and crush/sift them over whatever I want to dust.

B2B1F227-45AB-4210-8C45-0A105C9EDAB6.jpeg
2DDA6611-30B3-448B-8BEF-9CAC0DD76AD7.jpeg

Of course I made some test portions so Steve and I could give them a try. Yum! I even let one sit in the fridge for a day just to see how it would handle that down time. Not bad at all!!! The puff still had some crispy flakiness and the flavor remained delicious.

BCD5A579-484E-4A7E-B9F1-EBD5D99A2726.jpeg

Now that spring is pretty much here, start thinking about your own version of millefeuille. So many options. You can do it!

Meanwhile, Steve and I look forward to our second vaccine dose in a handful of days and . . . . . . my tulips are coming up!!! Yay!!

4CED9D9E-1D4E-41AB-AA89-1FDAA9962D7B.jpeg