English cheddar scones

IMG_2976.JPG

Let's be clear. I love cheese. So why not use some delicious cheeses in my baking projects, eh? It's a win-win - I expand my knowledge about different cheeses AND I get to create some tasty goodies to boot!

We're fortunate to have The Cheese Lady here in Grand Rapids. It's just one of six Cheese Lady shops located in lower Michigan (read more about it here), and boy-oh-boy do they have a fantastic selection. It's a wonderful spot where the staff is knowledgeable, friendly and helpful, plus one can sample and purchase all manner of cheeses from around the world.  In addition there are well thought out displays of cheese accoutrements and assorted cool serving bowls, cheese boards, platters and utensils. You should check it out!

IMG_2939.JPG

Below is a shot of the cheese board to get you in the mood to go buy cheese! Yeah!!

IMG_2941.JPG

This post launches a series I plan to do over the next several months, primarily on baking with cheese but also the occasional post on pairing cheeses with baked goods. First up - cheddar scones.

IMG_2984.JPG

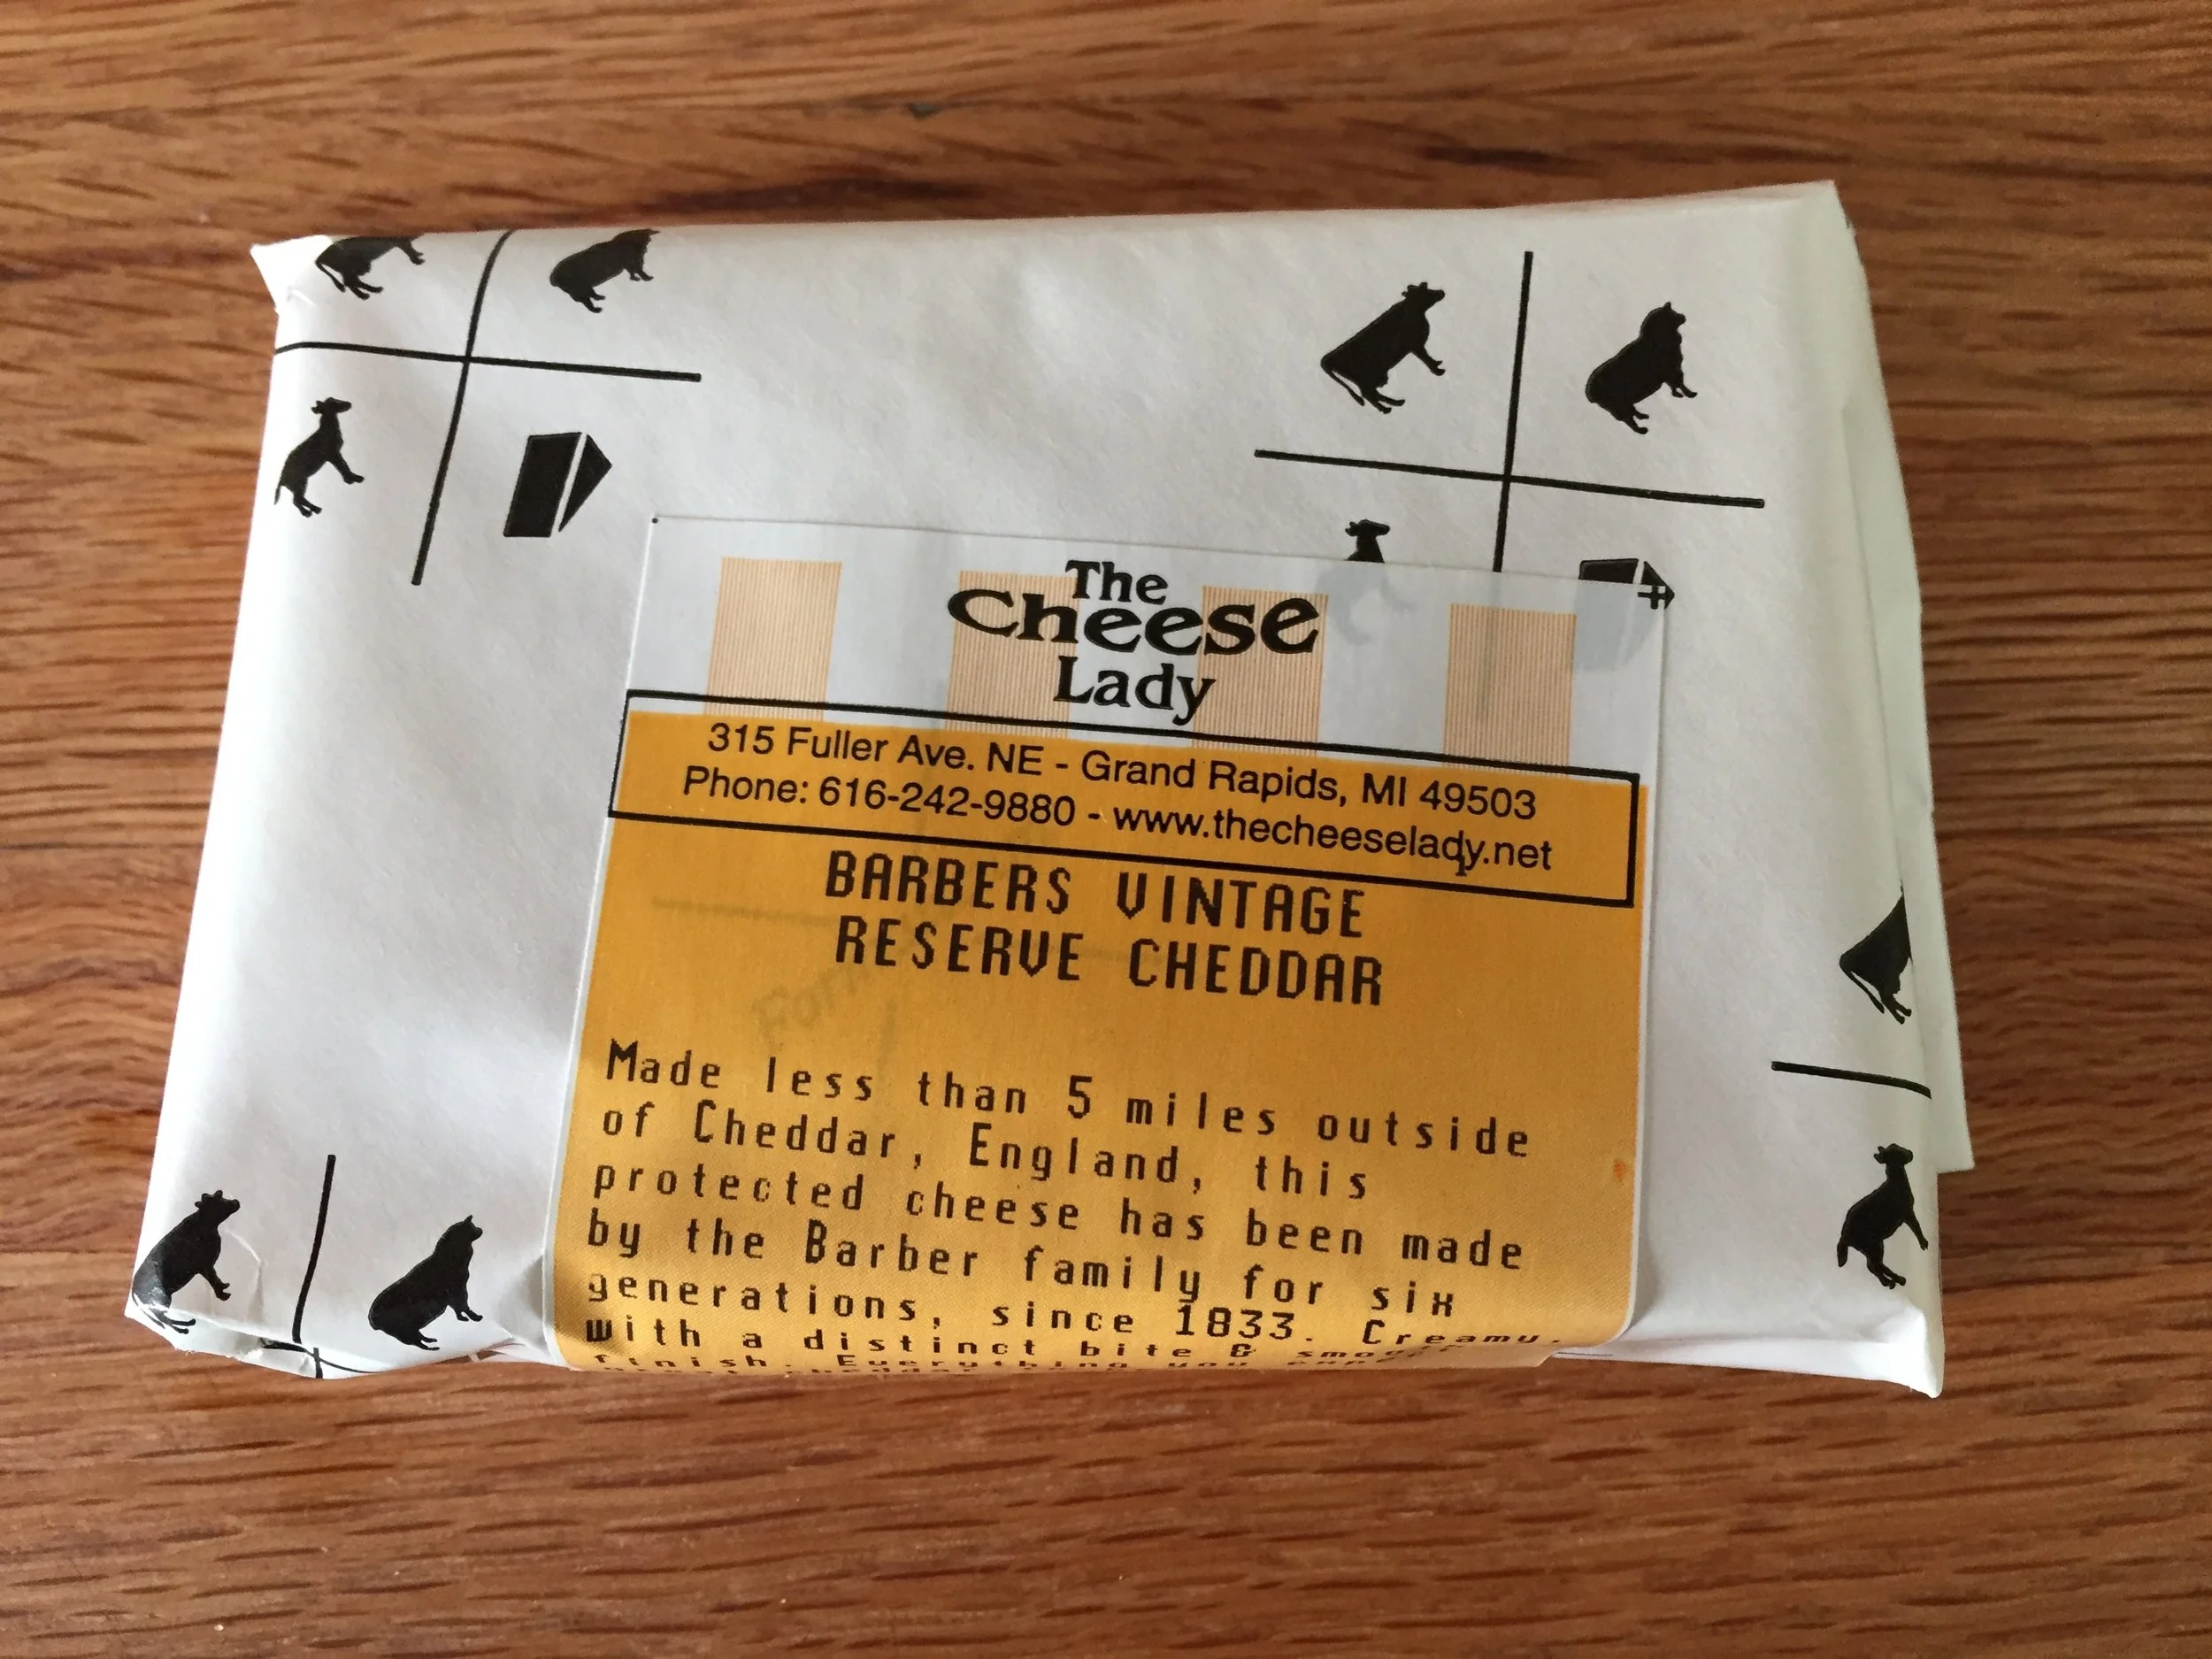
I chose an English cheddar, Barber vintage reserve, for this project. Did you know there's actually a town in England called Cheddar? If I did, it was certainly buried somewhere in my feeble brain. Just google "history of cheddar cheese" and you'll learn all about it. Bottom line - it's a cow's milk cheese and the good cheddars are REALLY good.

IMG_2936.JPG

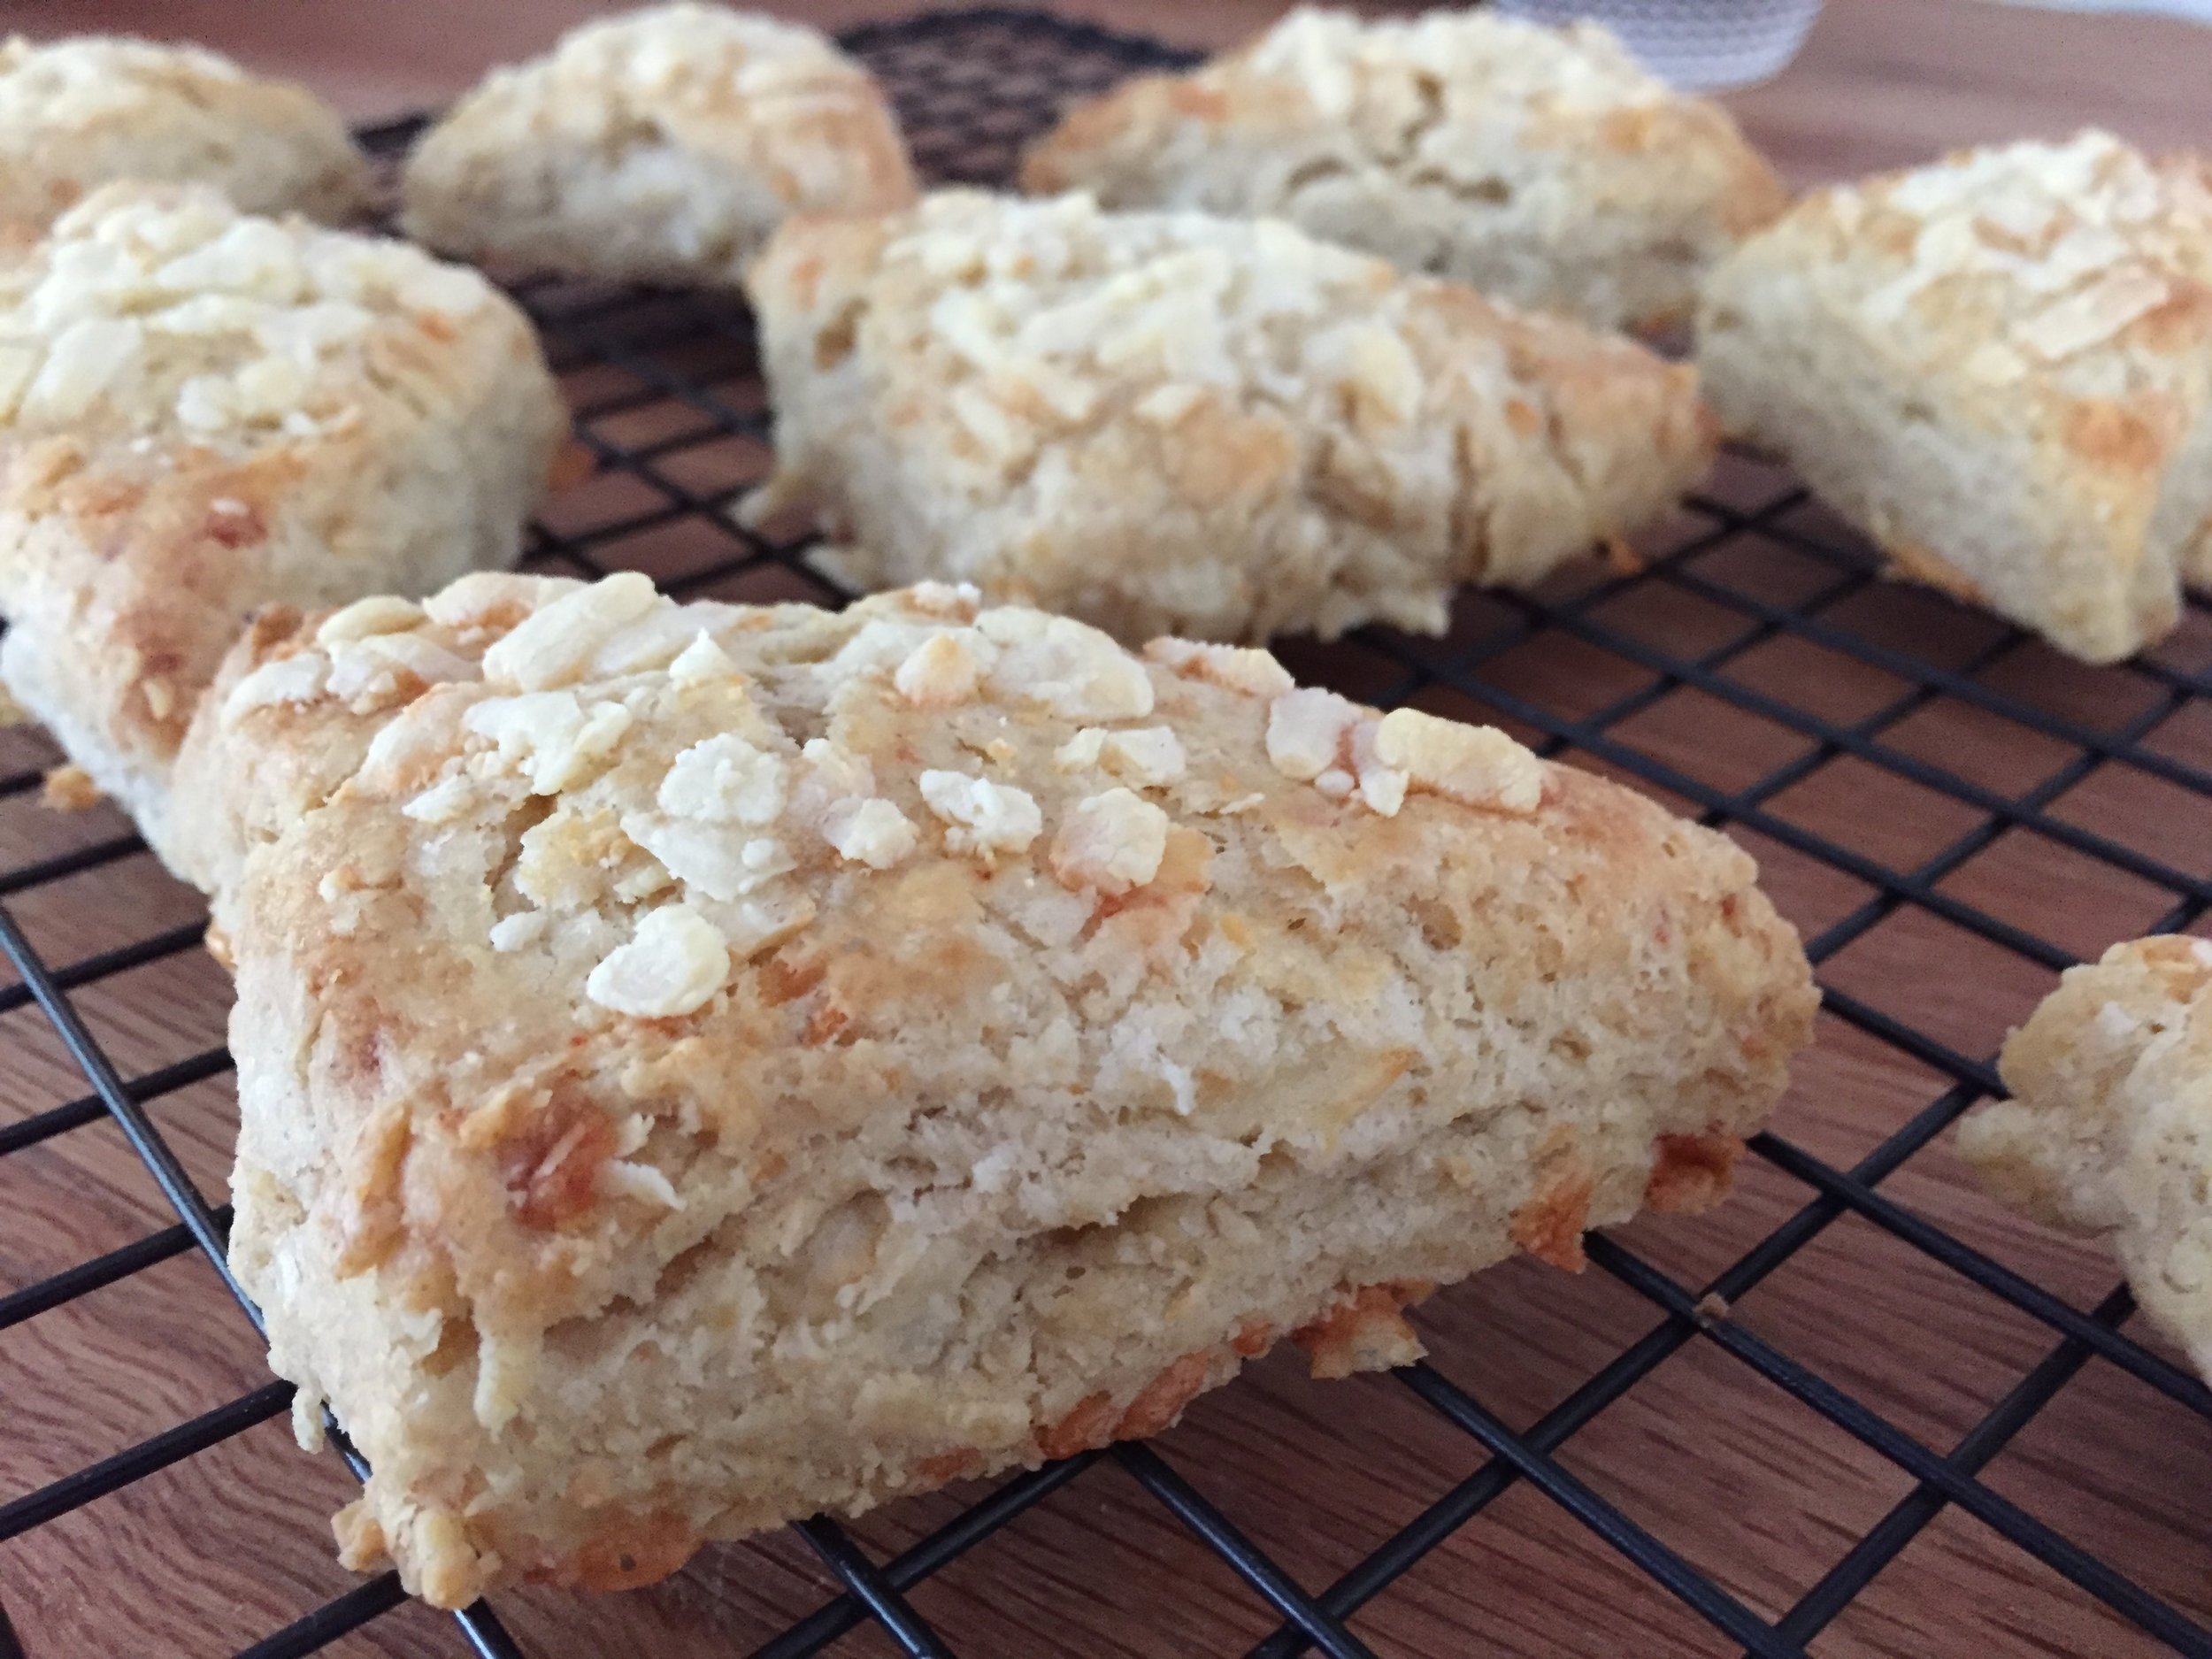
I tweaked my scone recipe to give it a savory note - subbed in some whole wheat pastry flour for some of the all purpose, reduced the sugar, added a little dry mustard, freshly ground black pepper and a hint of cayenne to set off the just-right bite of the cheddar. 

IMG_2949.JPG

The key to scone making is to keep everything cold and work efficiently without overdoing it. Dry ingredients in the bowl, diced cold butter tossed in . . . . . 

IMG_2950.JPG

Sand the butter into the dry ingredients to achieve coarse crumbs with flattened pieces of butter still visible. Distribute the cheddar cheese around the edges of the bowl then pour in the cream/egg . . . .

IMG_2951.JPG

Toss it up with a fork to moisten everything. At this point I use my trusty bowl scraper and quickly blend everything together, then turn out onto the work surface for a quick knead into a rough and tumble rectangle. Don't worry if there are still a few dry crumbs. It will all work out in the end - trust me.

IMG_2953.JPG

The next step helps to achieve a bit of layering to the dough, kind of like making puff pastry. Visually divide the dough in three and fold one end of the dough to the middle . . .

IMG_2954.JPG

then fold the other third over onto the dough like a business letter. 

IMG_2955.JPG

Et voilà! You've done a three-fold!

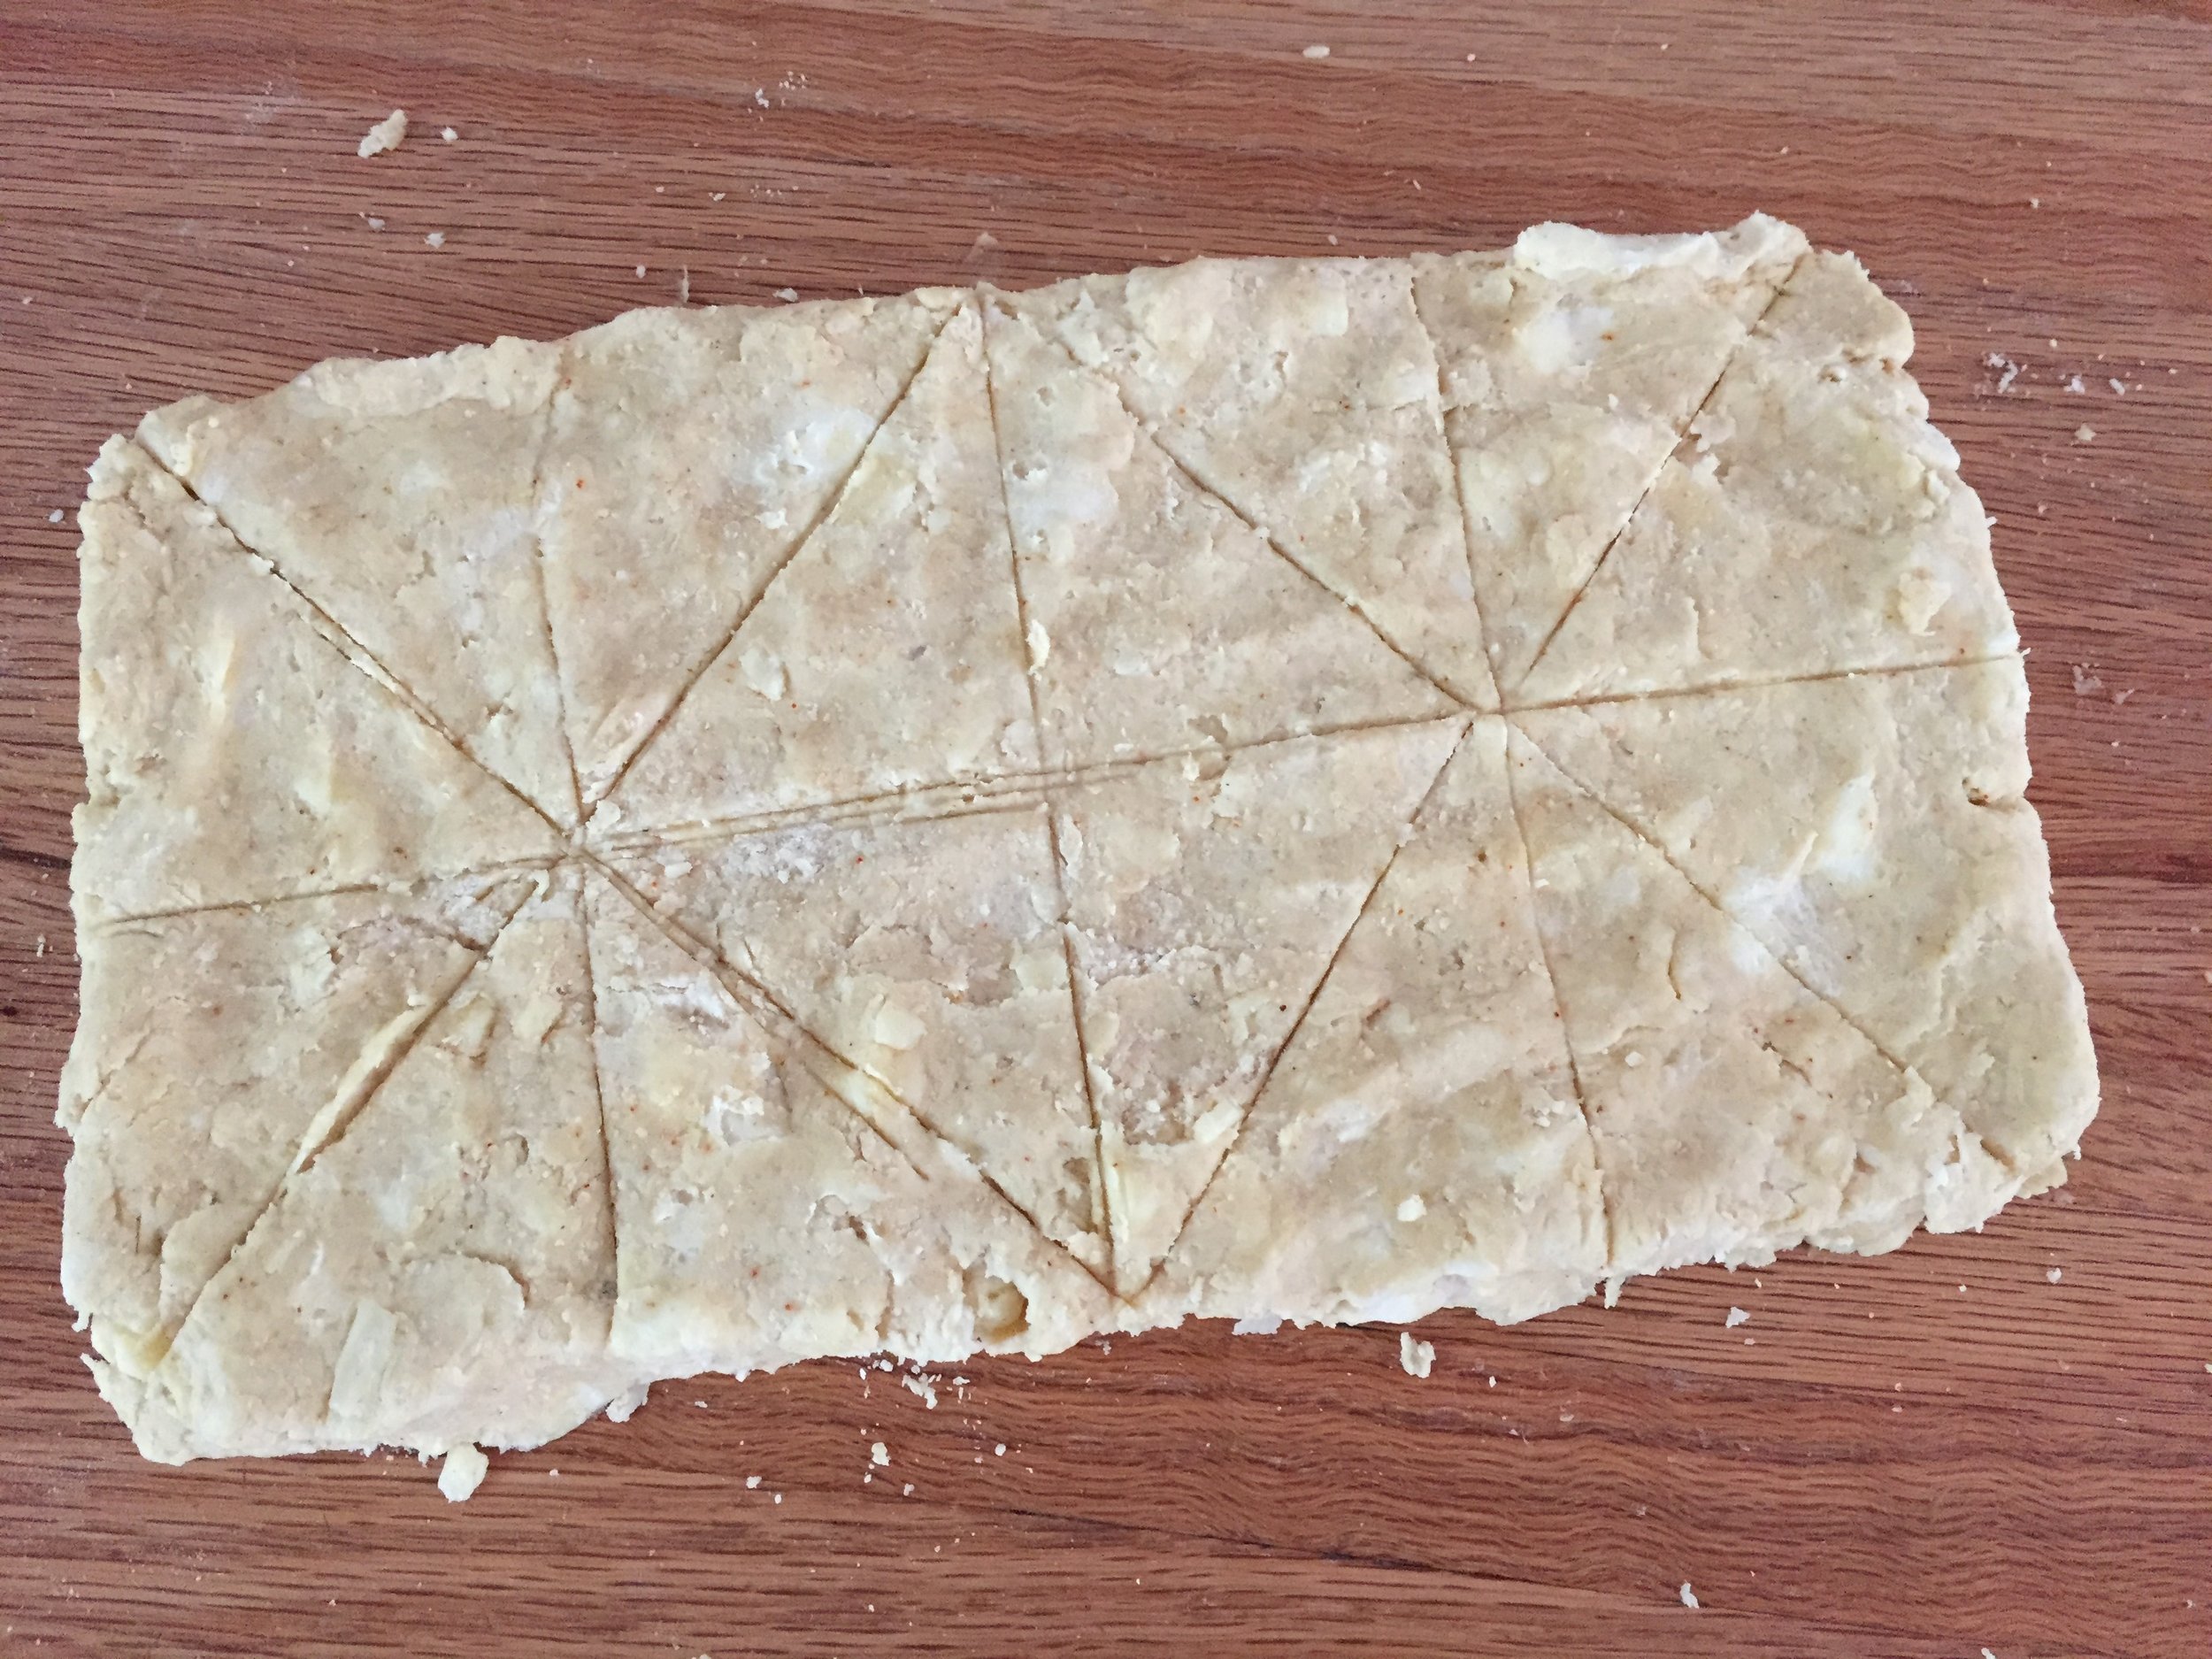
Now either pat by hand or quickly but gently roll the dough into a rectangle again. I like the dough to be about an inch thick so I eyeball the size of the rectangle based on my desired thickness. These are closer to 1/2", a bit too thin - next time I'll pay more attention. 

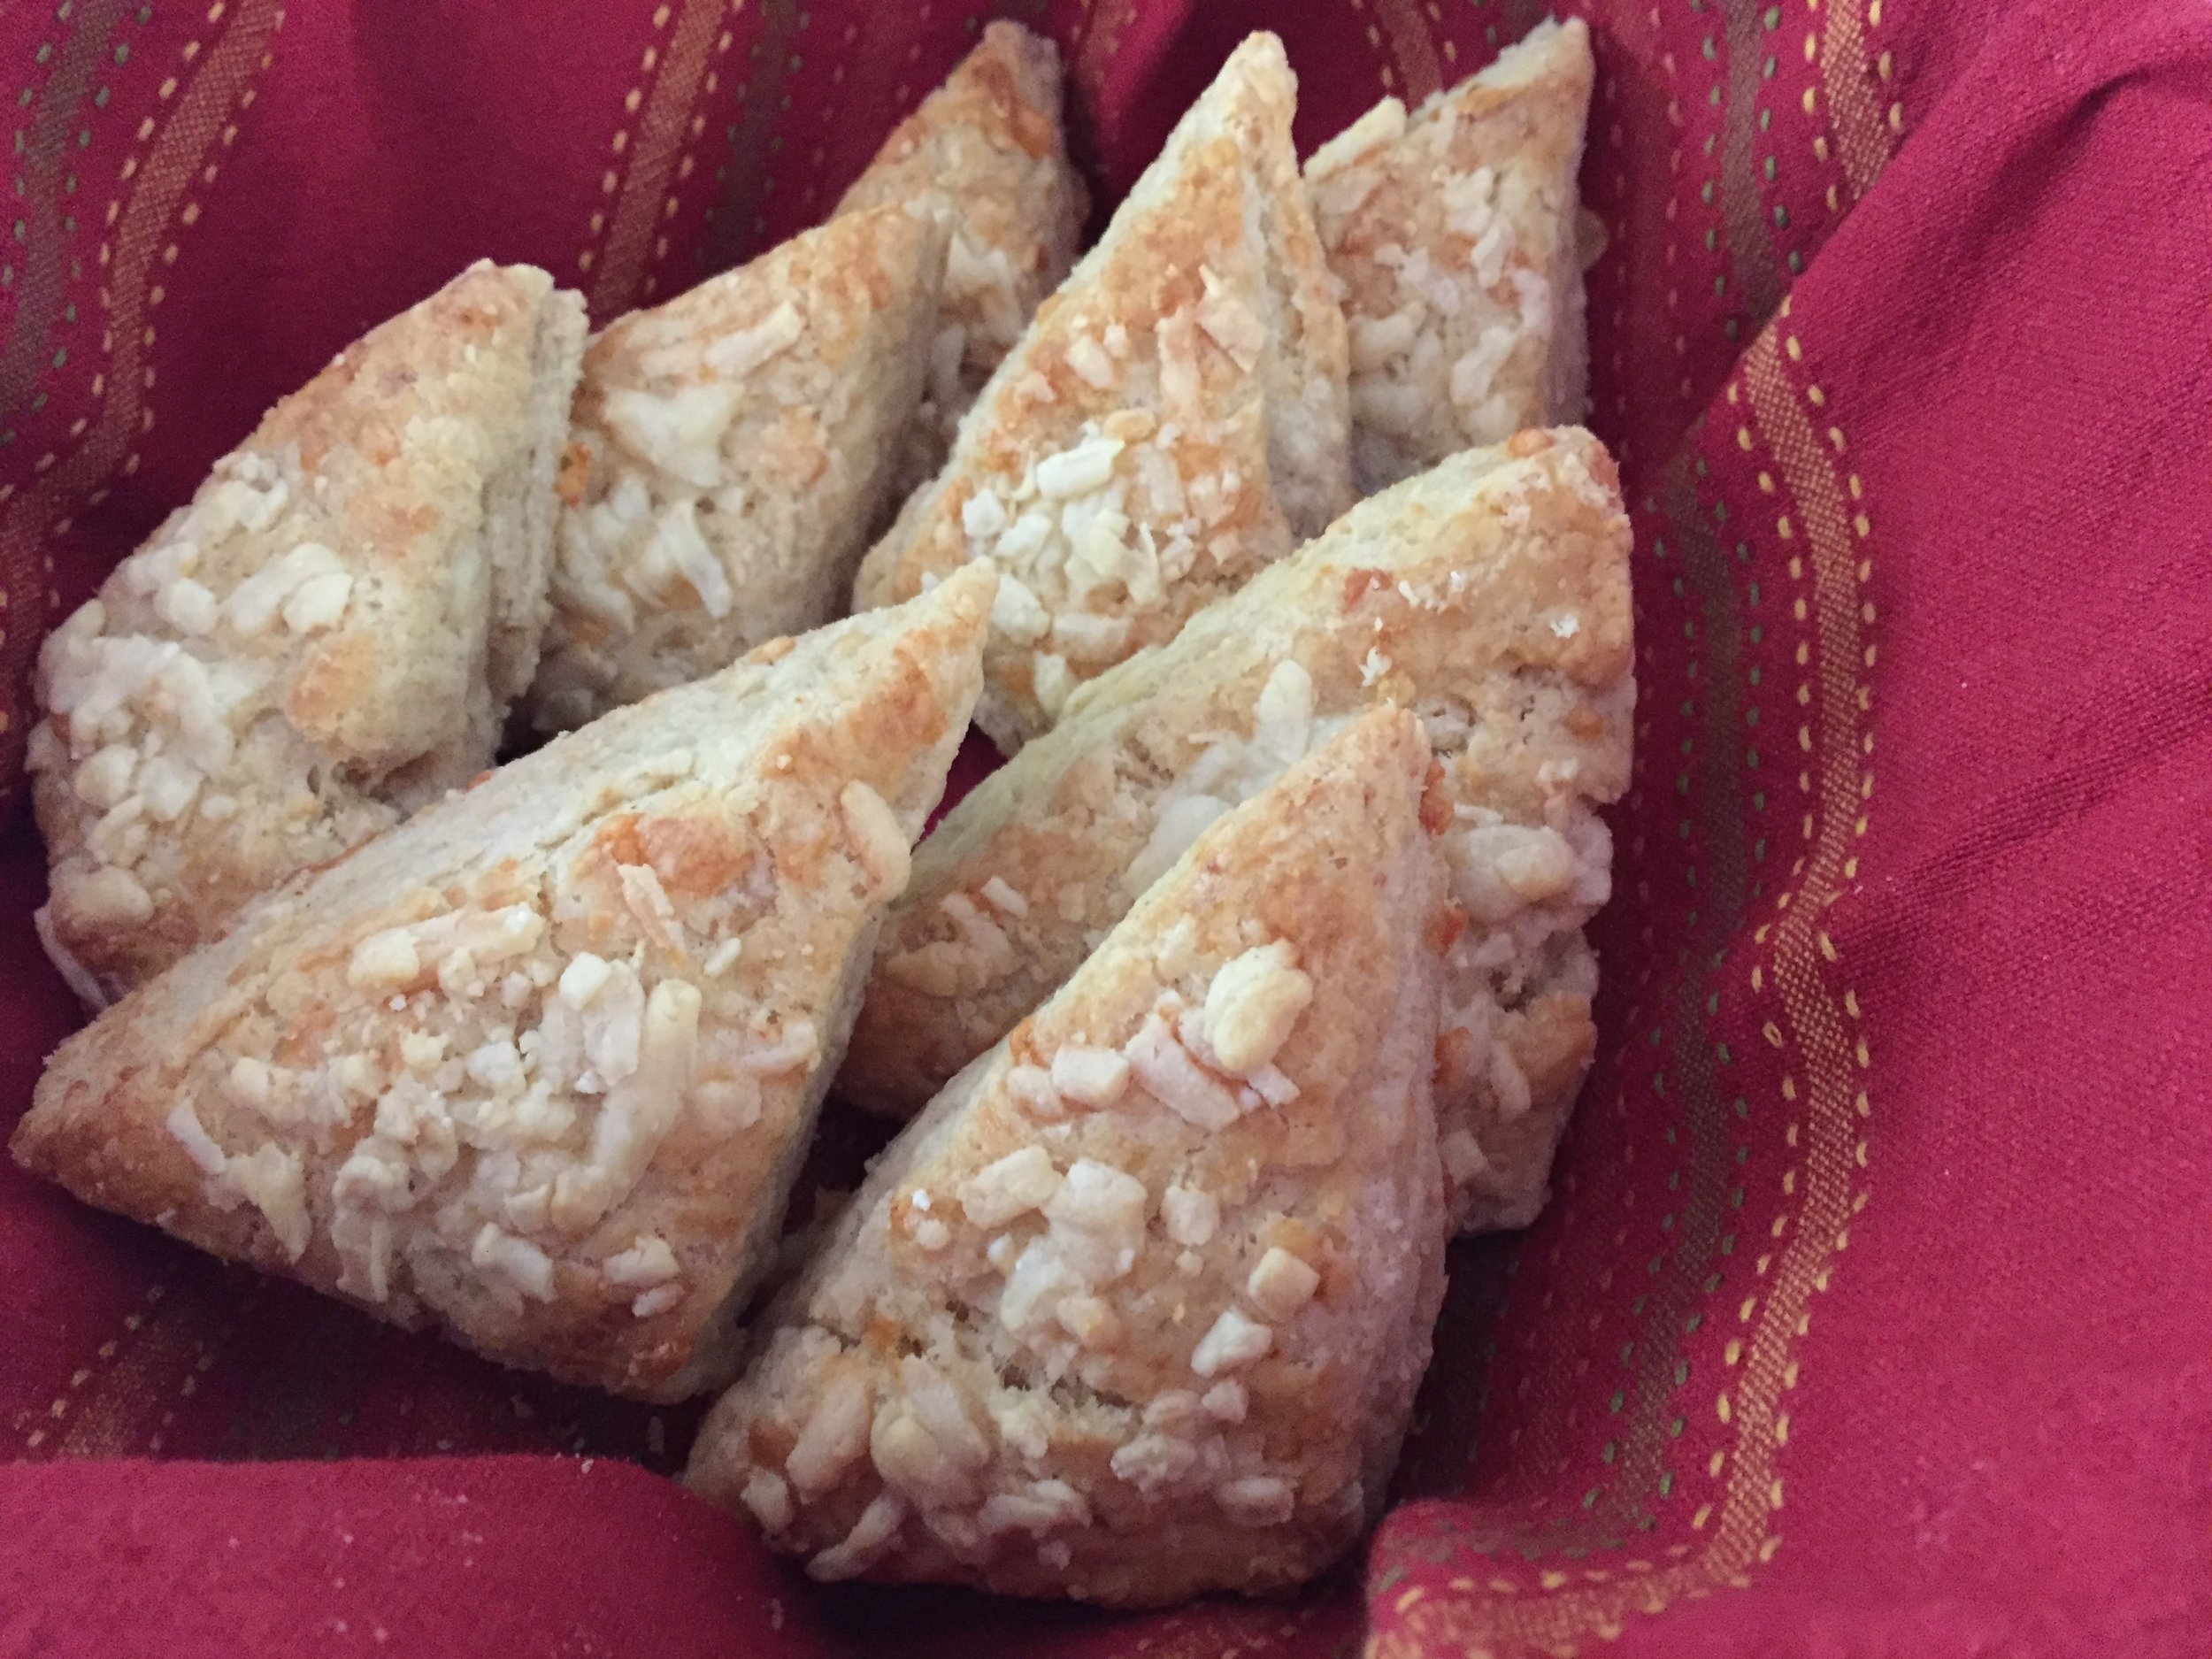
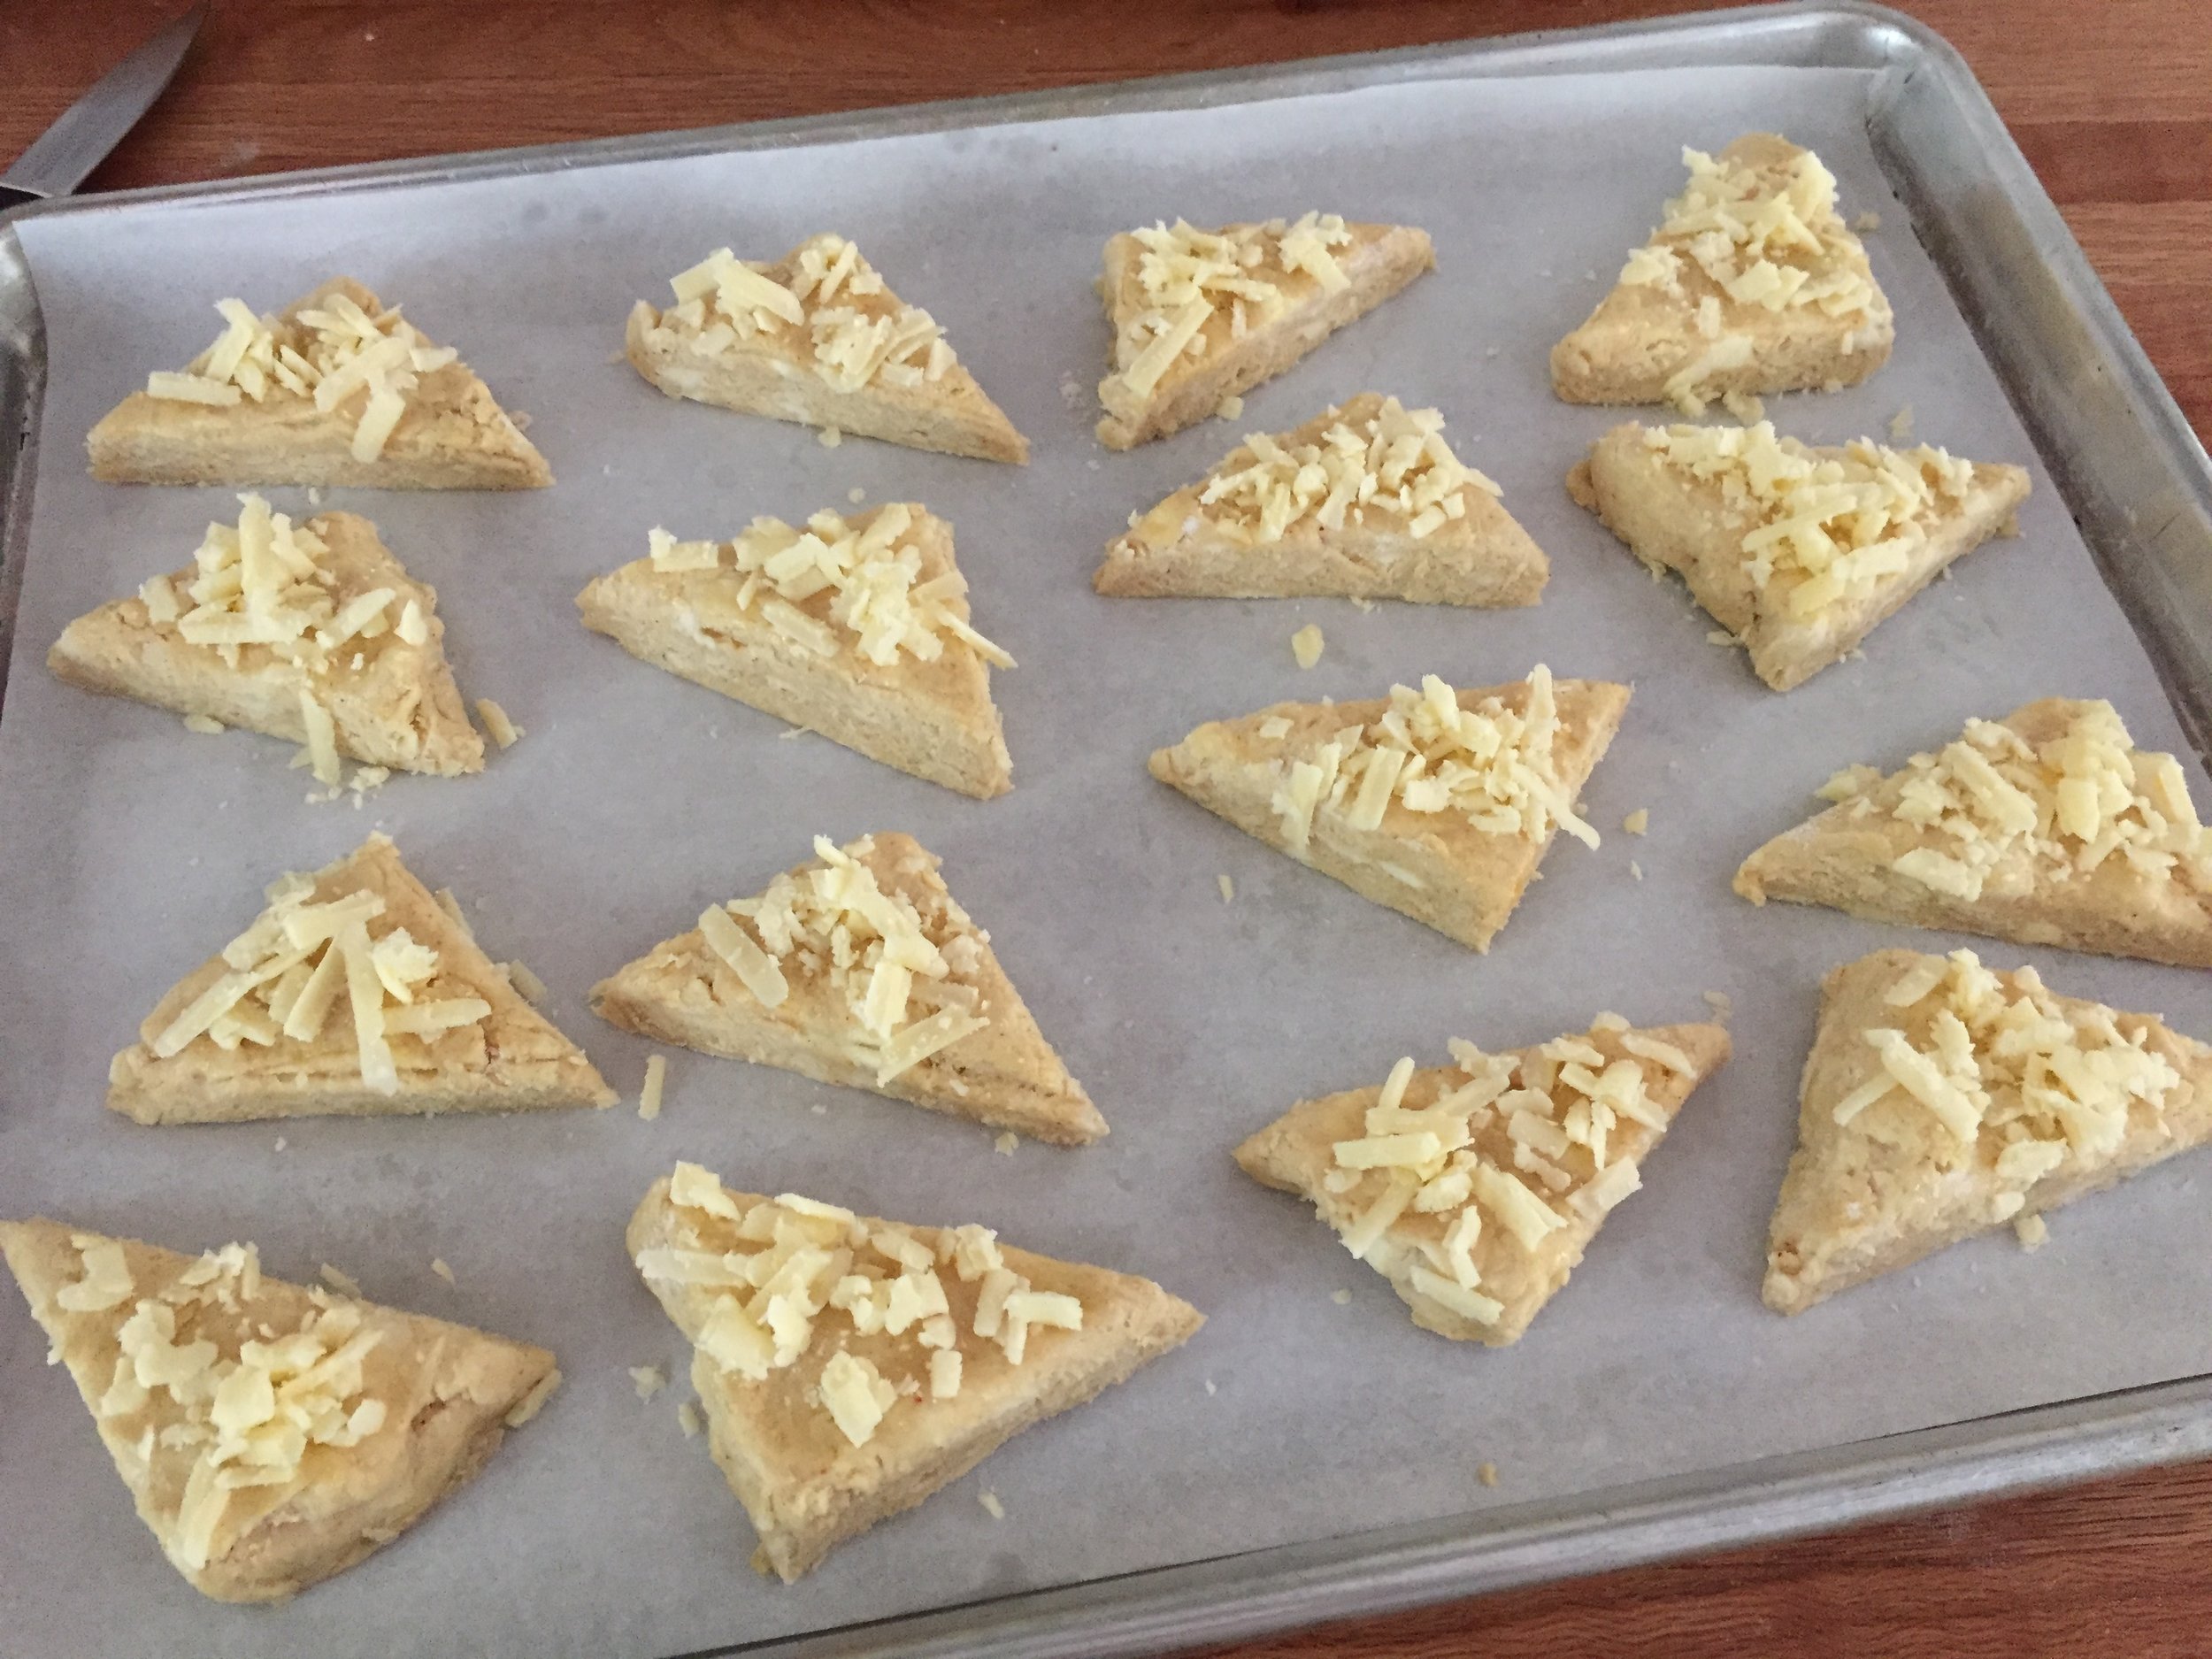
While this recipe makes 8 "standard" (whoever decided what that is?) sized scones, I prefer mine on the smaller size, particularly for trial and tasting purposes. First I score lightly, then cut with my bench scraper into 16 triangles. (NOTE: Going forward I'll do 12, working toward the one inch thickness - that gives you a not-too-big-but-still-nice-sized-scone).

IMG_2956.JPG

Place 'em on a parchment lined sheet pan, brush with egg wash or milk then sprinkle additional grated cheese on top.

IMG_2958.JPG

Place the tray of scones in the freezer while you heat the oven to 425ºF. Bake for 5 minutes then decrease the temp to 400ºF and continue baking for another 10-15 minutes until nicely browned. I rotate my tray half way through and will ratchet the oven down to 375ºF if I feel they're browning too quickly. Remember - it's up to YOU to watch what's going on in there.

IMG_2961.JPG
IMG_2964.JPG

The end result was outside crispy, inside buttery-melty, light texture-y, cheddar cheese-y with a subtle hint of heat on the finish. Those who tasted them thought they were deelish with one taster's plea for more heat. Good to know. Yes, I will definitely make these again.

IMG_2978.JPG

Raspberry-currant cream berry tart

IMG_2925.JPG

Planning a dessert for the recent Bastille Day celebration with the local GR chapter of L'Alliance Française, my thoughts turned to tarts (of course!). I had fresh raspberries, blueberries and even currants from the Fulton Farmer's Market, and it was definitely time to incorporate those goodies into a delicious tart.

I've previously written about Breton dough (one of my faves), the most recent post being in early July using a céréales version to support some fresh pastry cream and strawberries. Besides the flavor and delicious texture of Breton dough, on the more practical side, it calls for egg yolks which I always see as the perfect opportunity to accumulate egg whites for financier batter or meringues. Love it.

My Breton dough was already made and in the fridge, as was a batch of raspberry currant cream that I had used the previous day for some petite fresh berry tartlettes. The plan - layers.

First I rolled the dough out to 1/4" thickness, trimmed the edges as needed and pressed it into my lightly buttered 4"x11" rectangular tart form. (Side note: this is the one tart dough I use that I butter the tart ring or form - otherwise it sticks). I wanted to build up an edge that would bake up around the filling and fruit, so I cut narrow strips of additional dough and placed them around the periphery. Then I spread a thin layer of raspberry jam on the dough within the borders. 

IMG_2908.JPG

Next up - a layer of raspberry currant cream. Now here is just one of the wonderful things about pastry cream - you can replace 75-80% of the whole milk in your favorite pastry cream recipe with fruit purée(s), proceed with the usual preparation and voilà - fruit cream! For this one I used equal weights of fresh raspberry and fresh red currant purées made with some of my farmers's market booty. So tart yet creamy and delicious.

I found it easiest to pipe thin stripes of the cream over the raspberry jam, so as not to mess it up by trying to gently spread it. Piping makes things so neat, doesn't it? 

IMG_2909.JPG

Then comes a nice sprinkle of berries - in my case raspberries and blueberries. Another cool trick is if you freeze your raspberries a few hours ahead, you can easily break them up into halves or smaller pieces while still frozen to distribute them over the cream. You try that with fresh raspberries and you'll have a juicy mess! And you can pop the tart right into the oven - no need to wait for thawing, just go for it.

IMG_2910.JPG

For the final touch I brushed the dough edges with a bit of cream, sprinkled on some raw sugar and added chopped pistachios over the whole kit-n-kaboodle, not only to provide a wonderful color contrast but also some added crunch for the tasting portion of the program.

IMG_2911.JPG

This one baked at 325ºF (convection) for about 25 minutes. I always check things half way through, rotate my sheet pan to provide even browning (yes, even in a convection oven!). You want the crust to be nicely browned and the cream to be set.

IMG_2918.JPG

Let it cool for 15-20 minutes, gently slide a knife or offset spatula around the edges to loosen the tart form and lift it right off.

IMG_2932.JPG

Part of a dessert buffet for the Bastille Day L'Alliance gathering, I sliced it into strips and added a dollop of lightly sweetened whipped cream to each portion. Oh my, I love this dough sooooo much! Light, buttery and a wonderful complement to the tart, fruity cream and berries. And, to top it all off, I had some extra components to make another petite blueberry tart for Steve and myself to enjoy the next day. Scrumptious.

IMG_2935.JPG

Swirly whirly Viennese butter cookies

IMG_2897.JPG

Creating a varied menu and testing out the possible goods for an afternoon tea or special occasion brunch, lunch or what-have-you is an ongoing project of mine (Yes, I'm getting there). As I research recipes and ideas, I invariably come across something I haven't made for a long time. This cookie is one of them.

Years ago I had a cookie press with the various discs that allowed one to create butter cookies in different shapes or designs, including a simple swirl . I've since moved on from the cookie press, but these whirled Viennese cookies remind me of those days of yore. It's a classic butter cookie made even more enticing by sandwiching with raspberry jam and buttercream.

Most of the recipes I've seen call for equal (or nearly so) weights of butter and flour along with some confectioner's sugar, cornstarch (or cornflour, as the Brits call it), vanilla and maybe a bit of baking powder and salt. As is the case with pretty much all recipes, the quantities of each ingredient vary a bit from recipe to recipe. They're all good if you ask me! 

I opted to use white rice flour instead of cornstarch, being curious about the final texture (Spoiler alert - good!).

IMG_2844.JPG

Here's the recipe I used for these:

  • 200 g / 1 stick plus 6 tablespoons butter, softened
  • 50 g / 1/2 cup confectioner's sugar
  • 1 teaspoon vanilla
  • 200 g / 1 1/2 cups all purpose flour
  • 30 g / 3 tablespoons white rice flour
  • 1/2 teaspoon baking powder
  • pinch salt
  • 1-2 tablespoons whole milk
  1. Heat the oven to 325ºF. Line two half sheet pans with parchment paper.
  2. Cream the soft butter and confectioner's sugar with the paddle on medium-high for several minutes until pale and light.
  3. Add the vanilla extract and blend in.
  4. Sift the flour, rice flour, baking powder and salt into the bowl; add 1 tablespoon milk and blend until smooth and well combined.
  5. Add the additional tablespoon of milk only if the mixture seems a bit stiff.
  6. Spoon the dough into a piping bag fitted with a large star tip and pipe whirls onto parchment lined baking sheets. Leave some space to allow for spreading, although in my experience they don't spread too much.
  7. Place in the freezer for 20-30 minutes before baking. This step sets the dough and makes it more likely your cookies will hold their shape nicely.
  8. Bake for about 10-12 minutes until the edges start becoming golden brown. Cool on wire racks.

Once cooled, pair up the cookies, overturn them, pipe a swirl of your favorite buttercream on one side and a smear of raspberry jam on the other. Sandwich 'em together and c'est fini!

IMG_2894.JPG

A little dust of powdered sugar before serving gives them just the right elegant touch.

IMG_2896.JPG

I find the powdered sugar/butter version of buttercream (which is found all too often on cupcakes, in layer cakes, on cookies) to be too sweet for my taste, so I prefer to make a Swiss meringue buttercream which is lighter and less sweet. It's a little more work, but, once you've done it, the next time will go so smoothly. It's worth the effort for me.

For this project I made my orange honey buttercream as follows:

  • 3 large egg whites
  • 140 g / scant 3/4 cup cane sugar
  • 185 g / 1 stick plus 5 tablespoons unsalted butter, cubed and at room temperature
  • 84 g / 4 tablespoons honey
  • pinch sea salt
  • zest of one orange
  1. Have a stand mixer with whisk attachment at the ready.
  2. Place an inch or so of water in a medium saucepan and bring to a boil.
  3. Have a thermometer on hand (a digital probe type works well or a standard candy type thermometer).
  4. Meanwhile, place the egg whites and sugar in a medium bowl that sits nicely in the top of your saucepan and whisk them together. Reduce the heat to a simmer and whisk until the sugar is dissolved, the mixture starts to thicken and whiten and the temperature reaches 150-155º F.
  5. Transfer the meringue directly to the bowl of the stand mixer and whisk on high until cooled and thickened to nice shiny stiff peaks.
  6. Gradually add the room temperature butter, a few pieces at a time, until incorporated and the buttercream is smooth and creamy.
  7. Blend in the honey, sea salt and orange zest. I usually do that with a hand held spatula and make sure everything is blended nicely. 
  8. Pipe or spread as desired. This keeps well in the fridge for several days and can also be frozen. Once chilled or frozen the cream should be brought to room temperature and may need a bit of rewhipping to soften and smooth it out again for use.

And how did these taste, you might ask? Delicious. Melt in your mouth cookie with a delightful texture from the rice flour, along with the hint-of-orange-creamy and tang-of-raspberry-fruity. These keep very nicely in the fridge for several days and can also be frozen.

Feel free to create your own combos of buttercream and jam for something just a little different. I know I will and why not, eh?

IMG_2895.JPG

Sablé Breton au céréales avec fraises et crème

IMG_2886.JPG

Multigrain Breton shortbread, smooth luscious pastry cream and fresh strawberries. Yup. That's it.

Summer is upon us with a vengeance, with heat and humidity spending time with us for some days to come. Great for those who are spending the July 4th week at the beach or campground, but not ideal for the bakers of the world. There are some mornings when one gets up that simply announce themselves as baking days but, alas, not right now.

The good news is that strawberry season is in full swing here in west Michigan, and in fact is already starting to wane. What a delicious, albeit short, time of year, making it so important to take advantage of it while we can. 

freshstrawb.JPG

I had made some sablé Breton dough the other day, adding a mixture of seeds and grains to it for a change of pace. The base recipe is a favorite of mine, kind of a cross between a tart dough and a buttery dense, yet light and airy cake. Bake it on the thin side and it's a crispy texture, but on the thicker side it's kind of like a soft-ish, chewy cookie. You just have to taste it to know what I mean.

IMG_2871.JPG

It's a straight forward preparation and can be accomplished by hand or with a mixer. First you whisk 3 large egg yolks with 140 g sugar for several minutes to blanch and thicken it. Then blend in 150 g soft, unsalted butter until homogeneous. Sift in 200 g flour (I used half whole wheat pastry flour and half all purpose flour) along with one teaspoon baking powder, add in 1/2 teaspoon fine sea salt and 70 g almond flour and mix it all together. Finally blend in 80 g mixed grains, wrap the dough in plastic wrap and chill one hour. (See my previous post about Breton dough here and the full recipe here).

All mixed up

All mixed up

For the grains I decided on King Arthur Flour's Harvest Grain Blend, a combo of oat groats, wheat flakes, rye flakes, sunflower seeds, sesame seeds, flaxseed, poppy seeds and hulled millet. I've already used this mix in a simple wheat sandwich bread as well as in my favorite buttermilk scone recipe - wonderful toothsome chew and crunch going on. I'm definitely in.

IMG_2885.JPG

On our recent spring time trip to Paris I visited Mora, that wonderful all-things-pastry shop near the Etienne Marcel line 4 metro stop. There I purchased my first perforated tart form, a relatively new iteration that comes in all shapes and sizes for the avid and/or professional tart maker. The idea is to expose more of the dough to the heat of the oven for even better browning. I like that.

IMG_2879.JPG

For this Breton dough project I wanted a simple flat base, no edges, so I just had to roll and shape a piece of dough about 1/4 inch thick to fit my form. Easy. The quantity of dough needed is up to you, something you have to gauge based on size of the form or pan you are using and thickness desired. Remember - thicker is softer and chewier while thinner is crisper.

In spite of the heat I proceeded to bake the dough during the earlier morning hours while the temps were still on the coolish side. This one baked at 325ºF, convection, for about 20 minutes (look for golden brown and a lovely aroma). 

I had already been imagining the pastry cream/strawberry garnish, so my pastry cream was made and chillin' in the fridge. I just had to gently wash, pat dry, hull and slice my fresh local strawberries from the Fulton Farmer's Market.

IMG_2884.JPG

I sliced my Breton base into strips, piped on simple rounds of crème pâtissiére and topped with the fresh berries. The result was a delightful combo of creamy, fruity and that nutty, seedy chewiness of the Breton dough. Not bad at all. 

I can imagine this multigrain Breton option as a lovely biscuit on a cheese board. Hmmmm. . . . now there's an idea.

IMG_2891.JPG

In the meantime have a wonderful Fourth of July week and stay cool everyone!