Fun with afternoon tea

IMG_2769.JPG

Having returned from our France/Netherlands trip about a week and a half ago, we're slowly getting back into the swing of things here in Grand Rapids, MI. It took awhile for our colds to finally say adieu, and I must say it's a wonderful feeling to have some energy back in one's step.

Before we left on our voyage, I was already planning the goodies for another afternoon tea event at Heron Woods/Heron Manor , an independent/assisted living facility just down the street from our home.

Kim, the activities director, is a powerhouse of ideas for fun events and gatherings for the residents there. This time the tea was to follow an interesting presentation on how women dressed in Victorian times. Kim and her volunteer assistant, Dave, had the tables set just so with nosegays of pink roses, a beautiful assortment of teacups provided by one of the residents, as well as napkins folded to resemble roses.

Kim set out 26 (one for each letter of the alphabet) different decorated and hand written cards, one at each place, that included an interesting tidbit about or having something to do with tea. My favorite was a quote from Eleanor Roosevelt -"women are like tea bags - they don't know their strength until they get into hot water". Hmmmm.

IMG_2762.JPG

The menu consisted of two savories and three sweets. I had a pretty clear idea in my head of how I wanted to execute the prep. It's great to have plenty of time to plan/prep/bake/garnish for an event like this, and, fortunately, my days were wide open leading up to the actual day.

Cheddar pecan financier

Cheddar pecan financier

The financier process was très facile: make my usual financier base batter a couple of days ahead, fridge it until ready to use, then fold in grated sharp cheddar cheese and chopped toasted pecans just before baking. I used my favorite square savarin flexi-molds and, after baking, filled the top well with a bit of grated cheese, a dollop of apricot jam and a shard of toasted pecan to give it that je ne sais quoi. Yum.

Cucumber crème fraiche éclairs

Cucumber crème fraiche éclairs

The éclairs were a blast to make. I used my favorite pâte à choux base, added in a bit of salt and pepper and a skosh of ground mustard, piped 'em out, topped 'em with a grated aged cheddar-like Dutch cheese we found at Kingma's market here in GR and baked these little cuties. So satisfying. And the beauty is they can be baked several days ahead, frozen, then crisped back up for about 10 minutes in a 325ºF oven before cooling and filling. How great is that!

Below you can see the assembly process. It's all about being organized. For these I made my own crème fraiche (1 cup heavy cream plus 2 tablespoons buttermilk, let sit at room temp for 8-24 hours until thickened, stir and refrigerate), added a bit of salt and pepper plus lemon zest/juice and finely chopped chives. It didn't thicken as much as I expected, BUT I whipped it up and it was fantastic. Pipe-able and easy to fill les petits choux.

IMG_2745.JPG

I sandwiched them with the crème fraiche, a cucumber slice and julienned carrots and topped 'em off with a spurt of crème and a sliver of chive.

IMG_2746.JPG
 
IMG_2747.JPG

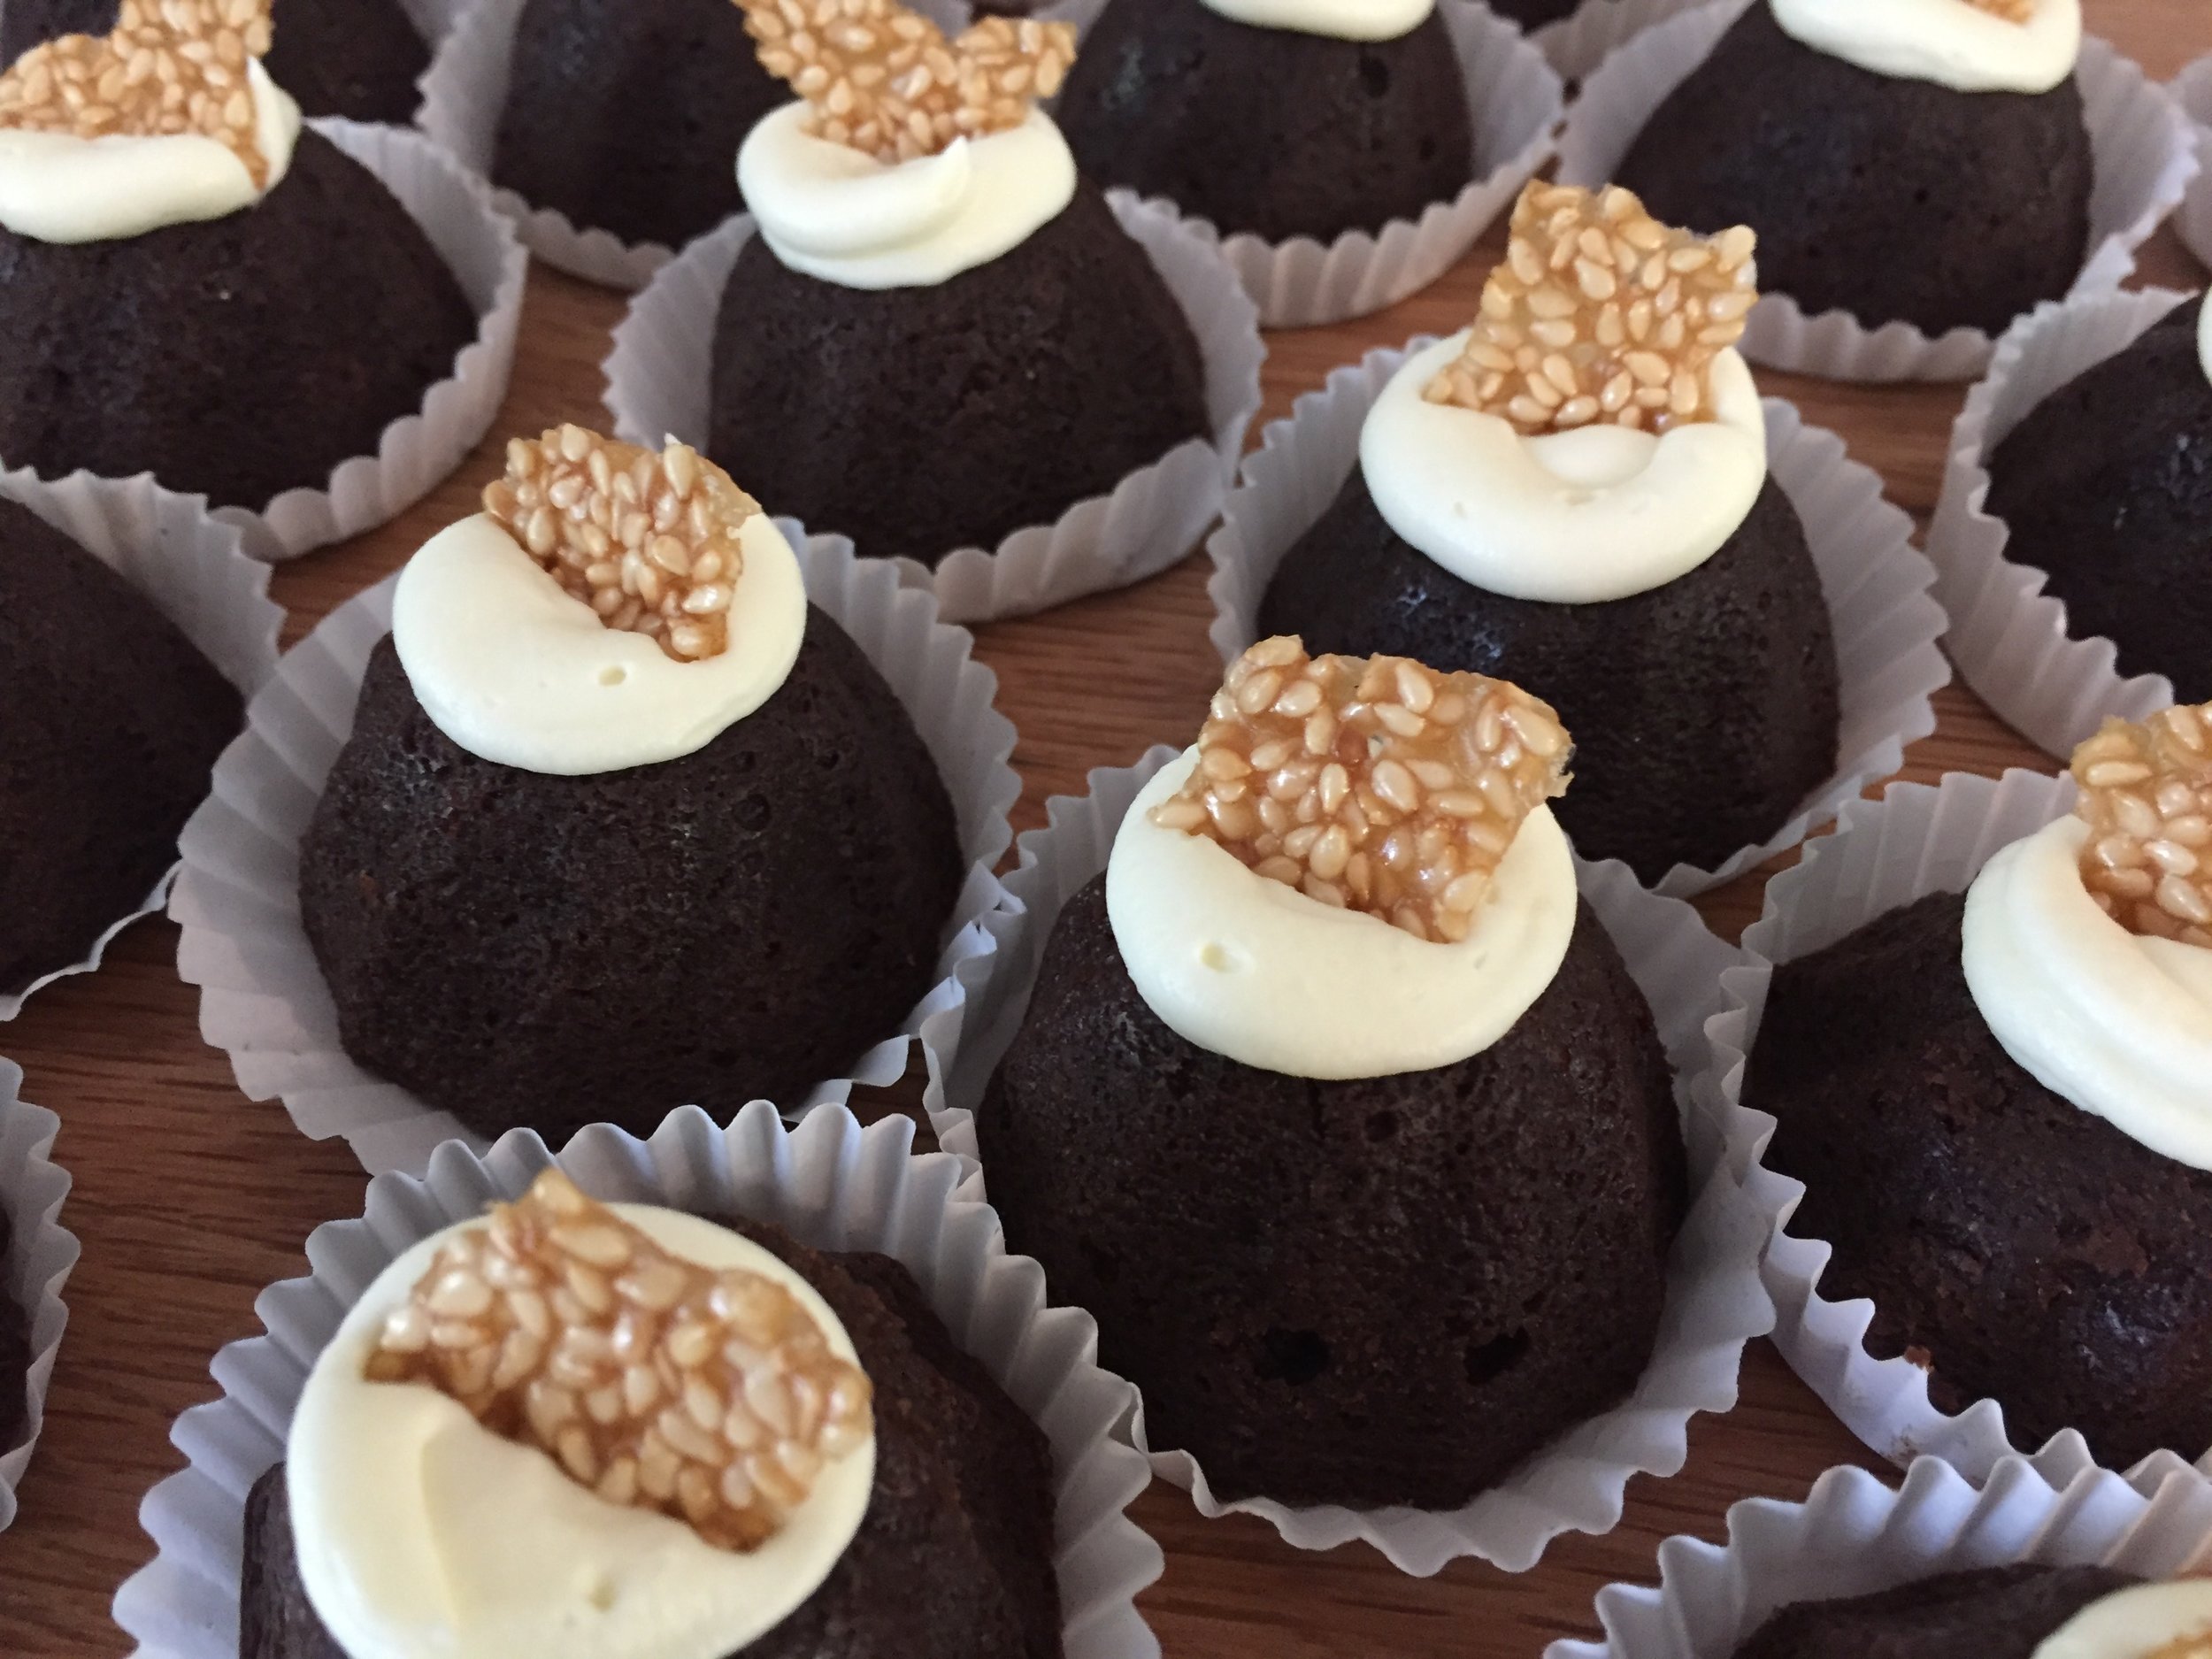
Now for the sweets. First up - a new chocolate cake recipe that I brought home from Paris. Our friend Val gave it to me and attributes it to Hélène Darroze, the Michelin starred French chef with restaurants in Paris, London and Moscow. It's a definite keeper.

Here it is in a nutshell: melt 250 g chopped bittersweet chocolate (I like 62-64%) with 250 g unsalted butter; whisk in 250 g cane sugar and 70 g sifted all purpose flour; add 4 large eggs beaten en omelette. The recipe calls for a buttered and floured 9" cake pan, but, as is my wont, I love to bake cakes in petite flexi-molds. And, wouldn't you know it? I purchased a couple of mini-kouglof Silikomart flexis at Mora in Paris and was so ready to give them a spin. Perfect is the word. These baked about 18-20 minutes at 325ºF convection - just until looking dry and a bit cracked on the top. So fudge-y and delicious.

And guess what?! They can be baked ahead and frozen. Just pull them the night before you need them and let them thaw in the fridge over night. Now you're ready to garnish.

IMG_2753.JPG

I posted recently about another petite chocolate cake with whipped white chocolate ganache and sesame crunch - I added the same garnish to these babies. Go with a good thing I always say.

IMG_2757.JPG

Next up - strawberry mascarpone tartelette - pâte sucrée crust, whipped/lime zested mascarpone cream topped with fresh strawberries tossed in a bit of raspberry jam and, for the piéce de resistance, a sprinkling of pomegranate seeds for crunch and a bit of tang.

And here we go again - the shells can be blind baked and frozen several days ahead. Thaw overnight in the fridge and fill when ready. Love that planning and prepping!

IMG_2750.JPG
 
IMG_2752.JPG
 
IMG_2765.JPG

And last but not least - orange vanilla ricotta custards on an orange cornmeal shortbread base.

IMG_2758.JPG

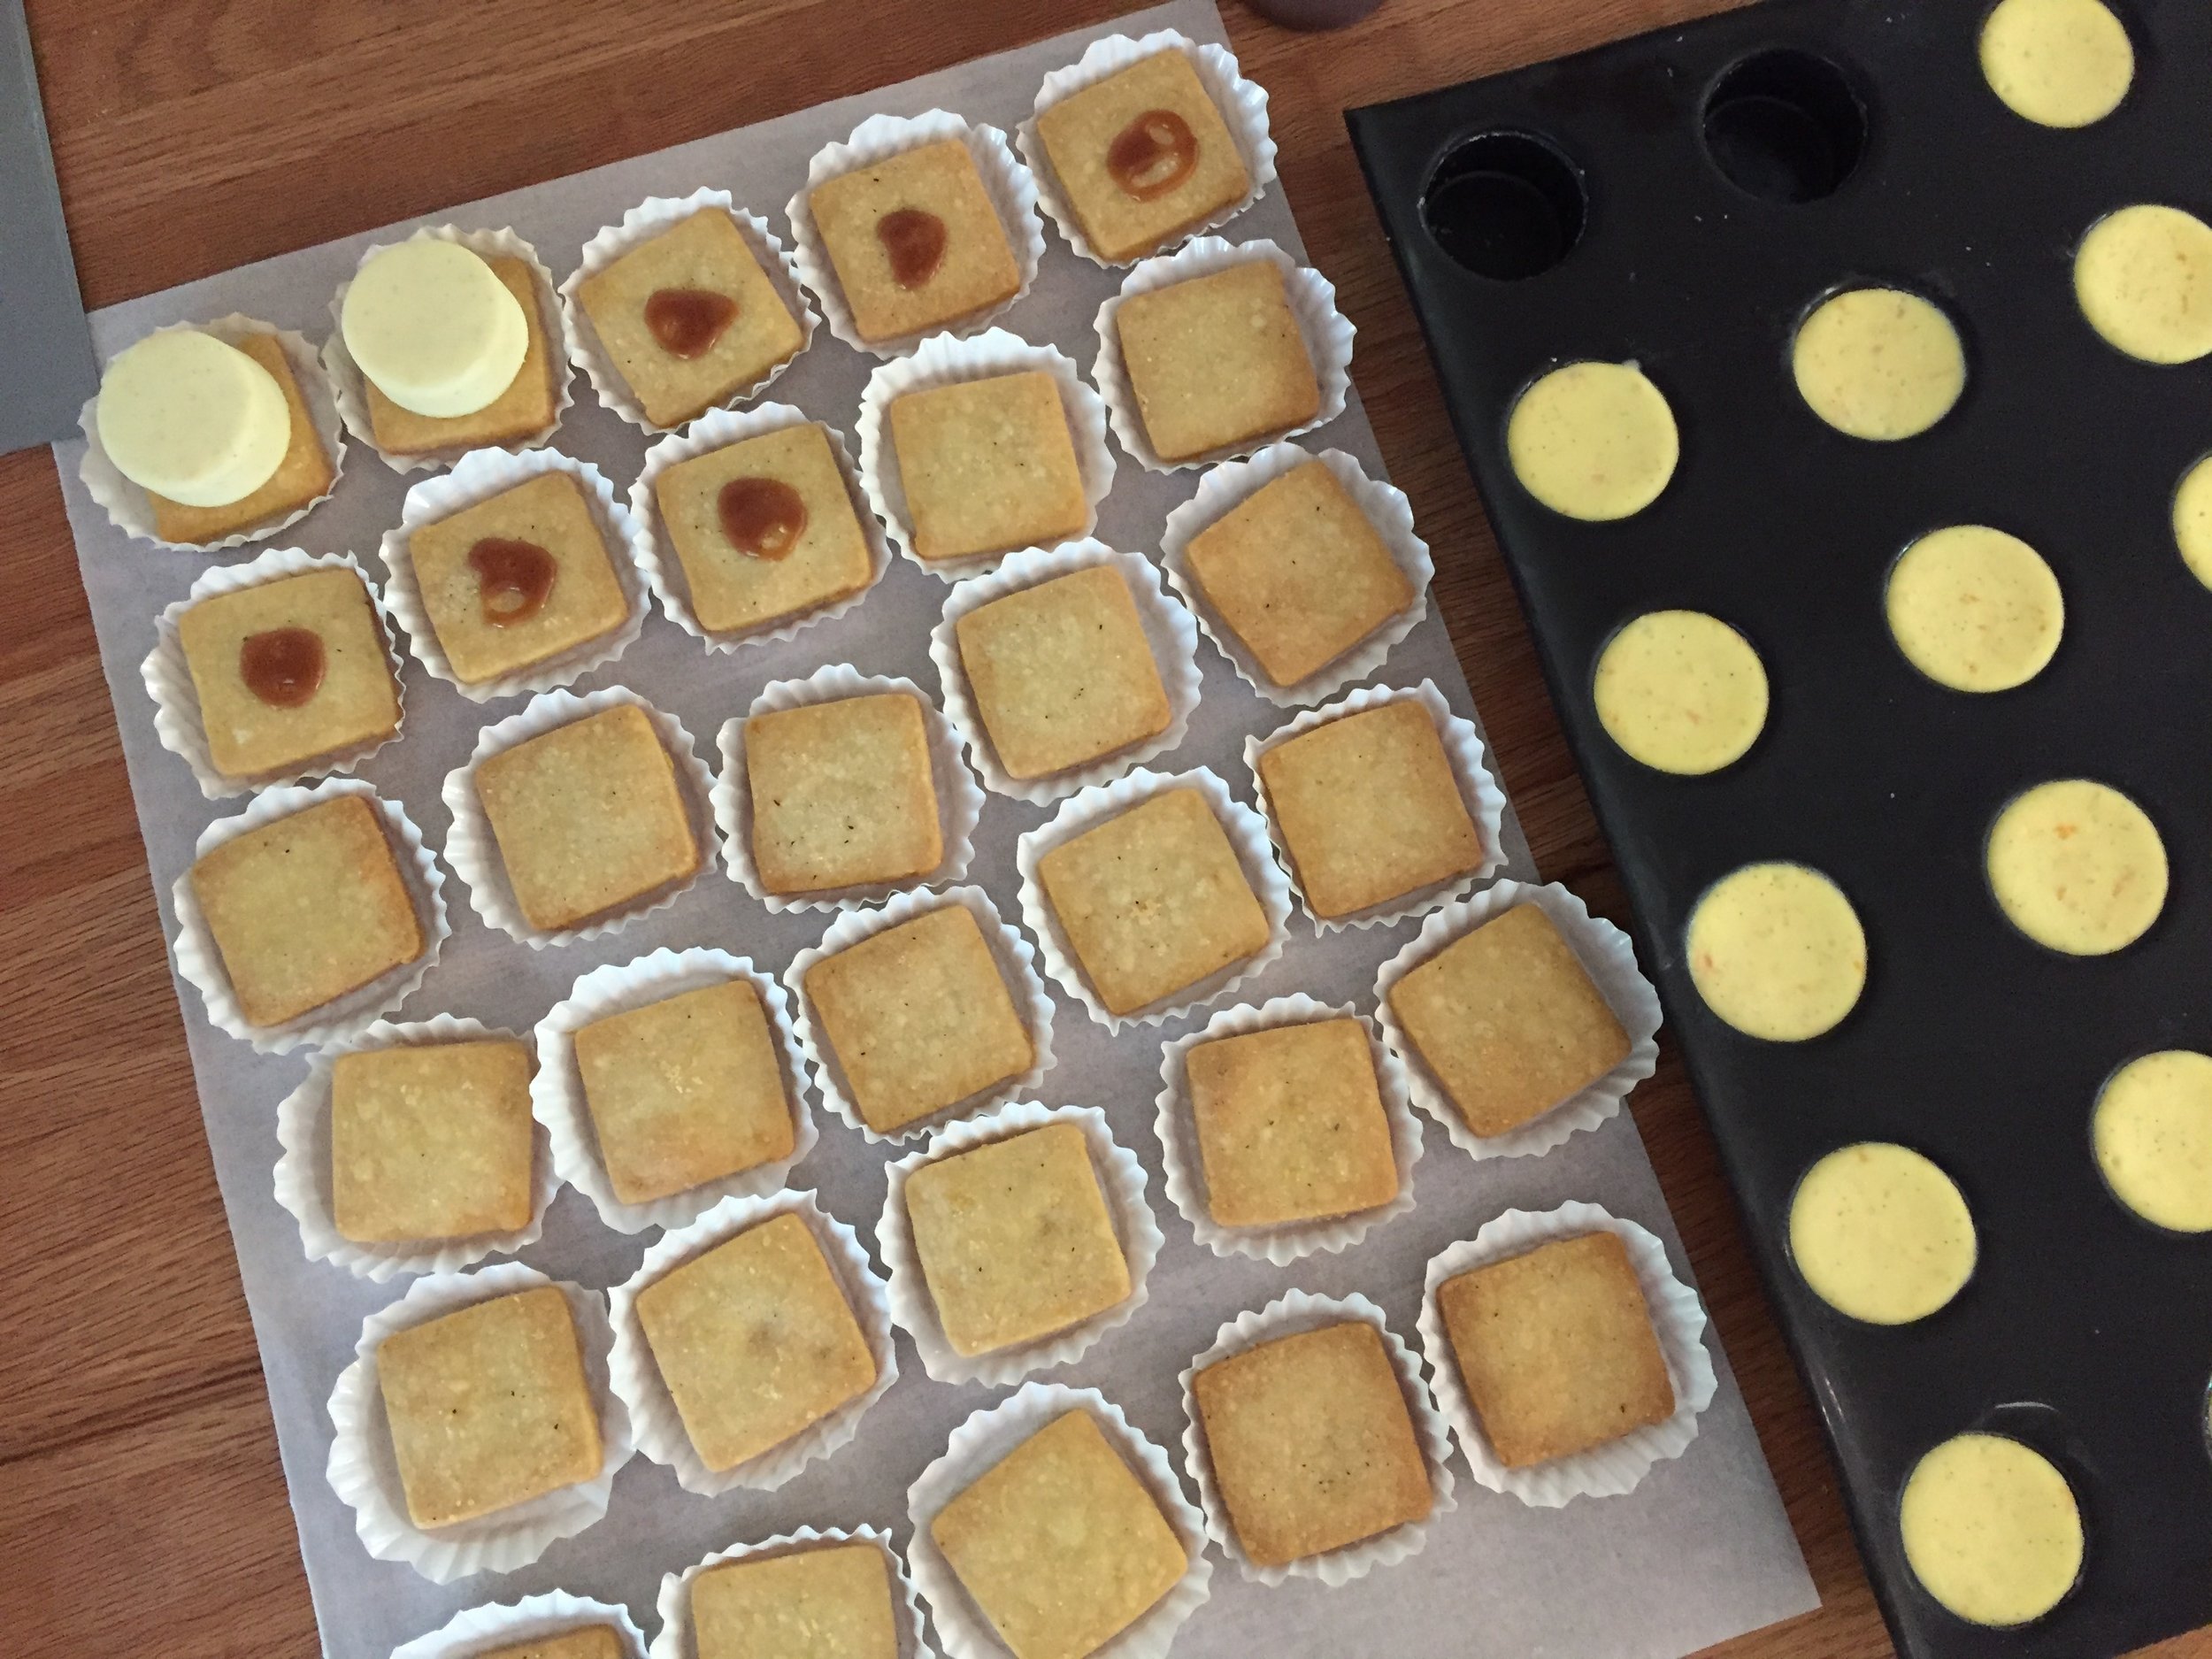
The shortbread can be baked several days ahead and kept in a sealed container in the fridge or freezer. The custards can be baked in your favorite flexi-mold shape, cooled and then frozen until you're ready to pop them out of the molds and settle them onto the shortbread base. Add a dollop of caramel or jam on the cookie to hold the custard in place.

If you do the assembly just a couple of hours ahead of serving, they'll hold and thaw very nicely in the fridge and are the perfect creamy texture when it comes time to eat. Yeah, works for me!

I topped them with a small dollop of orange marmalade for just a bit of color.

IMG_2761.JPG

Everyone enjoyed the menu as well as the time to sit and chat with friends on a beautiful summer-like afternoon. 

If you're interested in goodies for your own afternoon tea, don't hesitate to hop on over to the contact page and send me a note. We can put our heads together to create just the right assortment for you!

Since this post is more about planning/prepping/assembling and not specifically about individual recipes, in addition to some links I’ve included in the text above, you can find most recipes on my recipe page.

Now go out there, have a delicious Memorial Day weekend and offer up a hearty welcome to summer!!

IMG_2763.JPG

A few classic French treats

IMG_2733.JPG

Yes, you guessed it - millefeuille! Caramelized puff pastry layered with vanilla crème pâtissiére, Americans refer to this particular delight as Napoleon. I did a brief internet search and couldn't find a quick answer as to WHY we refer to this as Napoleon, cuz the French don't. Oh well, it's good no matter what you call it!

Having just returned from a wonderful trip to France and the Netherlands, I wanted to share with you some of the goodies in which I indulged during our stay. I tried to make a point of tasting some of the classic French pastries to be had, whether in Paris, Lille or pretty much any large city or small village in the country. If there's a pâtisserie or salon de thè nearby, you should be good to go.

Although Steve and I were in Paris for almost two weeks, my most memorable classics were enjoyed in Lille, right near the Belgian border. The millefeuille you see above was at the Meert salon de thè, just down the street from niece Christina and her family's apartment in the heart of vieux-Lille.

I joined Christina and her children, Kiera and Liam, for a memorable mid-morning chocolat chaud et millefeuille. Christina had the millefeuille as well, along with the signature "M" inscribed cappucino, while Kiera went for her favorite religuese caramel and Liam devoured L'impérial, a layered chocolate hazelnut number topped with a gilded hazelnut (hey - it's France!).

IMG_2730.JPG
IMG_2732.JPG
IMG_2731.JPG

Later that same day Steve and I joined Christina and her husband Glen for dinner at a lovely restaurant on the ramparts of vieux-Lille. Delicious food, good company and lovely surroundings sums it up.

For dessert Glen had his "usual" dining out treat, the café gourmand. Basically coffee with a medley of small desserts, the selection here was quite the assortment!

IMG_2737.JPG

Christina and I went with the strawberry-pistachio tart served with a vin jaune sorbet - delicious! The crust was so crisp, the pistachio filling just right and the cool sorbet the perfect complement to the fresh berries.

IMG_2739.JPG

You might be wondering what the Steve-meister had? He went with dessert wine which is often his answer to restaurant desserts. From a guy who loves pastries? Go figure! He claims he won't eat any dessert that his wife hasn't made. How sweet is that!

How about we end on a more savory note, OK?. In northern France one of the specialties is the planche, a board of charcuterie, cheeses, olives, etc served with bread. For a couple of our lunches at G&C's apartment, they provided us with that particular repast. Nothing like fresh baguette, a medley of cheeses, some saucisson, fresh veggies and hummus, nuts - and let's not forget the wine. Yum!

IMG_2734.JPG
IMG_2736.JPG
IMG_2735.JPG

Thanks for everything Glen and Christina! And Kiera and Liam too!!

Baking bread in Paris

IMG_2677.JPG

Baking in Paris is always a treat, and this trip included a four day bread class for me at Le Cordon Bleu's new facility on Quai André Citroën. When I did the pastry diploma program in 2006, the school was located on rue Léon Delhomme not far from the line 12 Vaugirard metro stop. 

blogger-image--1618611748.jpg

A couple of years ago LCB moved to their new location, still in the 15th arr., and it's, in a word, impressive. Back in the fall of 2016 during our last trip to Paris, I visited the school and had a short tour of the place. This time I got a much closer look, at least of the kitchen we were using.

Boulangerie kitchen

Boulangerie kitchen

Our instructor for this four day extravaganza of bread production was Vincent Somoza, a knowledgeable and amiable teacher. Each day we arrived, the big white board on the wall contained all of the necessary info about the breads that were to be worked on that day like kneading times (pétrissage), first rise (pointage), dough weights for division, second rise (apprêt) and so on. You get the idea. 

IMG_2666.JPG

Our group of 14 was international, with bread enthusiasts, bakers and chefs hailing from Russia, Saudi Arabia, Kuwait, Lebanon, Japan, Taiwan, Paris and, last but not least, the USA (I being the sole American aside from our traductrice Grace, second from left below).

IMG_2708.JPG

There is simply too much information to try and share here, so I'll simply give a short pictorial of some of les pains we produced. Chef Vincent stashed the extra loaves in the freezer each day so they could be pulled out for the above grand finale photo on day 4.

To top it off, we could take home everything we made every day (usually at least two of everything)! Wow. Many of us chose to leave some behind for the staff, since it was more than most could handle, either to eat or to store for the short term.

Kougelhof

Kougelhof

For day 1, three of our bread doughs had been made for us the day before, one for kougelhof, the classic Alsatian brioche-like treat, and two for our country style bread/pain de campagne sur pâte fermentée and whole wheat bread/pain complet.

It's typical to make brioche type dough the day before, wrap it and give it a rest in the fridge overnight before shaping it the next morning. Since it's a buttery/eggy dough, the rest allows the butter to firm up and makes working with the dough easier. Our job was to divide our allotted 600 g of kougelhof dough into two 300 g pieces, ball them up, push a hole through the center and place them in well-buttered molds with almonds placed in the bottom. After a 1.5 hour rise and an hour bake, they were finished!

IMG_2667.JPG

Once cooled and un-molded, these beauties were given a dunk in clarified butter followed by simple syrup. To finish, a dusting of powdered sugar et voilà.

IMG_2669.JPG

The country style and whole wheat breads were made with fermented dough/pâte fermentée which had been made ahead for the class. This is a starter made with flour, water, salt and commercial type yeast, meant to enhance the flavor of the bread. (NOTE: French boulangers typically use fresh cake yeast, as we did for this class). 

Boulangeries usually have leftover dough scraps and will simply save those for the next day's incorporation into their final dough. In addition, the final dough is given a long, cool rise in the fridge overnight which allows for even more flavor development in the end.

For our fourth bread that day, we all mixed a straight (no pre-ferment, no long cool rise) baguette dough by hand and proceeded to knead it with the aggressive slap-and-fold technique. Lots of noise going on in that session! Once kneaded this dough received a much deserved 20 minute rest before we divided it in two and shaped our baguettes for a one hour proof and final 20 minute bake.

Day one breads: country style, whole wheat, kougelhof, baguette

Day one breads: country style, whole wheat, kougelhof, baguette

A couple of other preparations were begun for breads to be made over the next several days. Chef Vincent began the multi-day process of making a liquid levain (natural starter) that would go into several different breads, as well as a poolish (commercial yeast based starter) for baguette tradition destined for baking on day 3. He also started another poolish which involved soaking seeds and grains for pain nutritionnel aux graines for day 2. Lots going on!

The tone was set: dough preparation for each or subsequent days, dividing and shaping various doughs, feeding of the levain and, of course, proofing and baking lots of bread. We all worked on our boule et batârd shaping techniques and the different ways to score our loaves (so many designs, so little time!)

Day 2 breads: Rye, grain, milk bread baguette and more!

Day 2 breads: Rye, grain, milk bread baguette and more!

At the end of each day we also had a tasting of our breads, accompanied by fresh French beurre et confiture. As the French say miam, miam!

Day 2 tasting

Day 2 tasting

As were proceeded through each day, my primary disappointment was the fact that we weren't given the opportunity to actually scale or small batch mixer knead any of the dough. No "normal size" stand mixers that might be shared among two or three people were available. Being able to perform the entire process, assessing the dough more directly at each stage, would certainly have given us a greater learning experience.  

Even so, the kitchen was perfectly outfitted with state of the art steam ovens, multi-shelved fridge/freezers, proofing cabinets, lots of speed racks for product placement before and after baking, two large mixers, one a flat bottom meant specifically for bread dough and one a standard large rounded bowl, multi-function planetary mixer. Everything a boulangerie might need.

day 3 cheese bread

day 3 cheese bread

Day 3 brought us cheese bread, brioche Nanterre, baguette tradition and walnut-raisin milk bread, in addition to a round pain de mie style brioche log that was to become bostock (don't worry, I'll explain).

brioche for bostock

brioche for bostock

day 3 breads: walnut raisin, cheese, baguette tradition

day 3 breads: walnut raisin, cheese, baguette tradition

Another day 3 project was to make the détrempe for our croissant et pain au chocolat for the final day. Chef kneaded a LARGE batch in the mixer, after which it was divided into portions, wrapped and refrigerated for the next day.

détrempe, like stepping stones, for day 4

détrempe, like stepping stones, for day 4

On our final day we were all given our portion of détrempe along with le beurre for the beurrage. We proceeded through the steps, giving our dough 2 double turns, a rest in the freezer, then the final rolling and cutting of the triangles and rectangles. The dough felt wonderful, was easy to work with and the laminations superb. After a 2.5 hour proof, into the oven they went.

croissant

croissant

pain au chocolat

pain au chocolat

We assembled our bostock by slicing our logs into ~1.5" rounds, dunking them in orange syrup then topping with almond cream, dipping in sliced almonds and baking until the almond cream became nicely browned. Very much like my favorite croissant aux amandes but with brioche dough instead. A great way to use up leftover brioche!

bostock out of the oven

bostock out of the oven

On our last day we also made an interesting striped bread using a "milk" dough similar to previous days. Squid ink (messy!!) was mixed into half of the dough, then the light and dark doughs twisted together to give a zebra stripe look.

pain de mie zébré

pain de mie zébré

The zebra bread is usually used as a base for some type of seafood sandwich or appetizer, since the squid ink gives a hint of a taste of the sea. We were told it wasn't really meant for flavor but for creating the stripe effect. Hmmm - what other colors might one create? I'll have to think about that one.

Day 4 also brought pain de campagne sur levain naturel, a rustic bread made with a stiff levain that the prep team had started even before our first class. The dough was kneaded, and we divided and shaped the dough on day 3 so it could develop in the fridge overnight for baking on day 4. What a process! But delicious and well worth it. It's all about planning after all.

pain de campagne sur levain naturel

pain de campagne sur levain naturel

day 4: bostock, pain de mie zébré, croissant, pain au chocolat, pain de campagne

day 4: bostock, pain de mie zébré, croissant, pain au chocolat, pain de campagne

My favorite breads from the class were the rustic pain de campagne, the multigrain bread and the cheese bread - chunks of gruyère, oh my! Of course, good croissants are a given, and I continue to find it fascinating that everyone, no matter their country, is infatuated with that particular viennoiserie! The oohs and aahs that abound as these gems bake and are then devoured span all borders.

Next time around, if we're so lucky to return to Paris some day, I'll search out a class that offers more comprehensive hands-on experience. Particularly with bread dough, that's truly important. It was a great review for me in regards to the steps/timing involved in bread baking, using natural starters and, bien sür, the many delicious things one can create from flour, water, salt and yeast. Oh yeah!

All in all, a grand time, wonderful textures and aromas, lots of cool stuff, many interesting people from all over, plus I was able to practice my French! Not bad at all.