Late summer update
/
August is almost over! Baking continues now and again, tucked in amongst hosting out-of-state family visitors, hot/humid weather, household and outdoor projects and the occasional country drive to feel the wind in our hair. Through it all I always circle back to the kitchen and thought I’d share a few of the treats I’ve made of late.
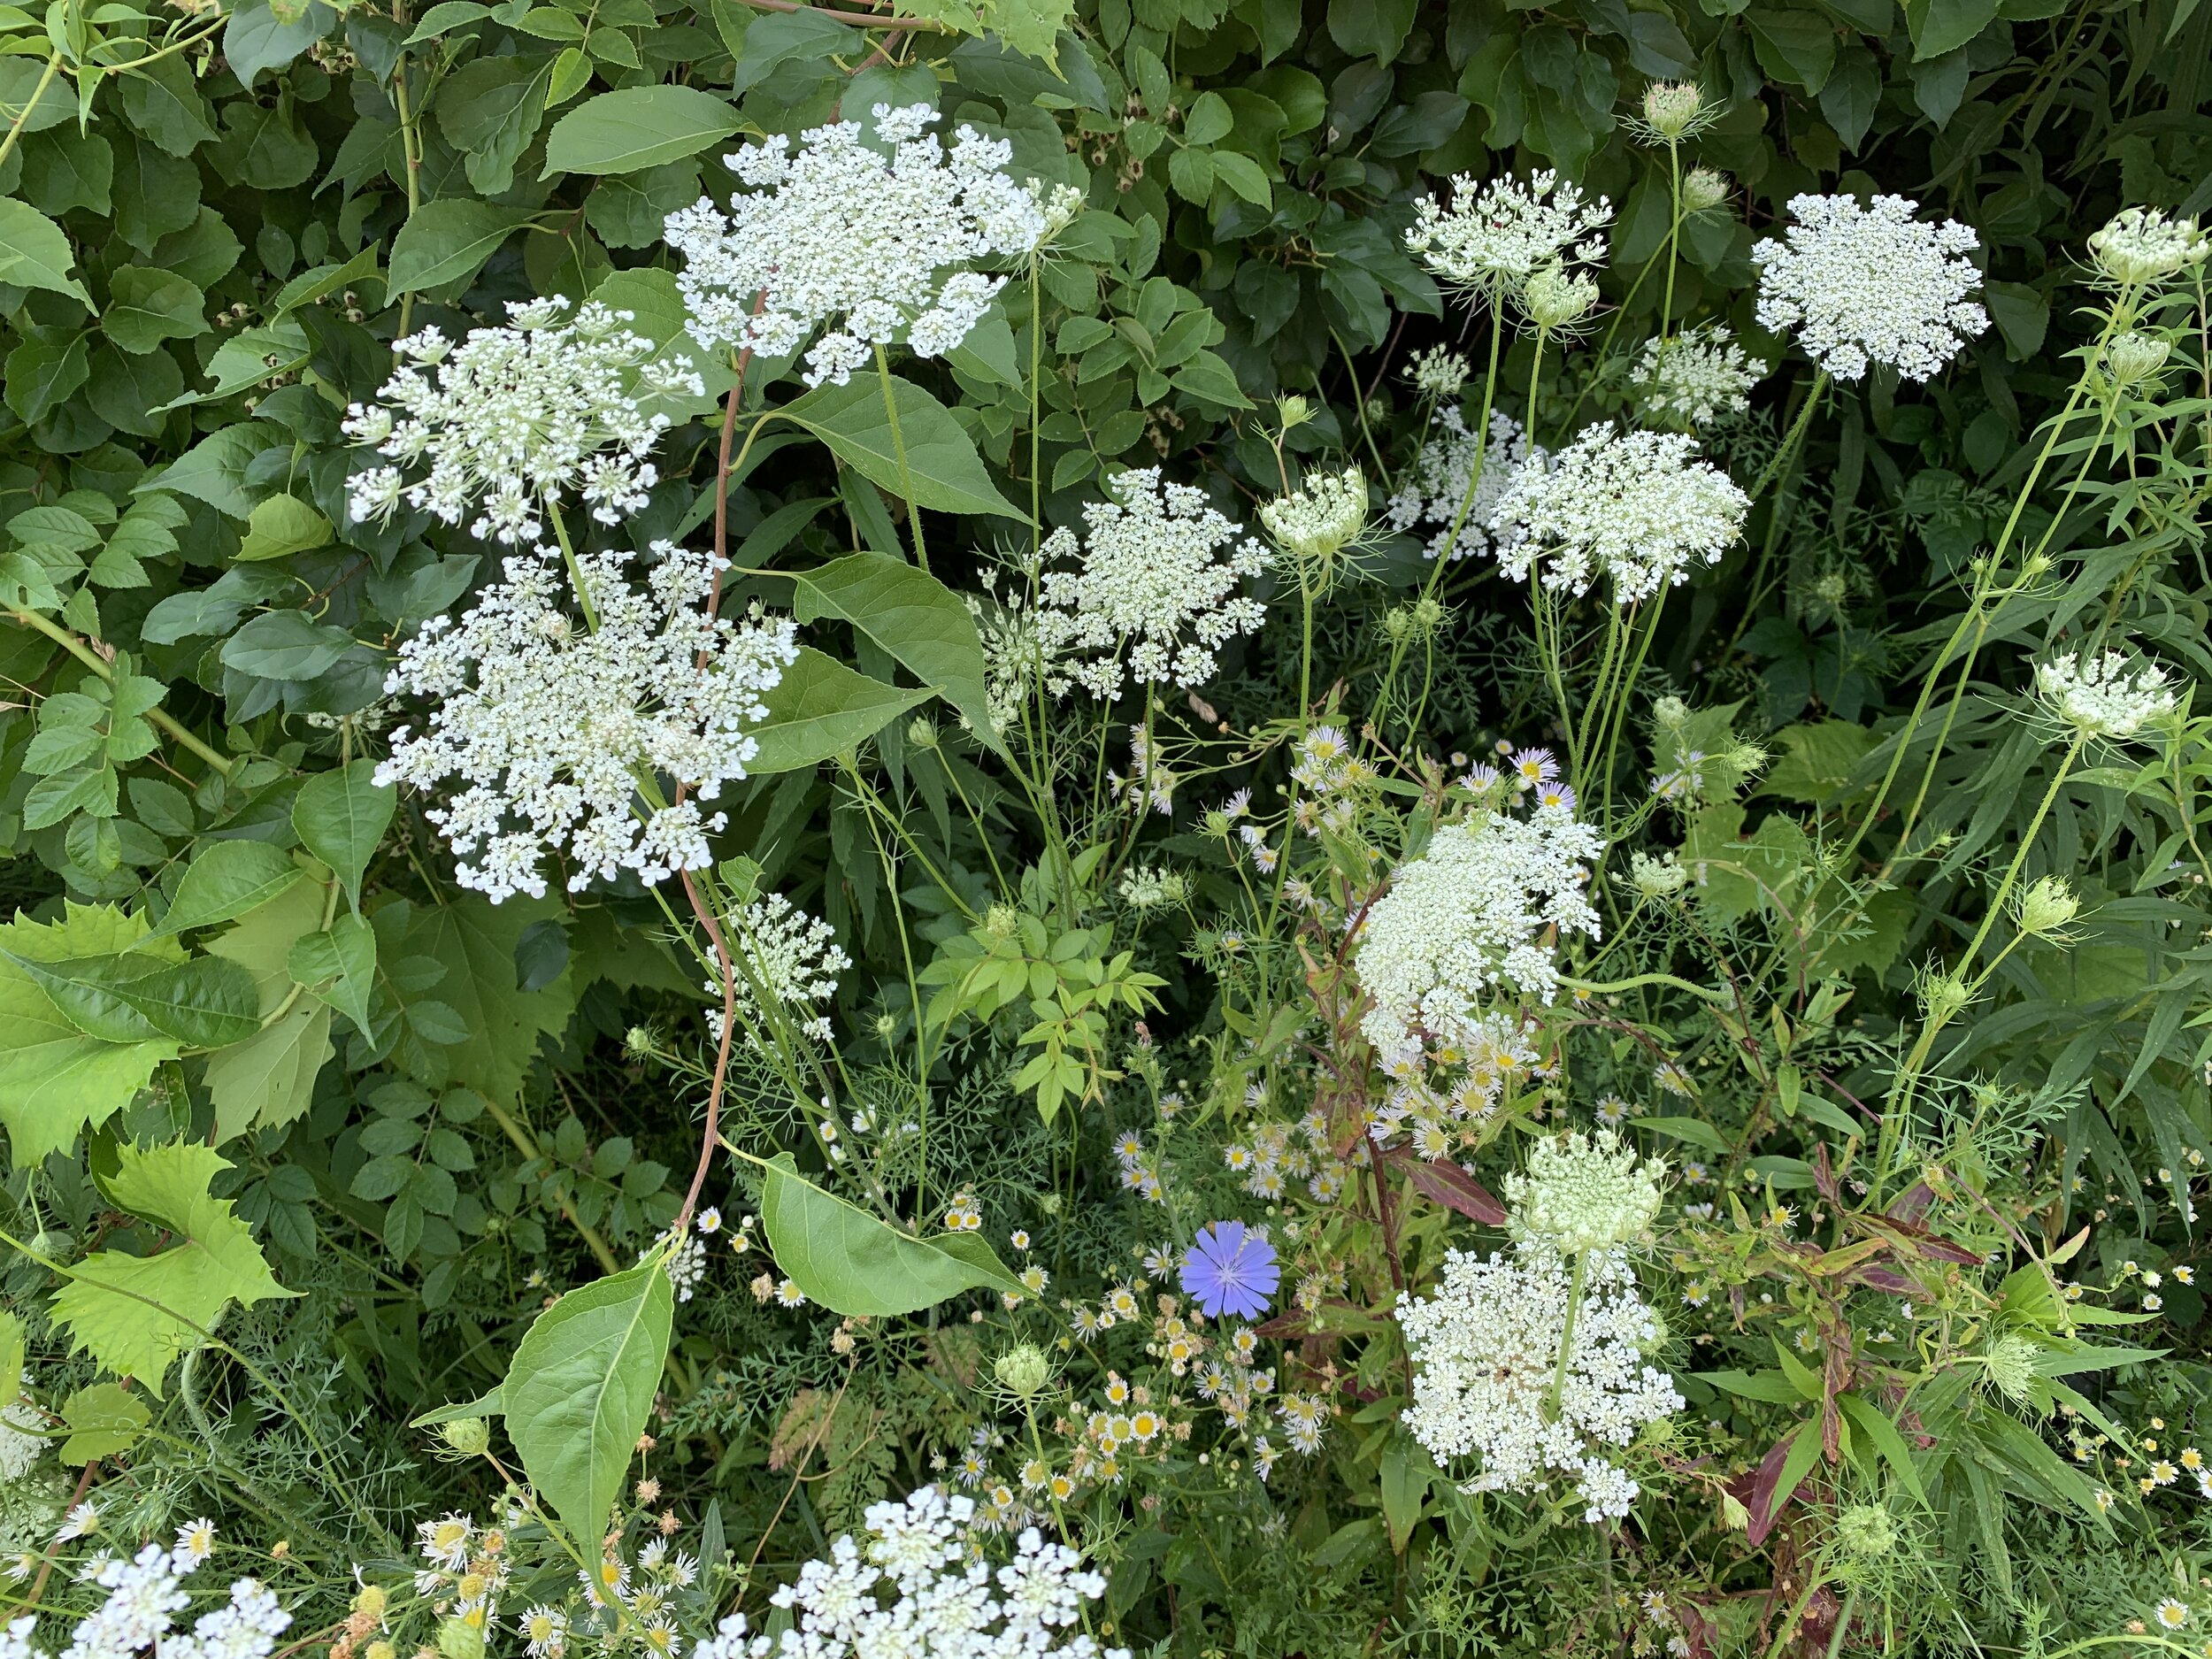
This time of year the likes of peaches, blueberries, tart cherries, tomatoes and sweet corn enter into my baking projects.
Thinking of tarts? Grab your favorite pâte brisée, create your filling and go for it!
For a savory treat, blind bake the crust, let cool, fill with a whipped goat cheese/ricotta filling and top with roasted tomatoes and fresh thyme. I think you’ll like it.
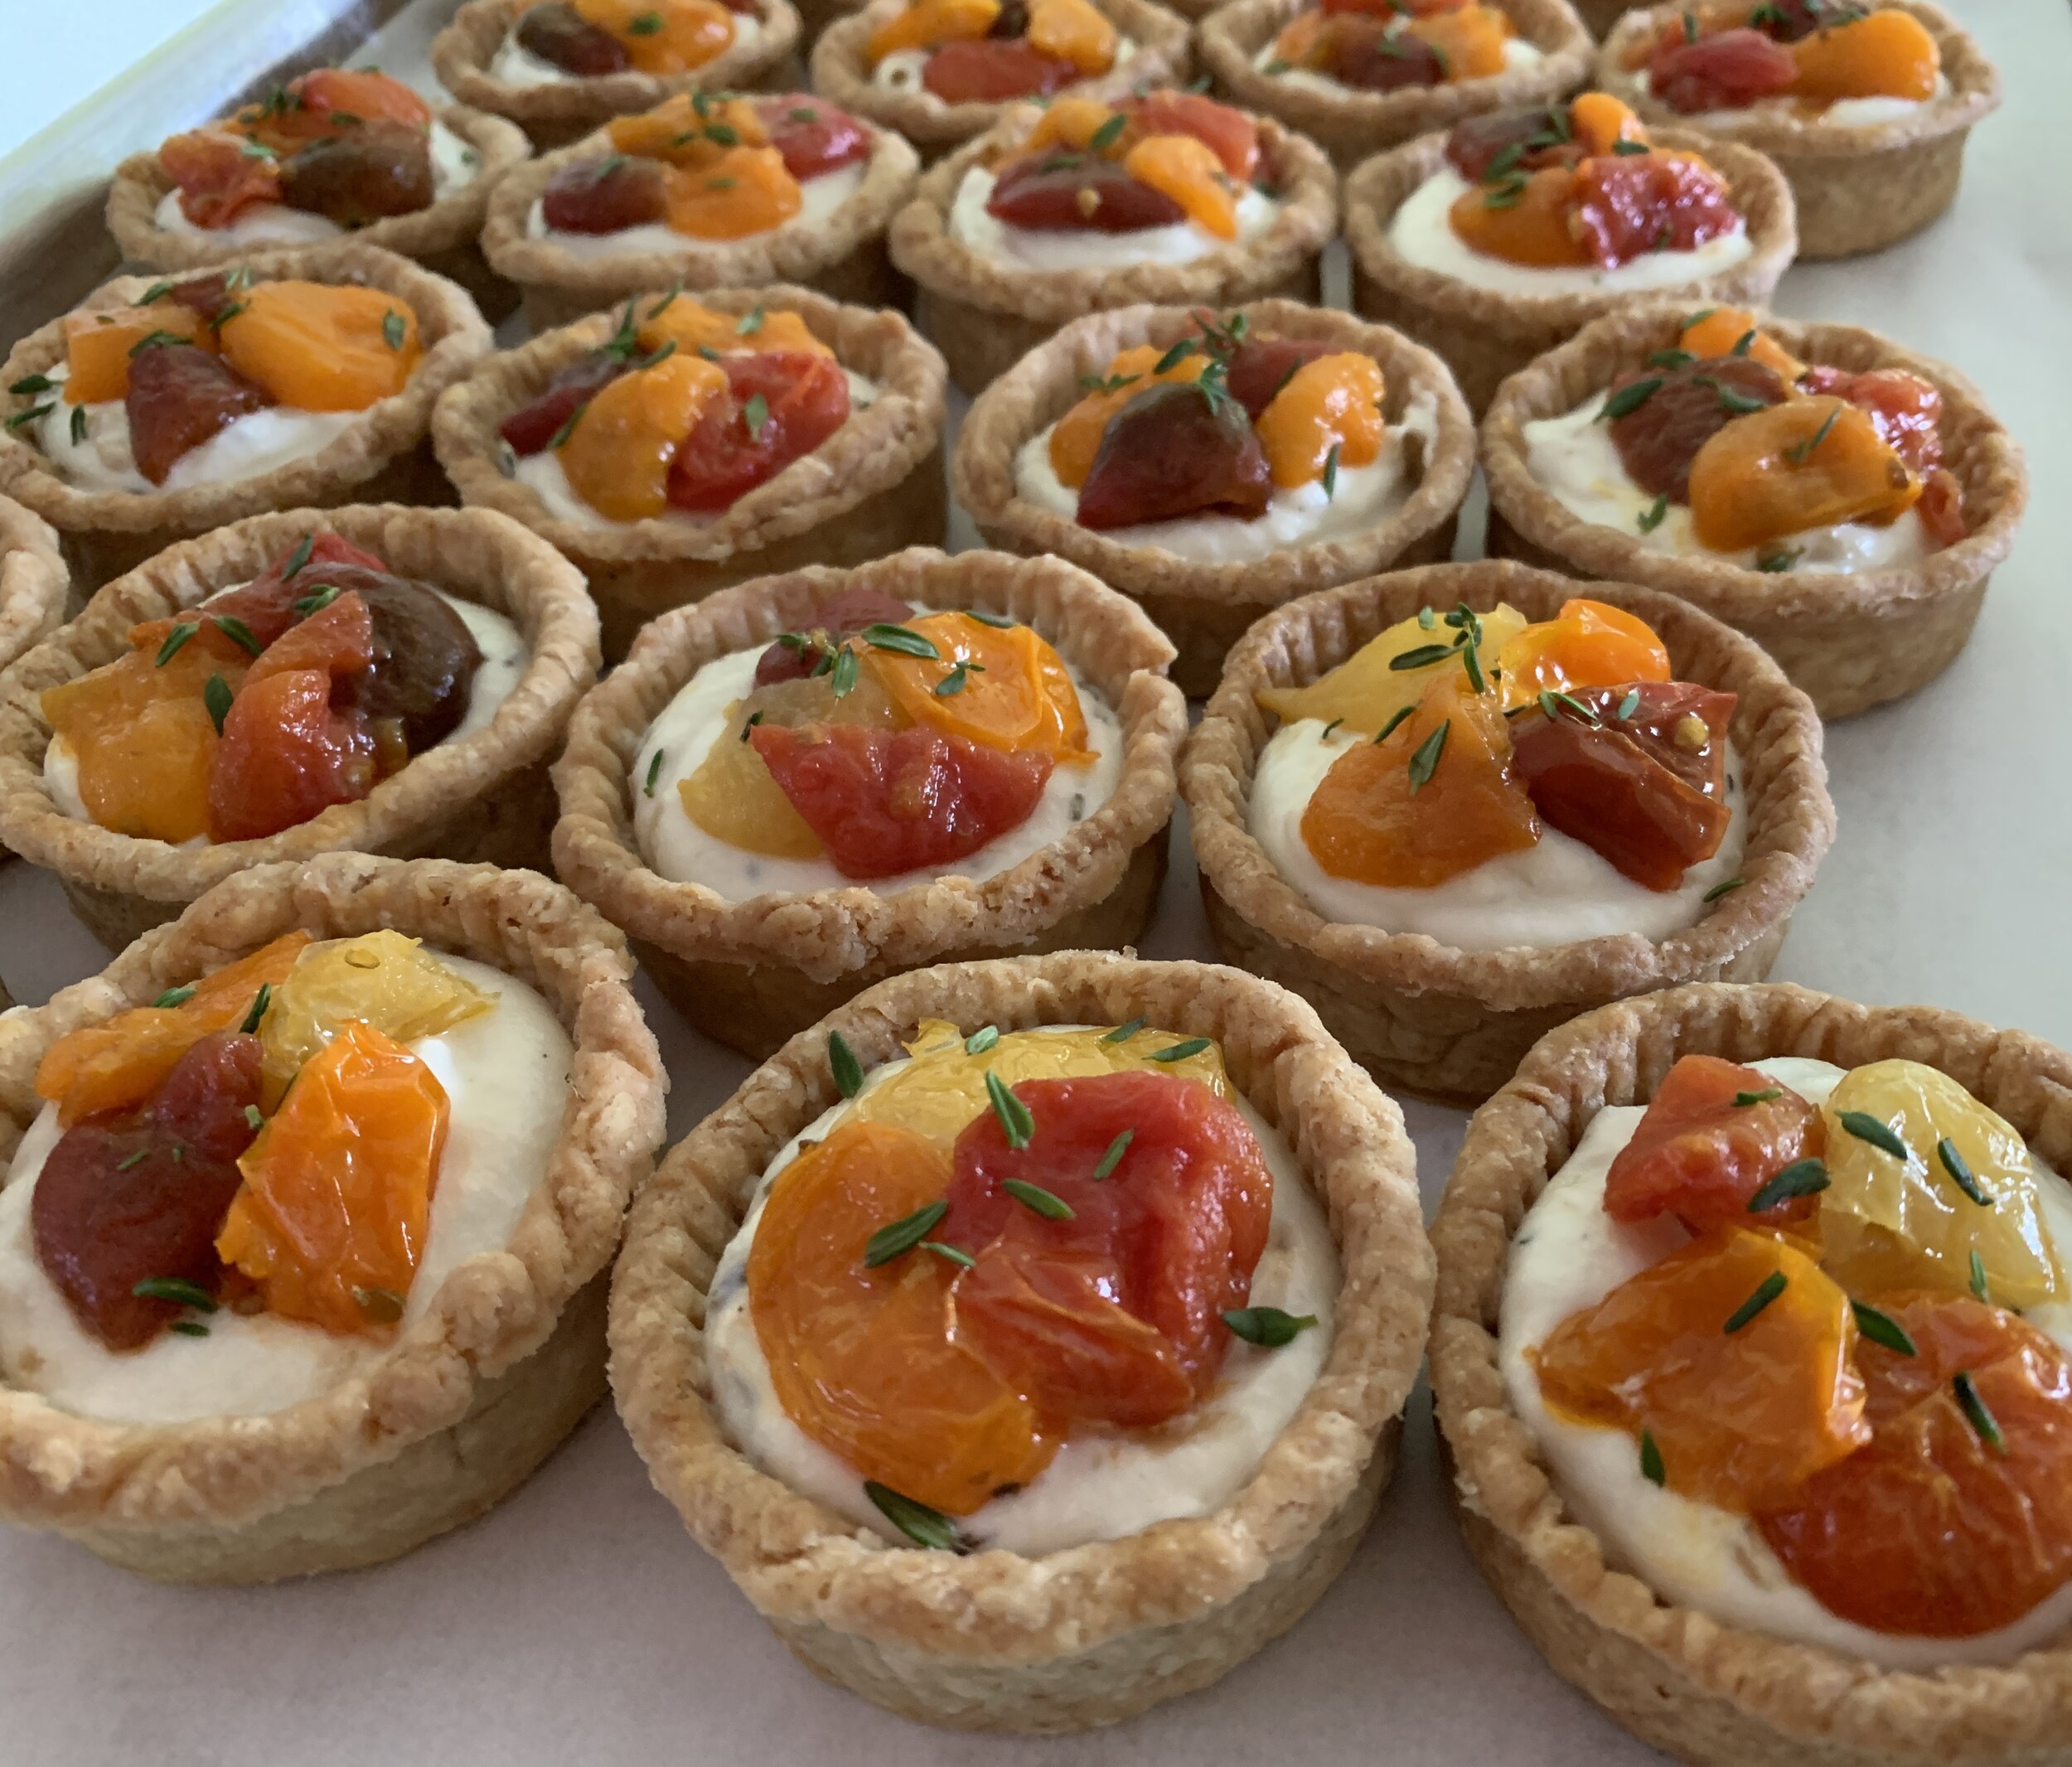
Roasted tomato goat cheese tartelettes
Blue, blue, blueberries!! These are individual versions of the double blueberry tart I wrote about here. I tweaked my pâte brisée by replacing some of the all purpose flour with whole wheat pastry/spelt/rye flours which resulted in a delectable crust that seemed so right with the blueberries. Love it.

Fresh blueberry tartelettes
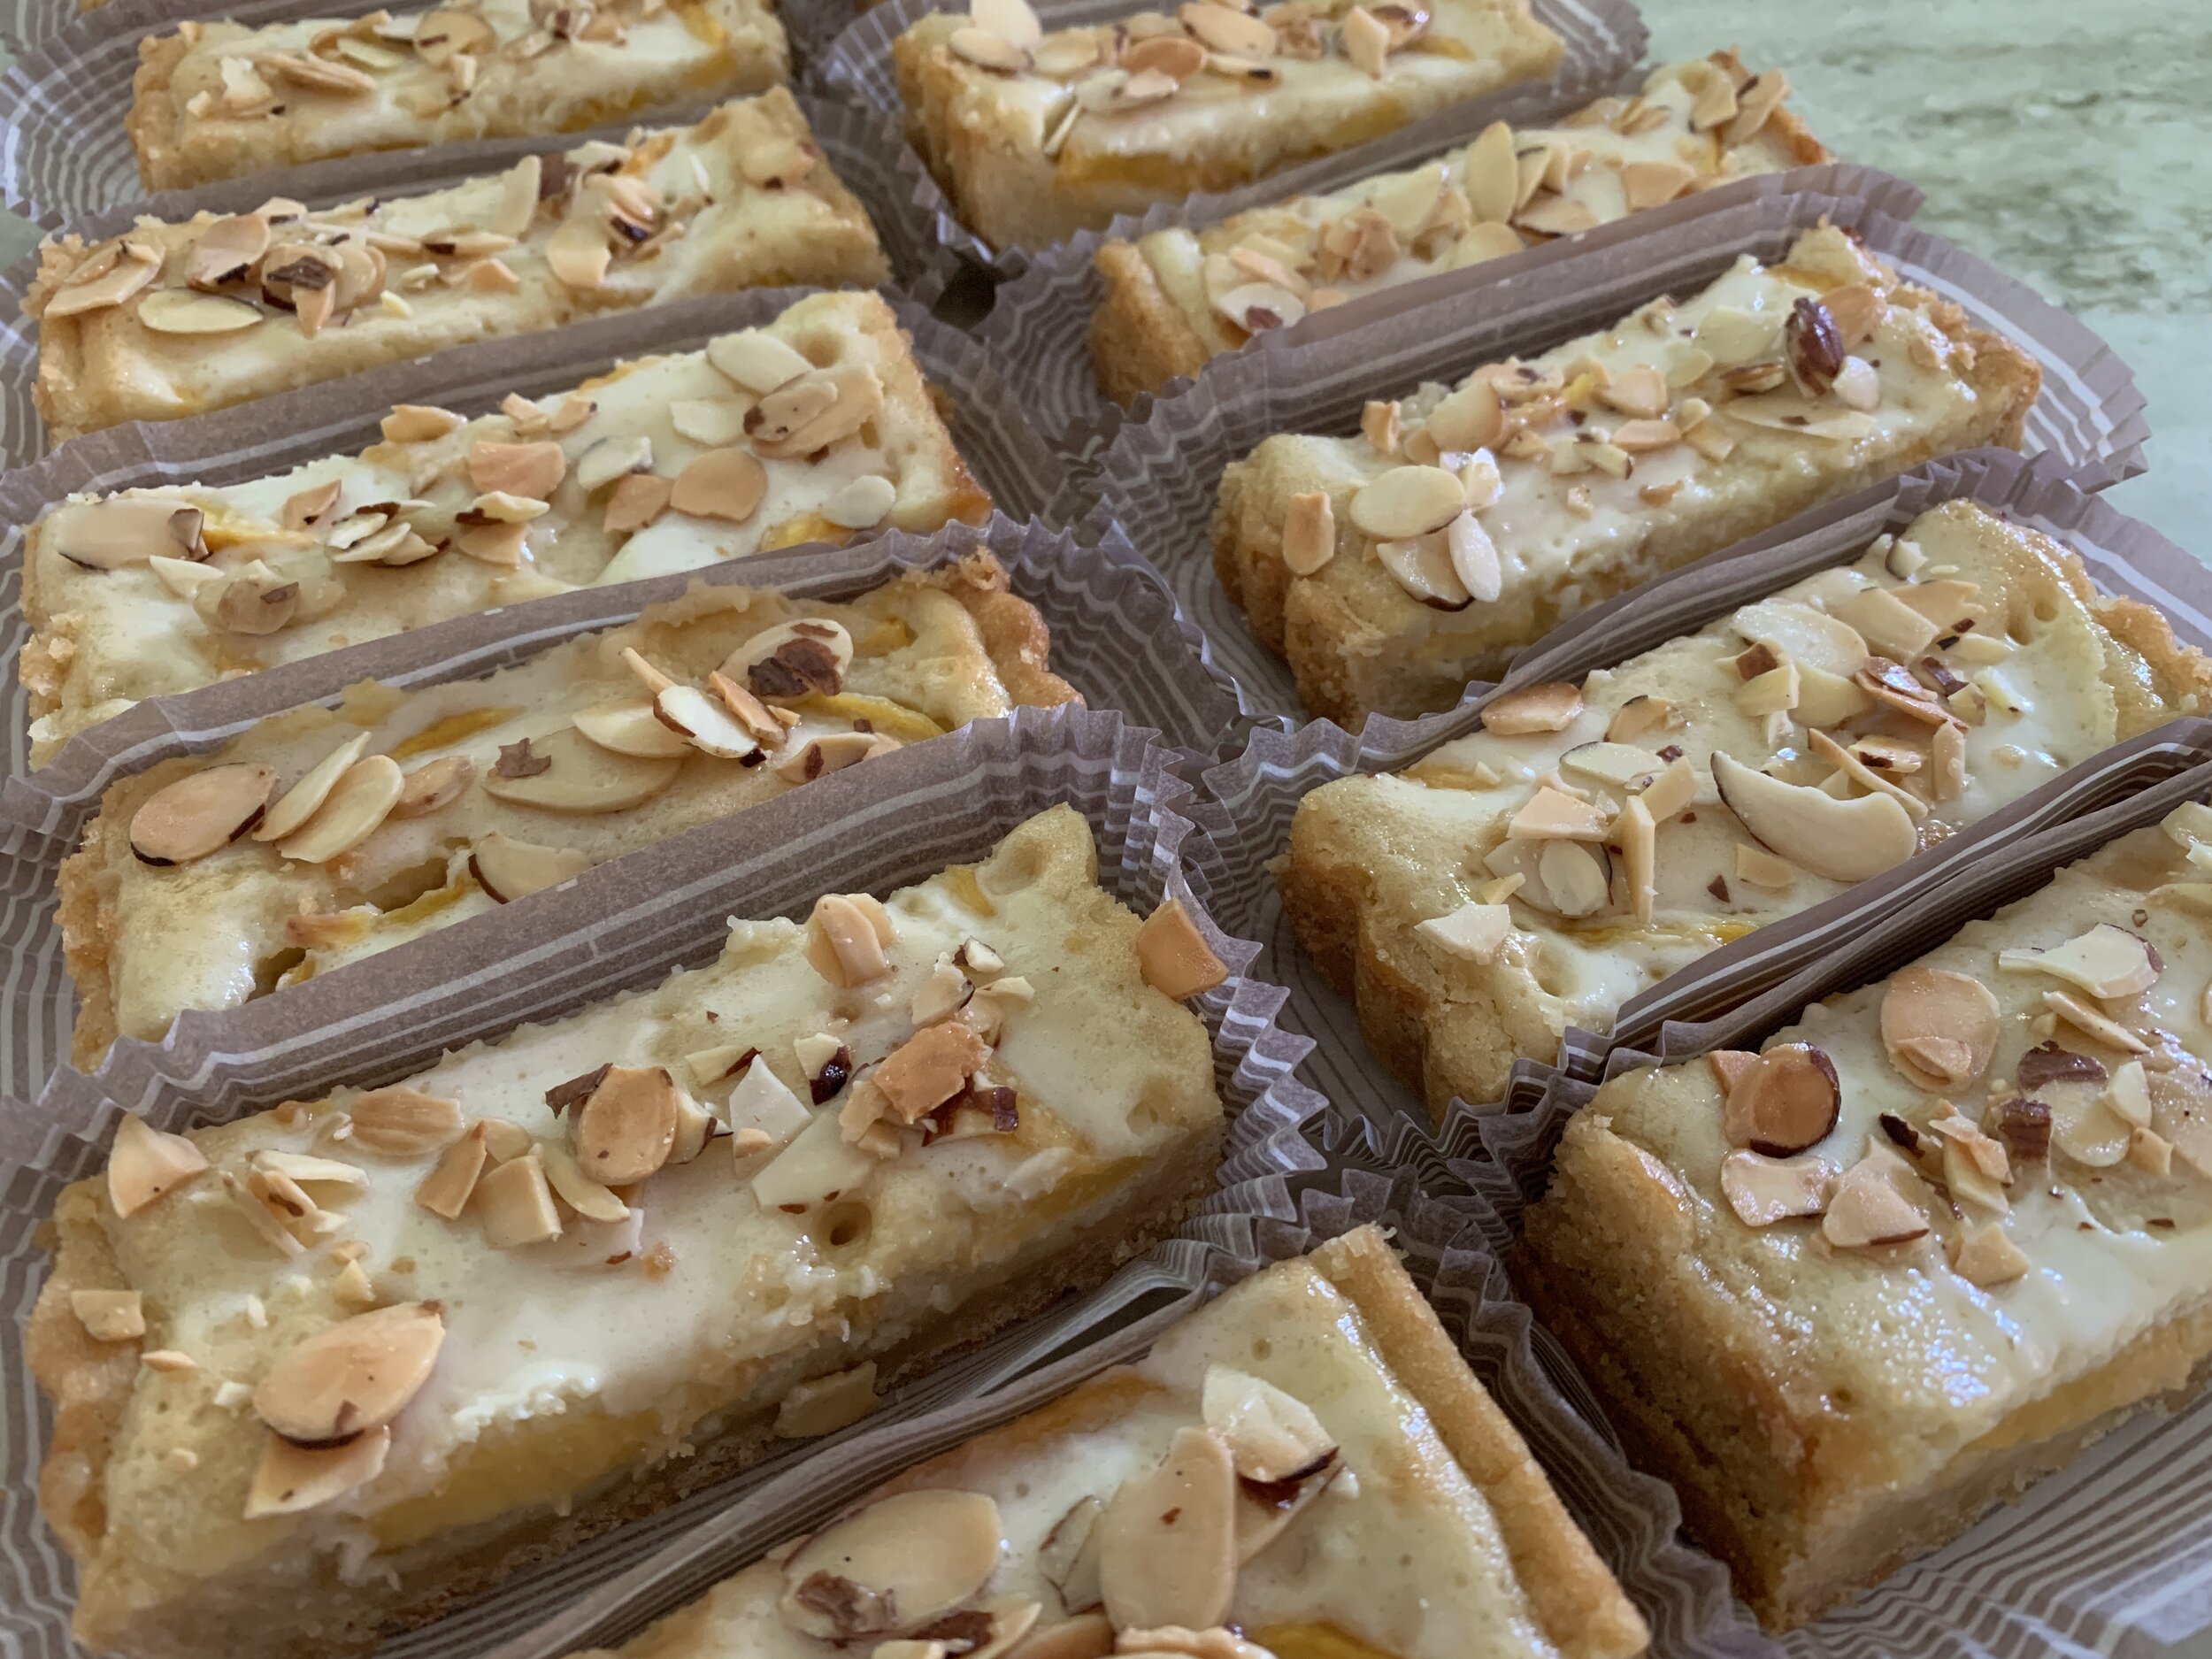
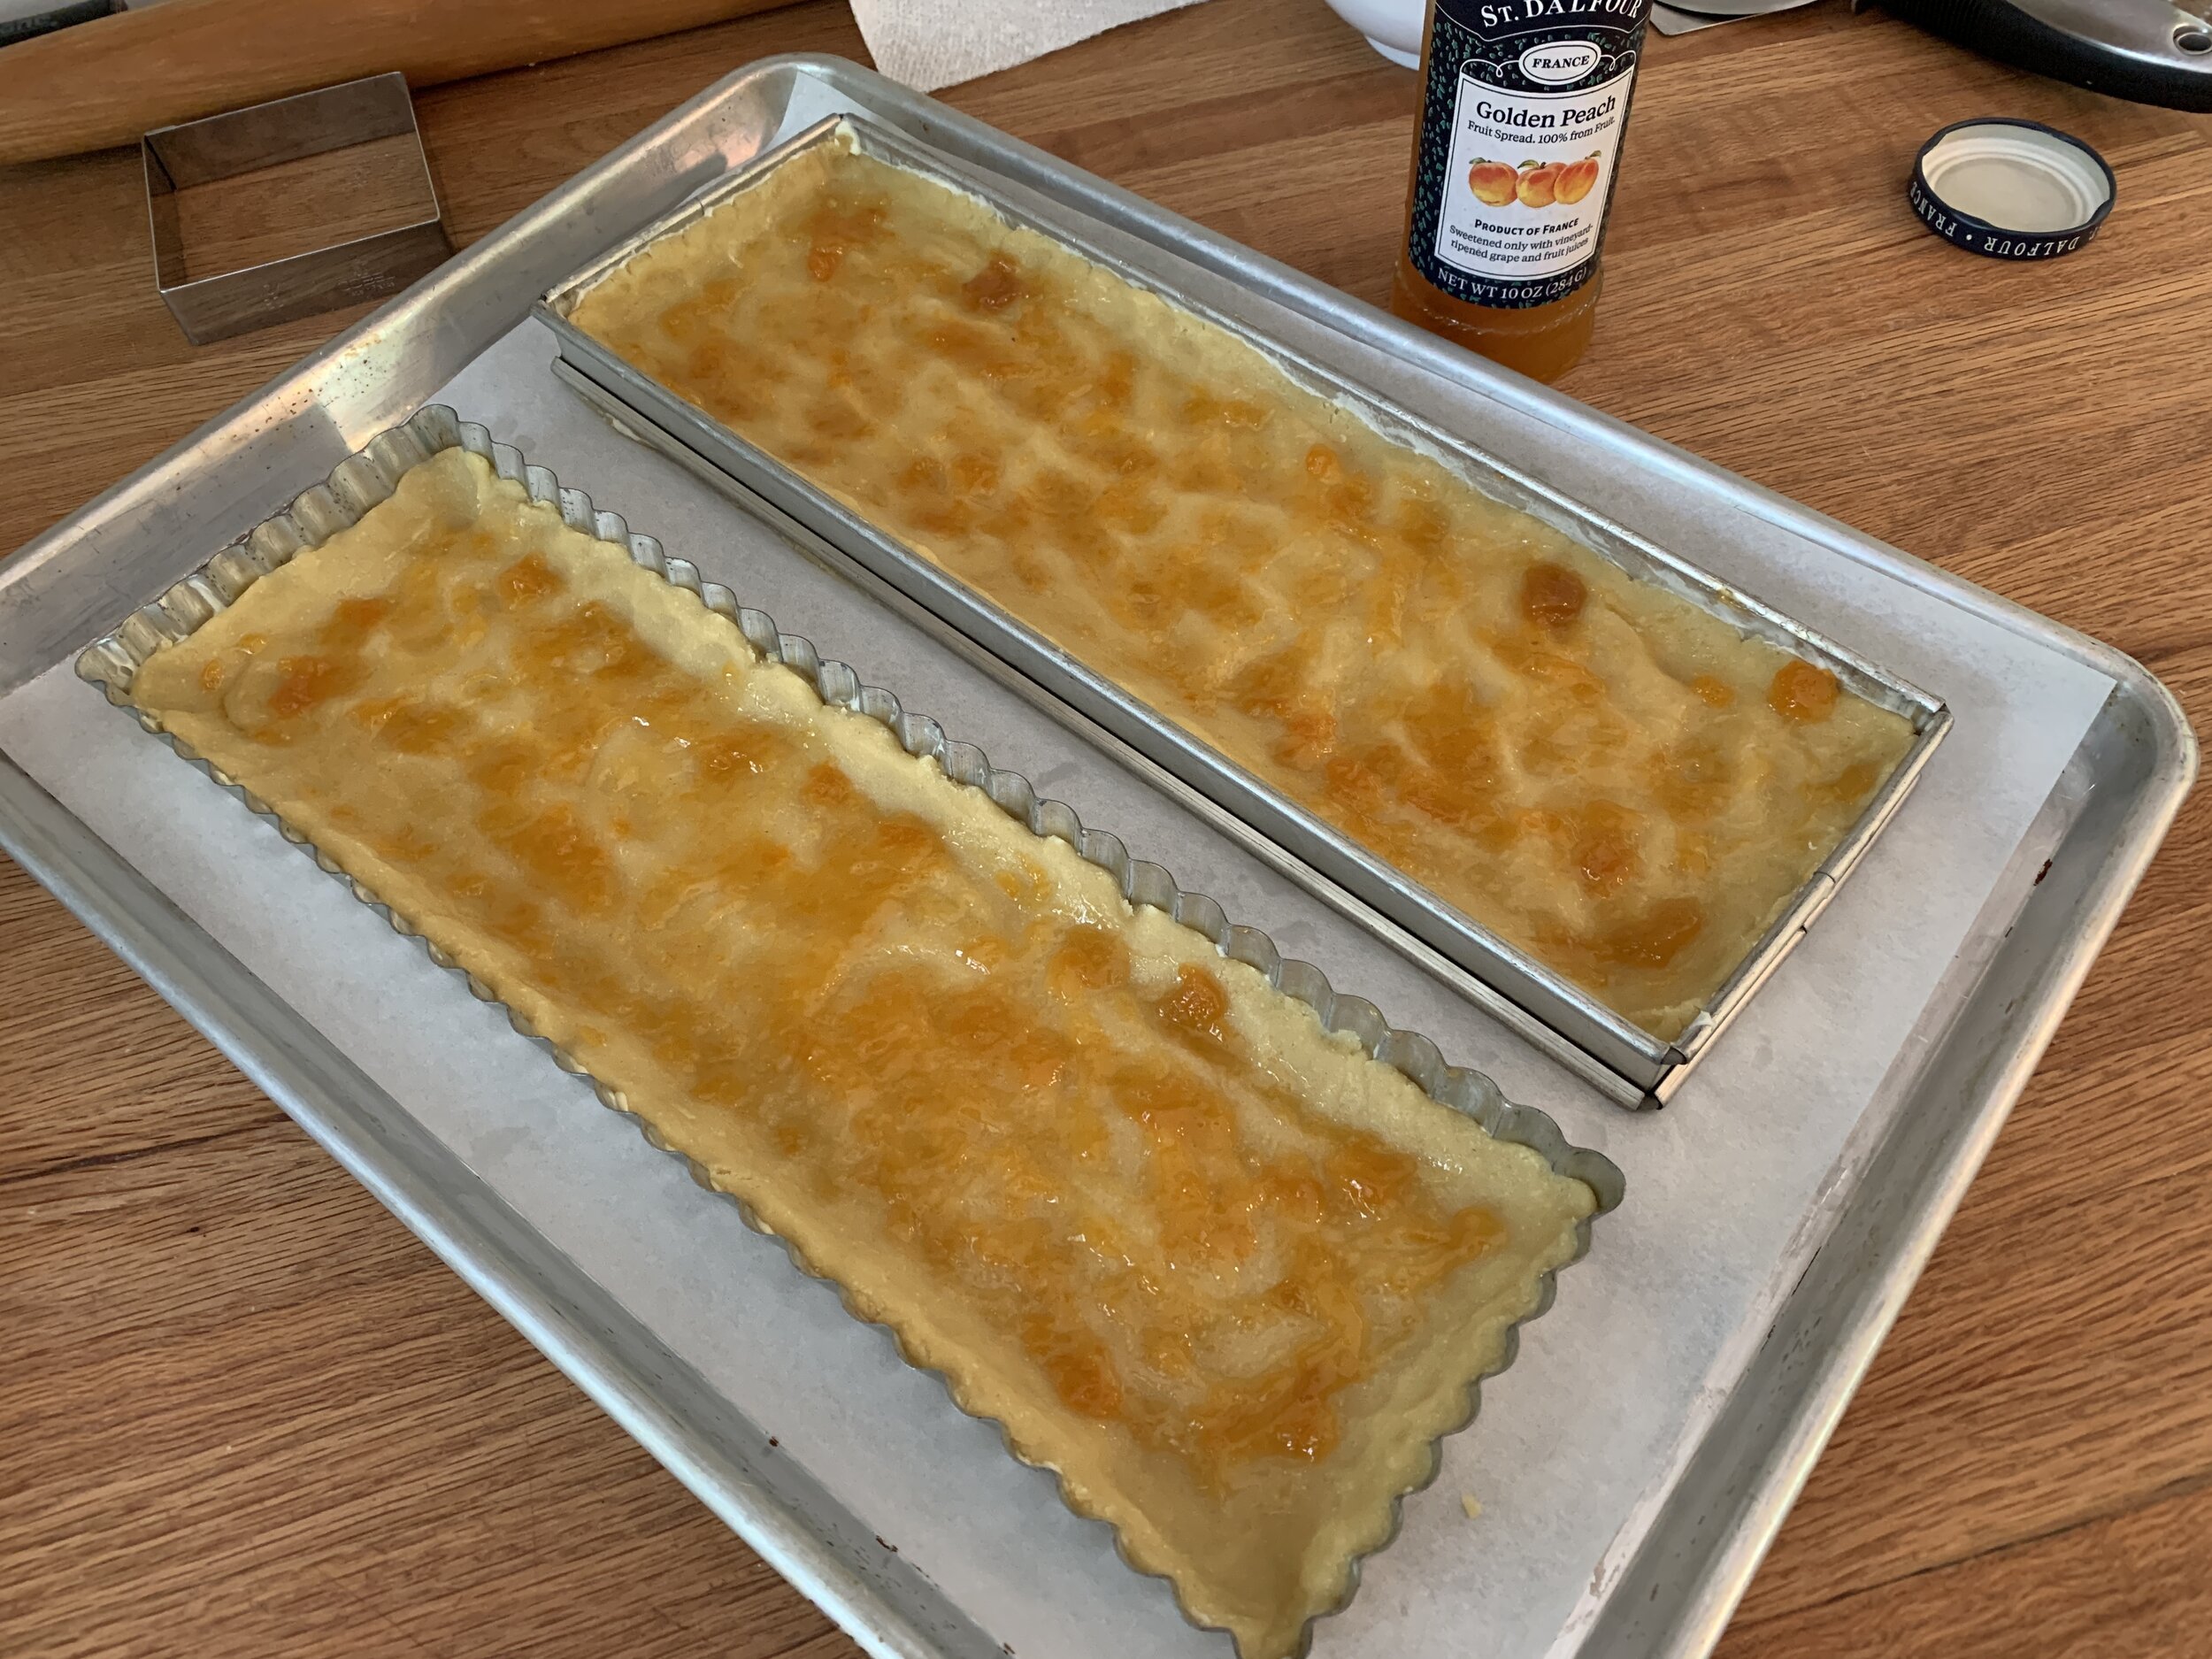
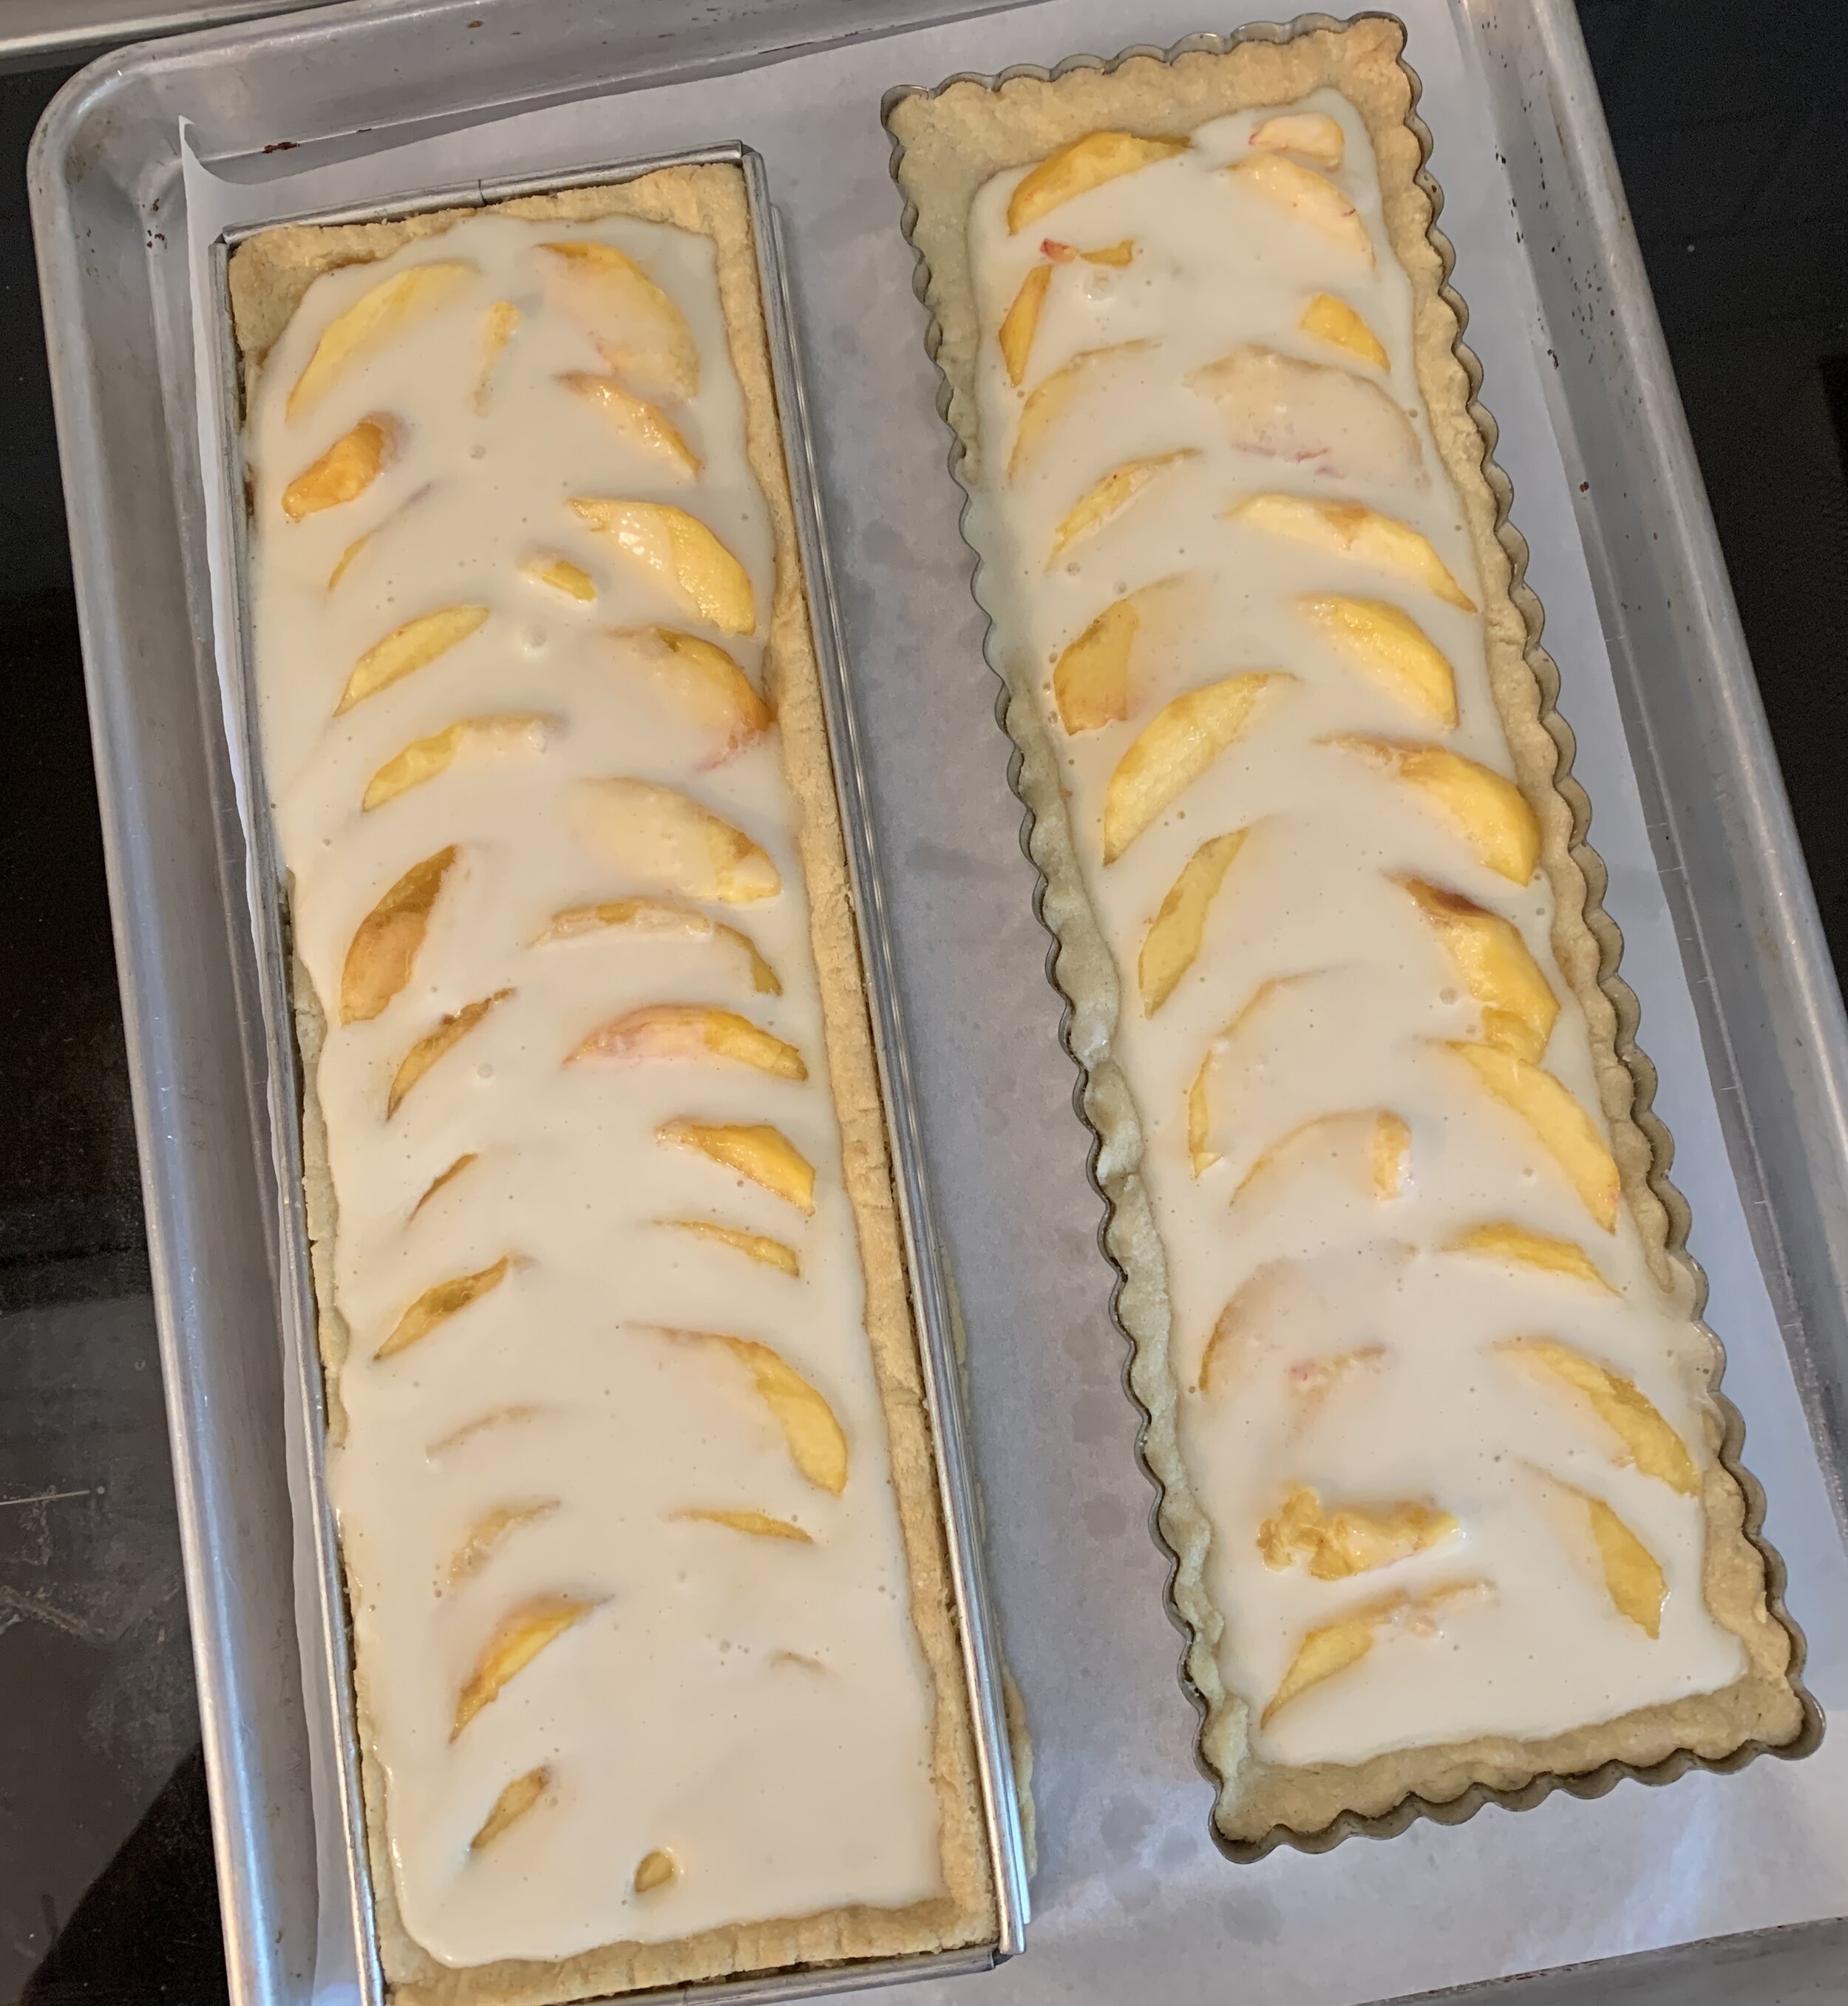
On another tart note, how about fresh raspberry tarts - pâte sucrée d’amandes with frangipane (blend of crème pâtissiére and crème d/amande) baked in, topped with fresh raspberries and finished off with raspberry coulis glaze - delicious!

Back to the savory side, here’s pizza topped with local fresh corn, tomatoes, broccoli, cauliflower and our go to favorite grated fontina cheese (soooo much better than traditional mozzarella in our book). Thanks Cheese Lady! TIP - pop the cheese into the freezer for 30-40 minutes then grate - it’s much easier.


Here are individual cherry puff feuilletées, a twist (hah!) on the free form cherry tart using the same components (puff pastry and tart cherry filling) but in a different form.

Tart cherry feuilletées
My go to favorite cakes of late, based on a financier like recipe (no brown butter here) - these are blueberry lime with roasted strawberry Swiss meringue buttercream - both petite and standard versions. Change up the flavors to reflect the seasons. Mmmmm!

Petite
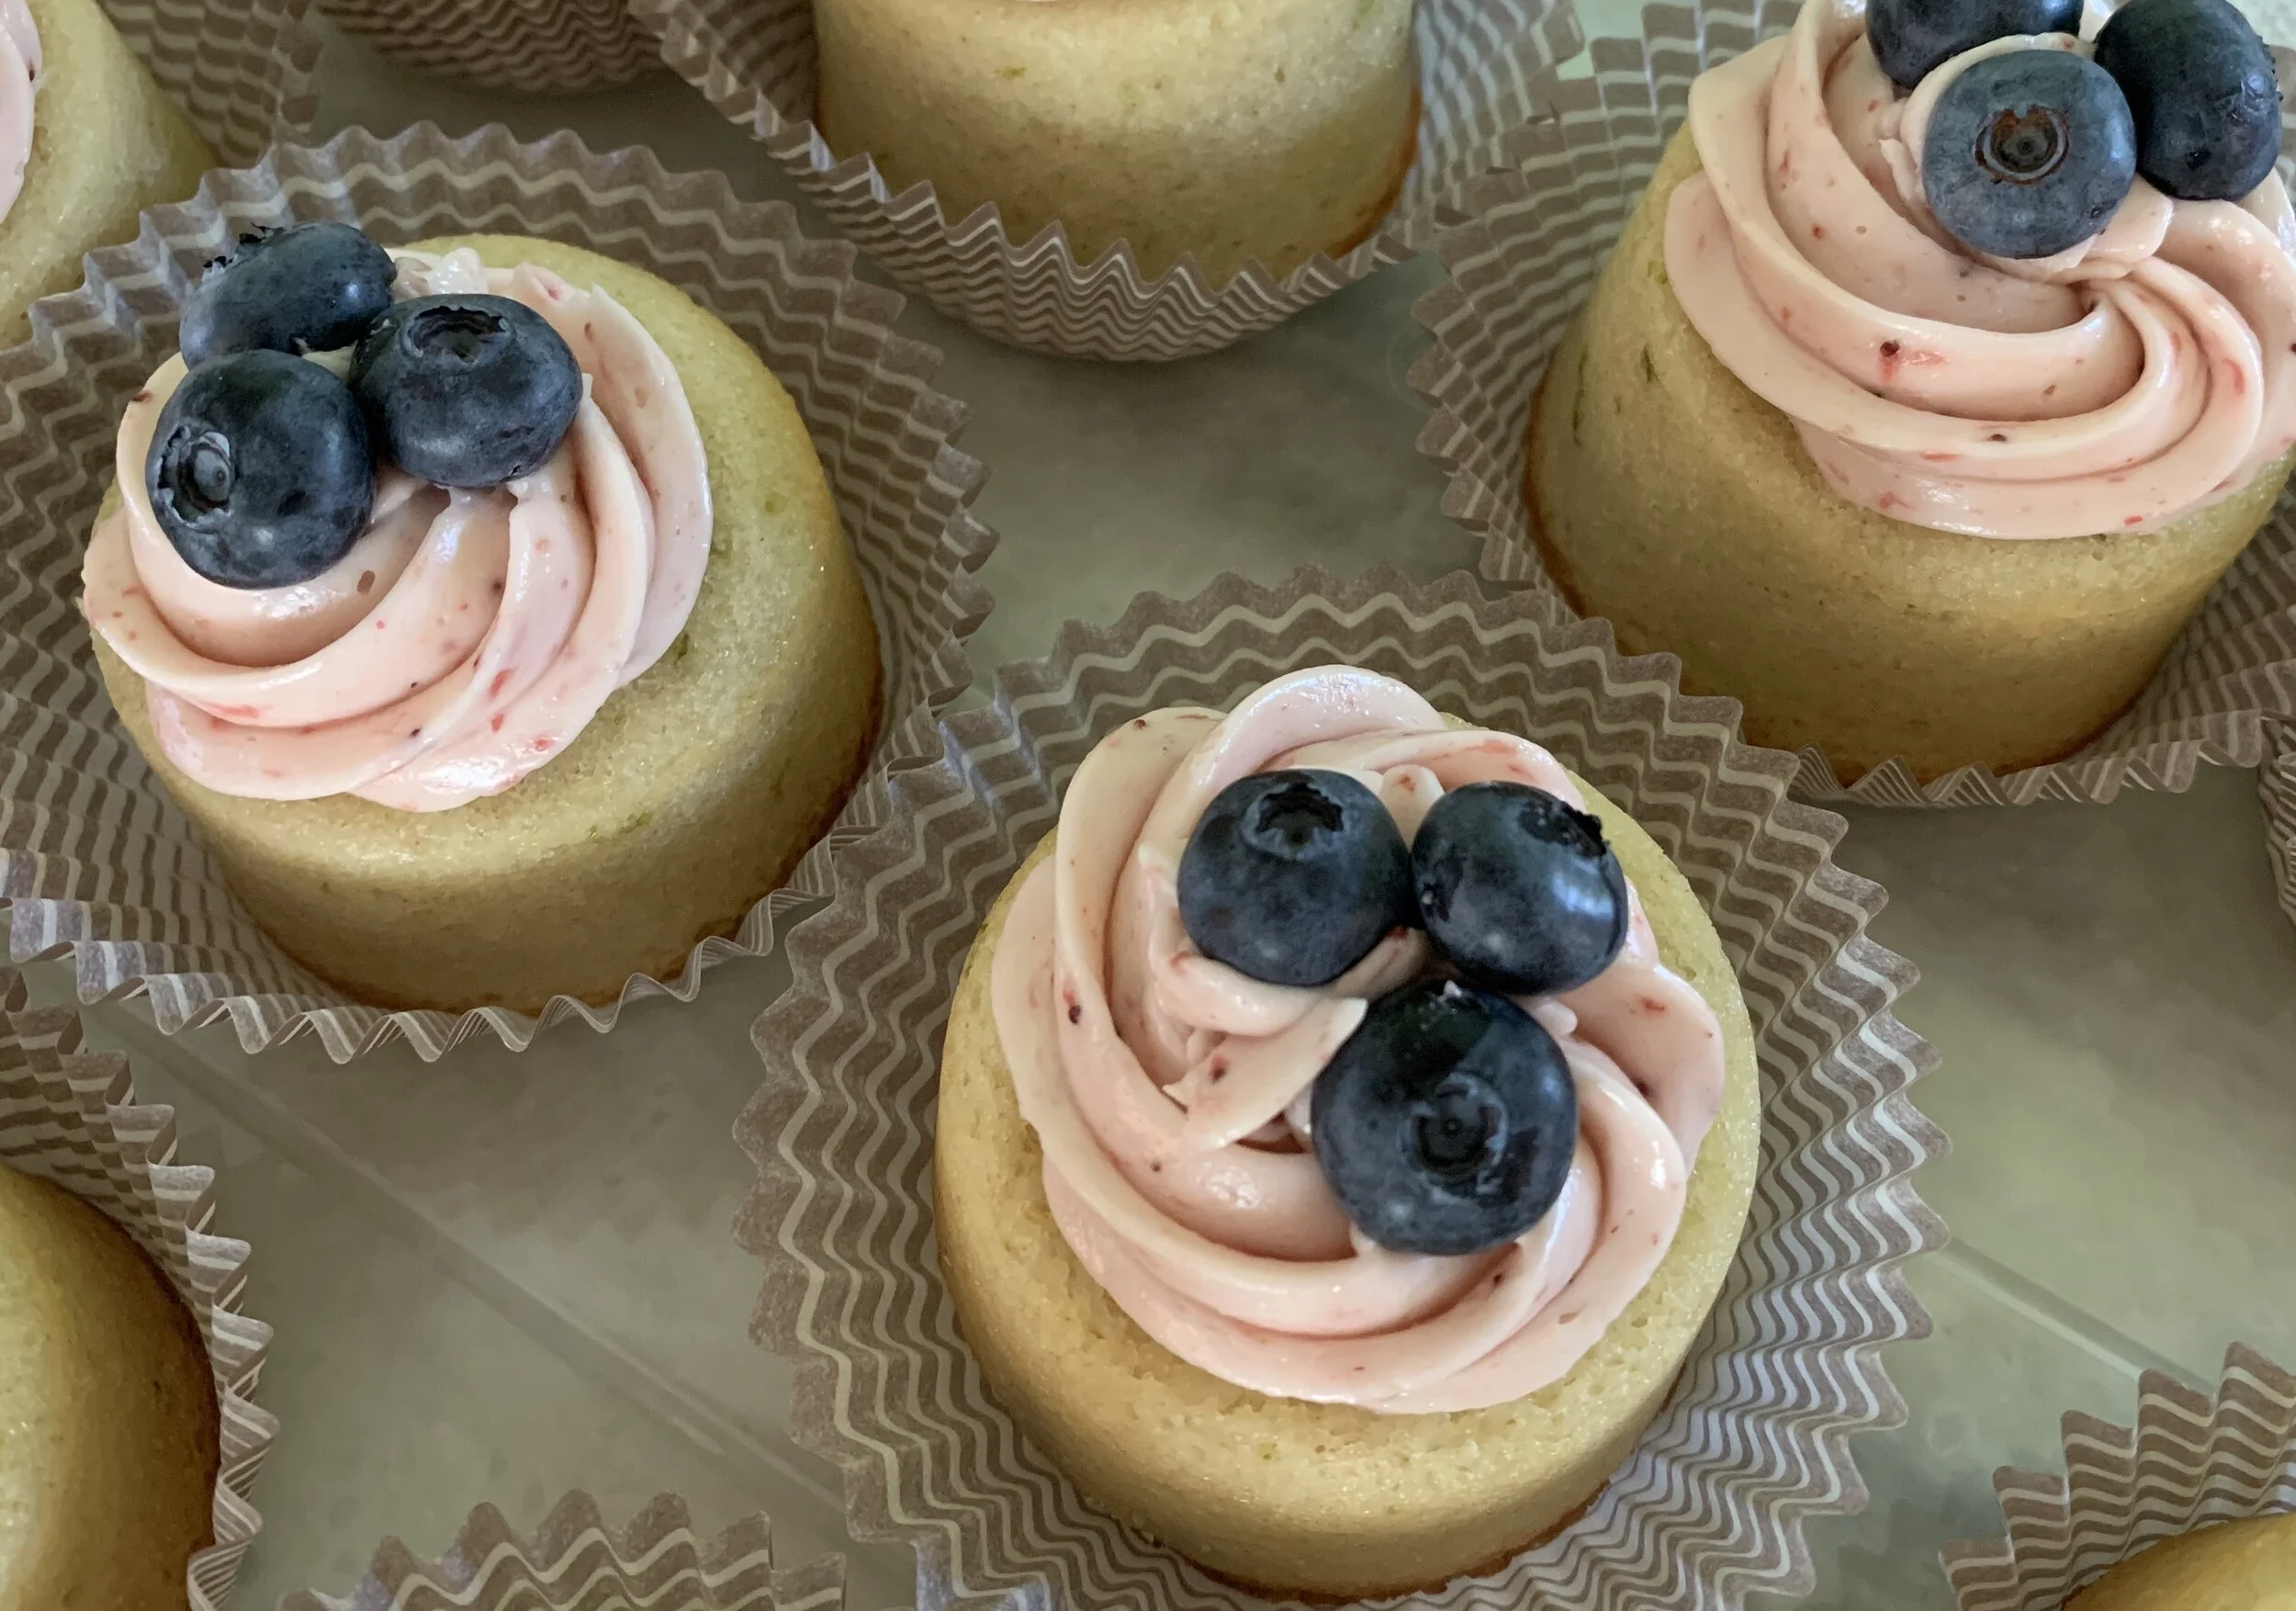
Standard
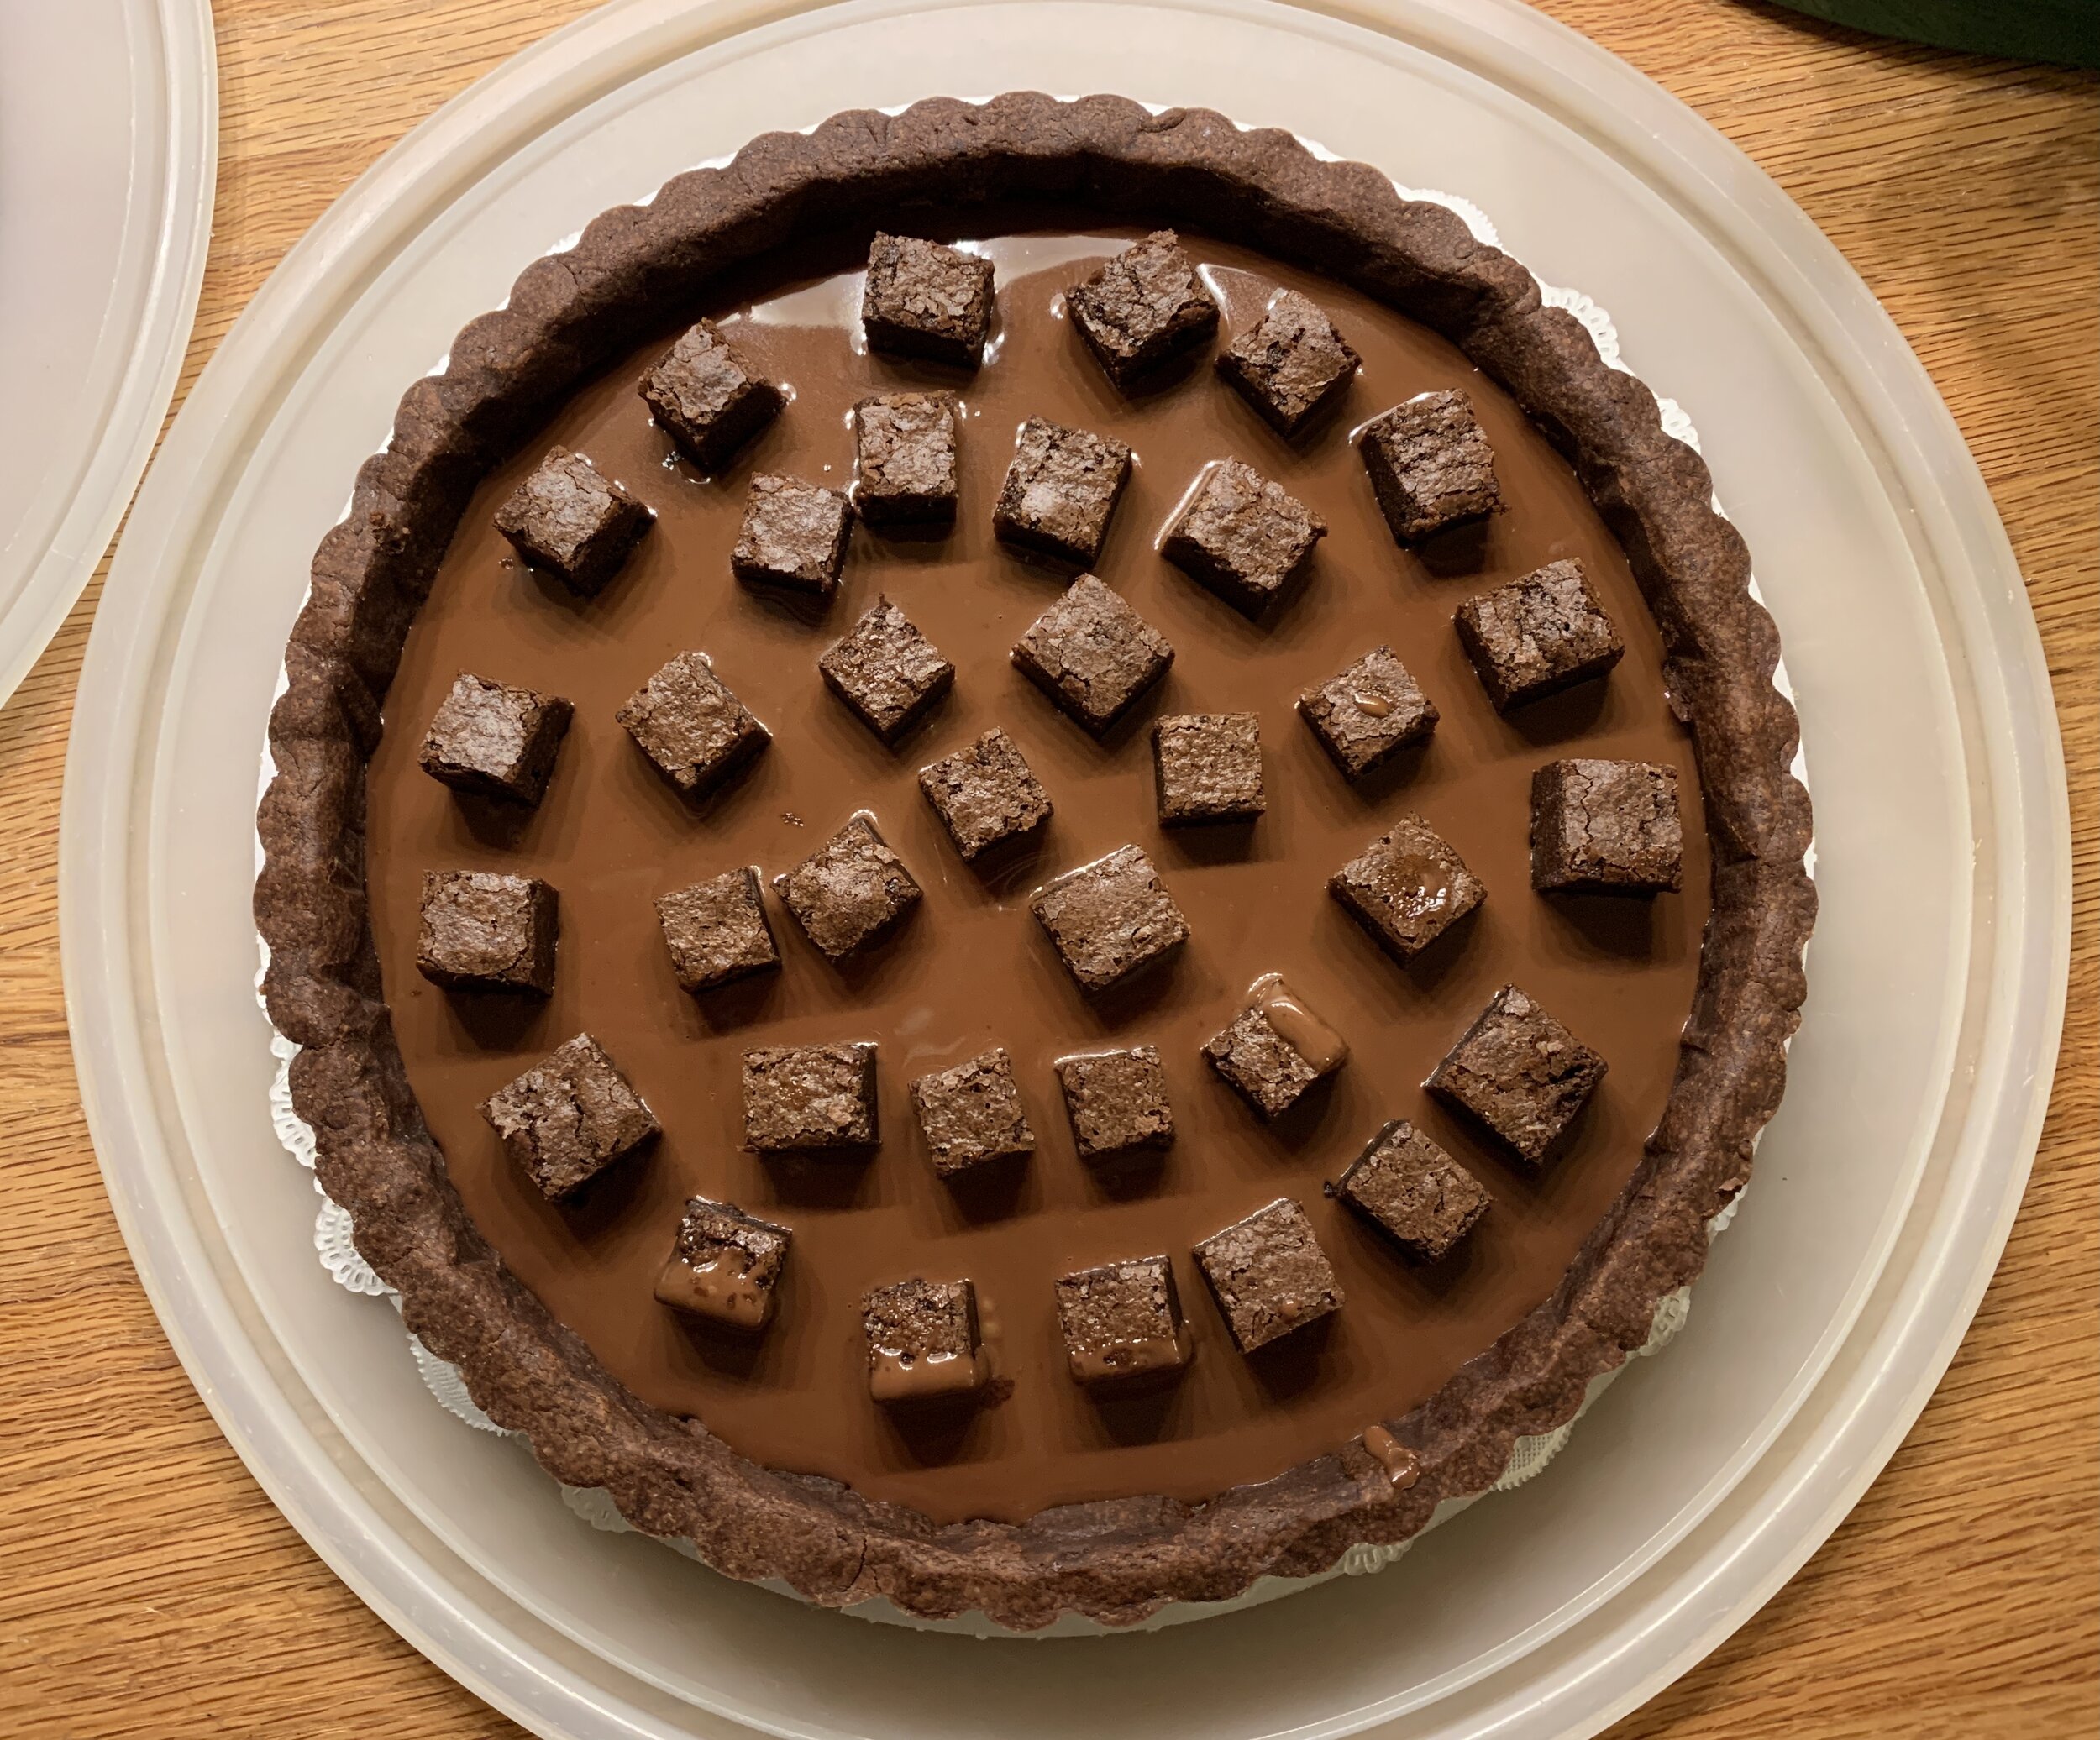
While these have nothing to do with fresh summer produce, you should know by now that I have to include some of my favorite laminated pastries.
Classic butter croissants can’t be beat. Pay close attention to the steps, how you handle the dough, the resting and rising times. They’re all so important in achieving the lovely airy center with crispy exterior.


Next up - maple glazed cinnamon buns made with laminated Danish dough. I’ve done versions of this sort of thing many times, yet some treats simply bear repeating (just like the croissants!).
I made the laminated dough this go around by adding 120 g butter to the dough and using 180 g for my butter block. Putting the dough through one 4-fold and one 3-fold yielded some lovely layers.
For the filling (I’m always tweaking the mixture) blend 100 g dark brown sugar, 2 tablespoons maple syrup, 42 g melted butter, 3 tablespoons flour, 4 teaspoons cinnamon (I use King Arthur’s Vietnamese version), a pinch of salt and a splash of vanilla extract. Feel free to go up to 2 tablespoons cinnamon to amp up the flavor.
Roll the finished dough into a 10” x 17”-ish rectangle with the long side parallel to the work surface. Spread the filling evenly and roll up into a log. Trim ends a tad, cut 16 one inch slices and place cut sides up/down into buttered muffin tins or open rings.
I have some 80 mm one inch high open tart rings that I love for this type of pastry. They hold the dough just right to allow for rising and preserving a pleasing round bun shape in the oven.
Bake about 18 minutes at 350ºF. Mix 3 tablespoons maple syrup with 3/4 cup confectioner’s sugar and thin with a bit of cream or milk to your desired consistency. I prefer thinner for a not too heavy coating.
Scrumptious, tender and buttery, lightly glazed - just what the doctor ordered!

Even though it’s HOT here right now, I can’t help but dream of apples, pears, nuts, pumpkins and more as the seasons continue to change.
Hang in there folks! We can do it. Here’s to a beautiful autumn.