Tarte à l'orange et tarte au citron meringuée

orangetart

As winter closes its doors and spring is invited in, the taste of citrus is still very enticing to me. Lemons, limes, oranges (naval, blood, tangerine, mandarin, Valencia) and grapefruit remain quite abundant in the local supermarkets, just calling out to be used in so many different ways.

IMG_2515.JPG

Tarts are one of the mainstays of my baking (why do you think they call me The French Tarte, after all??), and there is nothing like a perfect citrus tart. Not only did I have a new version of a chocolate tart crust I wanted to try, complemented with an orange curd filling, but I was itching to do a slightly different version of the classic tarte au citron with some kind of meringue garnish - think lemon meringue pie but NOT!

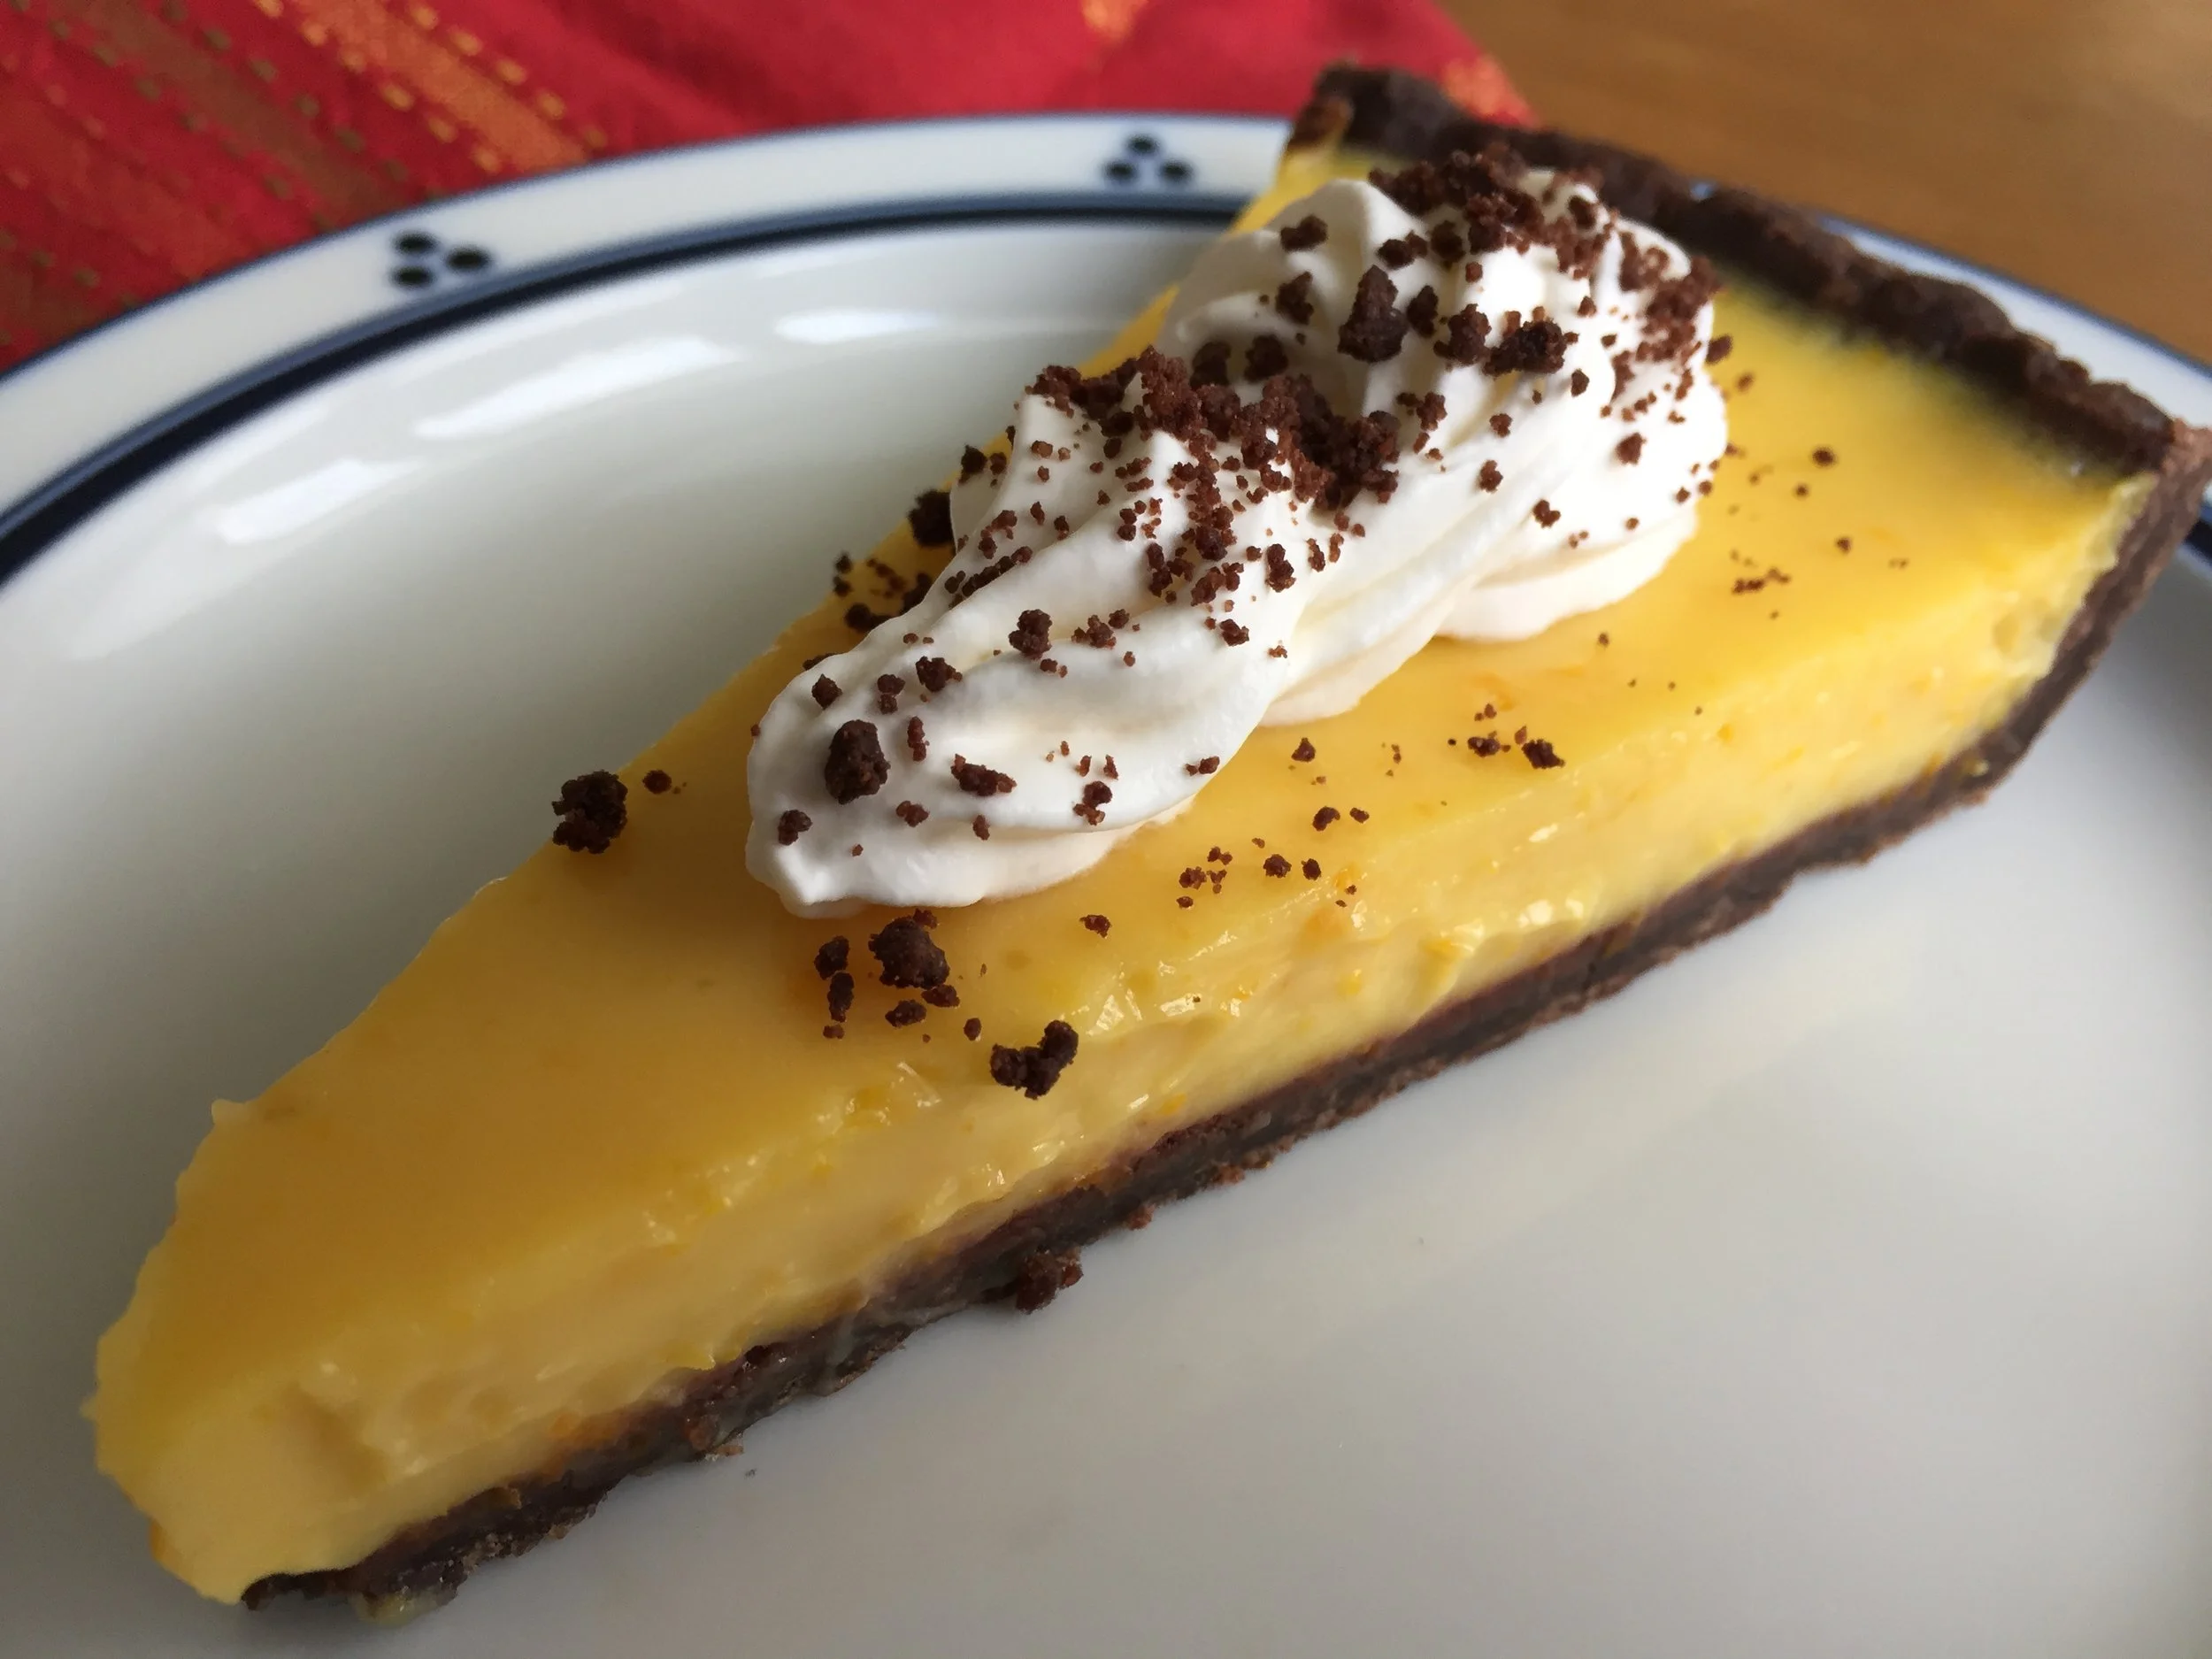
The result of my plan: orange curd baked in a chocolate crust . . . .

IMG_2530.JPG

and my favorite lemon tart with crumbled crunchy raspberry white chocolate meringue as garnish.

IMG_2601.JPG

Let's start with the orange version, OK?

IMG_2558.JPG

The chocolate short dough for the tarte à l'orange is a variation on the one I've been using for years now. It has the addition of instant espresso powder to ramp up the chocolate taste, plus a slightly higher ratio of butter and cocoa powder compared to the flour.

Here's the process: in a medium bowl sift together 248 g all purpose flour, 42 g Dutch process cocoa powder and 1/2 teaspoon instant espresso powder. In a mixer bowl using the paddle attachment blend 179 g unsalted butter, 44 g light brown sugar, 44 g granulated sugar and 1/4 teaspoon vanilla extract. Add 43 g egg and 1 teaspoon heavy cream and blend in. Mix in the dry ingredients on low speed just until blended. Wrap and chill for an hour before rolling out or, if not using right away, freeze for up to 3 months. NOTE: makes plenty for 2 full size 9-10" tarts.

I blind baked the crust, let it cool and then spread a thin layer of melted chocolate over the bottom. That's just one of the ways to protect the bottom crust from "sogging" under the filling, particularly if held refrigerated over a day or three. Hmmm - looking pretty good!

IMG_2526.JPG

The orange curd is a pretty basic version made with the usual suspects - citrus juice and zest, eggs/yolks, sugar and butter. For this recipe, in a medium bowl whisk together 3 large egg yolks and 3 large eggs. In a medium saucepan bring to a simmer 3/4 cup (180 ml) orange juice (could be tangerine, Cara-Cara, navel), 1/4 cup (60 ml) lemon juice, grated zest of one orange and one lemon, 125 g sugar, 1/8 teaspoon salt and 170 g unsalted butter. Have 1/2 teaspoon vanilla extract and the zests of one more orange and one more lemon waiting on the side.

Temper the eggs with the juice/sugar/butter mixture then return the whole shebang to the pot and cook over medium heat, while whisking constantly, just until you see tiny bubbles developing around the edges of the pan, steam begins rising off and it begins to thicken. Now strain into a clean bowl and add in the vanilla and reserved zests.

Pour the warm curd into the prepared crust and bake in a 325º oven for about 10-15 minutes until the filling is just set and you see a hint of a jiggle in the center. Let cool on a wire rack. Carefully remove from the tart pan and serve, or cover and refrigerate for 1-2 days. NOTE: always BEST the day of!!

Side note: we noticed the second day that the citrus flavor was not nearly as bright and fresh - orange doesn't seem to hold up nearly as well as lemon.

IMG_2529.JPG

The crust had just the right chocolate flavor, the filling a lovely sense of citrus-osity and the combination was deelish served with lightly sweetened Chantilly cream (my go-to garnish) and chocolate shortbread crumbs. Yup.

And guess what!? Steve liked it!! Yippee.

IMG_2556.JPG

Next up - the lemon version. Since I've written about the tarte au citron à la Jacques Genin in a previous post, I'll simply focus on the meringue garnish that I opted for this time around.

IMG_2602.JPG

I went with a basic French meringue (2 parts sugar to 1 part egg whites by weight, a pinch of cream of tartar) whipped to medium stiff peaks. I then folded in some crushed freeze dried raspberries and some finely chopped white chocolate (use your judgement on how much you'd like to add). I doled out blobs of the meringue onto silpat lined sheet pans and baked them at 200ºF for about an hour and a half to dry and crisp them up. Once cool they crumbled very nicely into just the right shards to top my tarte au citron.

Destined for a family dinner while sister Mary and niece Mallory were visiting, I served slices with a sprinkle of fresh raspberries. I've gotta tell ya - this tart held up extremely well in the fridge over several days. It served as our dessert for two days in a row and did not disappoint. Of course I LOVE the tartness and bright, fresh flavor of this one, and the crunchy meringue bits on top of the cool luscious curd gave it that special something.

Everyone enjoyed their slice, and, even though Steve tends to be a chocolate kind 'a guy, he gave this one an A+. Two for two - not too shabby.

IMG_2604.JPG
 
IMG_2605.JPG

Happy spring and happy baking!

Maple pecan brioche spirals

IMG_2575.JPG

These babies were really fun to make, particularly if you enjoy the whole laminated dough experience (as I certainly do!). 

IMG_2535.JPG

On my regular walks I pass a small woods near the Lincoln School here in Grand Rapids, Michigan and recently noticed they had put out the sap buckets for maple syrup. I have no idea how much sap/syrup they get from this late winter project, but it's cool nonetheless. It reminds me of our days of living in Vermont when it was tree-tapping-sap-running time and the sugar shacks were in full swing. Oh the memories.

Since we just happened to have a jug of Michigan maple syrup in the fridge, the maple pecan version of a laminated brioche roll was born.

IMG_2495.JPG

This post isn't so much about the process of making laminated brioche dough (which I wrote about here), but about the variety of goodies one can make with the same base dough.

Think pain au raisin, which is one of the classics for sale in many French pâtisseries. Typically made with croissant or brioche dough,  the dough is spread with pastry cream and sprinkled with rum soaked raisins, rolled up into a log, sliced, proofed and baked. This maple pecan version is simply another take on a delicious buttery dough, spread with an even greater filling. Yeah!

I made my brioche base dough, completed the beurrage and four 3-folds then wrapped it up to chill in the fridge overnight.

Going through the folds

Going through the folds

I had chosen pecans for my project, but you can certainly substitute your favorite nut instead. Toast up about 250 g pecan halves and let cool. I divided those into 150 g to coarsely chop and 100 g to grind into a meal for the filling.  The filling was inspired by a recipe in the French book Viennoiseries & brioches by Parisian pâtissier/chocolatier Laurent Duchêne who has been awarded the coveted MOF title (Meilleur Ouvrier de France) and has his own pâtisserie in the 13th arr.

After the dough's overnight rest in the fridge I rolled it out into an approximately 25 cm/10" by 50 cm/20" rectangle and spread the filling in a thin layer all over. The filling is made very simply by combining 85 g egg whites, 100 g ground toasted pecans, 85 g sugar and 30 g maple syrup. Then I sprinkled 150 g of toasted and coarsely chopped pecans over the filling and rolled it all up into a neat log.

IMG_2506.JPG
 
IMG_2507.JPG
 
IMG_2508.JPG

When I do this sort of log/slice/proof/bake approach, I typically pop the log into the freezer for 15 or 20 minutes to firm things up. It's a bit easier to slice without having the filling ooze out as much as it might otherwise.

IMG_2510.JPG

I sliced my spirals about an inch thick and, after trimming the irregular ends, had a yield of 16 slices.

IMG_2511.JPG
 
IMG_2514.JPG

Then it's on to a proof of about an hour under cover of lightly buttered film wrap, heating the oven to 350ºF and baking for about 25 minutes until nicely browned.

IMG_2518.JPG

I must admit I feared they might be a tad dry, so I brushed on a mix made with 4 tablespoons melted butter and 4 tablespoon maple syrup right when they came out of the oven.

Once cooled, Steve and I did a taste test. Our diagnosis: something is missing! And so, back to the drawing board. This time I made a glaze with confectioner's sugar mixed with maple syrup and a bit of milk to a thin enough consistency that I could brush on a nice coating. Then back into the oven for a few minutes to set the glaze and voilà. It was the perfect solution!

IMG_2573.JPG

These spirals did not disappoint. Not too sweet, just the right hint of maple, a pleasant nutty crunch and a lovely texture to the dough all made for a delicious treat. Steve gave them a thumbs up, particularly with that last glaze addition.

IMG_2581.JPG

Now it's time for you to choose your favorite brioche dough and make your own version of spirals. How about a spread of lemon curd and a sprinkle of candied pistachios? Or a raspberry version of pastry cream along with mixed berries and some chopped white chocolate? Or crème d'amande with chopped candied orange peels and toasted sliced almonds? So many choices!

Whatever you decide, have fun. That's what counts.


Pear almond cake

pearalmond


This cake is inspired by a recipe in Ottolenghi and Goh's book "Sweet" - an apricot almond cake that I decided to change up to a pear version.

Although I usually think of pears as a fall/winter fruit, their flavor and usefulness in desserts still speaks to me now, with hints of spring in the air. This pear almond cake is dense, moist and oh so delicious! Truth be told, I baked this one in late January and am just getting around to writing about it now. Oh, how time flies.

Bartlett, Bosc or D'Anjou are my usual pear choices, although I must say I usually end up veering toward the Bosc end of the pear spectrum. I simply enjoy their flavor and texture.

I generally prefer to poach my own pears, especially since those that one buys in the grocery store are generally rock hard and need days to ripen appropriately. Poaching helps to coax out that ripened texture and allows them to be used sooner than you would if waiting for them to ripen naturally.

I create a poaching liquid using 2 parts water to 1 or 1.5 parts sugar, giving me a light-ish syrup. I like to add in some lemon zest, a grate or two of nutmeg and perhaps a pinch of ginger and a few pieces of star anise. Nice and lightly spiced. I peel, core and halve my pears. 

The key with poaching is low and slow. The most helpful thing for me is the cartouche -  essentially a round of parchment paper with a small hole created in the center to allow steam to escape, placed cozily over the pears to keep them submerged. It prevents sides or ends of pears from sticking out of the poaching liquid and developing an unsightly brown tinge. We simply can't have that, now can we?

pearpoach

I let them go until I see a change from a dense whitish color to a more translucent, buttery color. I then stick a fork in to see if the tines go in easily. We're done!

See the translucence!

See the translucence!

The cake is made with your basic ingredients - butter, sugar, egg, flour, a bit of salt, lemon zest, vanilla and almond extracts and some sour cream. A sprinkle of almond flour and the pears are nestled on top of the batter and then covered with an intriguing topping concoction made with butter, sugar, spices, salt and egg. Hmmm - this should be interesting.

Batter in!

Batter in!

Almond Flour sprinkled!

Almond Flour sprinkled!

Pears and topping on! ready to go into the oven

Pears and topping on! ready to go into the oven

Here it is just out of the oven. Looks good!

Here it is just out of the oven. Looks good!

pearalmondcake

Let's do the recipe! I outline the steps/ingredients below but you can click here for a PDF of the recipe.

1. Butter a 9" springform pan and line the bottom with parchment. Heat the oven to 375ºF.
2. Drain and blot dry your poached pears, then slice each half into quarters. You'll need a couple of pears total (more or less, depending on how you like to arrange your slices).
2. Make the topping: in a medium microwave safe bowl, melt 56 g (4 tablespoons) unsalted butter; stir in 100 g/1/2 cup granulated sugar, 1/2 teaspoon ground coriander, a pinch of ground ginger, a large pinch of salt; cool for a few minutes then stir in two large lightly beaten eggs and set aside.
3. For the cake, put 84 g/6 tablespoons unsalted, room temperature butter with 200 g/1 cup granulated sugar in your mixer bowl with the paddle attachment and beat on medium-high for a couple of minutes; add 2 large eggs, one at a time, blending each one in and scraping down the sides of the bowl a couple of times; blend in the zest of one lemon, a teaspoon of vanilla extract and 1/4 teaspoon almond extract.
4. In a separate bowl sift 220 g/1 3/4 cups all purpose flour with 10 g baking powder and 1/2 teaspoon salt; have 2/3 cup sour cream standing by as well.
5. With the mixer on low add the flour mixture to the butter/sugar/egg mixture alternating with the sour cream, beginning and ending with the flour.
6. Scrape the batter into the prepared pan, smooth the top with an offset spatula. Sprinkle 35 g/1/3 cup almond flour over the batter, then arrange your pear slices in a design of your liking.
7. Now spoon/pour the topping mixture over the whole shebang!
8. Bake this baby for about an hour until a tester into the middle comes out clean. Always watch what's going on in there folks!. Cool in the pan for about 20 minutes before unmolding. 
9. Serve warm or at room temperature.

I chose to top it with some lightly sweetened whipped cream (although my cream seemed to have lost some of it's whip!).

This was absolutely delicious! And Steve liked it too. Yay!!!

IMG_2410.JPG

Quick puff pastry adventures

quickpuff

For several years now my standard approach to puff pastry making has been the reverse approach, or, as the French call it, pâte feuilletée inversée. It comes out so wonderfully flaky and light, buttery and delicious. Check out my post about the process here.

Chausson aux pommes (apple turnovers) are perhaps my favorite goodie to make with puff - the marriage of tart apples sautéed in vanilla sugar, butter and a generous squirt or two of my caramel sauce and then encased in the buttery goodness of puff is a marriage made in heaven.

As I continue to incorporate more whole wheat into my baking, I decided to give a spelt version of quick puff pastry a try. Spelt is considered one of the "ancient grains" descended from wheat. It has a mild, nutty flavor and, although it contains gluten, it has less than whole wheat or white flour. Substituting spelt flour for white flour may make baked goods more tolerable and enjoyable for people with gluten sensitivity. 

Spelt quick puff in progress

Spelt quick puff in progress

As usual, I compared various recipes for classic puff, reverse puff and quick or "rough-puff" versions. Generally the flour to butter ratio is close to 1:1 in puff recipes. The other ingredients are water and salt and, while those quantities vary a bit, the water can range from 0.3 to 0.5 of the flour by weight (it's generally lower in quick puff than in classic puff).

IMG_2428.JPG

The process with quick or rough puff pastry is simply to cube up the butter, "sand" it into the flour and salt, add the water and then turn it out onto a work surface to form it into a rough, crumbly rectangle. It eliminates the steps required in classic puff pastry of creating the butter block and enveloping it in the dètrempe before proceeding with the folds.

You put the crumbly rectangle through three 3-folds, during which it starts becoming a cohesive dough. Let it rest wrapped in the fridge for 30 minutes or so and repeat three more 3-folds. Give it an hour rest in the fridge and you're ready to go.

My plan was to make a half recipe and analyze the result. I went with a version using a higher ratio of butter to flour, along with a little less water than a classic puff.

My half recipe called for 320 g cold unsalted butter, 140 g all purpose flour, 145 g spelt flour, 1 teaspoon salt and 120 ml cold water. So, as a conscientious pastry chef will do, I weighed everything out, cubed up my butter and prepared to make my dough.

Into the mixer bowl go the flours, salt and cubed butter which are mixed until the butter begins to break up into smaller pieces. Add the water and mix briefly to incorporate with a resulting crumbly concoction.

OH NO!! Too much water. In my attempts at weighing precision, I neglected to reduce the water in the full recipe by half and in went the FULL amount. As soon as I added it, I realized what I had done. What was supposed to be a crumbly mixture was wet indeed. What to do? Regroup, of course.

I weighed out an additional 140 g all purpose and 145 g spelt flour, blended it in to my wet mixture and turned out the now crumbly dough onto my work surface, forming a rough rectangle. Essentially I moved up from my intended half recipe to a full one. 

I then cubed up another 320 g butter, started the first 3-fold, putting a portion of the butter on a third of my rectangle which I then enclosed by finishing the fold. Are you confused yet? 

speltquickpuff

After the first 3-fold was completed I distributed the remaining butter on top of it. 

IMG_2430.JPG

I pressed the butter into the dough then rolled it out and did my second 3-fold. I think this is going to work! Crumbly but OK.

fullsizeoutput_1a0.jpeg

You don't need to see every step, but, the good news is this dough came together very nicely with the ensuing folds. Amazing how dough can be transformed, isn't it?

IMG_2435.JPG

I divided the finished dough into three pieces, wrapped them well and popped them into the freezer until I was ready to give the quick spelt puff a try.

My first practice session with this dough involved chausson aux pommes and a simple blind baked tartlet shell, just to see how it would behave.

chausson
quickpuff
quickpuff

As you can see there's pretty good puffing going on here. The tartlet shell was really puffed up in the center, even though I pricked it all over with a fork and weighted it for most of the baking time. Once I removed the weights and finished the bake, it kept on a'puffing! What you see above is after I had pushed down the center layers to make room for a filling.

Although the chausson puffed up very nicely, I do have to admit that chausson made with reverse puff bake up oh so loverly, as the Brits would say. Witness that very thing in the photo below.

Isn't that just beautiful??

Isn't that just beautiful??

I truly enjoyed the flavor of the quick spelt puff - a bit more nutty and wheat-y than puff made with traditional all purpose flour. It's all about experimenting, eh?

The bottom line? Making mistakes is a great way to learn, and weighing ingredients is very helpful when having to correct those mistakes. Yes indeedy.

Quick puff is fun to make and has a very useful place in the pastry kitchen, particularly for things like tarts (both sweet and savory), quiches, turnovers and even cheese straws and palmiers. Go for it!

Here's the basic quick puff recipe (the FULL one!).

640 g cold, unsalted butter in 1/2 inch cubes
280 g all purpose flour
290 g spelt flour
2 teaspoons salt
240 ml cold water

1. Place the flours and salt in the bowl of a stand mixer with the paddle attachement
2. Add the butter and mix on low speed until the butter is coated and starting to break up into smaller pieces
3. Add the water and mix briefly to incorporate. The dough will be crumbly.
4. Turn the dough out onto a lightly floured work surface and form into a rectangle about an inch thick.
5. Use that wonderful bench scraper of yours to assist in performing a three-fold. Turn the dough 90 degrees and press it again into a one inch thick rectangle. Do another three fold, then repeat the steps one more time, giving you a dough with 3 three folds. As you go, it should start holding together more and more.
6. Wrap the dough in plastic wrap and chill for an hour.
7.  Now with the help of your favorite rolling pin, roll the dough into a rectangle about 1/2" thick, do a three-fold, turn 90 degrees and repeat another one. Turn 90 degrees again and do the last three-fold. You'll now have a finished dough with a total of 6 three-folds.
8. Wrap in plastic wrap and chill an hour before using. You may also wrap and freeze it for later use.

Now get into that kitchen of yours and play!

IMG_2456.JPG