Fougasse au sucre

A663E321-940C-44CE-B3D4-4584D295CE9A.jpg

Time for something a little different - a sweet version of fougasse, that classic Provençal flat bread that many of us recognize as a savory treat. Often referred to as the French version of Italian focaccia, it’s usually baked with olives and herbs but you can certainly play around with it - leave the olives out and top it with thinly sliced potatoes, grated cheese and a nice sprinkling of sea salt.

On the sweet side, a bit of quick research finds this brioche like bread is traditionally associated with the Camargue region (known for its fleur de sel ) at the mouth of the Rhone, in between Montpellier to the west and Marseilles to the east. The recipes I perused use butter, milk and eggs in the mix (hence its brioche-ness) and the top is sprinkled with orange flower water and sugar before baking to create a crunchy top.

However . . . . . This recipe comes from “The French Baker” by Jean Michel Raynaud, a native born Frenchman who lives and works in Australia. He has fond childhood memories of staying with his sister at their grandparents home in a small village in Provence and enjoying “two slices of crunchy, buttery fougasse . . . . with a bowl of chocolat chaud” on Sunday mornings. Ahhh youth!

His dough base is more along the lines of focaccia, using all purpose flour, water, olive oil, salt and yeast with some added sugar and butter but no milk or eggs,

E39362F3-D85B-4732-A65C-9B09ABC661B8.jpeg

It’s a straight forward direct dough (no poolish or preferment) that yields two loaves.

You’ll need 100 g each unsalted butter, granulated sugar and heavy cream for the topping so be sure you have those on hand. The butter/sugar will be spread over the shaped dough before the second proof, and the cream will be poured over the dough after it goes in the oven. Imagine that!

For the dough you’ll need 40 g unsalted butter at room temp so have that set aside - it’s added last. In the bowl of a stand mixer fitted with the dough hook combine 340 g all purpose flour, 190 g cold water, 70 g granulated sugar, 30 ml (2 TBSP) extra virgin olive oil, 6 g fine salt and 3 g instant yeast. Knead on low for 2-3 minutes until the dough comes together. Increase to medium and knead for 8-10 minutes. You want the dough to come away from the sides of the bowl as it becomes smooth, soft and elastic.

Now add the 40 g of butter and knead another 2-3 minutes to incorporate it. I found that at first it smeared quite messily and buttery around the sides of the bowl but it all blended together just fine in the end.

CE676ABA-5C83-4186-8A2C-55AEA44F3E37.jpg

Cover the bowl with a towel and let proof about an hour until increased by about two-thirds.

After first proof

After first proof

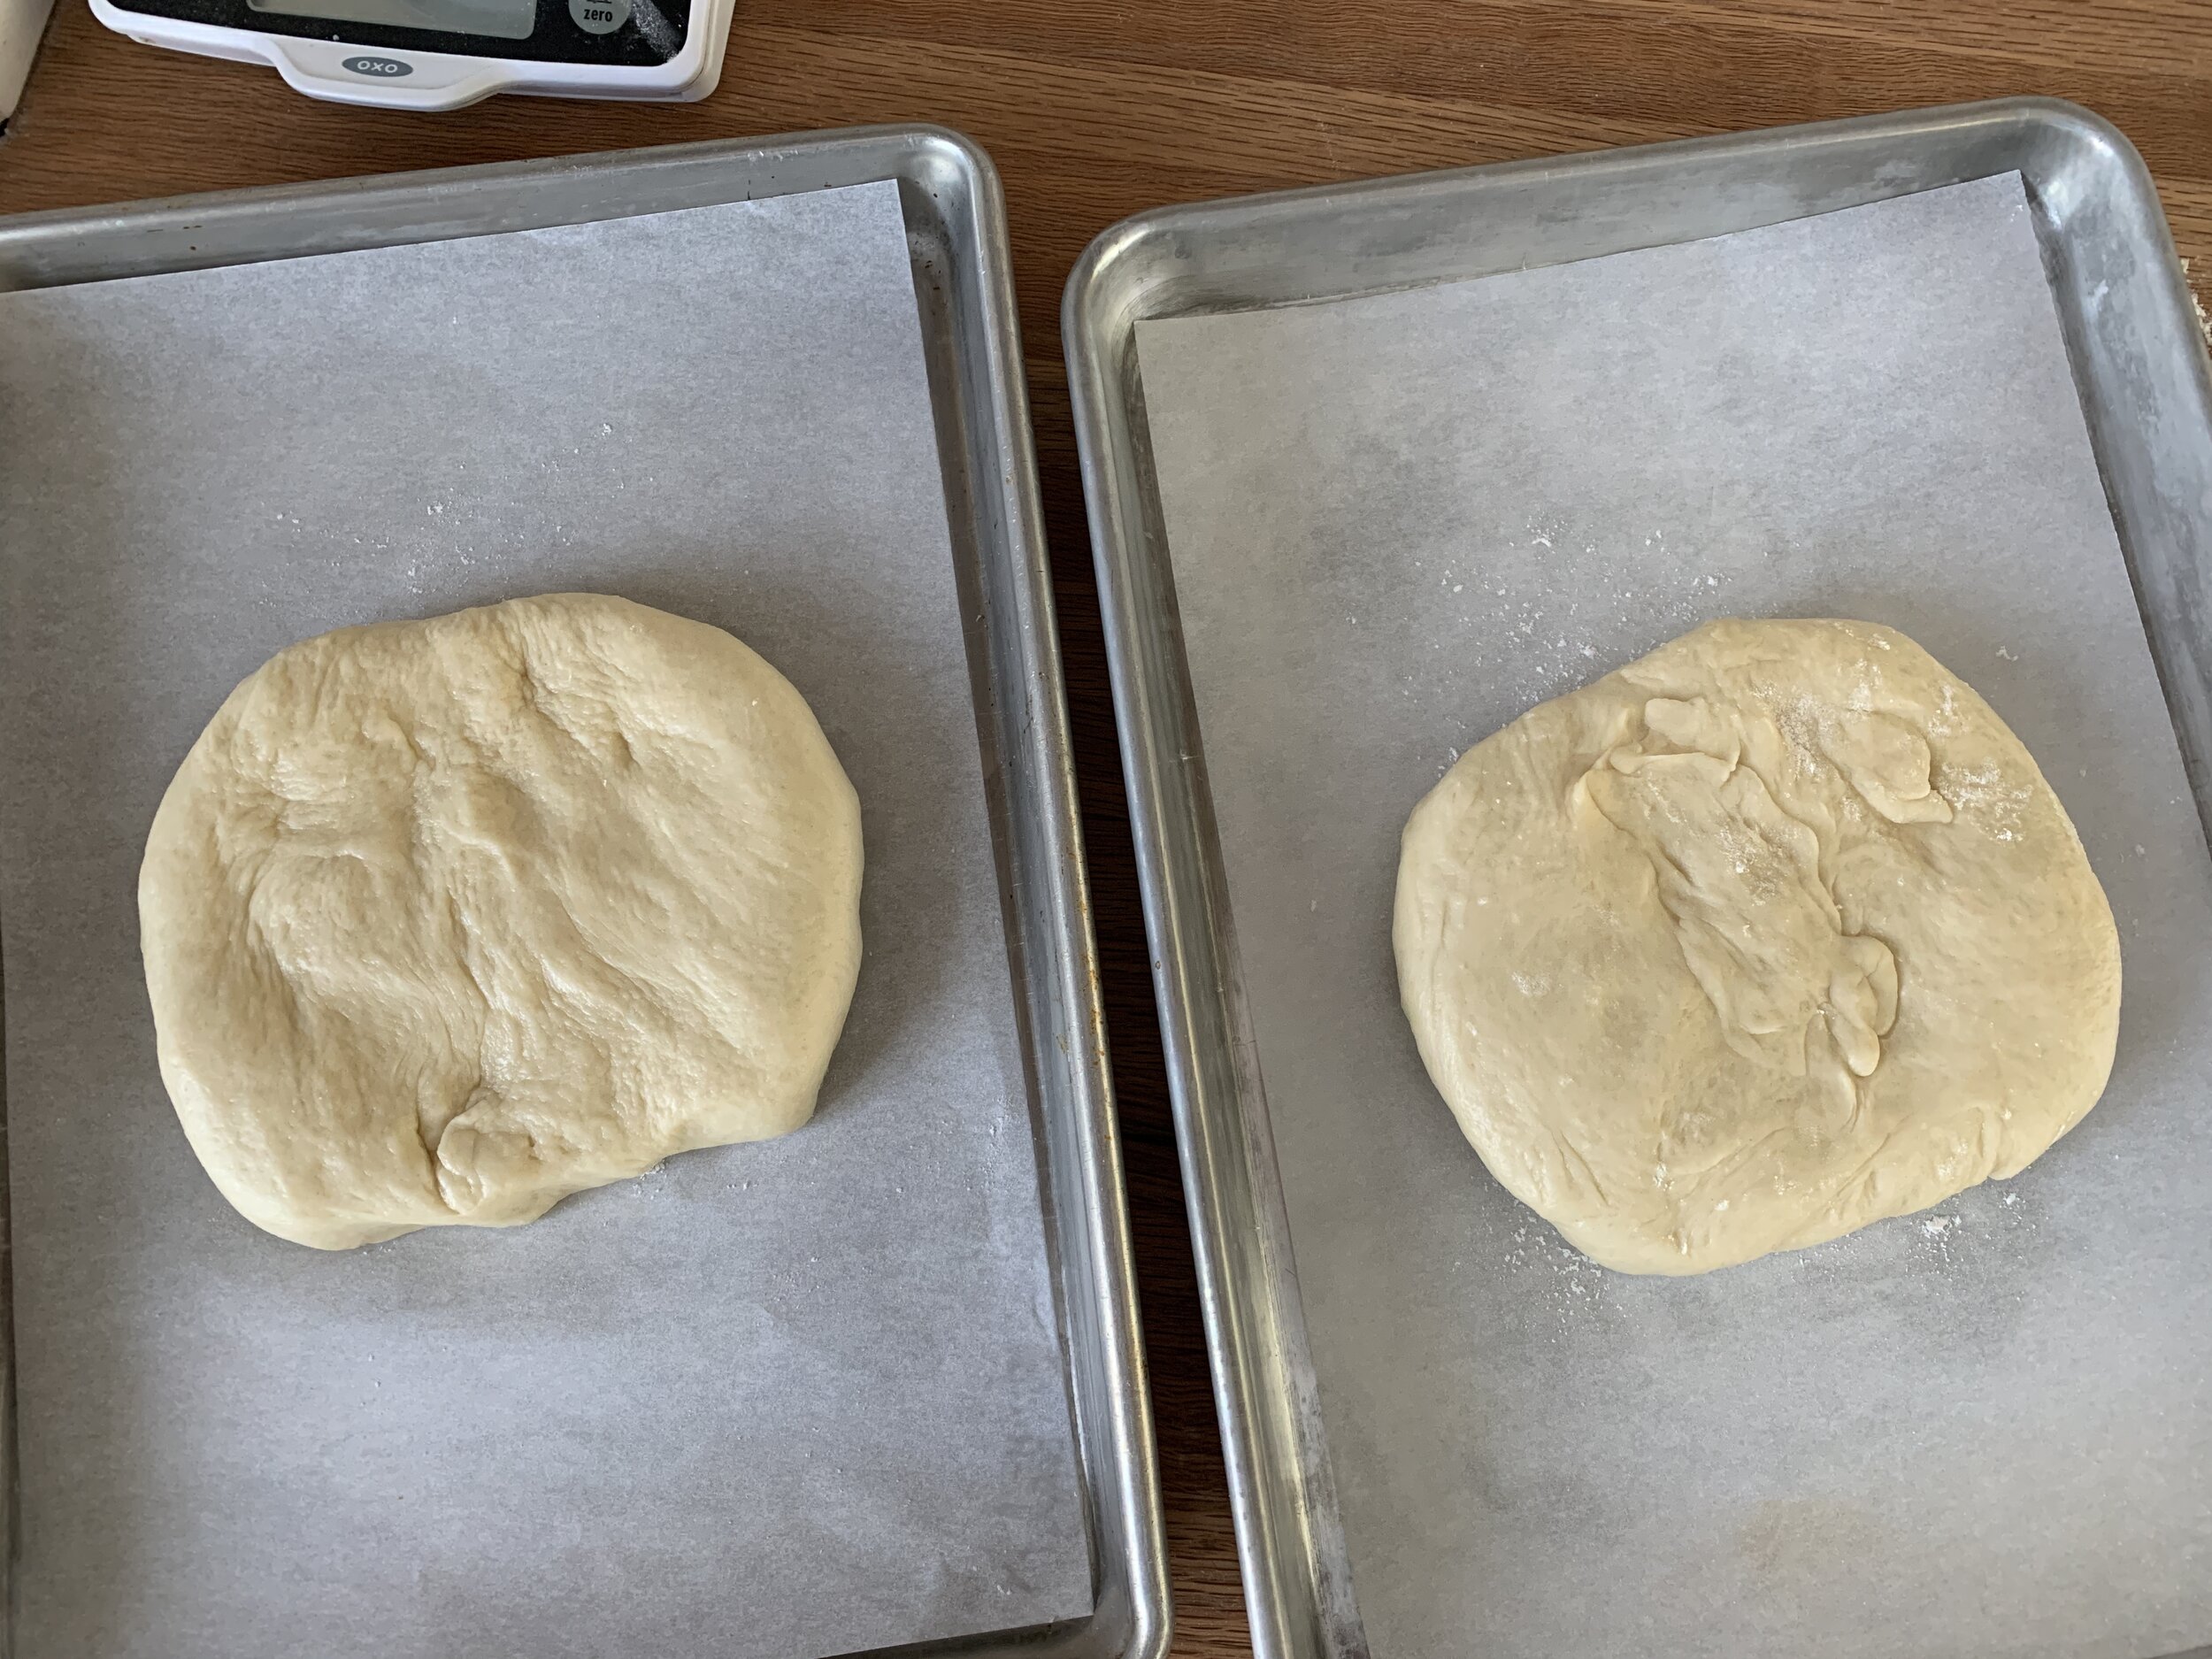
Now it’s time to divide the dough in half - each should weigh about 345 g, give or take. Place a portion on a lightly floured surface and flatten the dough to a round about 2 cm thick (about 3/4 inch). Do the same with the second portion. Don’t be too fussy with it. Put each on a parchment lined 1/4 sheet pan (or you can put them both on a 1/2 sheet pan with space in between if you’d like) and place in the freezer for about 20 minutes.

92D77340-5808-4DBC-8845-000708E514EC.jpeg

Meanwhile place 100 unsalted butter and 100 granulated sugar in a small saucepan over low heat to melt the butter and blend it. You don’t want it to boil ‘cuz you want to preserve the sugar crystals which give the finished bread it’s crunchy top. Remove from the heat and let cool to touch. (Note to self: next time melt the butter, cool a bit, stir in raw sugar and finish cooling - more crunch in the end methinks.)

Take the dough out of the freezer and spread half of the cooled butter/sugar mixture over each round. Hmmmm . . . . this is becoming interesting.

5292BB2C-57E9-46D1-A631-7FAEE7754187.jpeg

Here’s where I had to do a bit of quick thinking when realizing I was supposed to cover these with a cloth for the second proof. To avoid top smearing, I over turned a wire grid cooling rack across each sheet pan . . . .

624D6463-BAA5-4849-BD90-5F2B7E698F4E.jpg

and now I could easily lay a cloth towel over them. Yay!

Give them an hour or so to double, heating the oven to 400ºF during the second half hour. It was a bit difficult to assess the amount of the rise although I could appreciate more poofy-ness and fullness to the dough. I even gave them an extra 15-20 minutes.

61825726-41A1-44A5-A2B8-15BAFD6DAAD6.jpeg

Just before putting these in the oven, dimple the tops all over with your fingertips. Fun!

7413EDBF-367C-4F30-8F0D-E6E8B87548E7.jpeg

Bake for 10 minutes then open the door and pour the cream over the top of each. The dimples are meant to hold the cream so it won’t run over the sides. I actually had to re-dimple after the first ten minutes since my first dimplings puffed up.

Re-dimpled

Re-dimpled

Cream poured over with a bit of spillage

Cream poured over with a bit of spillage

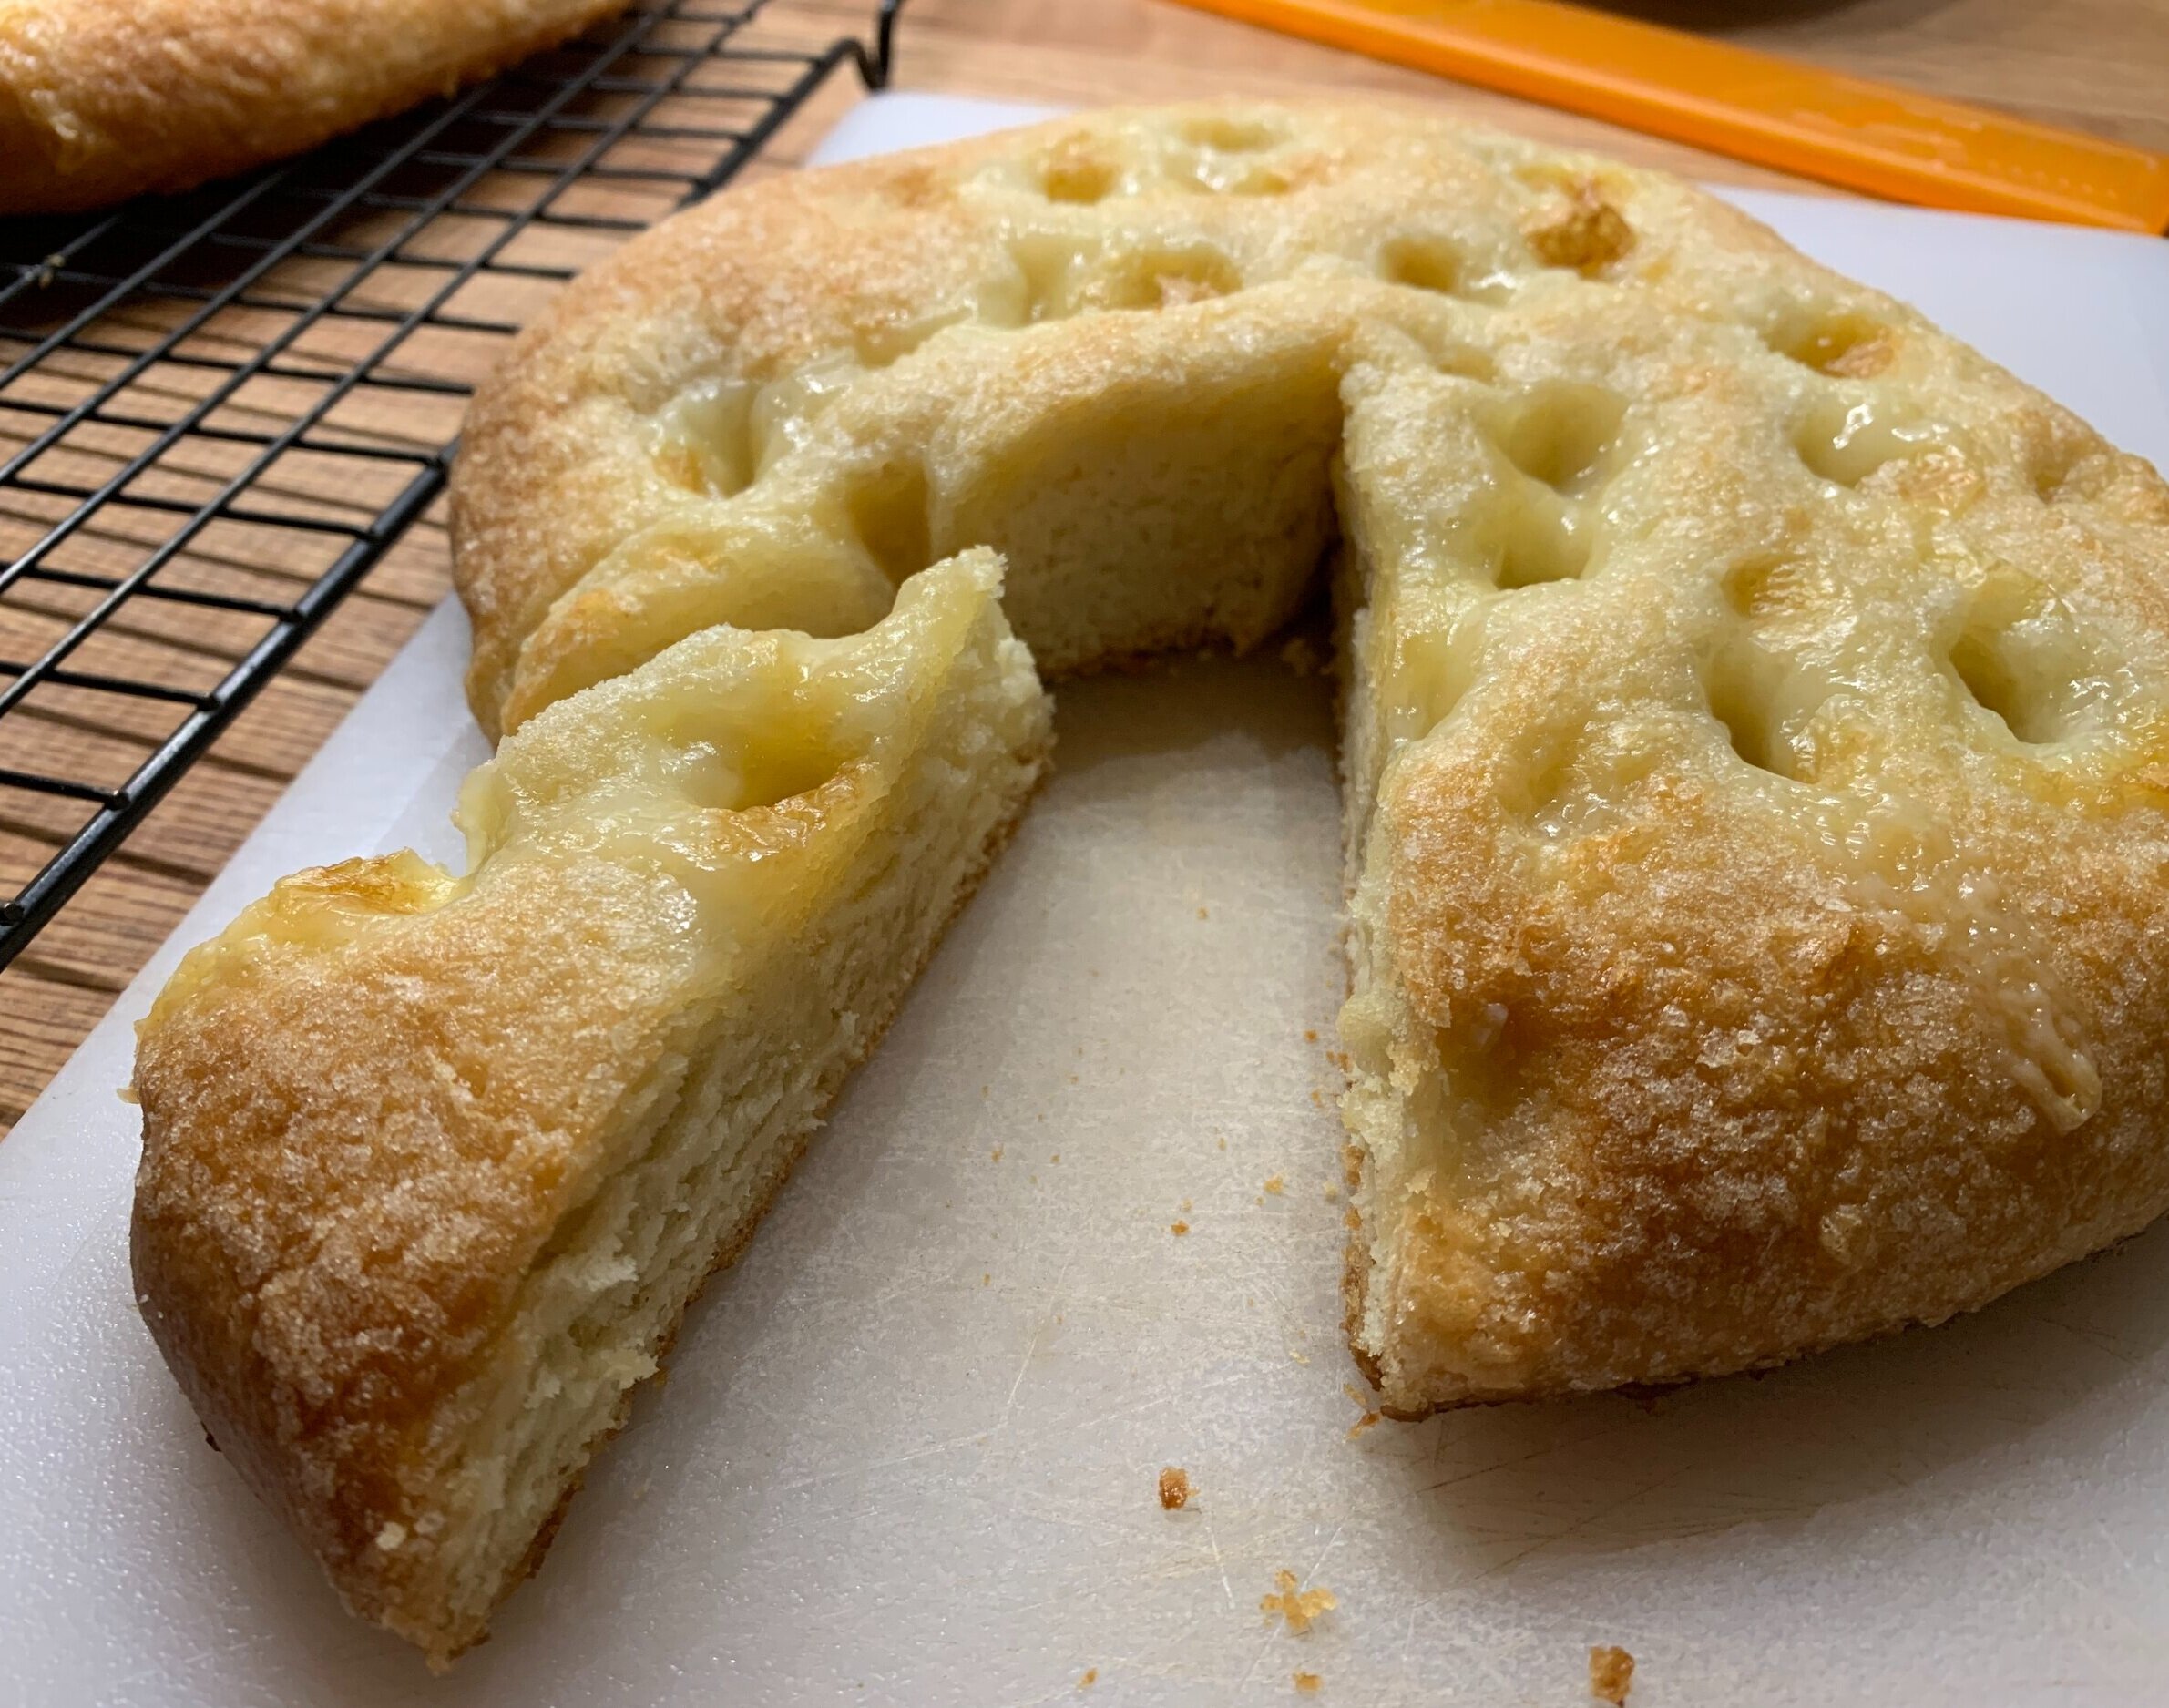
Bake for 10 more minutes or until golden brown. Voilà!

D7D66B34-AF45-4948-85C1-51067E018D0E.jpeg
 
08C606EA-9CC9-46FB-ABFA-8FE0F3A1AB39.jpg

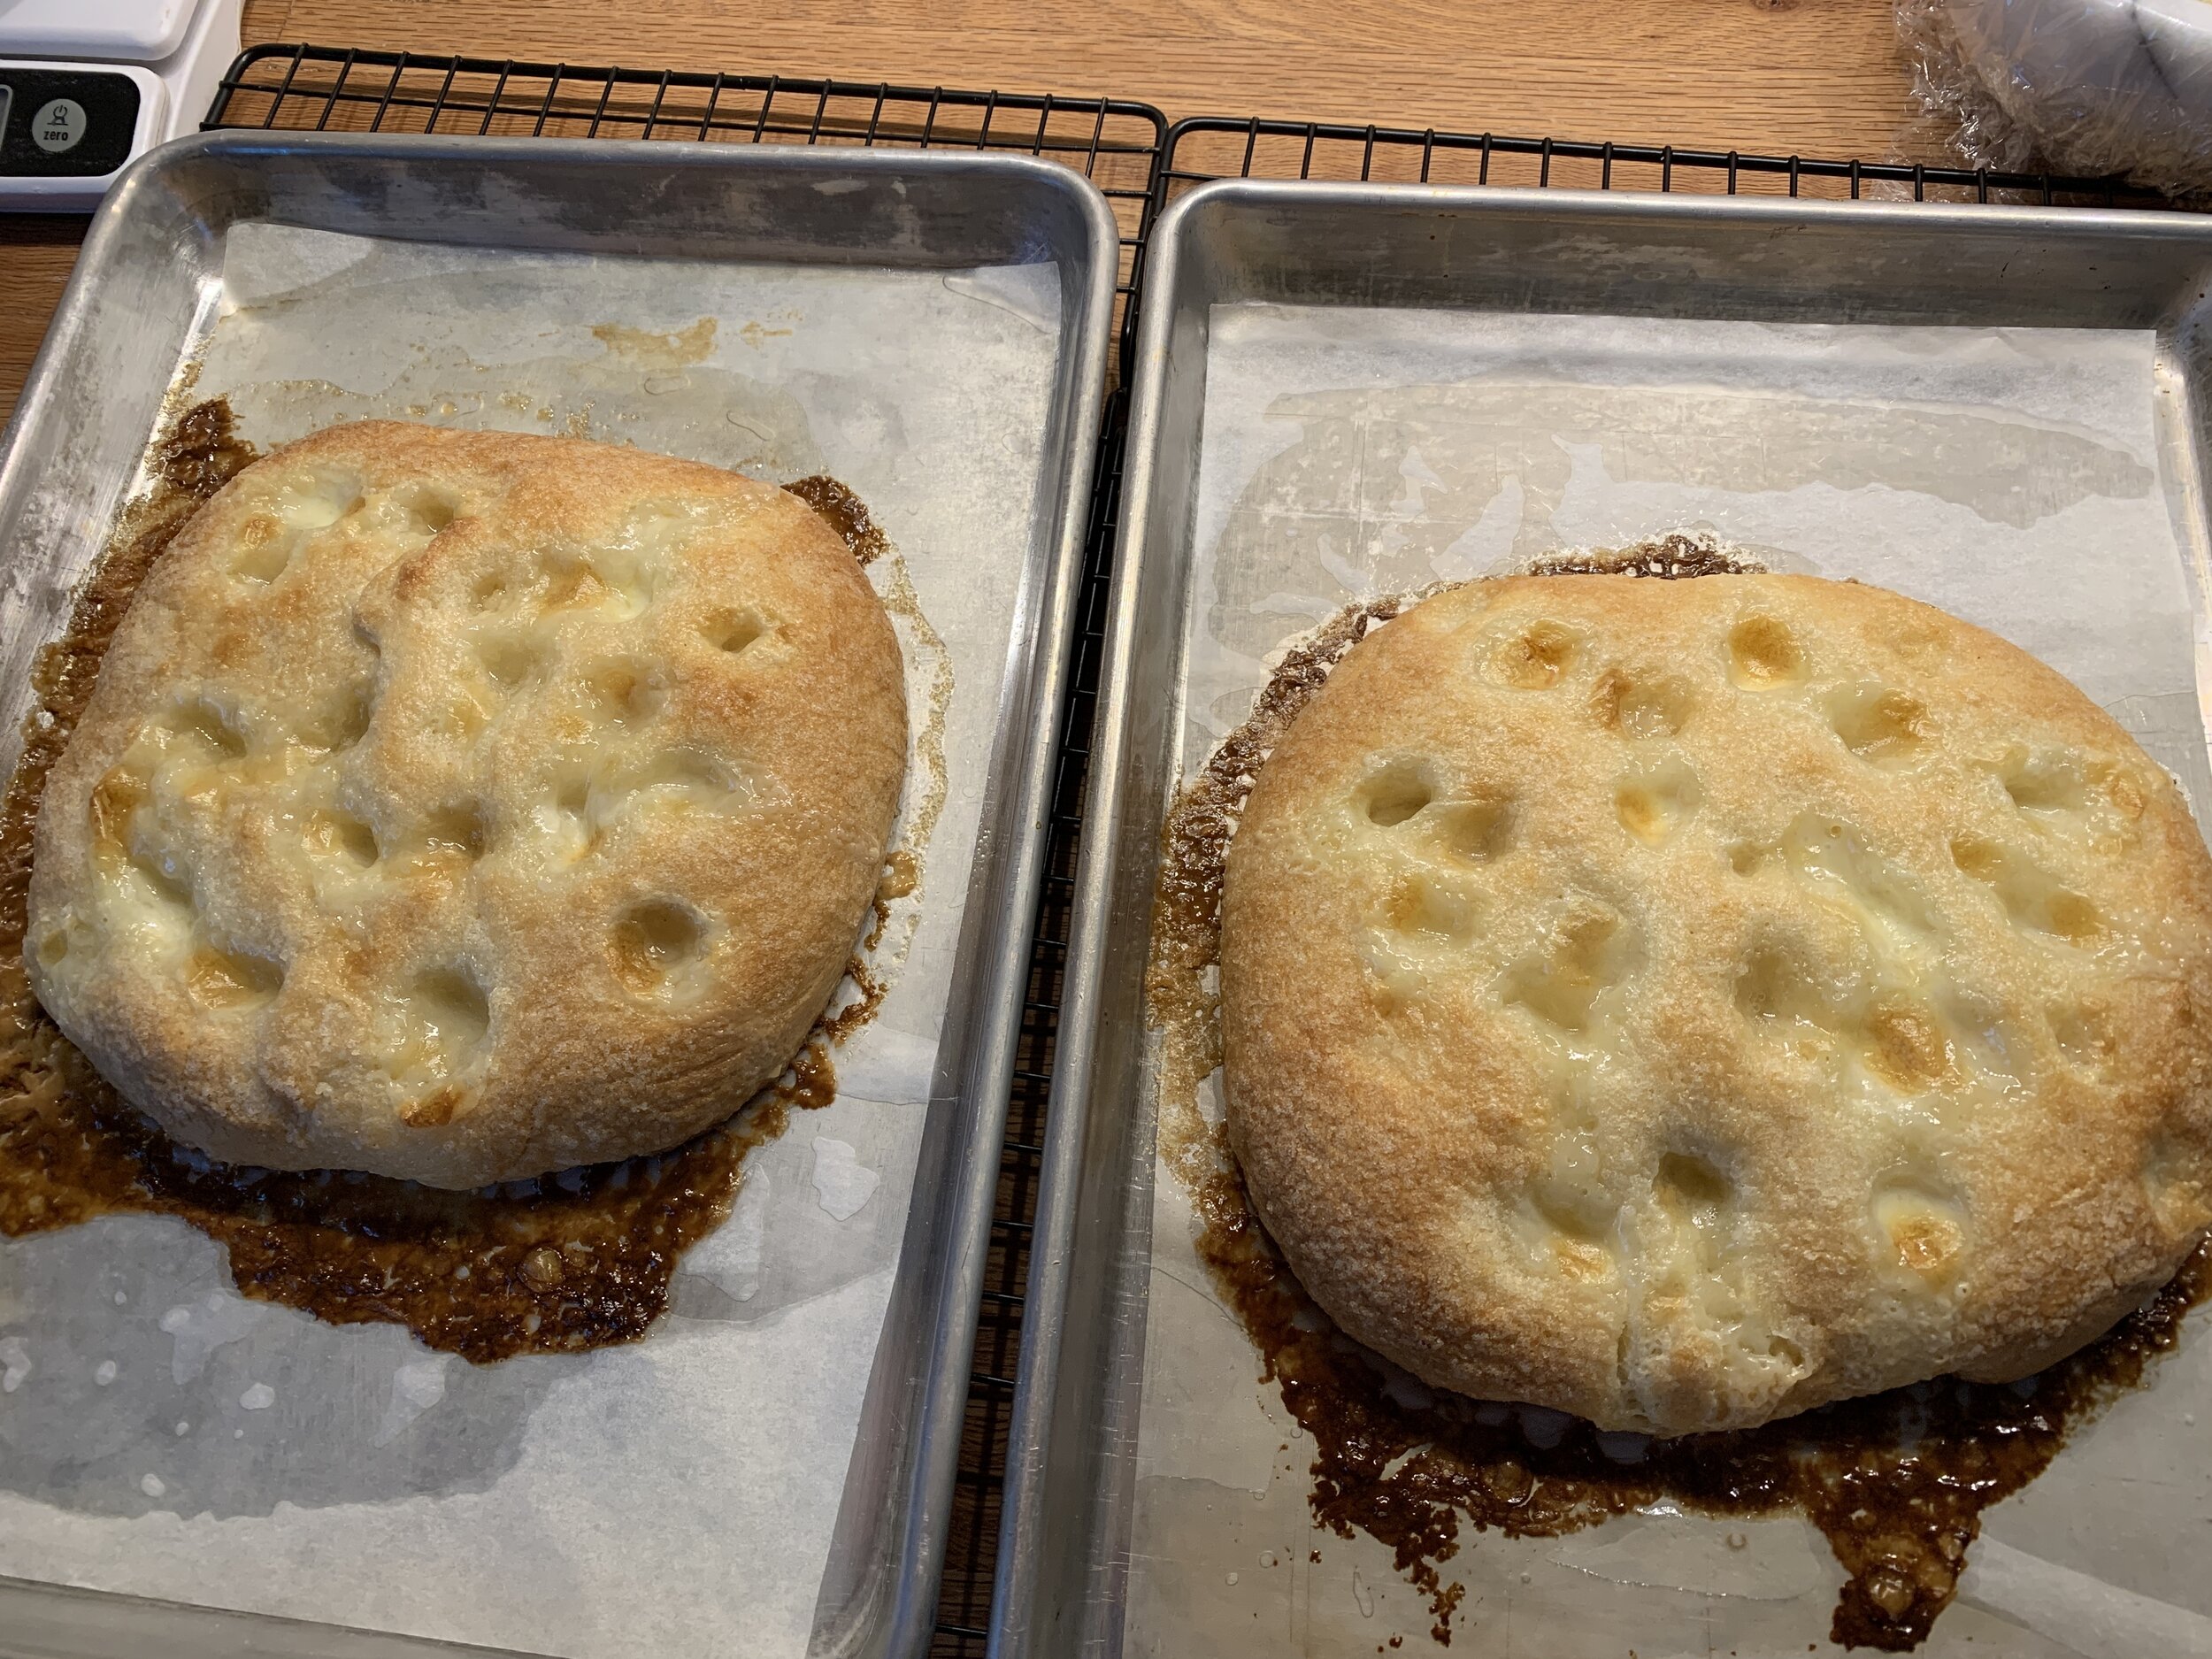
I can certainly appreciate how one might enjoy a slice of this dipped in chocolat chaud. With a pleasant flavor, light/sweet bread-y crumb, not too heavy and a hint of crunch on top - not bad at all.

0CDC7286-87E0-4584-AA65-A632D50D79D6.jpg
A663E321-940C-44CE-B3D4-4584D295CE9A.jpeg

Til next time, keep your chin up and think positive! I’m certainly trying to do just that.

And spring marches on!

3CF7F3AD-473E-4676-9197-8208C0A223D9.jpeg

Blueberry hazelnut tarte Bretonne

Petite version

Petite version

I’ve extolled the virtues of sablé Breton on a number of occasions over the years and simply must return to it now and again. The dough is versatile and one that I can make ahead and keep handy in the freezer for a couple of months. As we ease into the late spring and summer seasons, a Breton dough base is perfect either baked with fruit or jam or baked au naturel and topped with fresh fruits and luscious creams. Mmmmm . . . I can just taste them now. Fulton Farmers Market here I come!

Just one of the beauties of this dough is it’s made with egg yolks so . . . . . . When I need to amass egg whites for some of my faves like financier, dacquoise or Swiss meringue buttercream, Breton dough comes to the rescue. Separate the eggs, yolks go into the dough and whites (which can sit in the fridge for a week or so and can also be frozen) are on hand for whatever. I love that.

As an aside, a few other basics that offer me the same egg white saving opportunities are the classic custard sauce/ice cream base crème anglaise or the familiar crème pâtissiére, crème brulée and pots de crème. Of course it’s generally best to make these egg and dairy based goodies within a couple of days of enjoying them, so some planning ahead is important. But they’ll all give you plenty of whites to add to your stash.

I do digress. On to la tarte Bretonne!

The dough comes together easily - one plan ahead note is the butter should be soft. Let it sit out an hour or so, mise out the rest of the ingredients and you’re ready to go. Once mixed you can either wrap in plastic and chill for later or you can shape a rough circle and simply press it into a buttered ring or mold. NOTE: I love baking this dough in silicone flexi-molds which don’t have to be buttered. Yay - one less step!

Here I sub in hazelnut flour for the almond but you can do the same with pretty much any ground nut. Using a buttered 220 mm / 9” tart ring, I guestimated about 360 g of dough to press in the bottom and build up the sides. It’s up to you to experiment a bit, depending on how thin or thick you want your finished dough to be. Thicker than a typical tarte crust is my preference here. You can use even more dough (up it to 400 or 425 g) for a base that’s a delicious, buttery cross between tarte and cake. Yum.

Just for comparison sake, if I’m making a standard tarte with let’s say pâte sucrée, a good rule of thumb is to take the diameter of your ring (e.g. 220 mm), add 30 g to that number and that gives you a decent estimate for the amount of dough for that size ring - 250 g. It works pretty well with inches/ounces too - 9” tart uses about 9 ounces of dough.

998021B8-862D-4609-A6A0-E076FDB324CD.jpeg

Once the dough is pressed into the ring, you can cover and refrigerate it for a few hours or overnight if you’re not quite ready to proceed.

I made a quick hazelnut crumble with 50 g sugar and 75 g whole wheat pastry flour (all purpose is fine too) mixed in a medium bowl; sand in 60 g of cool, cubed butter to coarse crumbs and add 30 g of toasted and chopped hazelnuts. It yields plenty for this type of project and you can freeze any leftover for next time.

My store bought blueberry jam is Bonne Maman, but I also like St. Dalfour, both of which have some great flavor options.

Heat the oven to 350ºF.

Create a layer of fresh blueberries mixed with a few spoonfuls of jam (eyeball it) over the dough. No fancy fillings here folks!

AD5ACA4A-199B-4E0B-A84D-7EC84214C368.jpg

Top it with a decent layer of crumble.

68D8D8D9-ACD6-491E-917F-F435171D62D9.jpg

Bake about 25-30 minutes until the edges and crumble are nicely browned and the jam/berries look bubbly and set. Reduce oven to 325ºF if you feel your edges are browning too quickly. It’s up to you to keep on eye on things!

478CDEBC-5EE7-49F1-8120-45C11B67F05F.jpg

I made this baby for Easter dessert, served with homemade raspberry ice cream. The end result was a nutty, chewy, buttery, jammy, fruity and delicious treat which paired so beautifully with the creamy raspberry.

Truth be told, I prefer small individual desserts to larger, sliceable versions. I made a petite version ahead of time as a test, and it worked so well with a rustic scoop of ice cream right on top. Steve and I enjoyed our taste test while the tartelette was fresh and still a tad warm. Oh my.

E02D9501-C815-468A-97EB-DD1CBA277249.jpg
E5E79400-8188-4574-82DC-AB4326796713.jpeg

There are so many ways to create your own tarte Bretonne. Trust me, you won’t regret it!

Meanwhile spring keeps springing with flowers popping, sightings of turtles on logs, herons flying overhead, red wing blackbirds with their shrill call, garter snakes on the path and spring peepers singing to us all.

Enjoy the season and stay safe.

80881E5D-722B-4B7A-AD7B-25E567586C19.jpeg
7A8FA5C7-2D42-457A-8EBE-FFFF9C231D14.jpeg


Not your mother's (or grandmother's) cherry pie: free form cherry puff pastry tart

6B3CBB64-6FEB-4983-A3D7-B1EAF59FB71B.jpg

Yum yum yum. On the heels of the mille-feuille that I recently posted on, I came up with a free form cherry tart for cousin Melissa’s husband Jeff’s 60th birthday. I had rough puff and my last bag of Michigan sour cherries from summer 2020 in the freezer. What better way to use them than to create a spur-of-the-moment dessert!

DD3DF47B-861A-4C0A-9E9E-2A2FCA615452.jpeg

I let my generous 2 cups of cherries (~350 g) thaw at room temperature for an hour or two then put them in a medium saucepan along with 100 g / 1/2 cup cane sugar and a pinch of salt. I opted for a few grates of fresh nutmeg, 1/2 teaspoon ground coriander too. Heat on low, with occasional stirring, until the cherries release some juice and the sugar dissolves. Blend a tablespoon lemon juice with 2 tablespoons cornstarch and stir it into the cherry/sugar mix. Bring to a boil then cook for several minutes until thickened. Add a splash of vanilla or almond extract if you like and let it cool. You can prep the cherry filling a day or 2 ahead and hold it in the fridge until baking time. Just look at these jewels!

1DE3C61D-E679-4FD4-9798-AA0F452092A9.jpg

The beauty of a free form tart is being able to make any size or shape your little heart desires. For this one I used about 300 g of puff, rolled it out to a 6-ish by 13-ish rectangle and put it on a parchment lined sheet pan. I then cut ~1/2” wide strips from each border and “glued” them around the edges with a brush of egg white. I had some scraps from which I cut small diamonds and spaced those along the edges too. Those touches give a bit of a border for the end result.

You can go even more decoratively as I did for this small savory tart some years back. Make it your own!

freeformpufftart.jpg

Brush the puff with egg white or wash, add a sprinkle of vanilla sugar over the dough and freeze the puff while heating your oven (helps keep down shrinkage), then bake fully at 400ºF for about 20-25 minutes until golden toasty brown (reduce oven heat as needed). I overturn a wire grid across the sheet pan to keep the rise even.

Reduce the oven temp to 325ºF. Let the pastry cool 5-10 minutes (so you don’t burn your fingers), gently push down the puffed center and layer the already cooked filling over the dough. I had just enough cherries for a single layer. Return to the oven for about 20-25 minutes to warm and set the filling a bit more.

7103DB85-40AA-481E-B885-9E3668DFBDF7.jpg

I had frozen a bunch of leftover baked puff scraps from the mille-feuille project so I crushed/cut a bunch of those up to use as a rustic topping.

1DE3C61D-E679-4FD4-9798-AA0F452092A9.jpg
2B8D7701-73E1-4F60-BB09-6E01F7C8D341.jpg
A49EF8C4-C587-4C4B-A458-1B2BC8B62A78.jpeg

A drizzle of caramel to top it off plus a dusting of powdered sugar before serving. Ohhh . . . . the tartness of the cherries with just the right hint of sweetness and spice. Love it!

It’s great au naturel but a scoop of vanilla ice cream wouldn’t hurt a thing. Your choice.

6B3CBB64-6FEB-4983-A3D7-B1EAF59FB71B.jpg

I saved some of the cherry syrup from the filling and used it to make a batch of cherry Swiss meringue buttercream which is currently residing in my freezer. Hmmm . . . I wonder what I’ll create with that! Time will tell.

Keep moving, stay safe, everything in moderation and enjoy spring wherever you are.