French Tarte Faves (FTF) No. 3: dacquoise

Here I am, back with another favorite - dacquoise in all it’s glory. I’ll warn you - this one’s kind of a mouthful with various components, assembly steps etc. But the end result is deelish! And it’s a great make-ahead project.

Dacquoise is a nut meringue made in a similar fashion to the ever popular French macaron. While very versatile for creating all manner of assembled desserts, it’s also delicious baked into petite button-like cookies that can be sandwiched or simply left alone. In fact, the term dacquoise can refer to the meringue base itself OR the assembled/layered dessert.

Here are a few posts on past creations: pistachio berry dacquoise; hazelnut dacquoise tarte; chocolate hazelnut marjolaine; vanilla/chocolate dacquoise.

This time I went with a passion/raspberry/pistachio flavor profile, feeling the dessert would be a good palate refresher after an Asian meal that Steve prepared recently for a group of friends. The idea actually goes way back to my Gracie’s days when I came up with a dacquoise/passion cream/raspberry number for the dessert menu. I won’t even begin to tell you how fussy that assembly was, but, boy oh boy, it was delicious!


The nut meringue dacquoise component is frequently made with almond flour but you can substitute in hazelnut or pistachio flour (or a mix of your favorite ground nuts). This time around I used half blanched almond flour and half ground pistachios.

Plan aheads are: bake the dacquoise a few days ahead/hold in the freezer until ready for assembly; make passion fruit curd and raspberry coulis a day or two before/hold in the fridge; make a basic crumble and hold in the freezer (or use some of your freezer stash); on assembly day whip heavy cream to fold into the passion curd. NOTE: once assembled you can freeze the whole shebang (except for last minute garnishes) too!

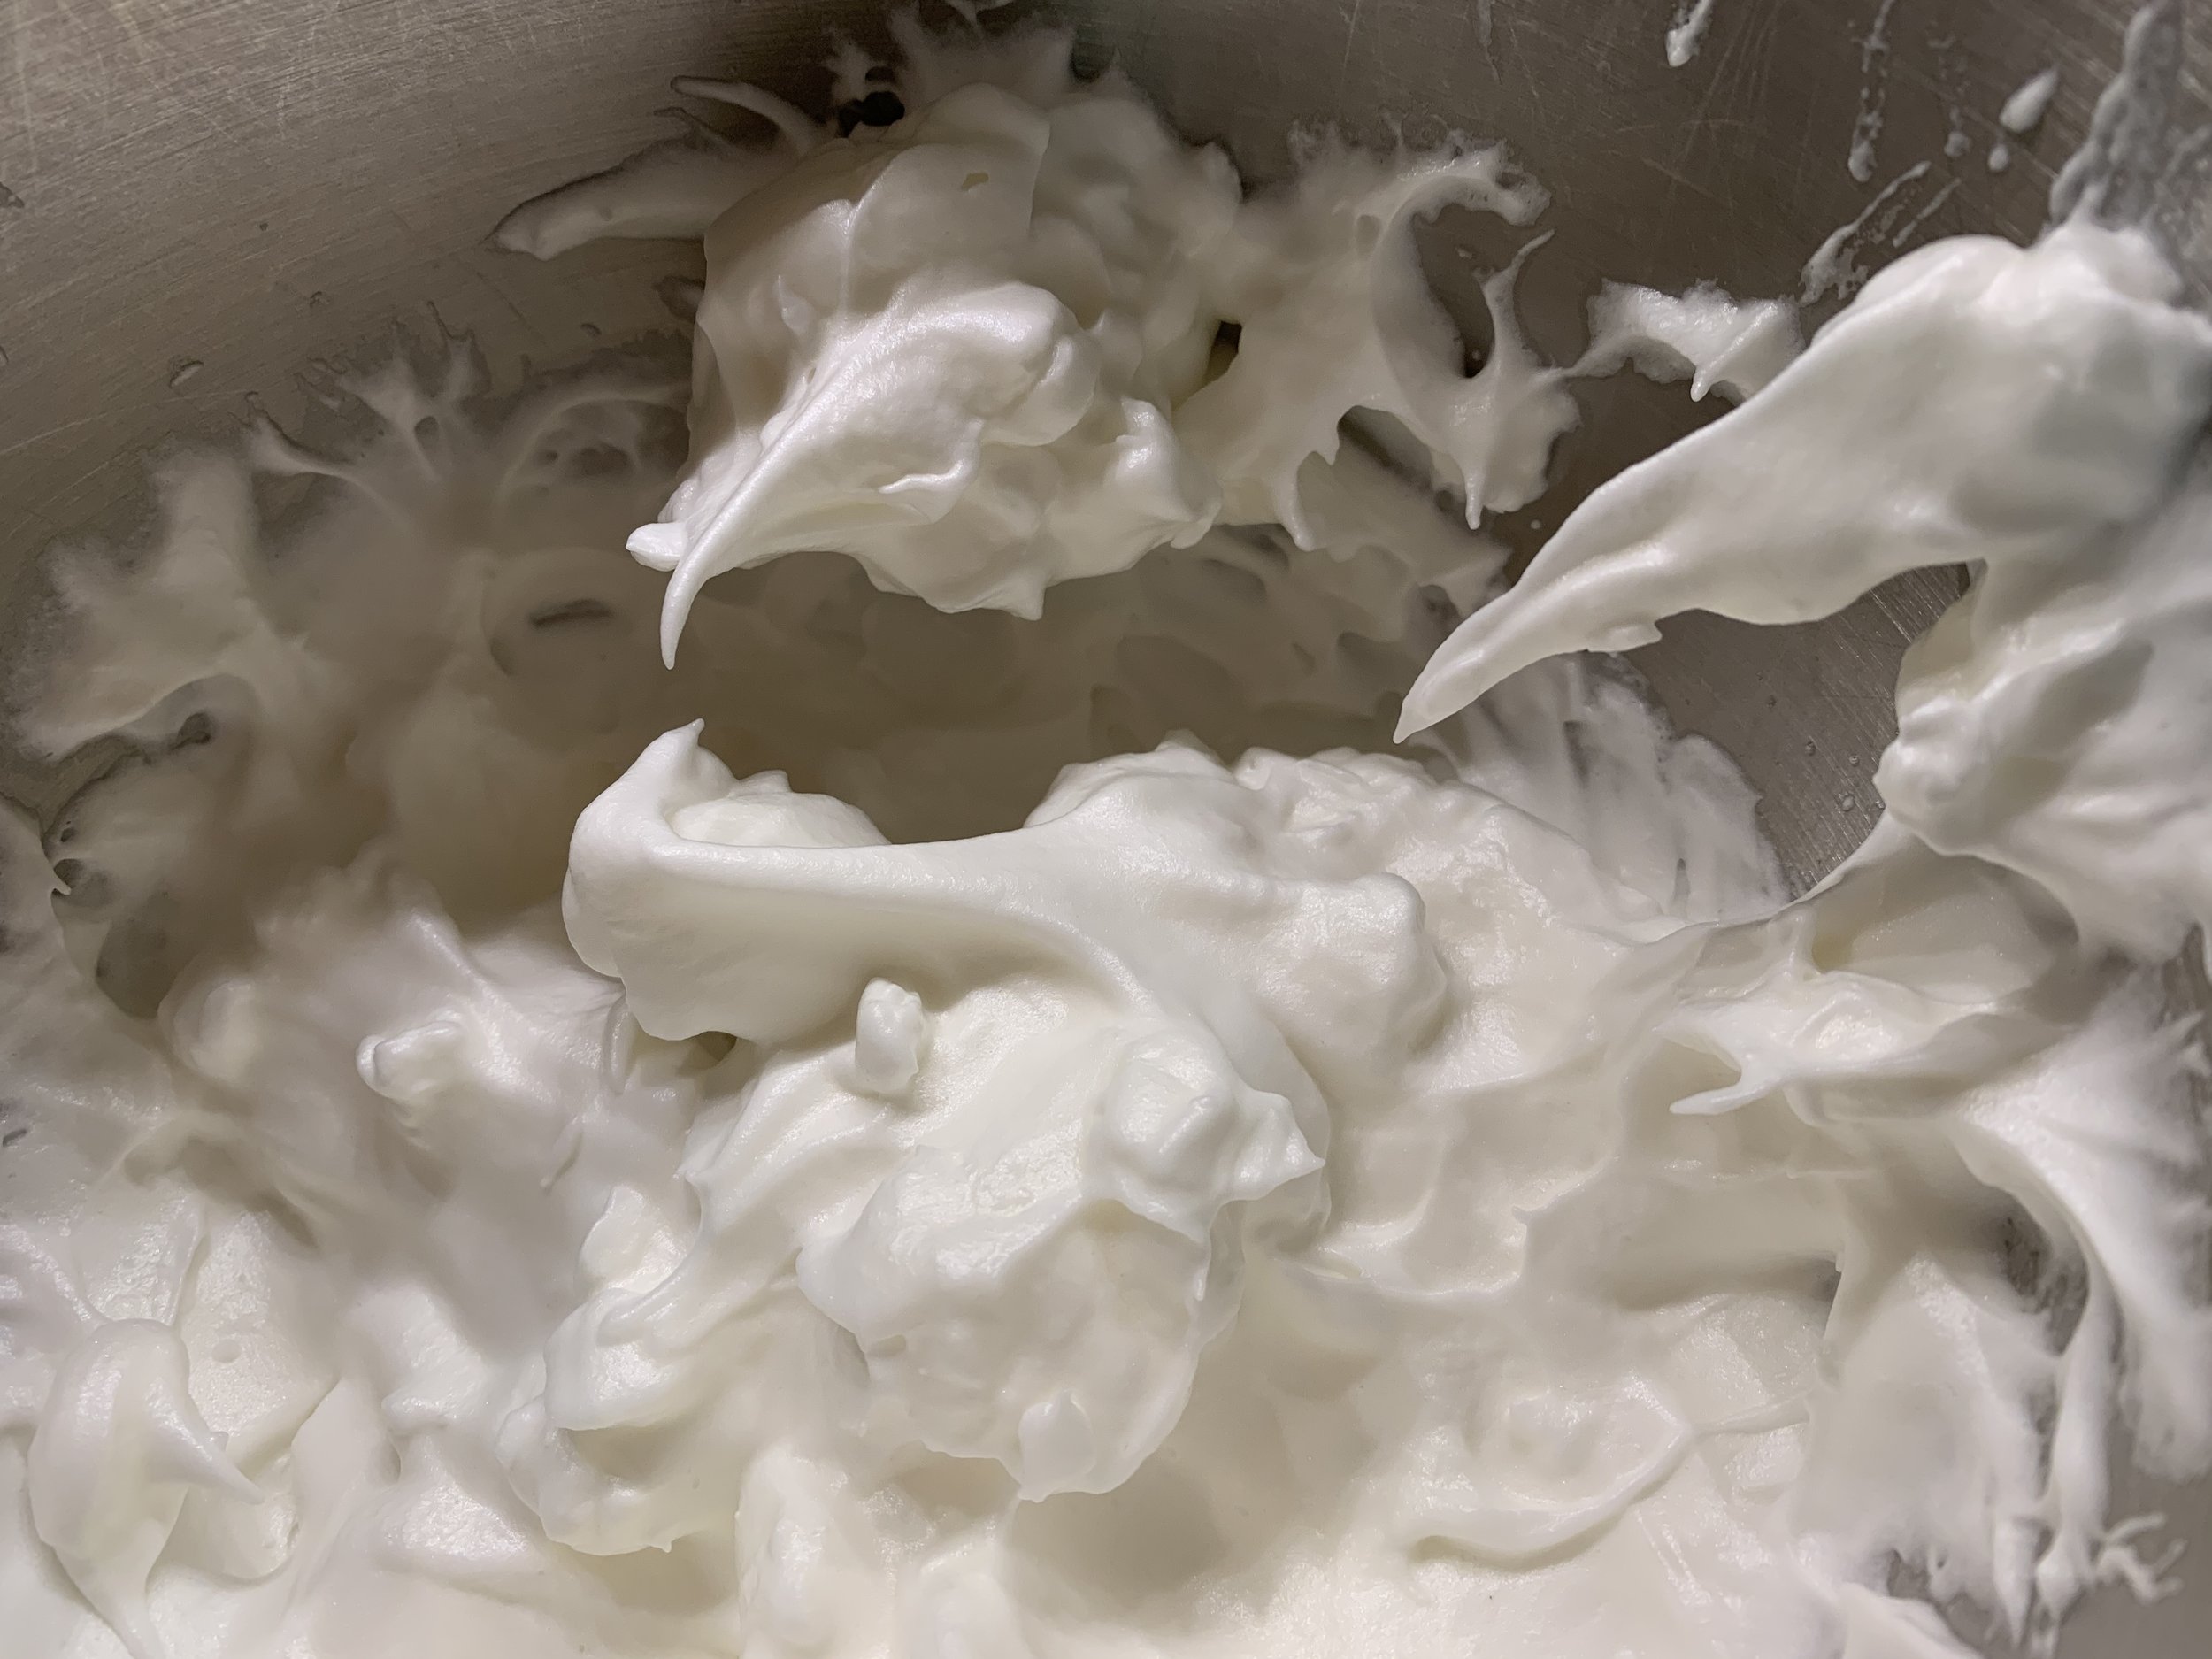
Here are the ingredients for the dacquoise base: almond flour, ground pistachios and confectioner’s sugar sifted into the bowl left/front. Then simply whip the egg whites with a pinch of salt until foamy, then gradually add the sugar. Once all the sugar is added, increase the mixer speed and whip to stiff peaks.

Dacquoise mise

Nice Stiff peaks

Blend the nut flour/confectioner sugar mix into the whipped whites in three additions then pipe your desired shapes.

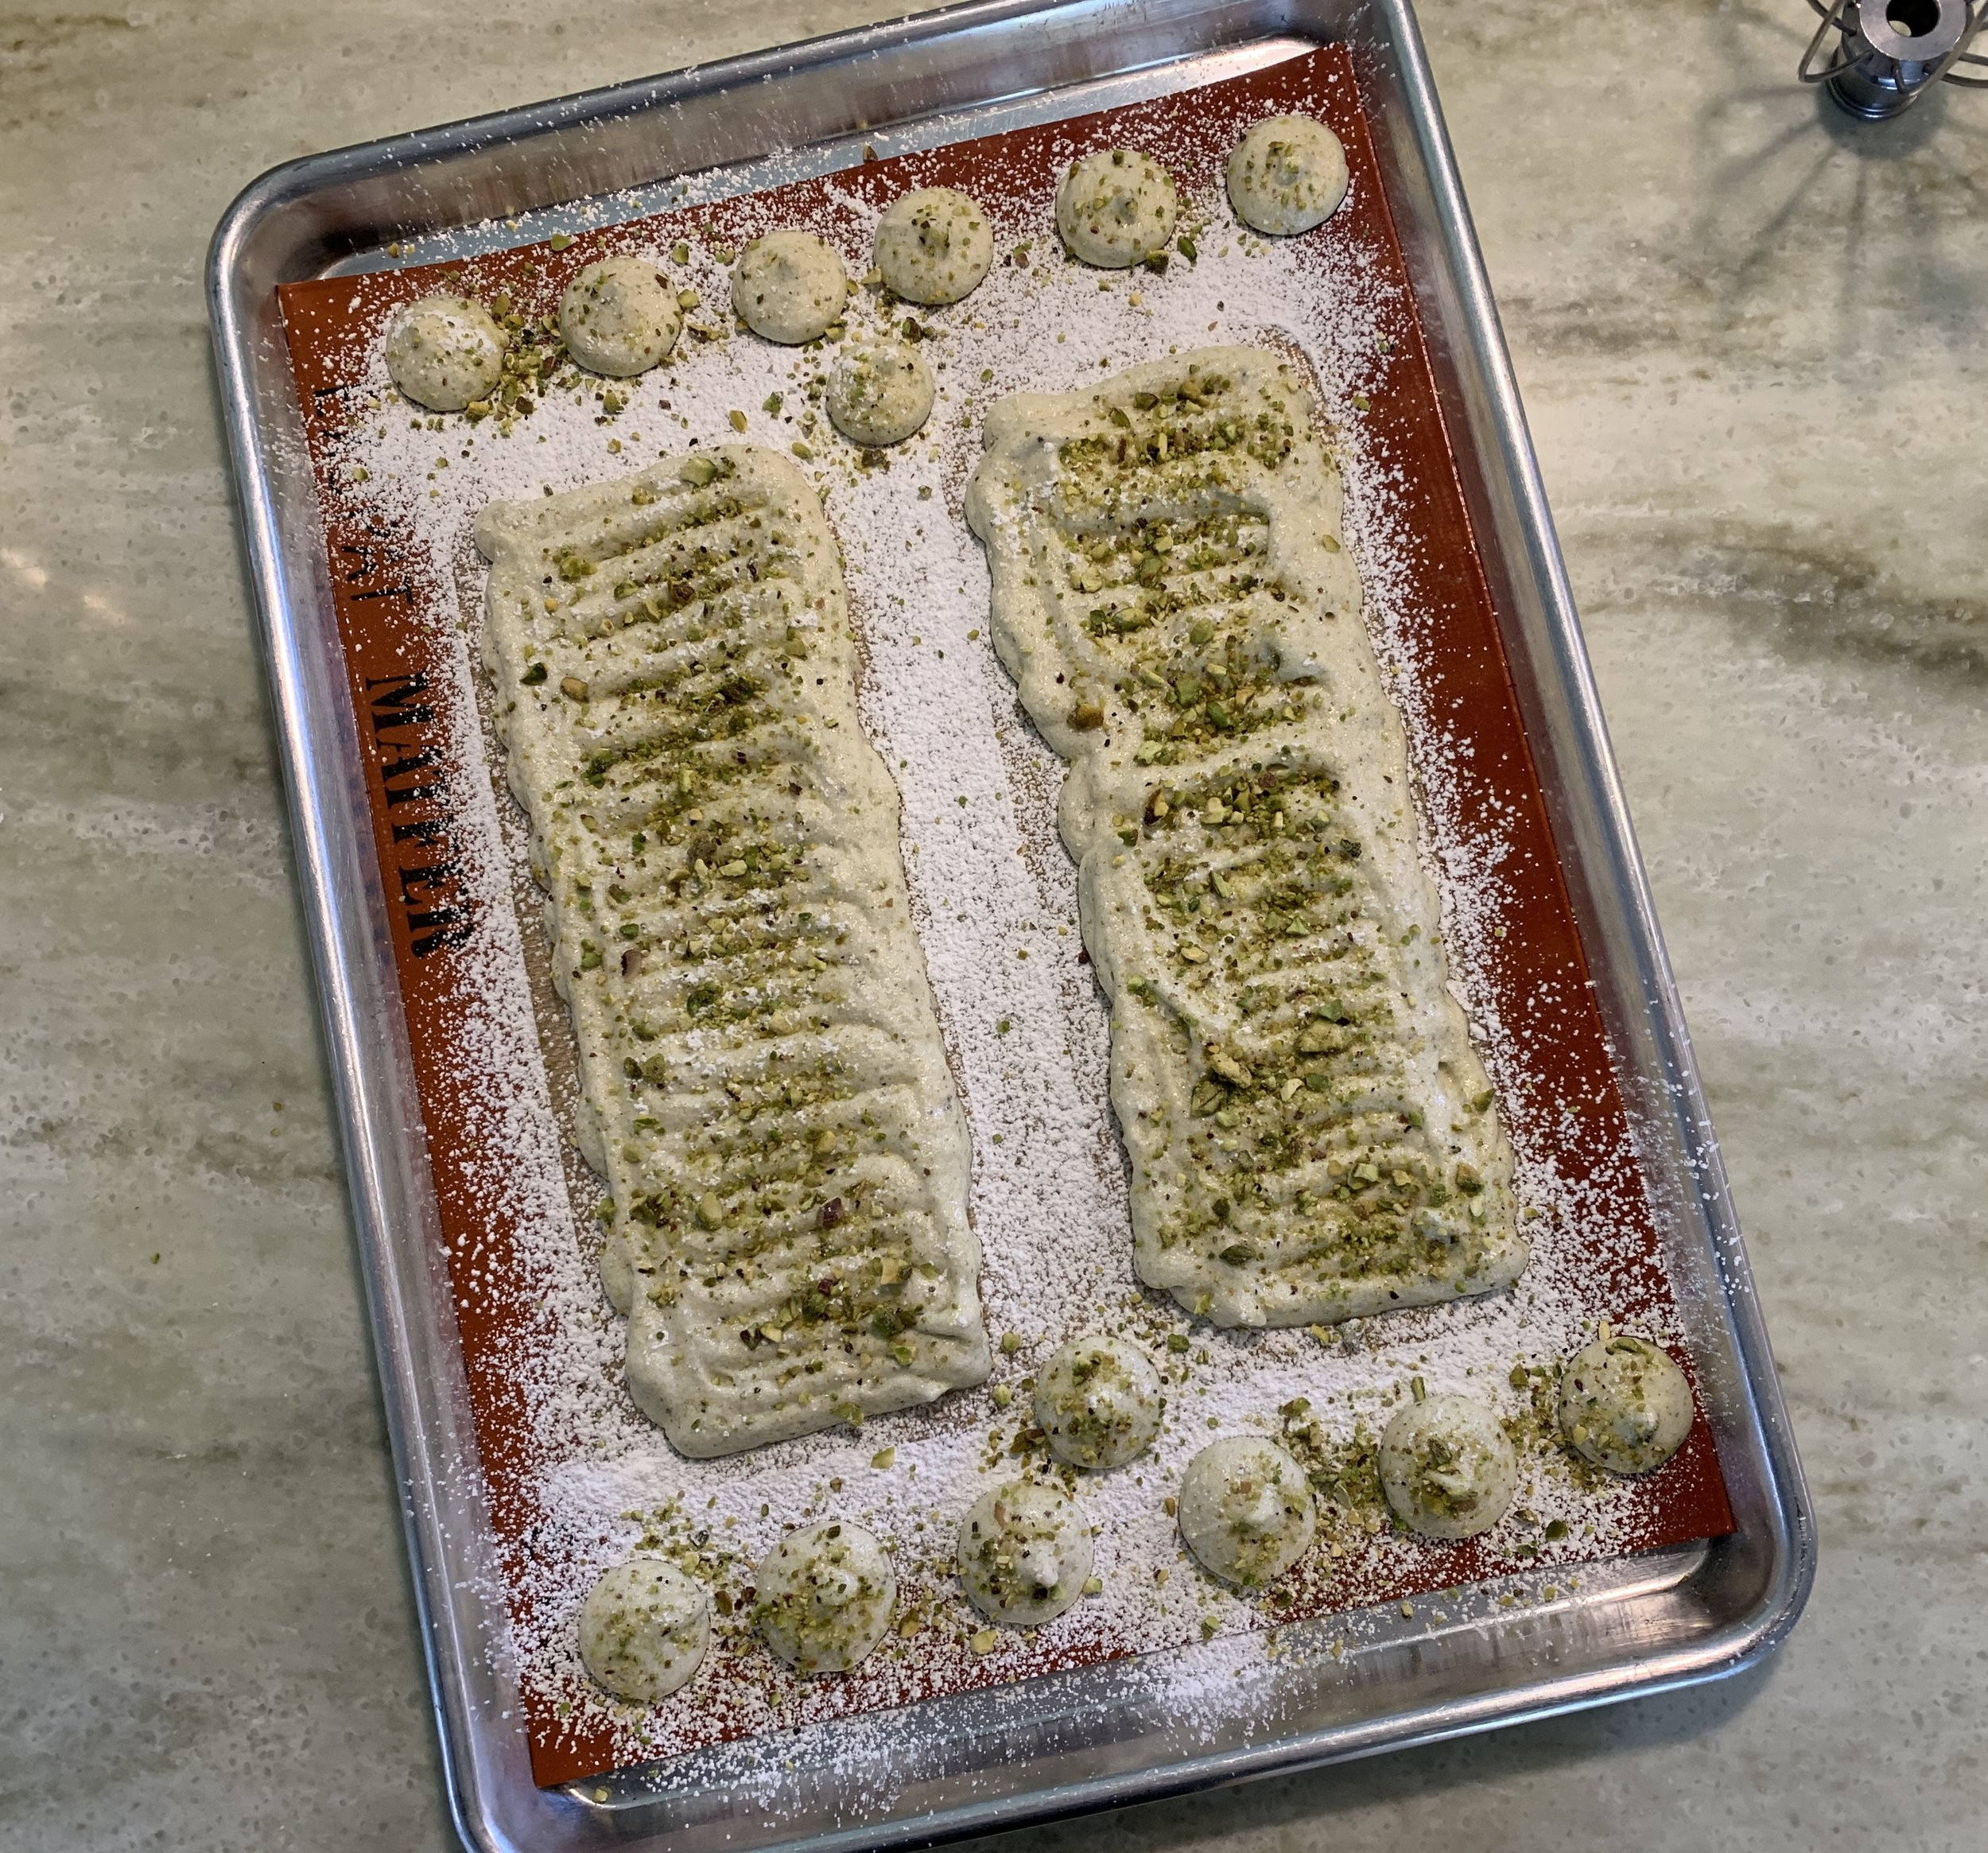
I planned to assemble this in my mom’s longer, narrower Mirro loaf pan so I use the pan as a guide, placing it on Silpat and dusting over it with confectioner’s sugar to give myself an outline for piping my dacquoise shapes. I know I’ve shown you this trick before - it’s pretty slick.


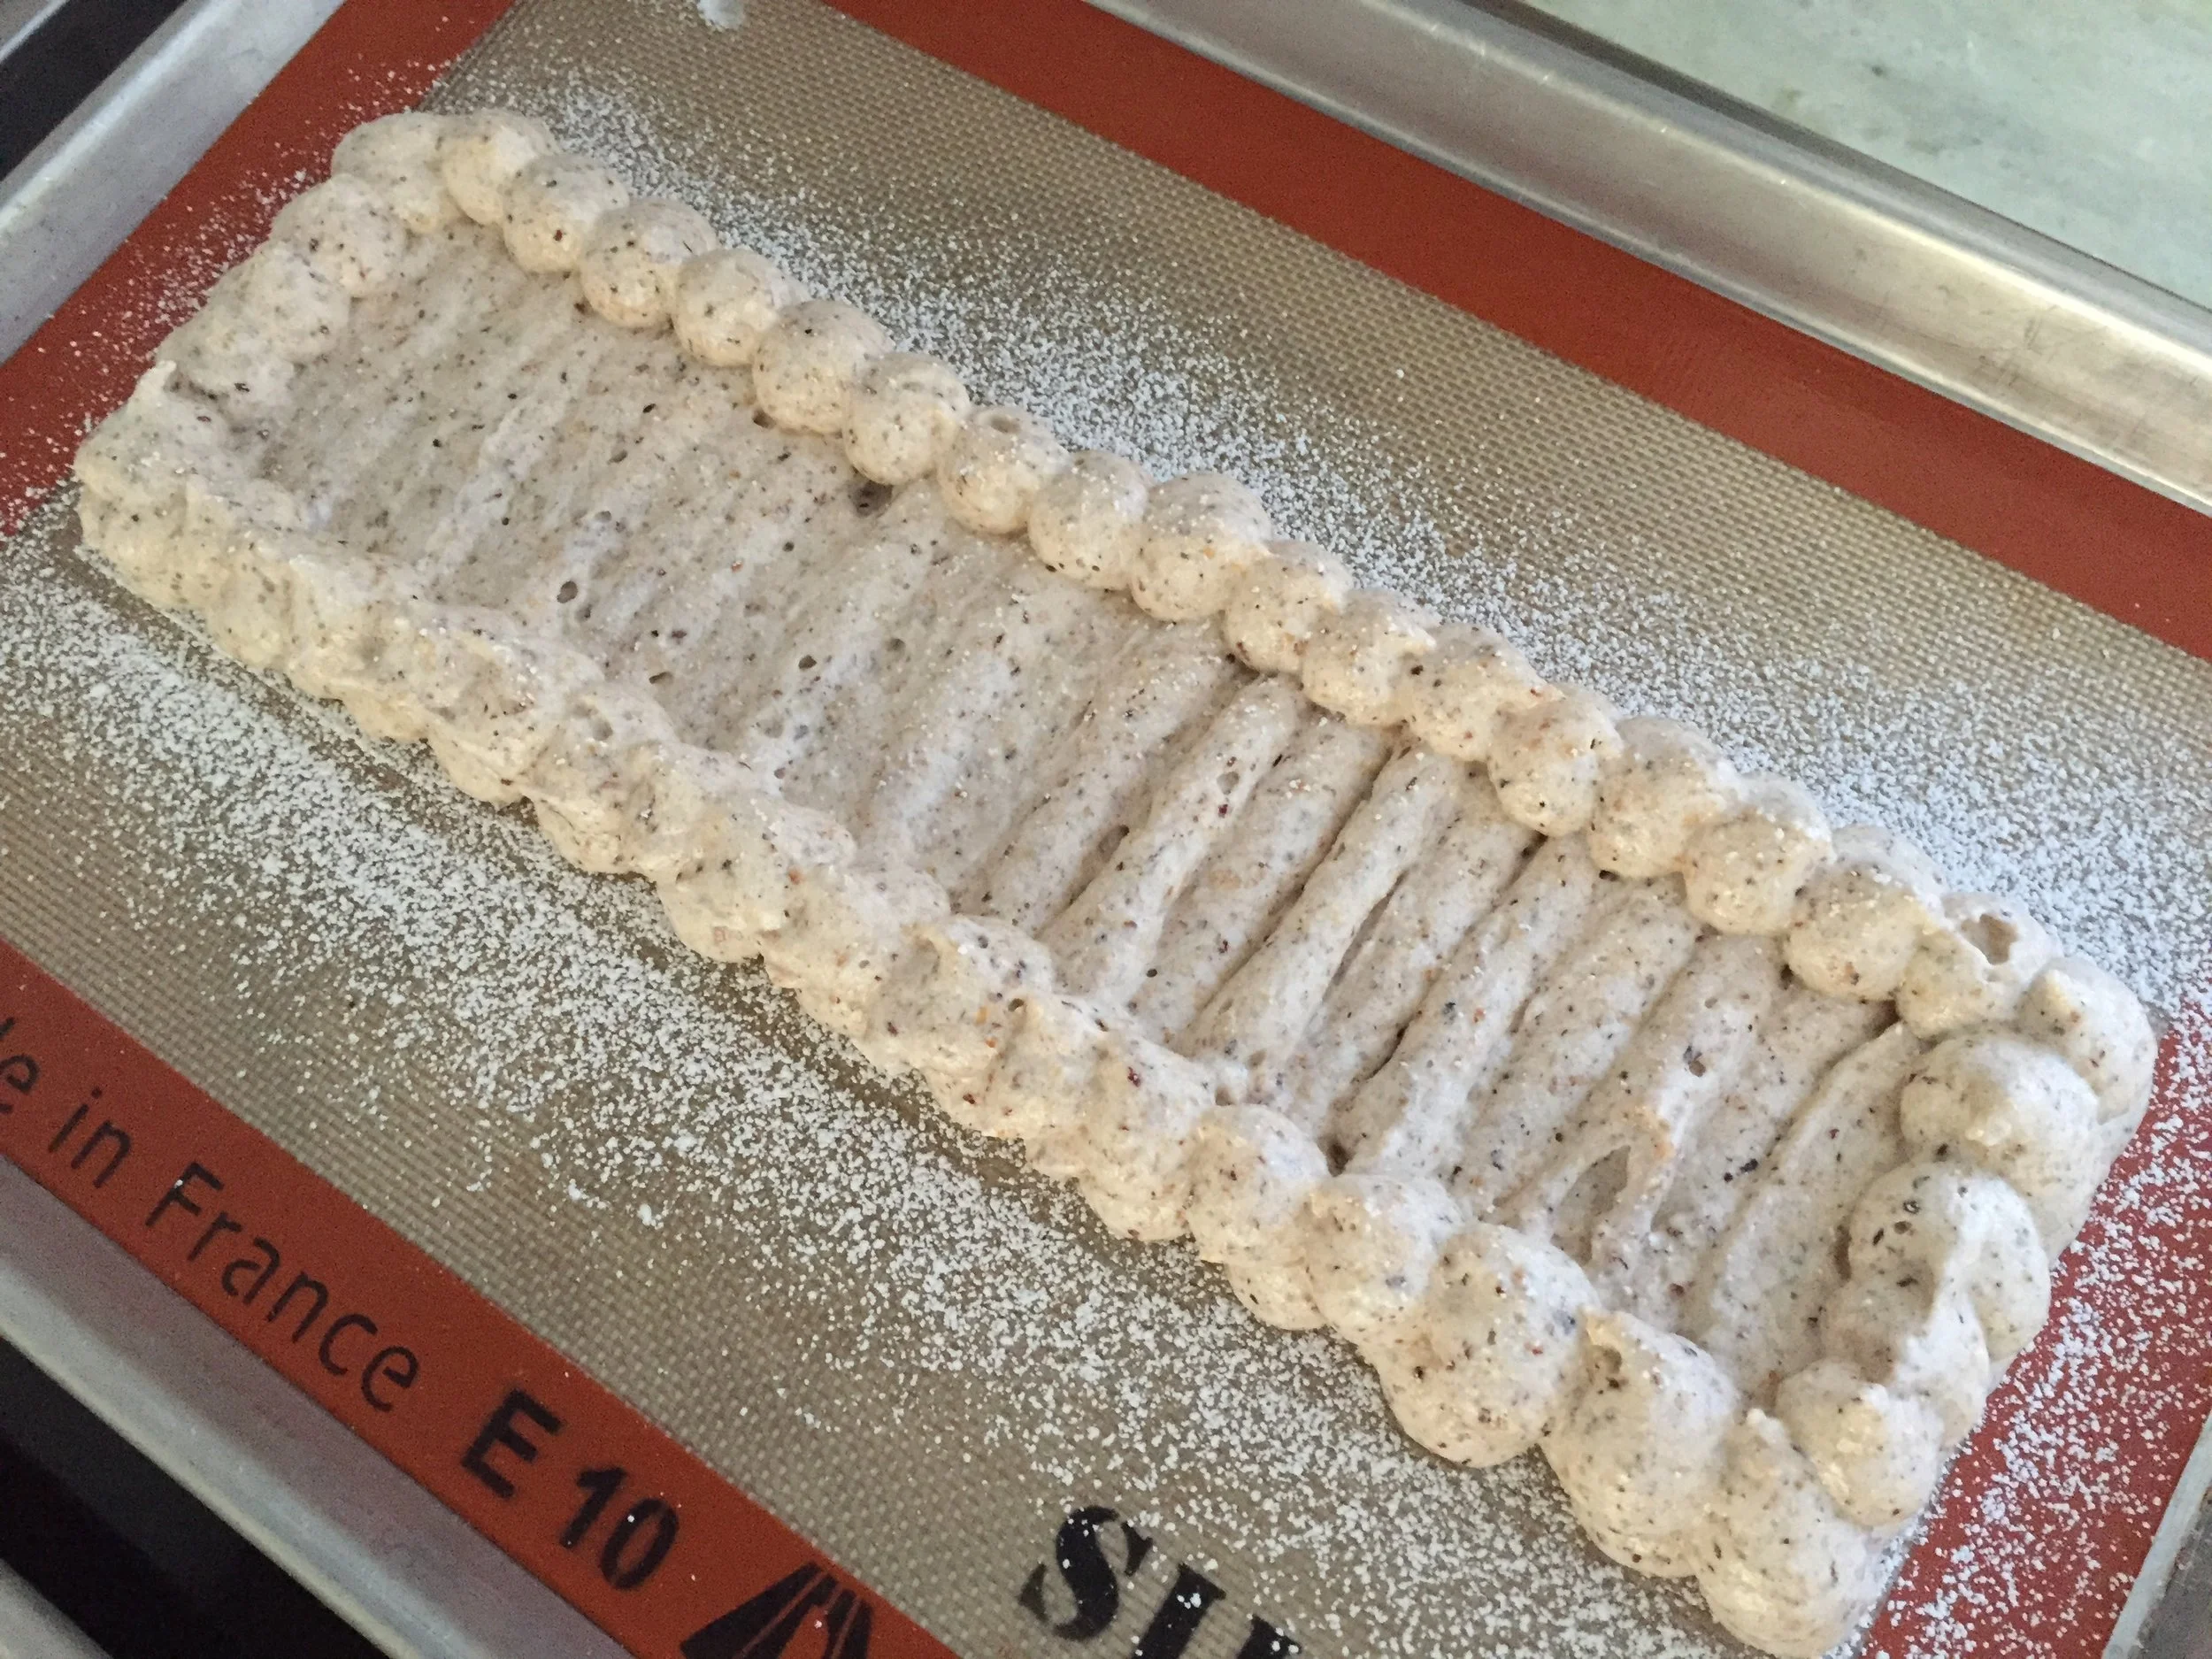
I ended up with two rectangles plus a number of cookies for garnish.

Piped and unbaked

Once the dacquoise is baked at 350ºF for about 20 minutes, let it cool then gently release from the Silpat with a small offset spatula. You can freeze the pieces now if you’re not ready for assembly yet.

Next up: passion curd. Through Amazon I ordered Funkin brand passion fruit purée (reportedly popular with bartenders for making cocktails). It stores at cool room temperature - as long as it’s unopened, shelf life is great. Once opened, refrigerate it and use within 10 days. I only needed a portion of the total amount so I poured the extra into ice cube trays and froze them for future use. I do that with freshly squeezed lemon juice too.

Passion curd mise en place

Whisk 2 large eggs and 4 large yolks in a medium bowl and set aside. In a medium saucepan heat 150 ml / 1/2 cup+2 tablespoons passion purée with 45 ml / 3 tablespoons lemon juice and 150 g / 3/4 cup granulated sugar (I’m using a golden organic cane sugar here). Temper half of the passion mixture into the eggs then return all to the saucepan and cook stirring constantly over low heat until thickened and a couple of bubbles appear (165º-180º).

Remove the saucepan from the heat and whisk in 140 g / 10 tablespoons cubed, room temperature unsalted butter. Using an immersion blender makes for a nice creamy end result. Transfer to a clean bowl, cover the surface with plastic wrap, let cool briefly at room temperature then refrigerate. This keeps in the fridge for up to a week and can be frozen. Here’s the recipe again


The curd recipe makes about 2.5 cups. I needed 360 g / 1.5 cups for this project so I froze the rest.

I often have different berry and other fruit purées in my freezer as well as whole raspberries and blueberries from summer crops. If you happen to have raspberry purée on hand, by all means use it. Otherwise thaw a couple pints of raspberries (or use fresh), smush them and strain out the seeds and add ~10% sugar to the purée to create a coulis. I used 120 g of purée set with 1/2 sheet of gelatin for the middle layer of my assembly. I saved the remaining coulis for garnishing and, if you have any of that left, freeze it for later. You’ll be ready for next time.

Let’s assemble!! Lightly oil or butter the insides of a loaf pan then line it with plastic wrap wide enough to have some hanging over the rim. Press one dacquoise rectangle gently into the bottom of the pan. You may have to trim edges a bit.


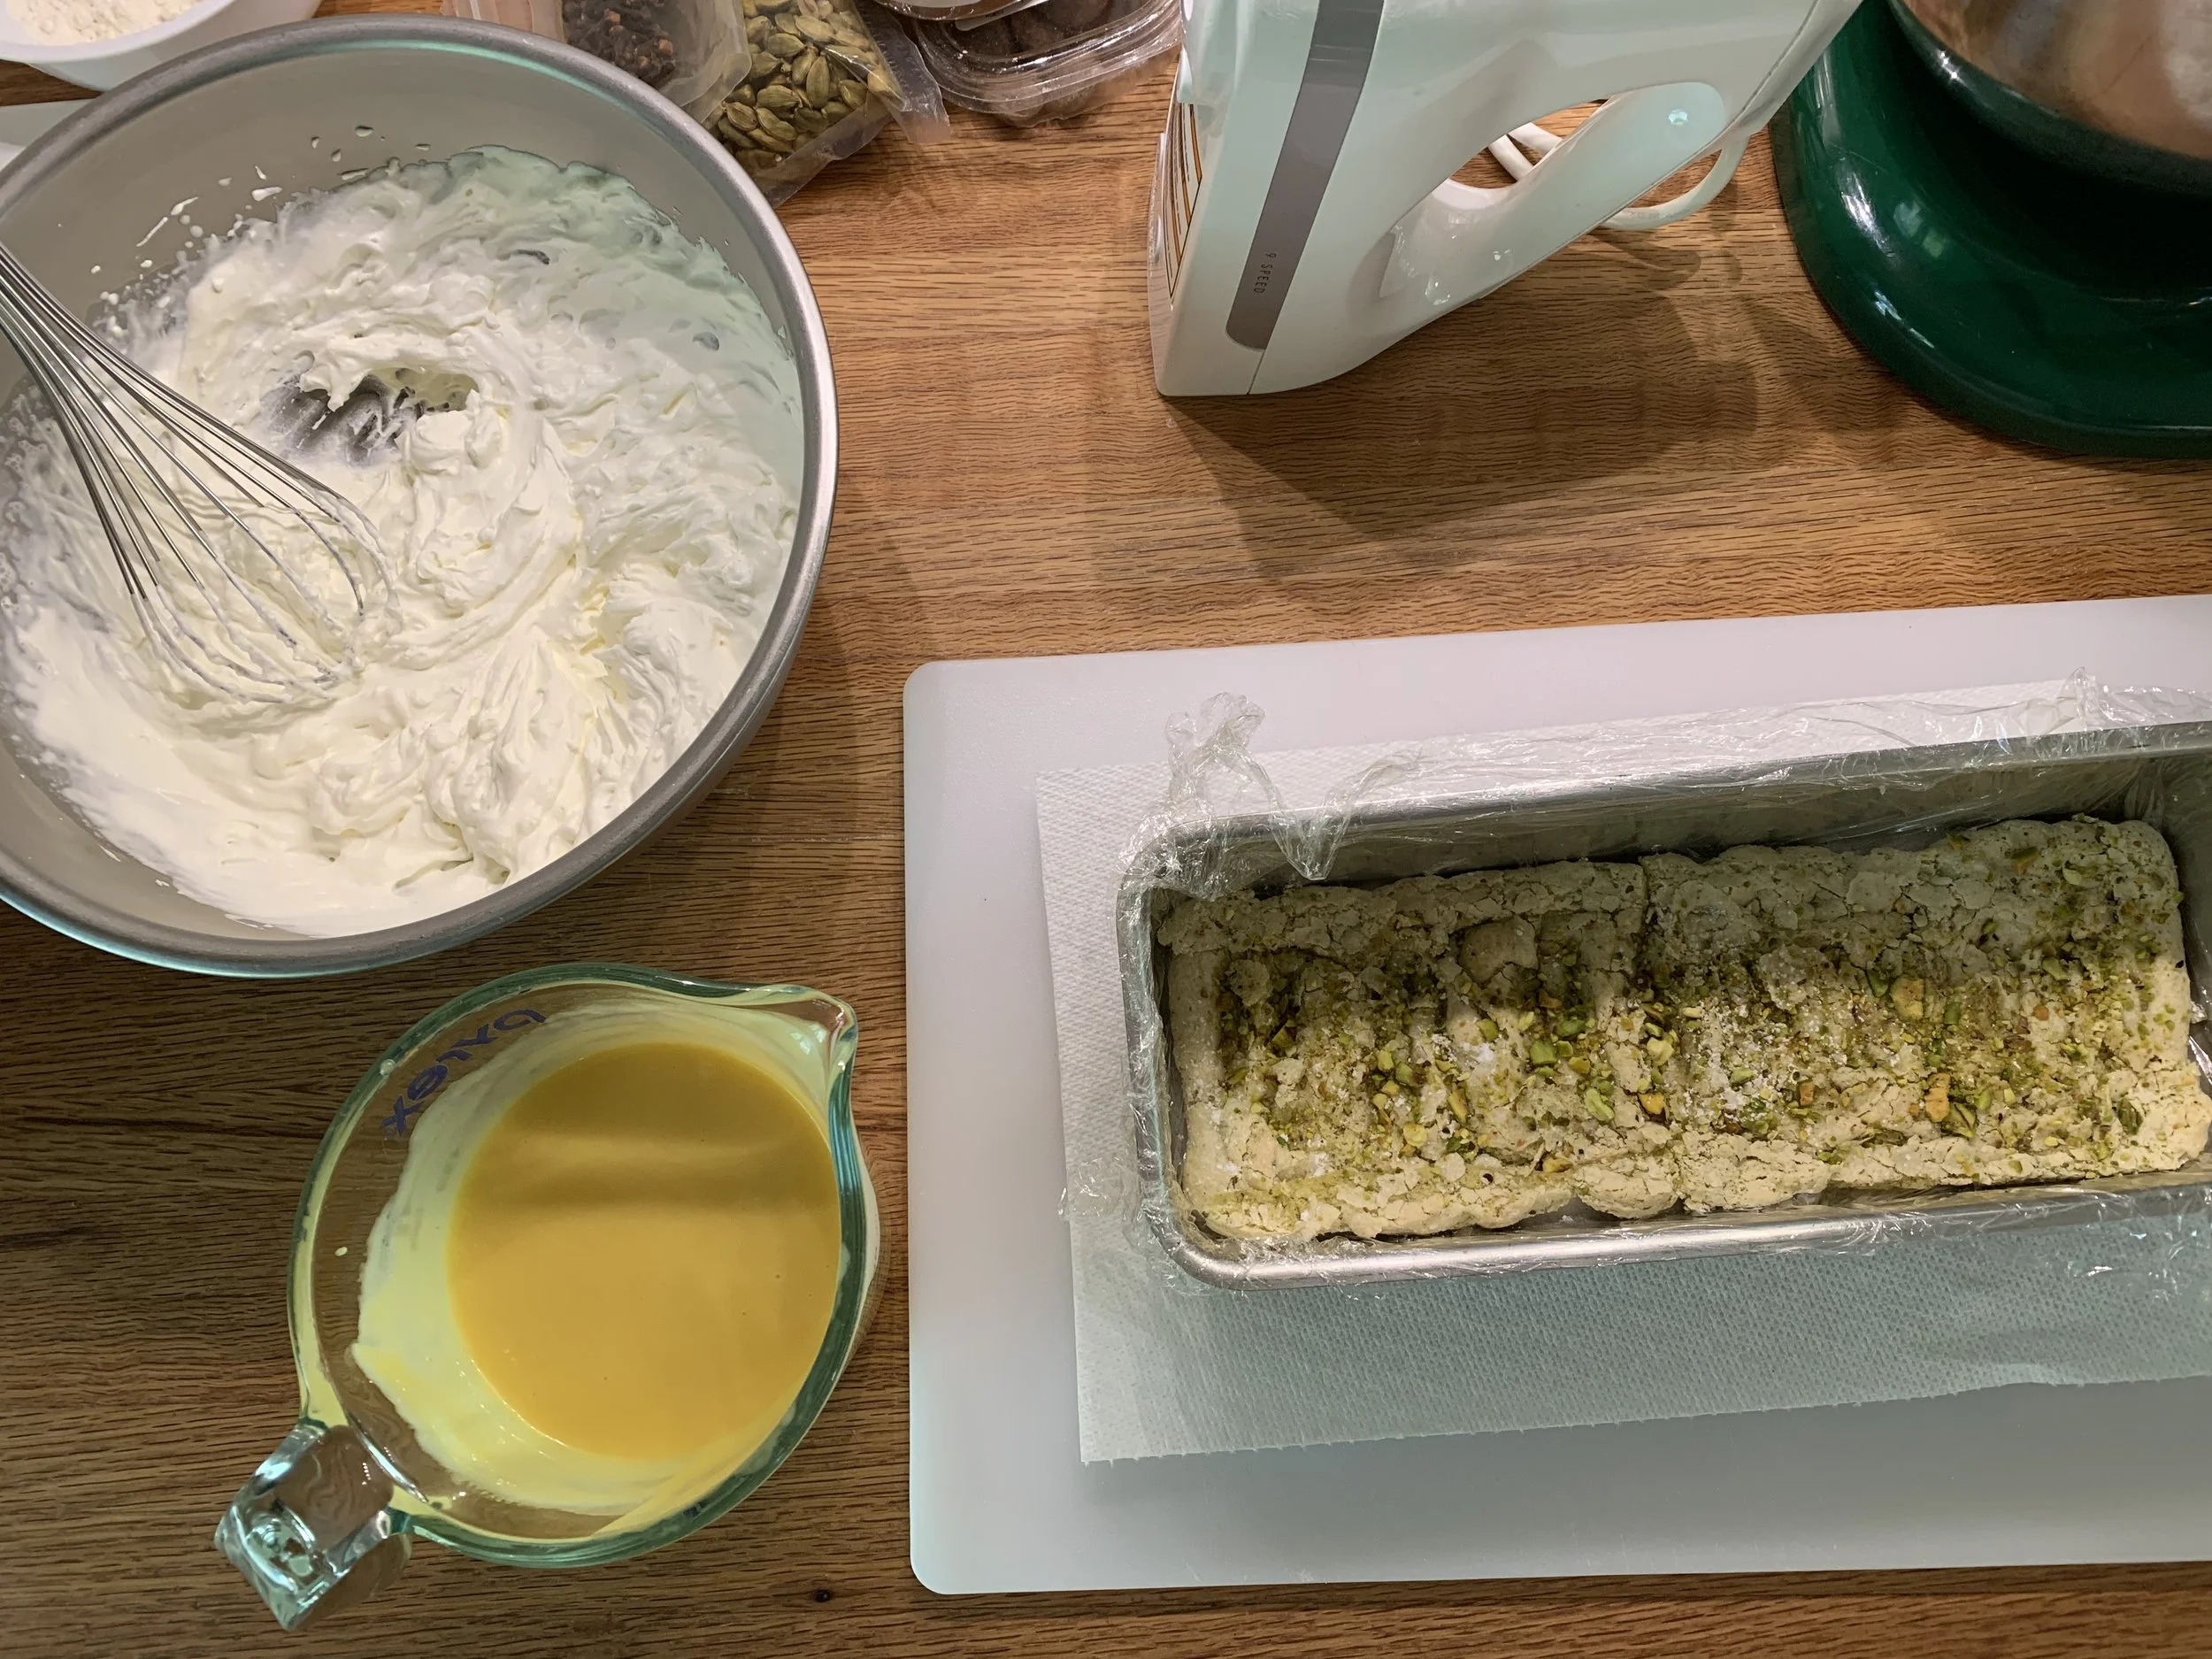
Whip 200 g heavy cream, blend it into the 1.5 cups of curd and set the blend by whisking in 1.5 sheets of bloomed, strained and squeezed out gelatin, creating a bavorois.


Use about half of that to cover the bottom dacquoise layer. Let the remainder rest in the fridge.

Pop the whole pan in the freezer for about 20 minutes to set before covering with the coulis.


Pour the coulis over passion cream and once again place the whole thing in the freezer to set.


Next I topped the berry layer with some pistachio olive oil shortbread crumbs that I had in my freezer. I had made the cookies a while ago and found them tasty but very crumbly so . . . . into the freezer they went for such an occasion as this!


Now carefully cover the crumbs with the remaining passion cream and smooth the top. Place in the freezer to set.


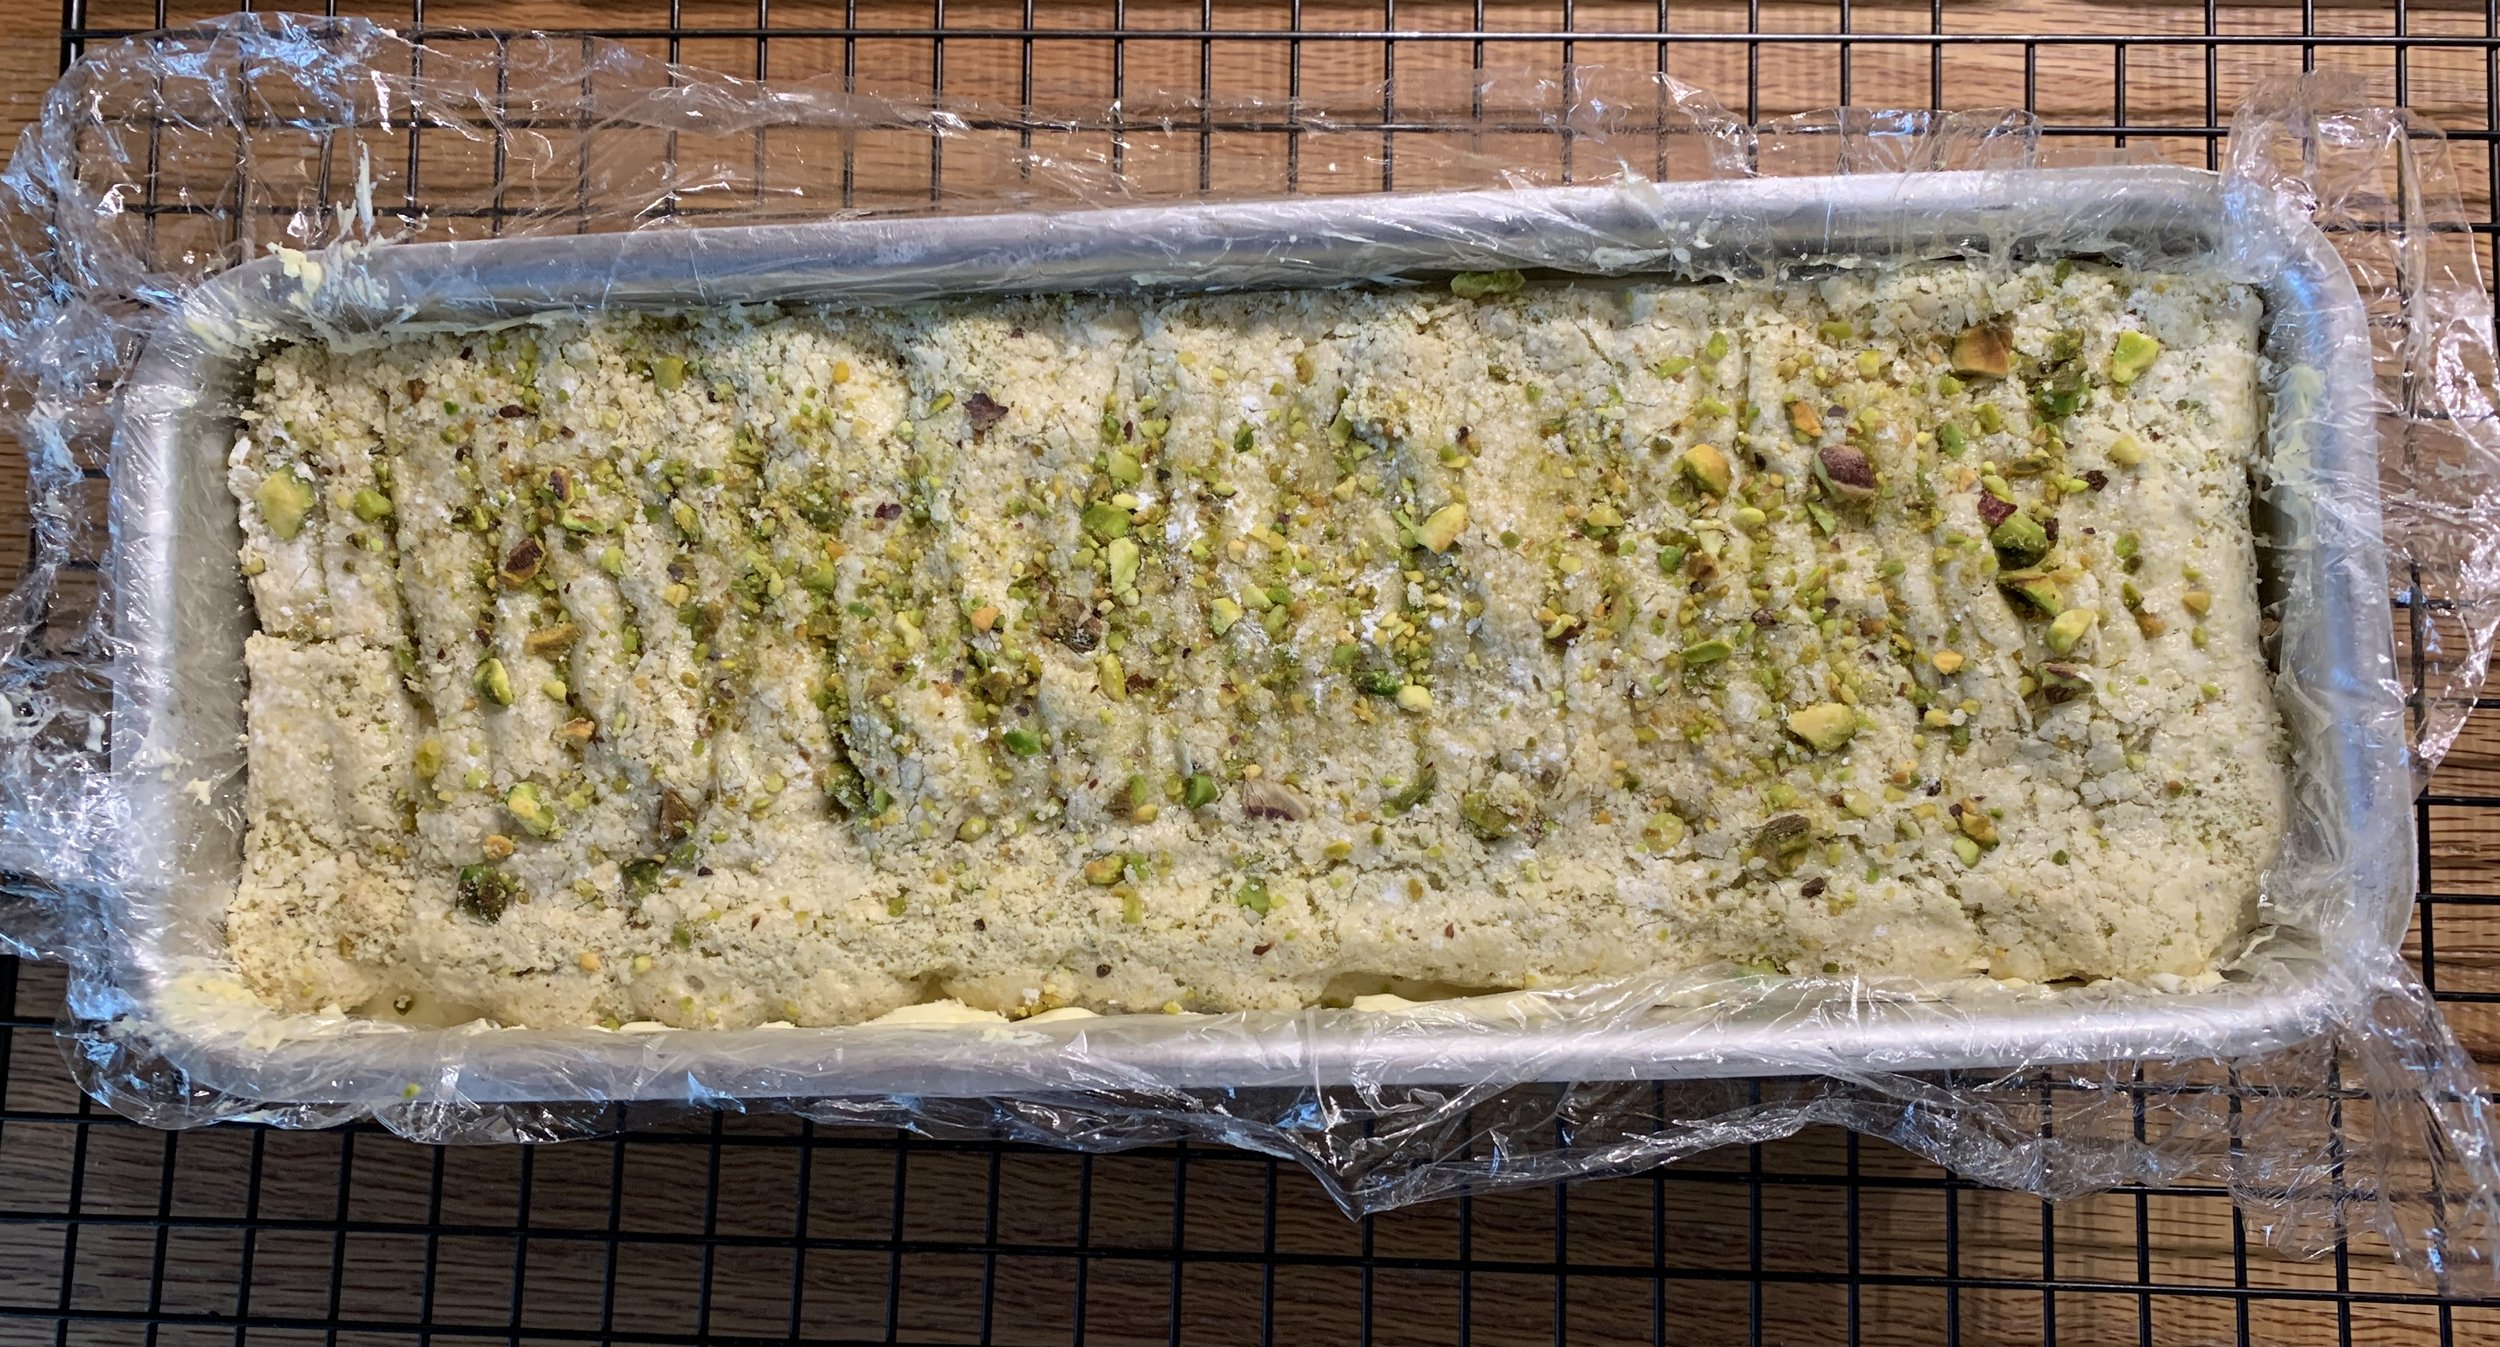
Finally place the second dacquoise rectangle on the top. Fold the plastic wrap edges up over the top and freeze the entire pan. I fully assembled this some days before the dinner event to make the day-of super easy. Plan ahead - my favorite mantra!


On the day you plan to serve, transfer the pan from the freezer to the fridge about 4 hours ahead. A couple of hours later, have a platter or even a simple cutting board at the ready. Gently lift the whole thing from the pan by the plastic wrap edges while it’s still semi-frozen without being rock hard. I find a warm, wet cloth wiped along the outsides of the pan helps it release more easily. Place it on the platter or cutting board, pulling the plastic away from the sides.

Hold it in the fridge where it will continue to thaw but remain cold. It should hold it’s shape.

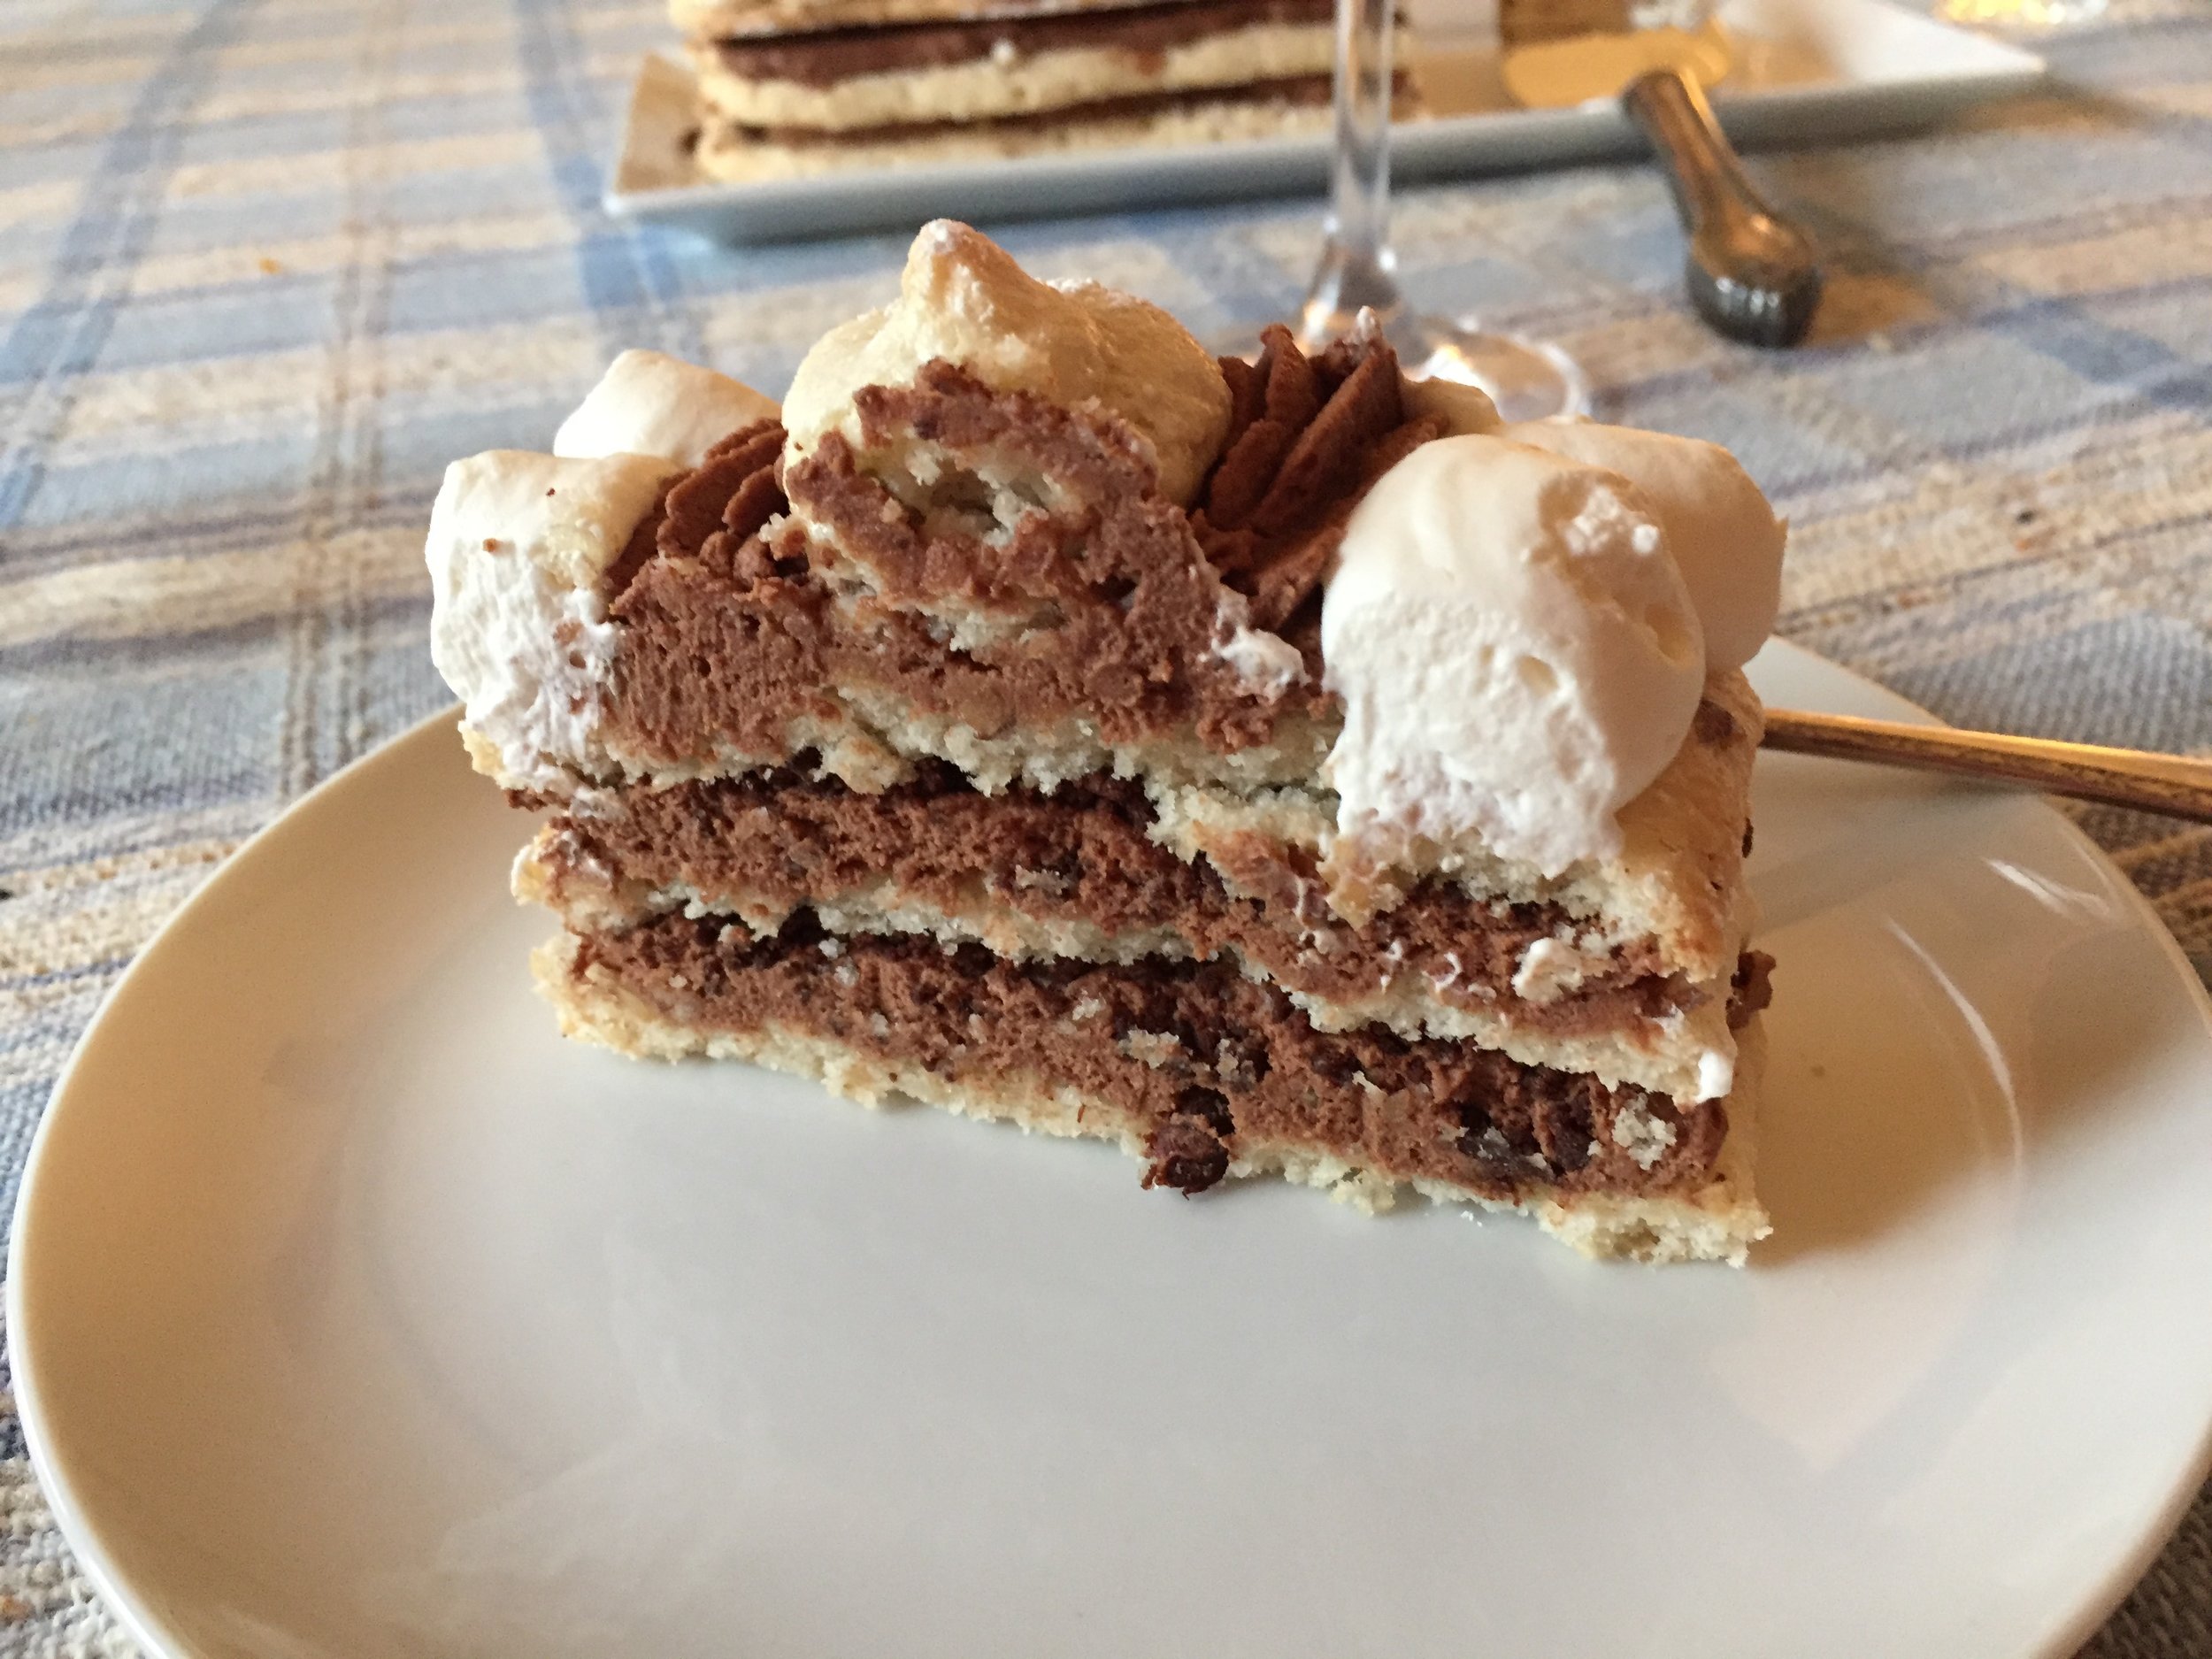
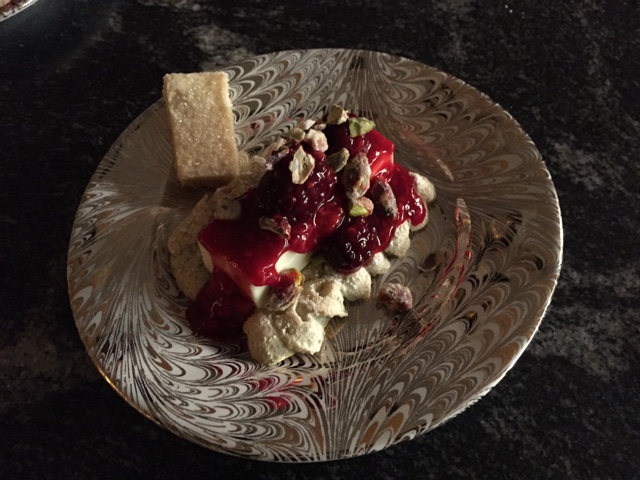
When ready to serve, slice with a sharp knife (8 slices worked well here), plate and top with a dollop of whipped cream, some raspberry coulis, a few fresh raspberries and a petite dacquoise cookie. Yum.

All plated up

The new year is almost upon us. Take care of yourselves.

Early summer update

Maple glazed pecan Danish

Maple glazed pecan Danish

Though it’s not officially summer by the calendar, it certainly feels like it here in West Michigan. Hot and humid! The inspiration to bake is low on the priority list at the moment, but I can certainly dream, plan and write about baking, can’t I!

It’s been a bit since I’ve posted so I wanted to take the time to share a few of the goodies I’ve made in the past couple of months. Relying on favorite base recipes is de rigueur for me, and where appropriate I’ll share links to those recipes and give you any little changes I might have incorporated.

Chocolate dacquoise bites

Chocolate dacquoise bites

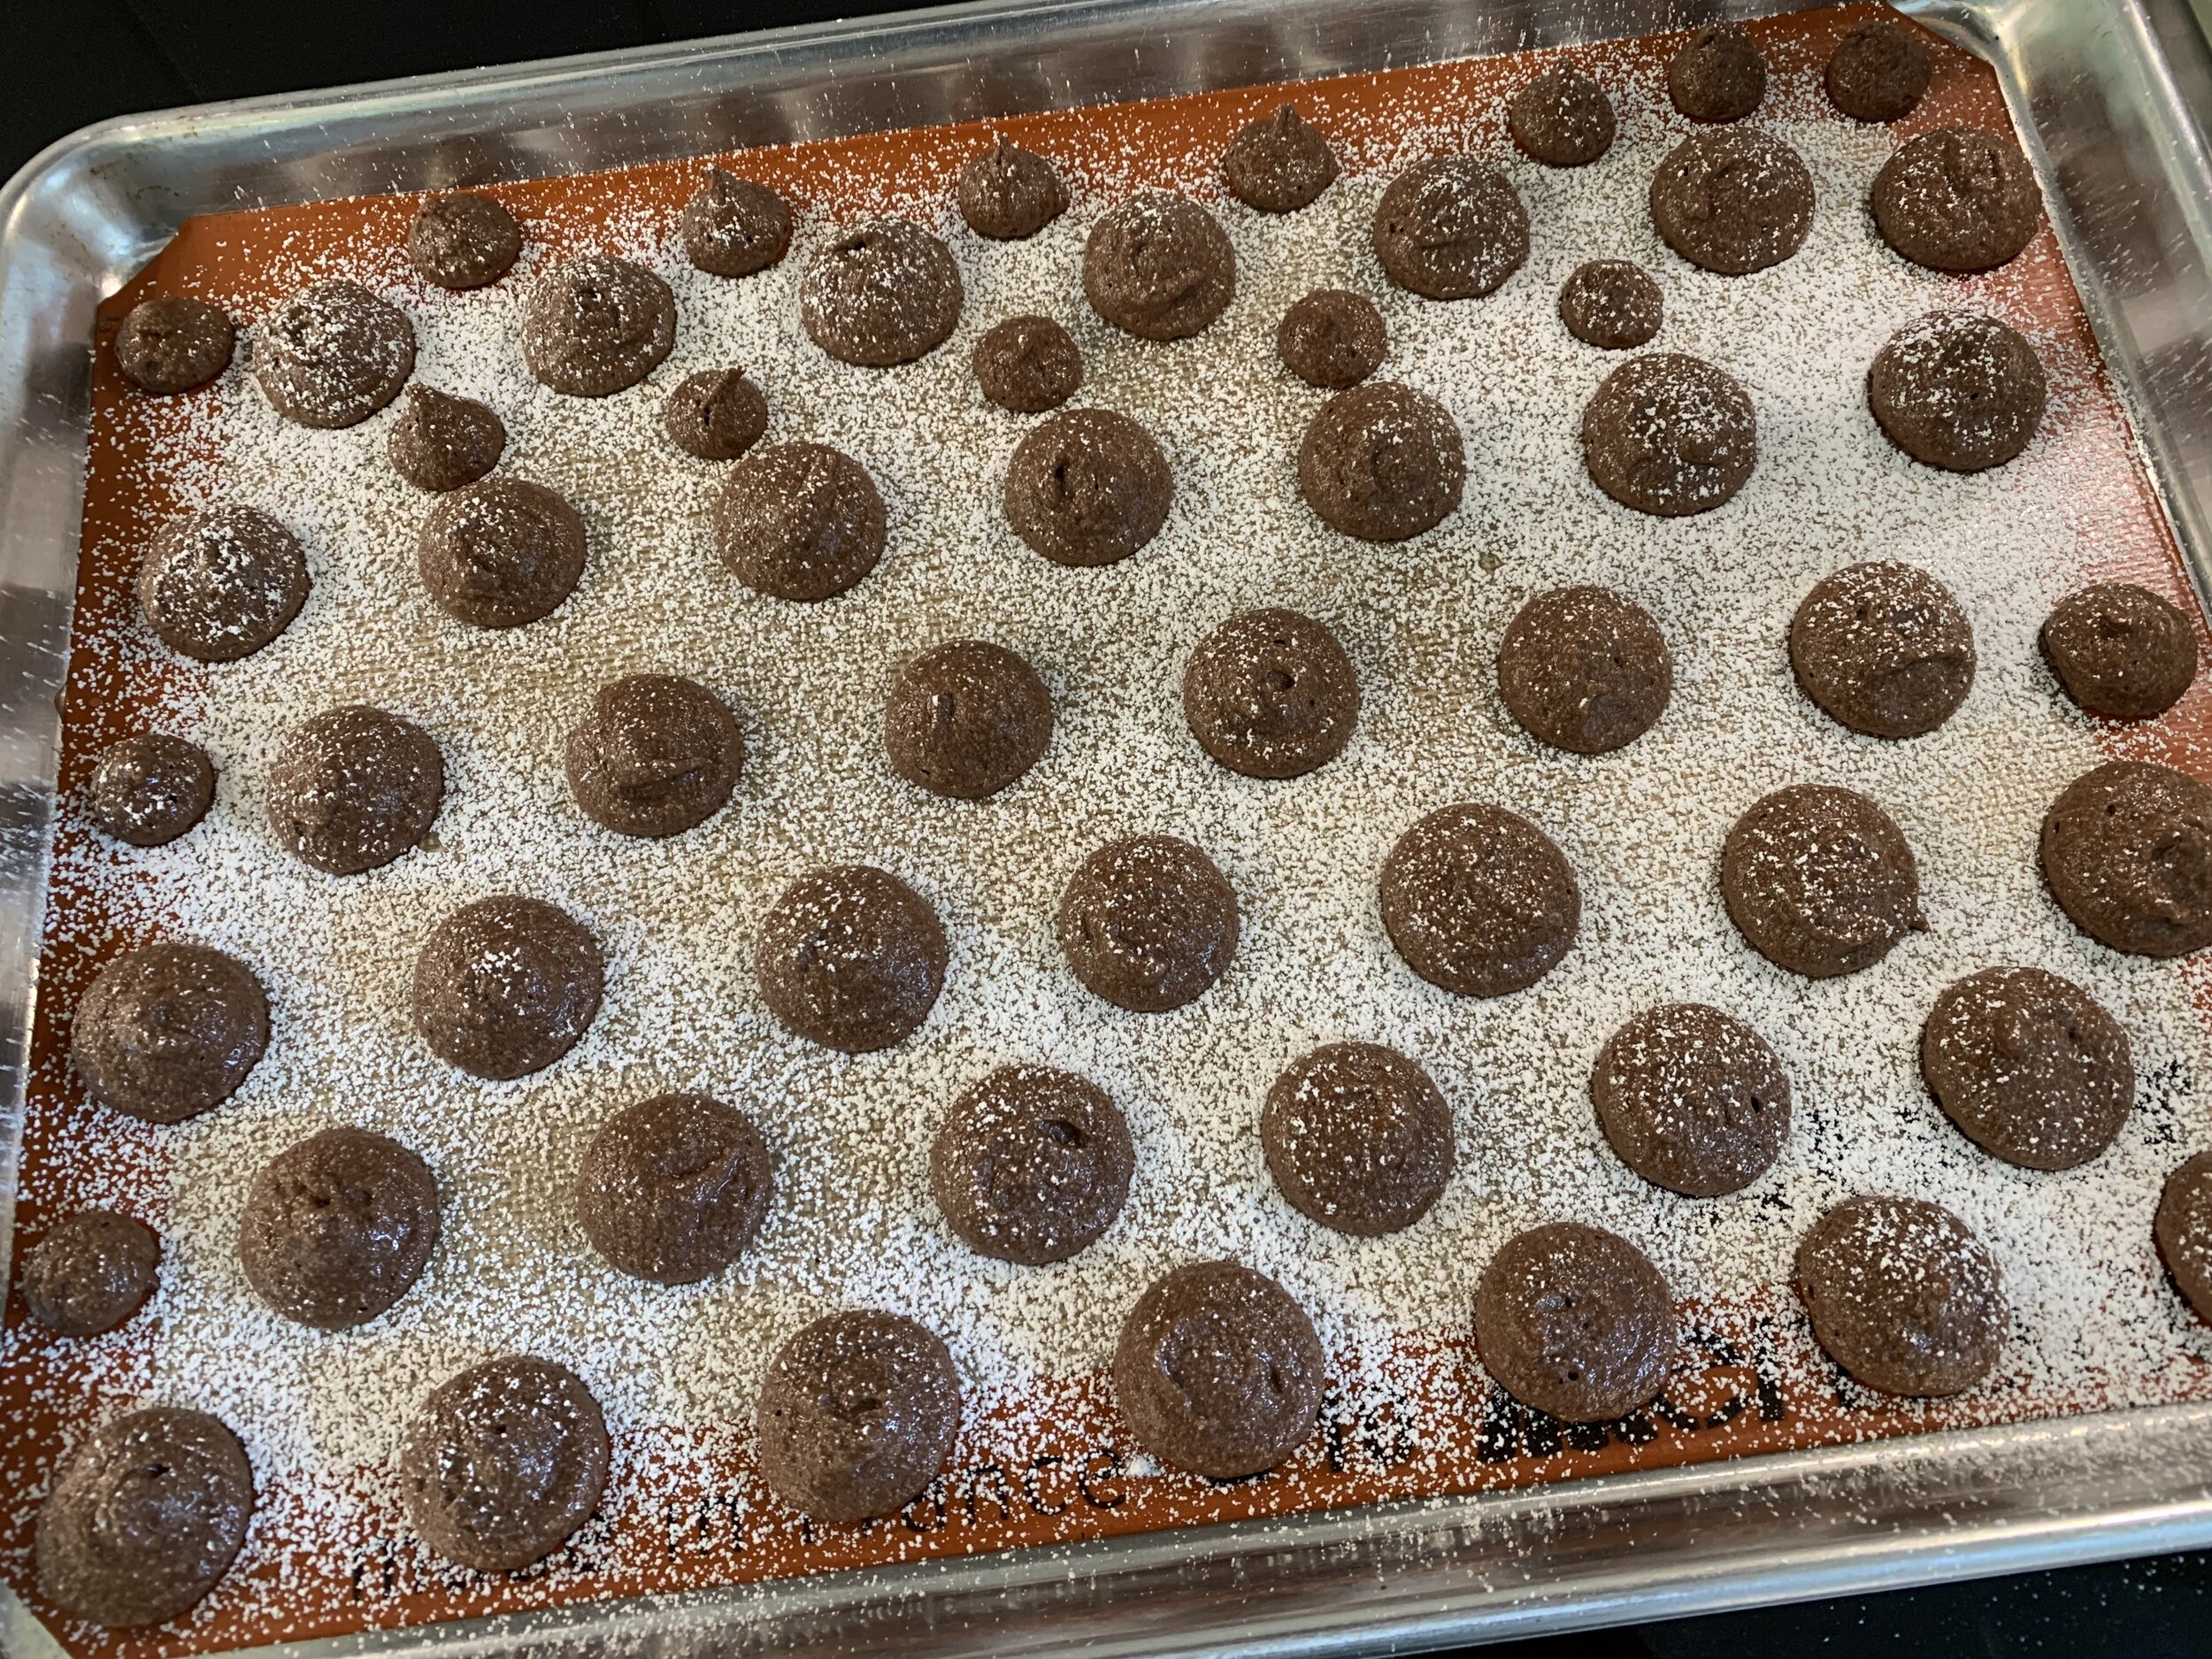
First up - I refer to these as rustic macarons. Made using my standard dacquoise base (remember my last post on vanilla-chocolate dacquoise?), I added 30 gm Dutch process cocoa powder to the almond flour/confectioners sugar to create a chocolate version, piped/baked simple rounds then sandwiched ‘em with salted caramel buttercream. The result is less sweet than the ever popular French macaron, a characteristic I prefer.

The buttercream is basically a combo of about 1 3/4 cups stove top caramel sauce whipped until cool then blended with 113 g (one stick) cubed/room temperature unsalted butter. Add the butter cubes bit by bit as you whip, just like you would when making Swiss meringue buttercream (you could make a caramel version of that instead if you prefer).

These freeze extremely well and can be eaten pretty much as soon as you take them out to enjoy.

Chocolate caramel dacquoise bites

Chocolate caramel dacquoise bites

These treats became part of a small gift box for a volunteer at a nearby assisted living facility, combined with Breton cherry/pistachio tartes topped with tart cherry Swiss meringue buttercream and candied pistachios. Yum.

547781AD-1060-42C1-96D5-AF9560A64093.jpeg

For the Breton tartes, use this dough recipe and add some chopped tart dried cherries and chopped pistachios to the dough (just eyeball it). I use about 40 g of dough for my 65 mm / 2.5” open tart rings (buttered). There are so many options one can create!

Next - maple glazed Danish buns.

05092172-07DC-4578-96F9-4B07477E212A.jpeg

I had a couple of batches of laminated Danish dough in the freezer and decided to create a few things with them: cherry cheese Danish, Danish almond braids and these buns for which I used a half batch of dough for a yield of 9 buns. Roll the dough out to a 12” high x 9” wide rectangle (for a full batch of dough roll to 12” high x 18” wide).

Make a filling (double it for a full batch) by blending 50 g almond flour (or sub in toasted and ground pecans for extra pecan-ness), 43 g dark brown sugar, 30 g egg white (1 large), 15 g maple syrup plus 1.5 T unsalted butter and a tablespoon all purpose flour. Spread it over the rolled out dough then sprinkle toasted, chopped pecans over, pressing them down to help them adhere.

Roll it up cinnamon roll style then slice into nine 1” rolls. I decided to bake these in a buttered and sugared 9x9 pan (again cinnamon roll style) rather than individually placed on a baking sheet. It’s easiest if you line your lightly buttered pan with parchment with an overhang on two opposite sides then butter and sugar the parchment.

After an hour or so rise, they baked up beautifully! Once baked you can simply lift the whole thing out, no muss, no fuss.

Mix 3/4 cup confectioners sugar with 1-3 tablespoons maple syrup to a thin-ish, brush-able consistency and give the buns a good coating.

1836FE29-7D0A-4042-821A-8CFE0B373996.jpeg

Let cool completely or feel free to gently pull them apart and try one still warm. You won’t regret it! So good.

C0D4750B-1E2A-4A01-A322-D228880855FB.jpeg

Next - roasted garlic/dill/cheddar bread created using a poolish approach. It came out pretty tasty although I’d like to tweak the hydration level and kneading/rising times to create a more chewy, rustic style bread. I hope to post about that adventure later this summer.

Roasted garlic/dill/cheddar boule

Roasted garlic/dill/cheddar boule

E94AC5B2-B77E-49CC-A924-961AF2207B33.jpeg

I don’t want to keep you much longer in describing my kitchen shenanigans. There’s always something going on in my head or in my oven so stay tuned for Canadian butter tarts and more.

Meanwhile we have a couple of sandhill cranes hanging out nearby, and we’re just waiting for a baby or two to appear.

Stay cool and calm and enjoy summer!

Mom or Dad??

Mom or Dad??

240A9599-639A-4988-9CD7-B80432E8E3F9.jpeg

Vanilla/chocolate dacquoise

vanilla chocolate dacquoise

Here’s a perfect example of taking oft made and familiar components from your repertoire and putting them together for a delicious dessert. It’s a wonderful way to create a layered entremet either from new beginnings or as a means of using a leftover cream or ganache that’s begging to be saved. BTW - the freezer is your friend here.

As a reminder, don’t forget to check out my recipe page where you’ll find some of my favorite base recipes that can be combined as you see fit to make your own version of tastiness.

This one came together after making the mille-feuille aux fraises that I wrote about here. I had enough vanilla crème légère left that I simply couldn’t throw away, so I went with my favorite dacquoise as the base for my creation.

The full dacquoise recipe is intended to be good for a half sheet pan but I wanted only two 16 cm (just a tad over 6 inches) squares so I used 3/4 of a recipe. I’ve shared this trick with you before - place your intended mold/shape on the Silpat and dust confectioner’s sugar over it to give you the outline.

EC9E47B6-6DAA-44E6-973E-662E7D635161.jpeg

Pipe your meringue mixture evenly within the outlines and sprinkle with additional confectioner’s sugar. It’s OK if you’re a little outside the lines - you’ll trim the edges before assembly anyway.

Ready for the oven

Ready for the oven

Bake at 325ºF for about 20-25 minutes until lightly browned.

All baked up!

All baked up!

Let cool. Once cooled, I like to pop the sheet pan into the freezer for 10-15 minutes which allows for easier release from the Silpat.

When ready to assemble, I first neatened up the edges using my 16 cm form as a faux cutter. BTW - never cut with anything sharp on a Silpat. You’ll regret it.

BD70B852-FA40-4F6B-B4EB-82E6C1F992C0_1_201_a.jpeg

Place the 16 cm form on a cake board (I used a cardboard square covered with foil), have your intended cream and any other garnishes at the ready, then set in the first layer of dacquoise.

90C856F6-7568-4E28-A635-A704384C9ACD_1_201_a.jpeg

I proceeded with caramel drizzle topped with chocolate shortbread crumbs . . . . . .

BA0FB448-217D-4791-B678-6539D0DFC666_1_201_a.jpeg

followed by a layer of vanilla crème légère spread evenly. Eyeball the amount of cream you use depending on the height of your form and the other layers you’re planning to add.

My form is 4.5 cm (1.75 inches) high and, since I wanted to leave room for my second dacquoise layer and some whipped ganache, I took my cream about 1/2 way up.

5FAFFA95-D98F-462D-B2ED-34CABEA6AB46_1_201_a.jpeg

Top with the second dacquoise layer and hold in the freezer to firm up a bit before the finale.

45C9A53D-DD16-418F-B42E-86F747AA4ABD_1_201_a.jpeg

For the ganache I used 50 g of Guittard’s 61% Lever du Soleil . . . . .

3748CB81-7E5B-47A8-89EF-1FB7072FB2AB_1_201_a.jpeg

and three times that weight in heavy cream. I knew I didn’t need much and this turned out to be the perfect amount. Of course, if you make more, you can always use the extra for something else, eh?

C1E8FB08-C2F3-4238-B33B-E22B2013675F_1_201_a.jpeg

Make as you would any ganache by boiling the cream, pouring it over the chocolate (chopped if you don’t have it already in discs), and gently blending until smooth. I suggest making this early in the day - it has to chill completely before you whip it. When you’re ready to add it to your entremet, just whip to soft peaks and spread it on top.

Whipped ganache - the best stuff ever

Whipped ganache - the best stuff ever

4D6DDDE4-8FCE-4788-9F40-9DD0AC3DB5B5_1_201_a.jpeg

Place the whole thing in the freezer. Once firm, cover the top with a piece of parchment or waxed paper, pressing down gently to exclude air. Wrap it all in foil or plastic wrap. It can remain in the freezer for some weeks. Mine was frozen for about a month before Steve, my mom, and I enjoyed it for his recent birthday supper.

The day you wish to serve, take it out of the freezer, put it in the fridge for an hour or so, then use a knife warmed in hot water and wiped dry to cut around the edges to loosen the form. Lift off the form then cut into slices of desired size, again using the warmed knife technique. It’s much easier to slice when still semi-frozen and firm.

Hold the portions in the fridge in a covered container where it will continue to thaw and be ready to eat several hours later.

65928896-DE23-4972-8BE9-4ABCF97813A5.jpeg
BC9AEFEE-E90D-4D71-9719-AB8CF684AB7B.jpeg

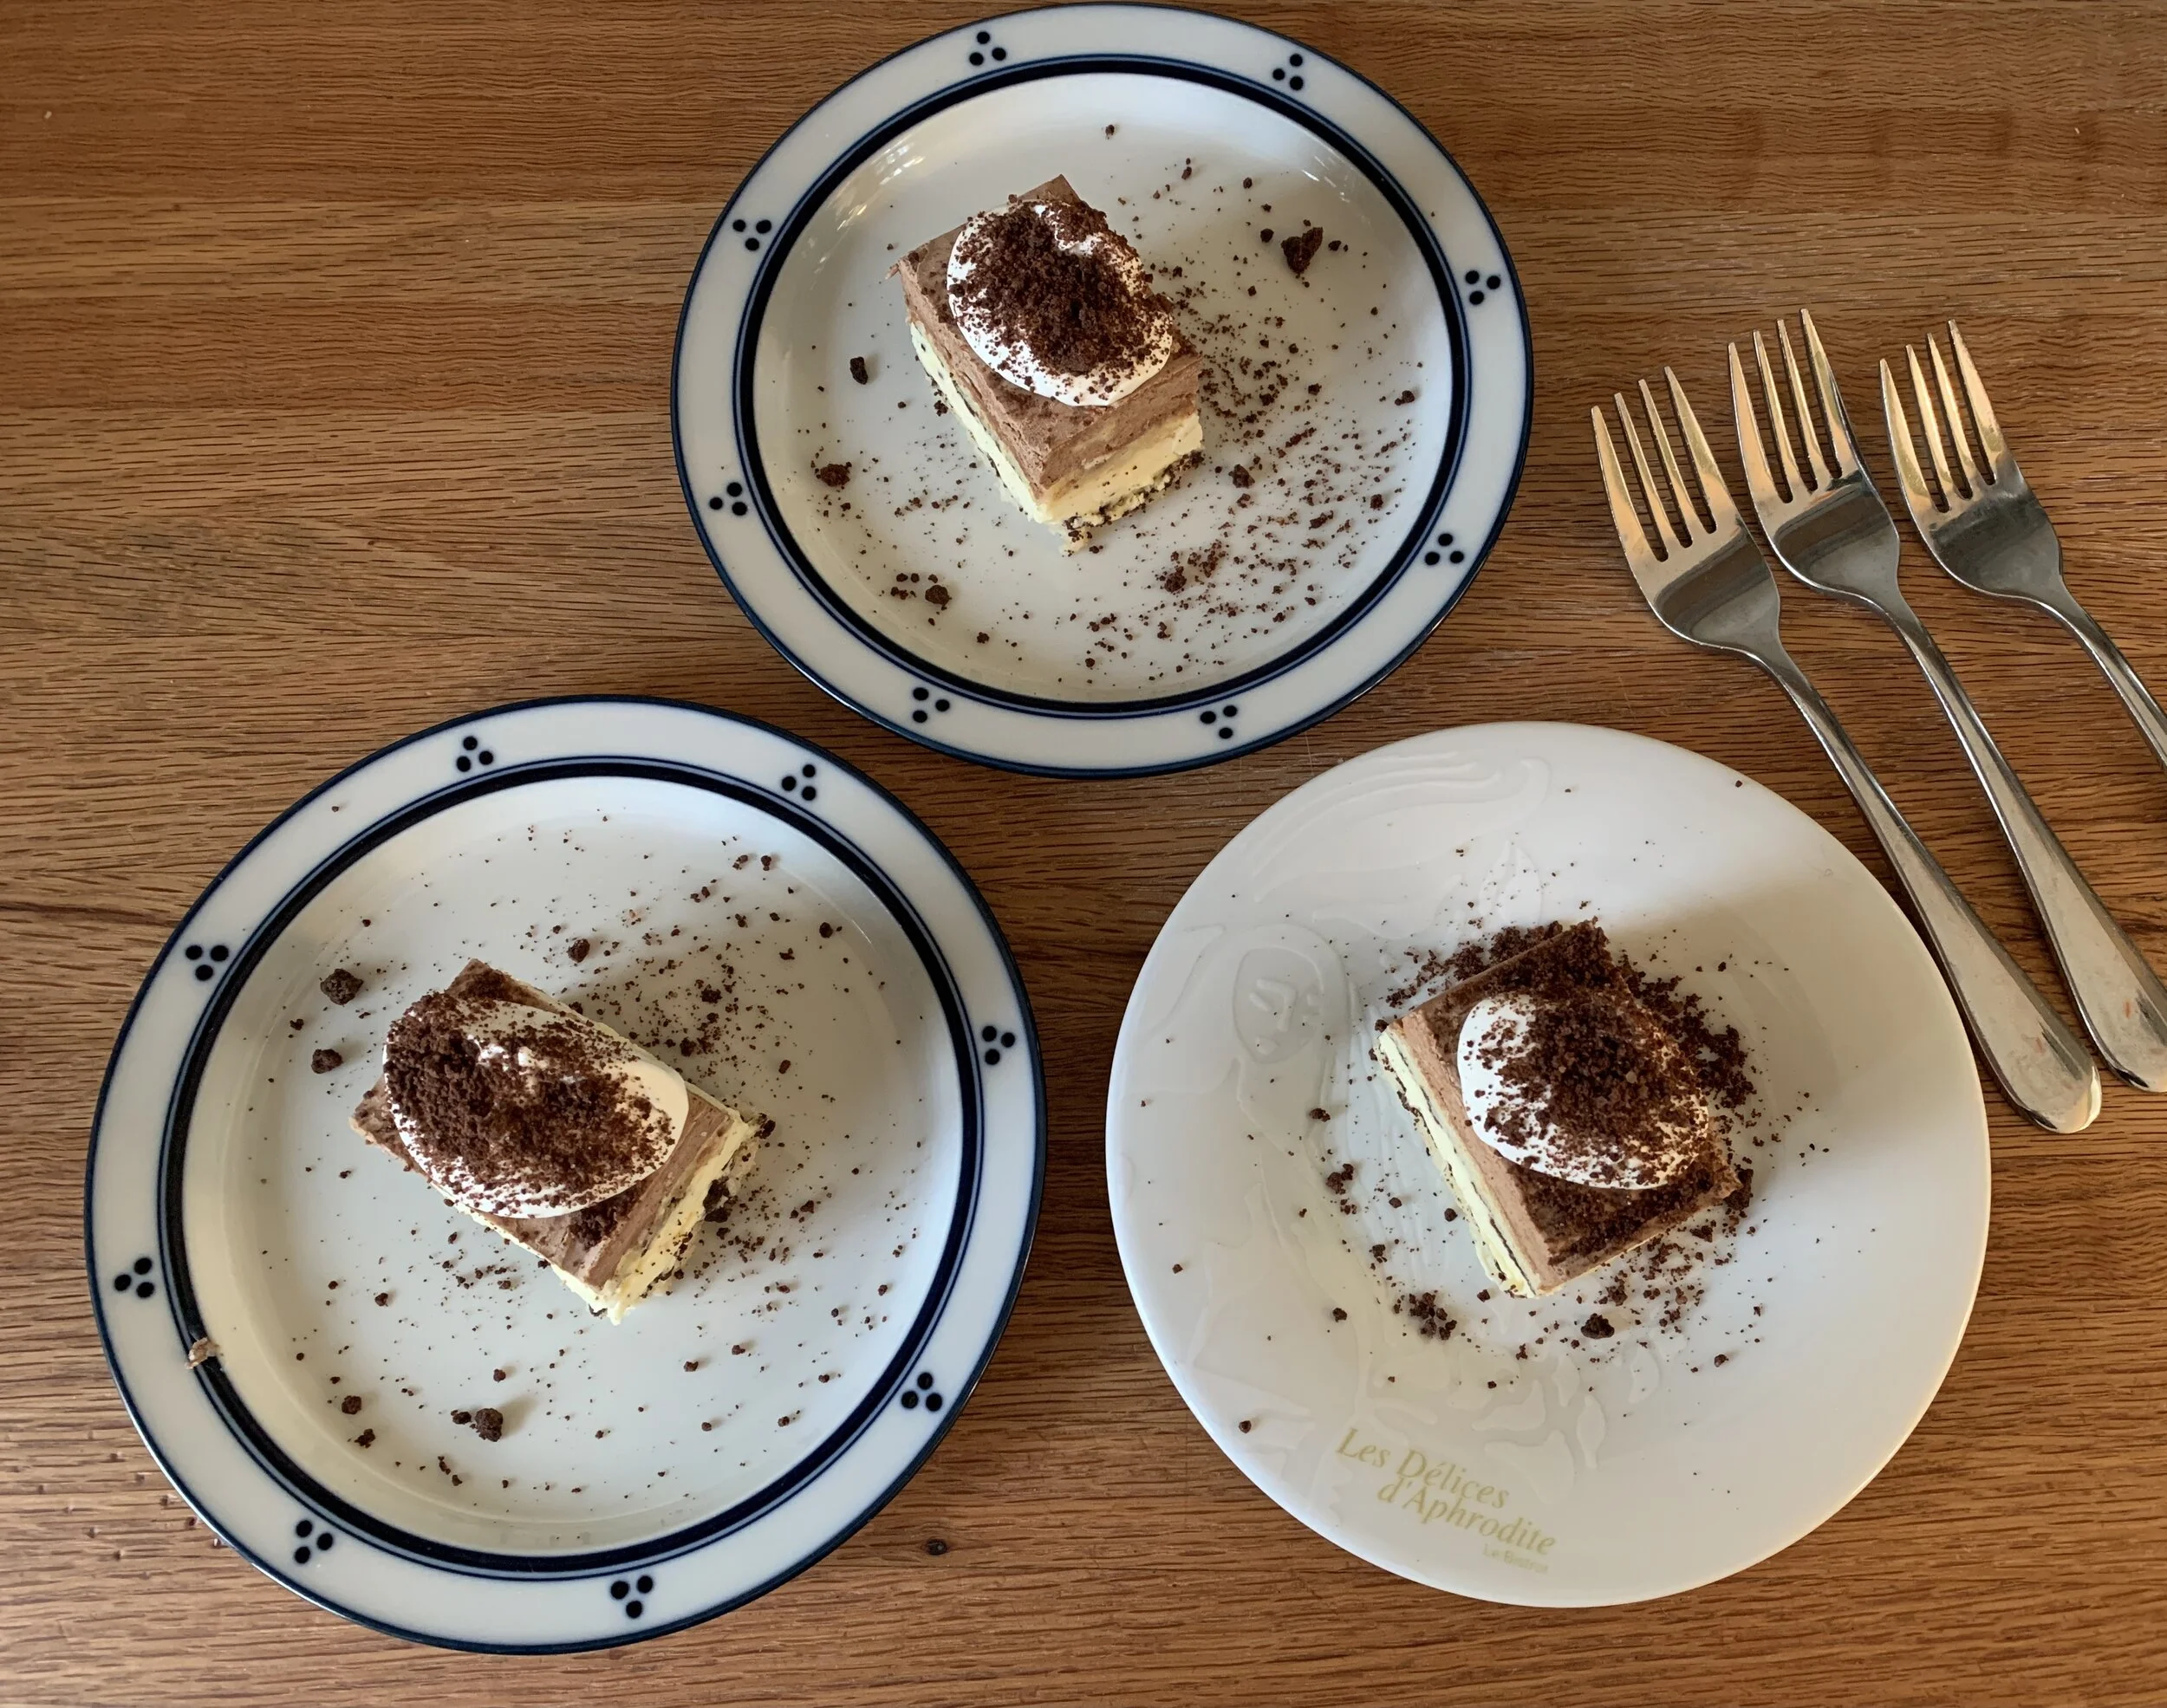
I garnished with a simple dollop of whipped cream and a sprinkle of chocolate crumbs for serving and enjoying.

377BE83C-8210-43B0-B62E-5EE6253FFED3_1_201_a.jpeg
8F6E2689-5CE6-44D2-8167-B9370C20C68E.jpeg

Steve the birthday boy’s conclusion - yum, yum, yum. Oh so light, creamy and smooth, a hint of crunch and the soft slightly chewiness of the meringue layers all made for a memorable dessert (and the leftovers kept for 2-3 days in the fridge!)

Now think about creating your own version of deliciousness. You can do it!

May you have a song in your heart and a spring in your step.

34CC6476-F824-4998-96DE-6BF48B8F2E34.jpeg
Whatever it is, the way you tell your story online can make all the difference.

Chocolate hazelnut marjolaine

IMG_3809.JPG

For Steve’s one-week-early birthday meal at my mom’s I decided to make a marjolaine for our dessert. He’s a sucker for anything with dacquoise or choux paste so of course I wanted to include at least one of those components in his celebration dessert. Since we won’t be in GR on his actual birthday, Mom hosted us, along with cousin Clark, for a repast of her famous Swiss steak, cheesy potatoes, green beans and crunchy cole slaw. What a great way to launch a birthday week, eh Stevie?

Happy Birthday to Steve!

Happy Birthday to Steve!

A classic marjolaine is a layered, flourless dessert consisting of rectangles of nutty meringue (dacquoise) layered with ganache and pastry cream or buttercream. Once assembled it’s finished off with a coating of ganache or buttercream along with sliced almonds pressed onto the sides for garnish. Some flavors that are popular with the dark chocolate ganache are hazelnut, coconut, coffee or pistachio.

In my case chocolate and hazelnut were the choices, particularly since I had some of my homemade praliné in the fridge. The plan: three layers of toasted hazelnut-topped dacquoise sandwiched with whipped dark chocolate-praliné ganache and garnished with Chantilly, dacquoise kisses and more ganache. I opted for the rustic approach without the finish coat.

A quick note: my marjolaine became “floured” due to the addition of chocolate shortbread crumbs as one of my layers - omit that component and it is indeed flourless!

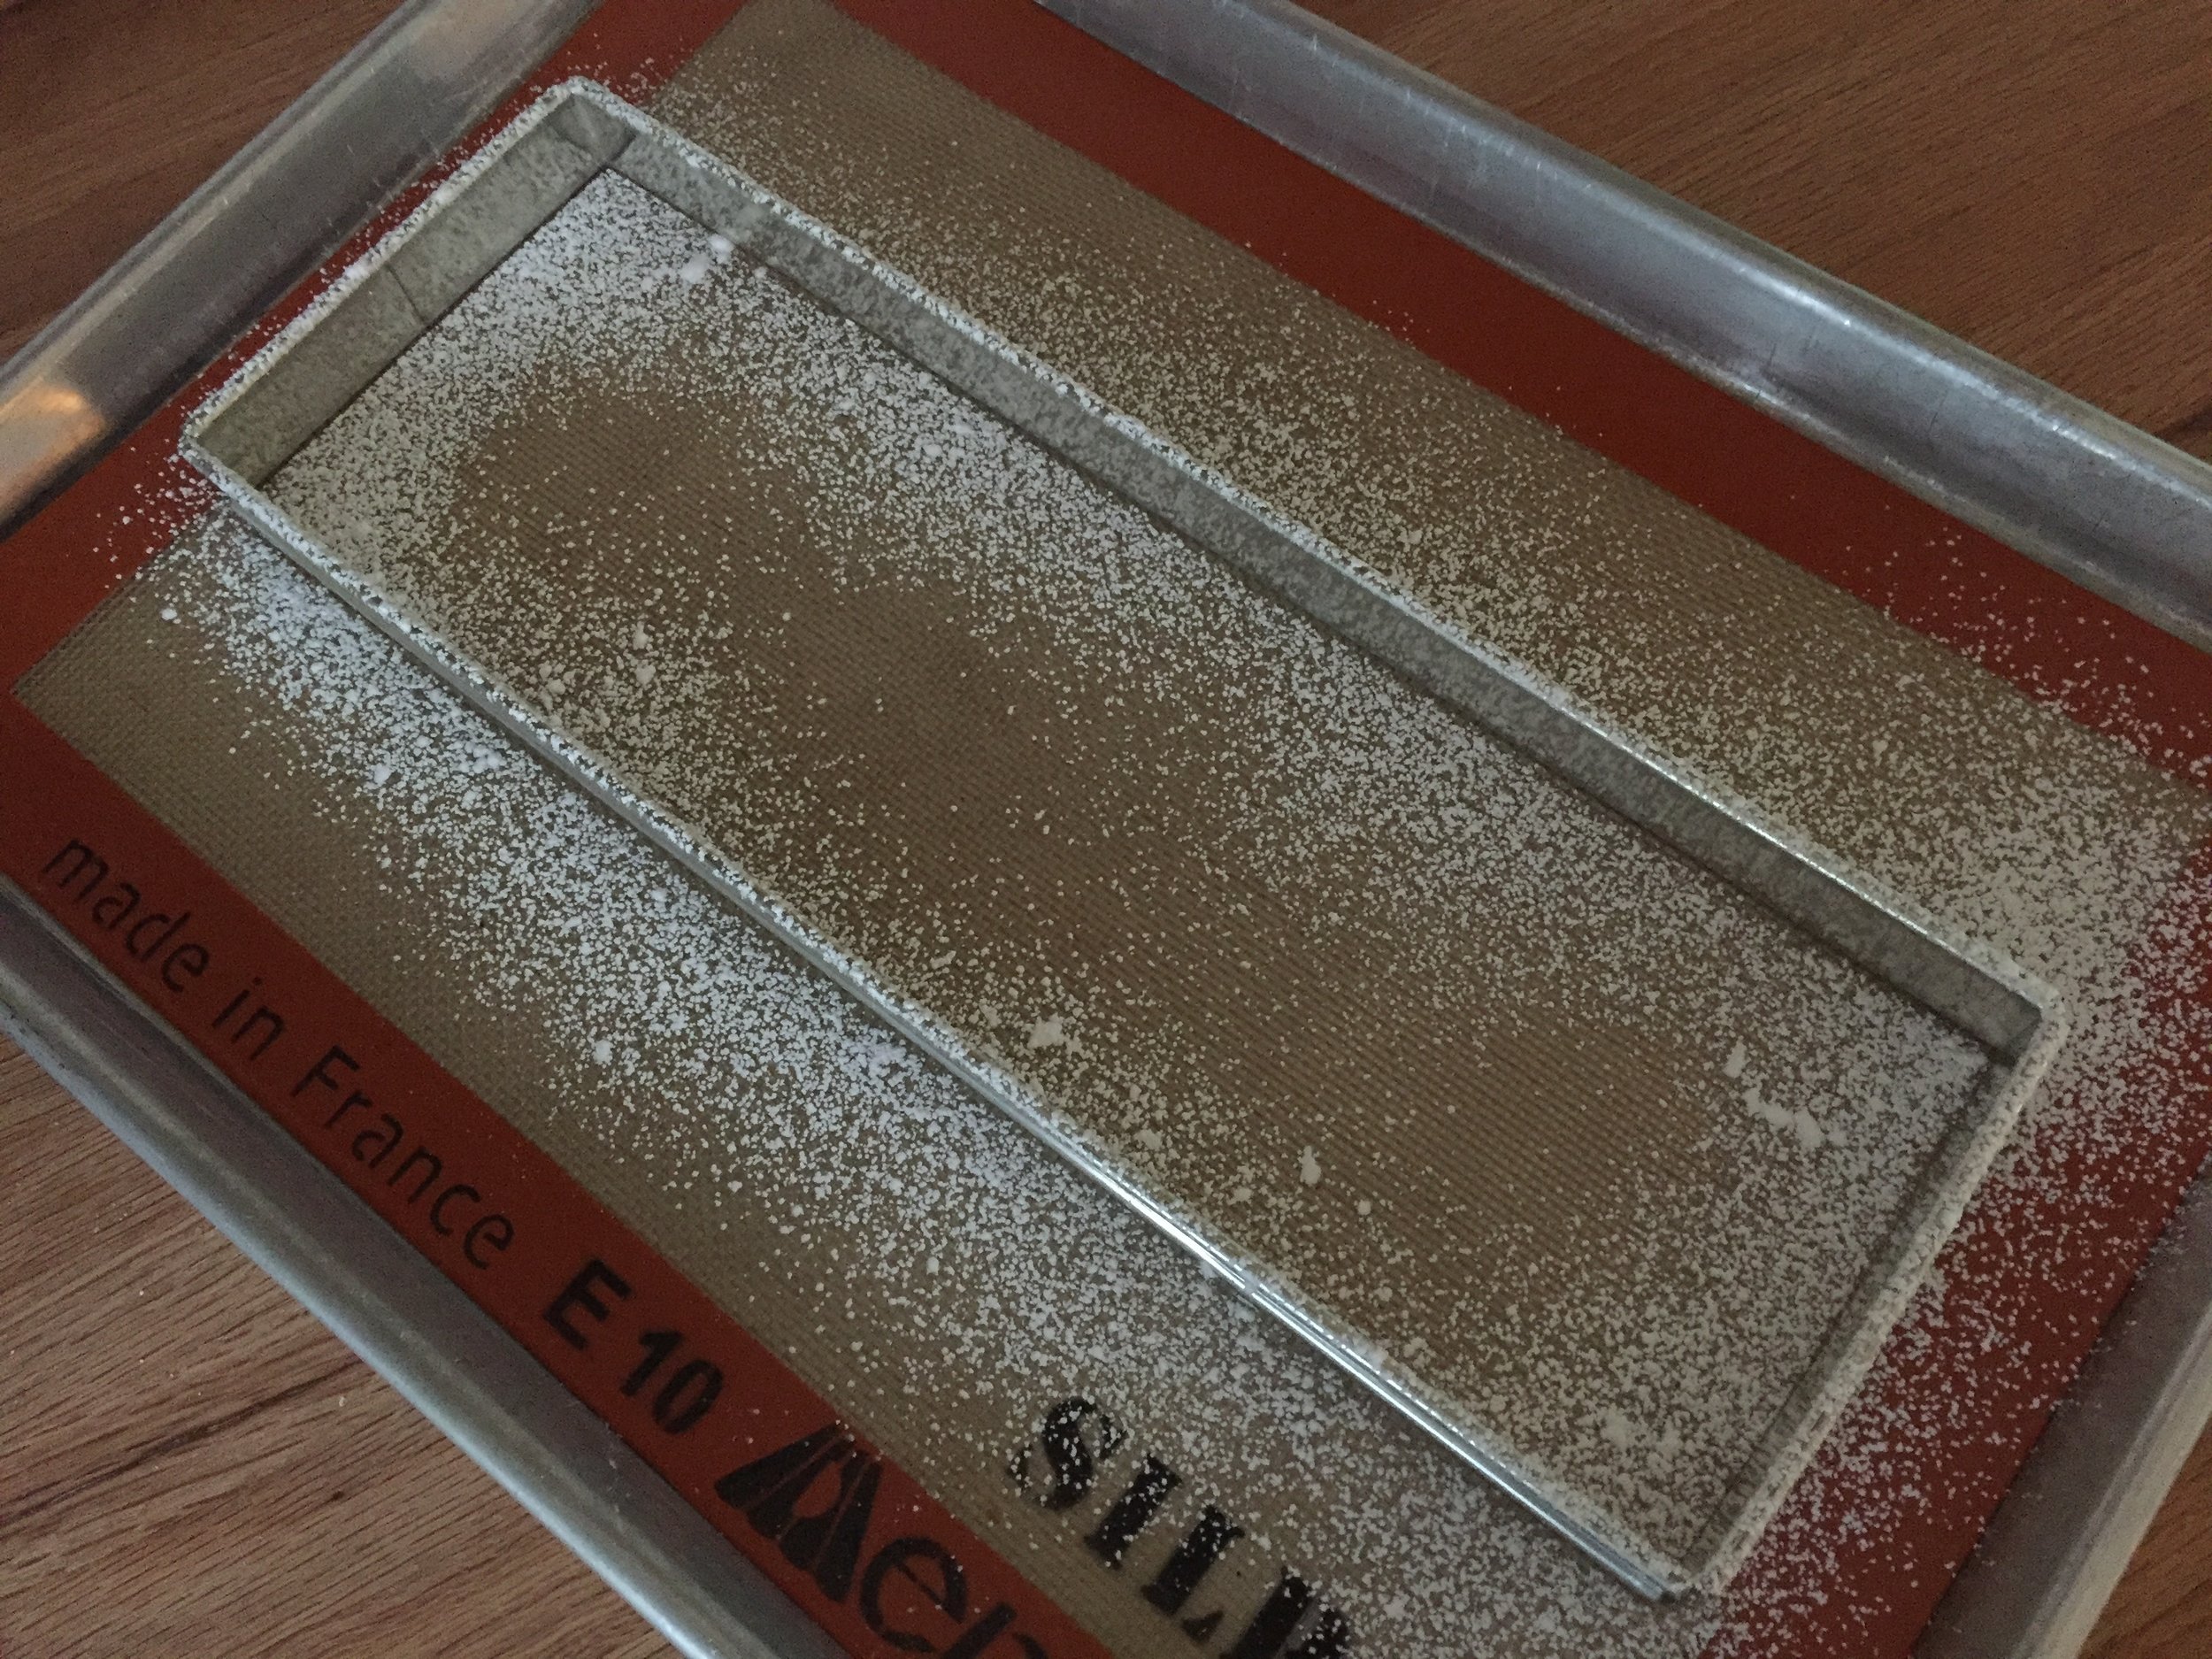
In preparation for dacquoise baking I used my 4” x 11” tart form to outline my rectangles - just place the form on the Silpat, dust powdered sugar over, lift off the form and voilà - the shapes are there as simple templates for the dacquoise. Cool.

IMG_3794.jpg

I had enough batter for the three rectangles plus some leftover for petite kisses. Awwwww.

All piped out

All piped out

Before baking I sprinkled chopped hazelnuts on top along with a generous dusting of powdered sugar.

IMG_3796.JPG

Dacquoise bakes at 350ºF for about 20 minutes. My version is a soft meringue - I look for lightly browned and set rectangles.

IMG_3797.JPG

For the ganache I put 100 g dark chocolate pastilles in a heatproof bowl, brought 250 ml heavy cream to a boil, poured it over the chocolate, blended until smooth and then added 50 g (about 15% by weight of the ganache) of praliné (caramelized hazelnuts processed to a paste). Pop it into the fridge to chill before whipping it up for the layering portion of the program. I had plenty of ganache for this purpose - good for perhaps some petite tartelettes or profiteroles.

IMG_3801.jpg

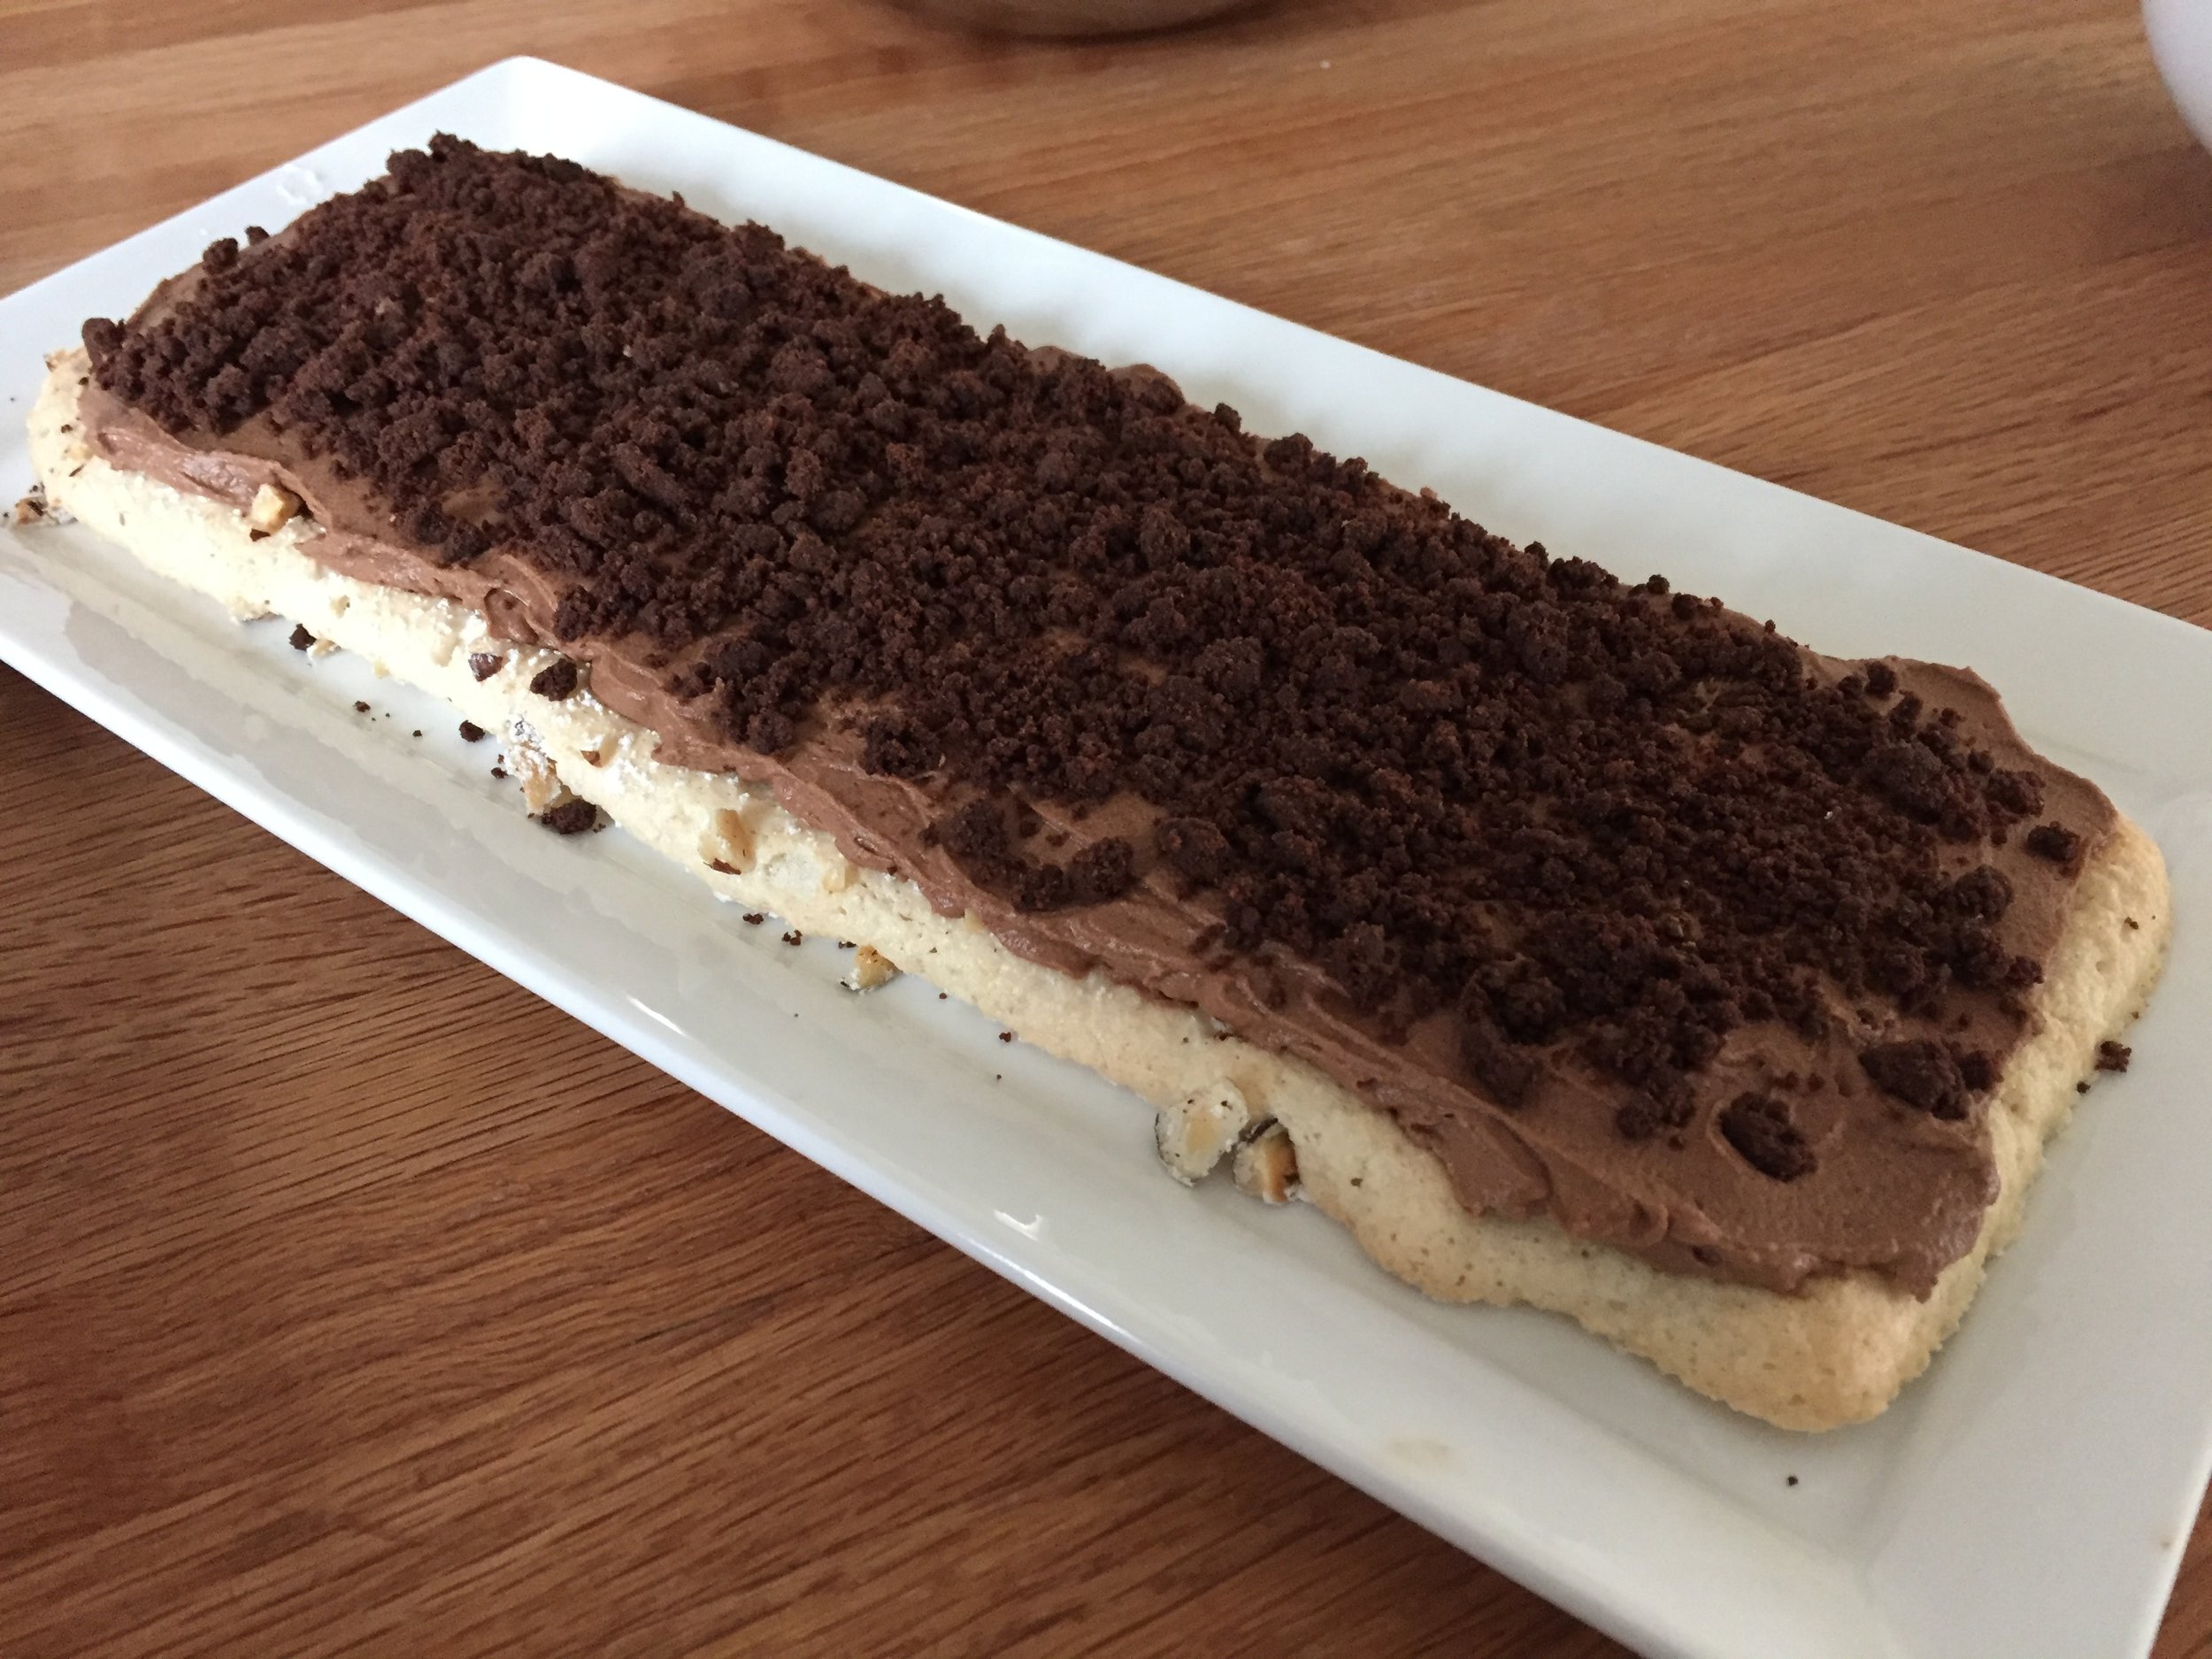
One rectangle of dacquoise down, ganache spread over it, then my chocolate crunchy crumbs (my favorite chocolate shortbread dough baked into crumbs) sprinkled over that.

IMG_3802.JPG

Another layer of dacquoise then ganache then crumbs and so on.

IMG_3804.JPG

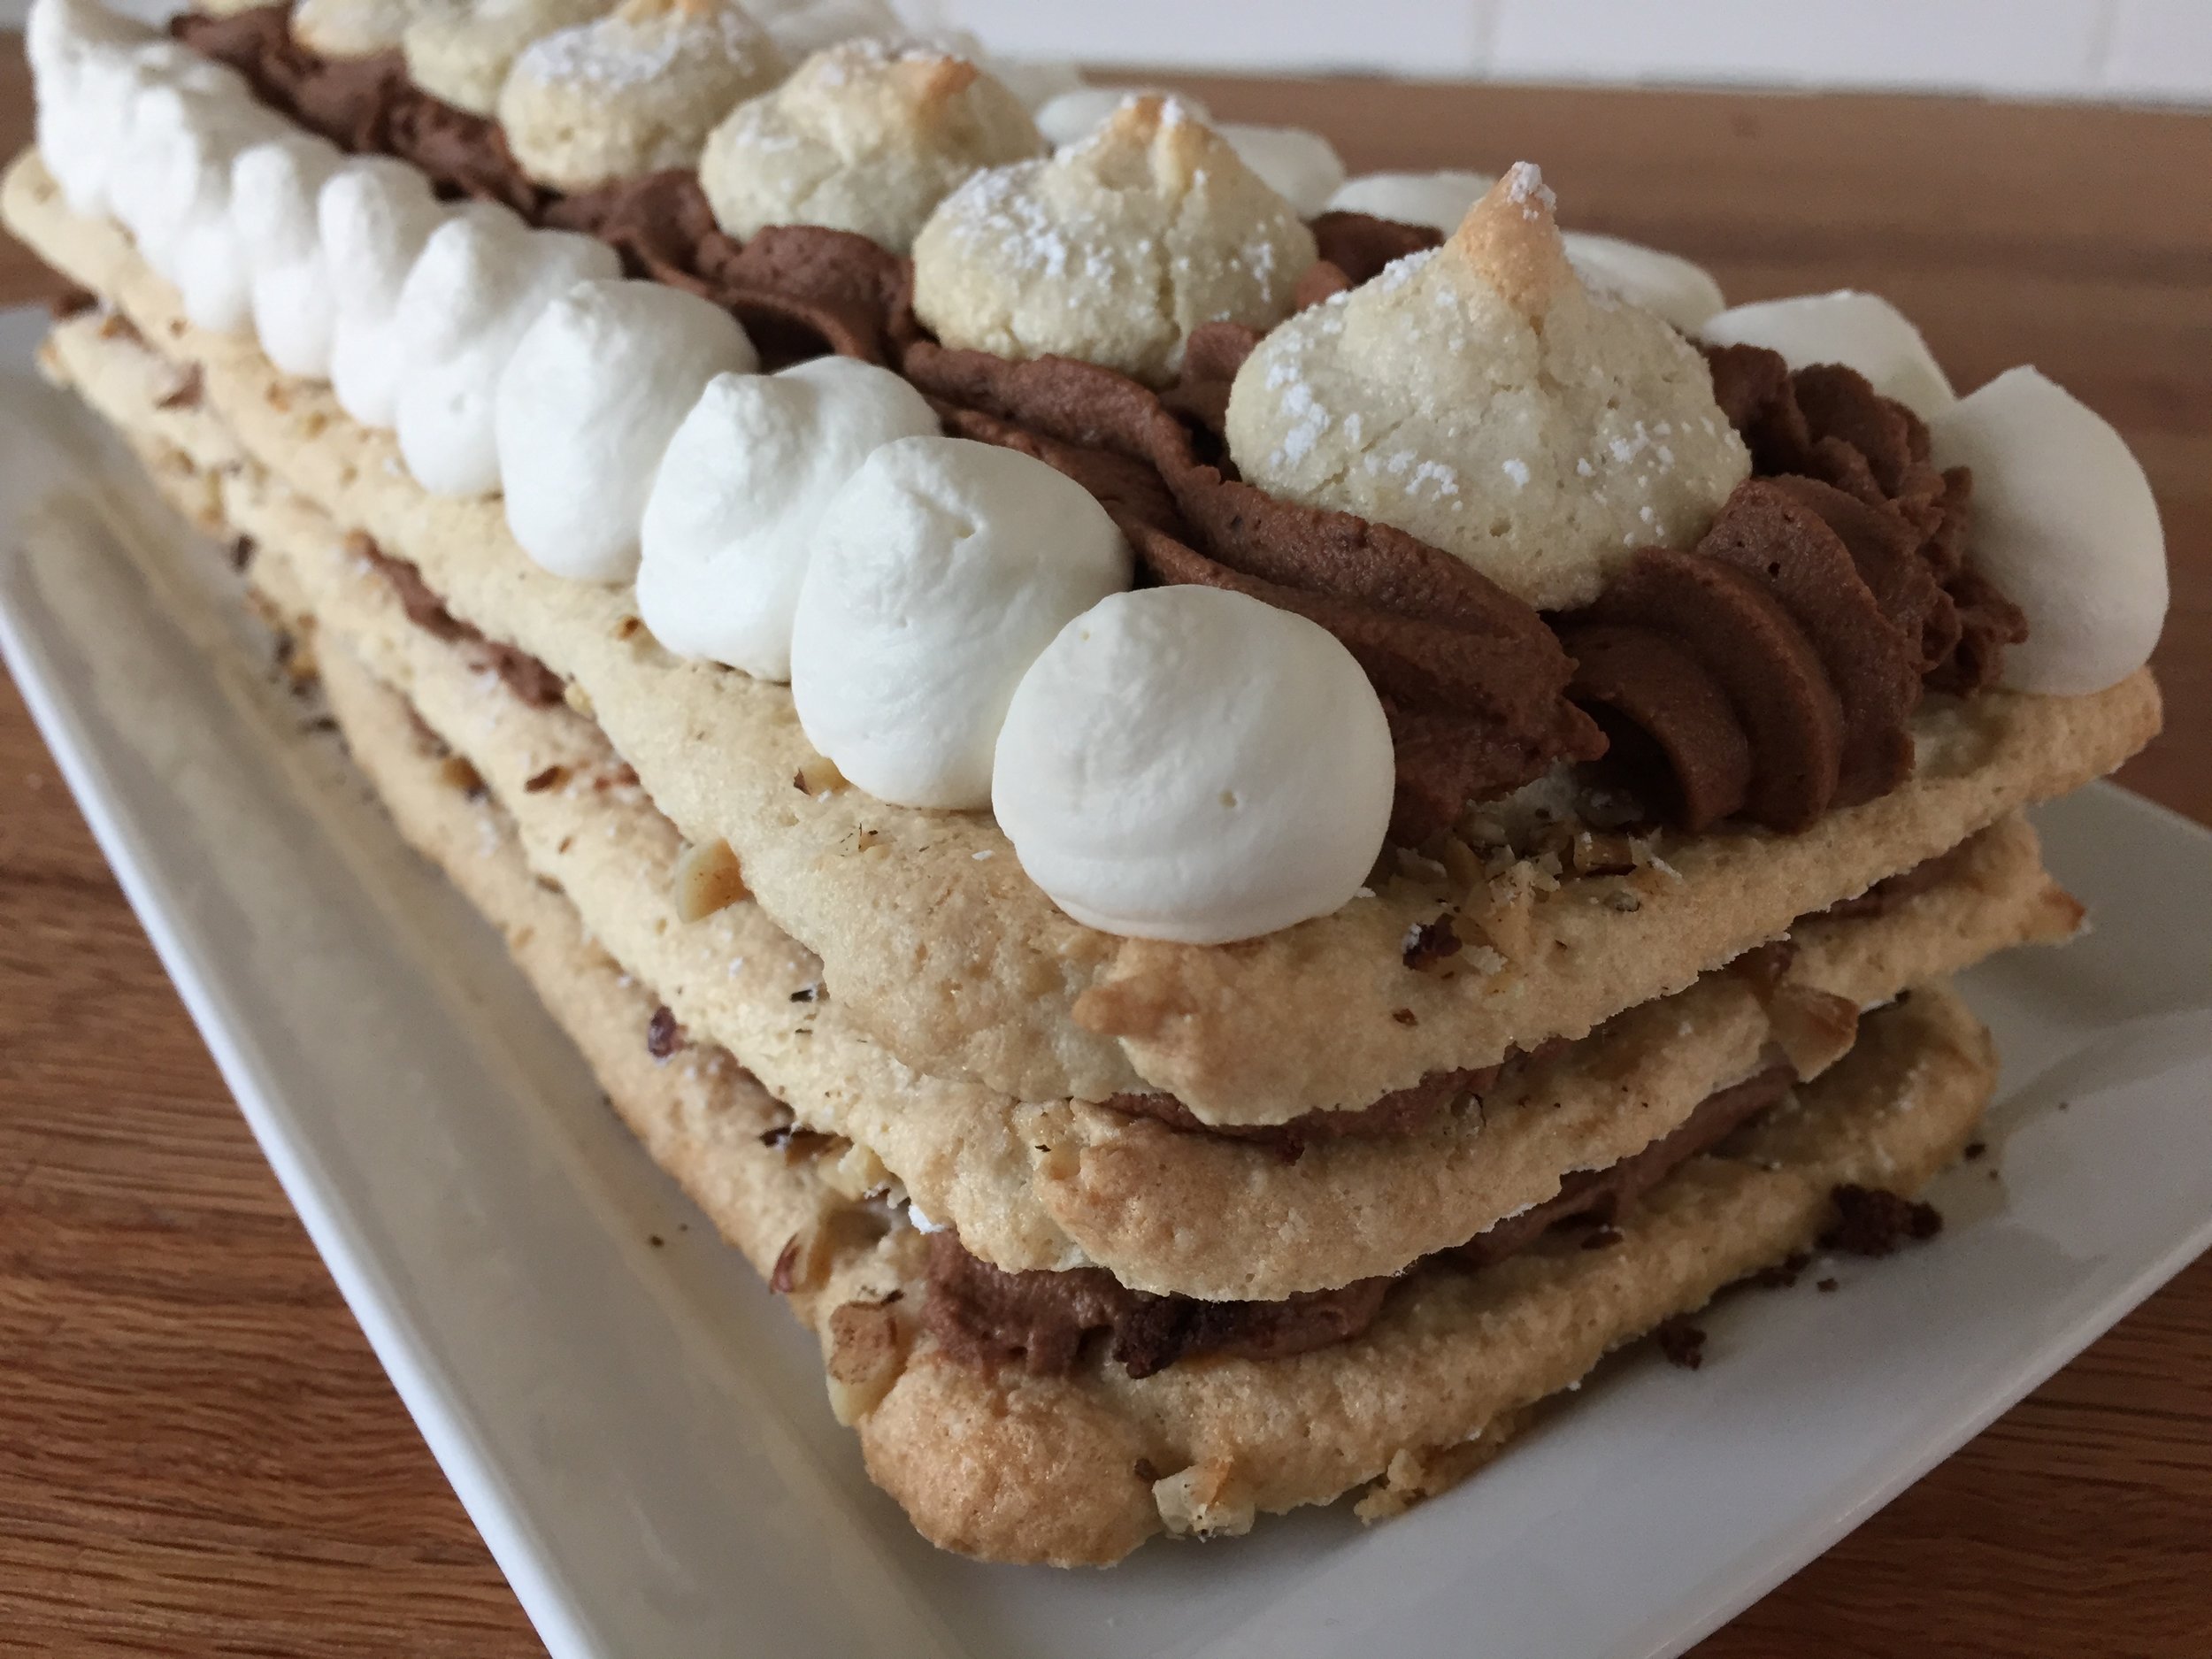
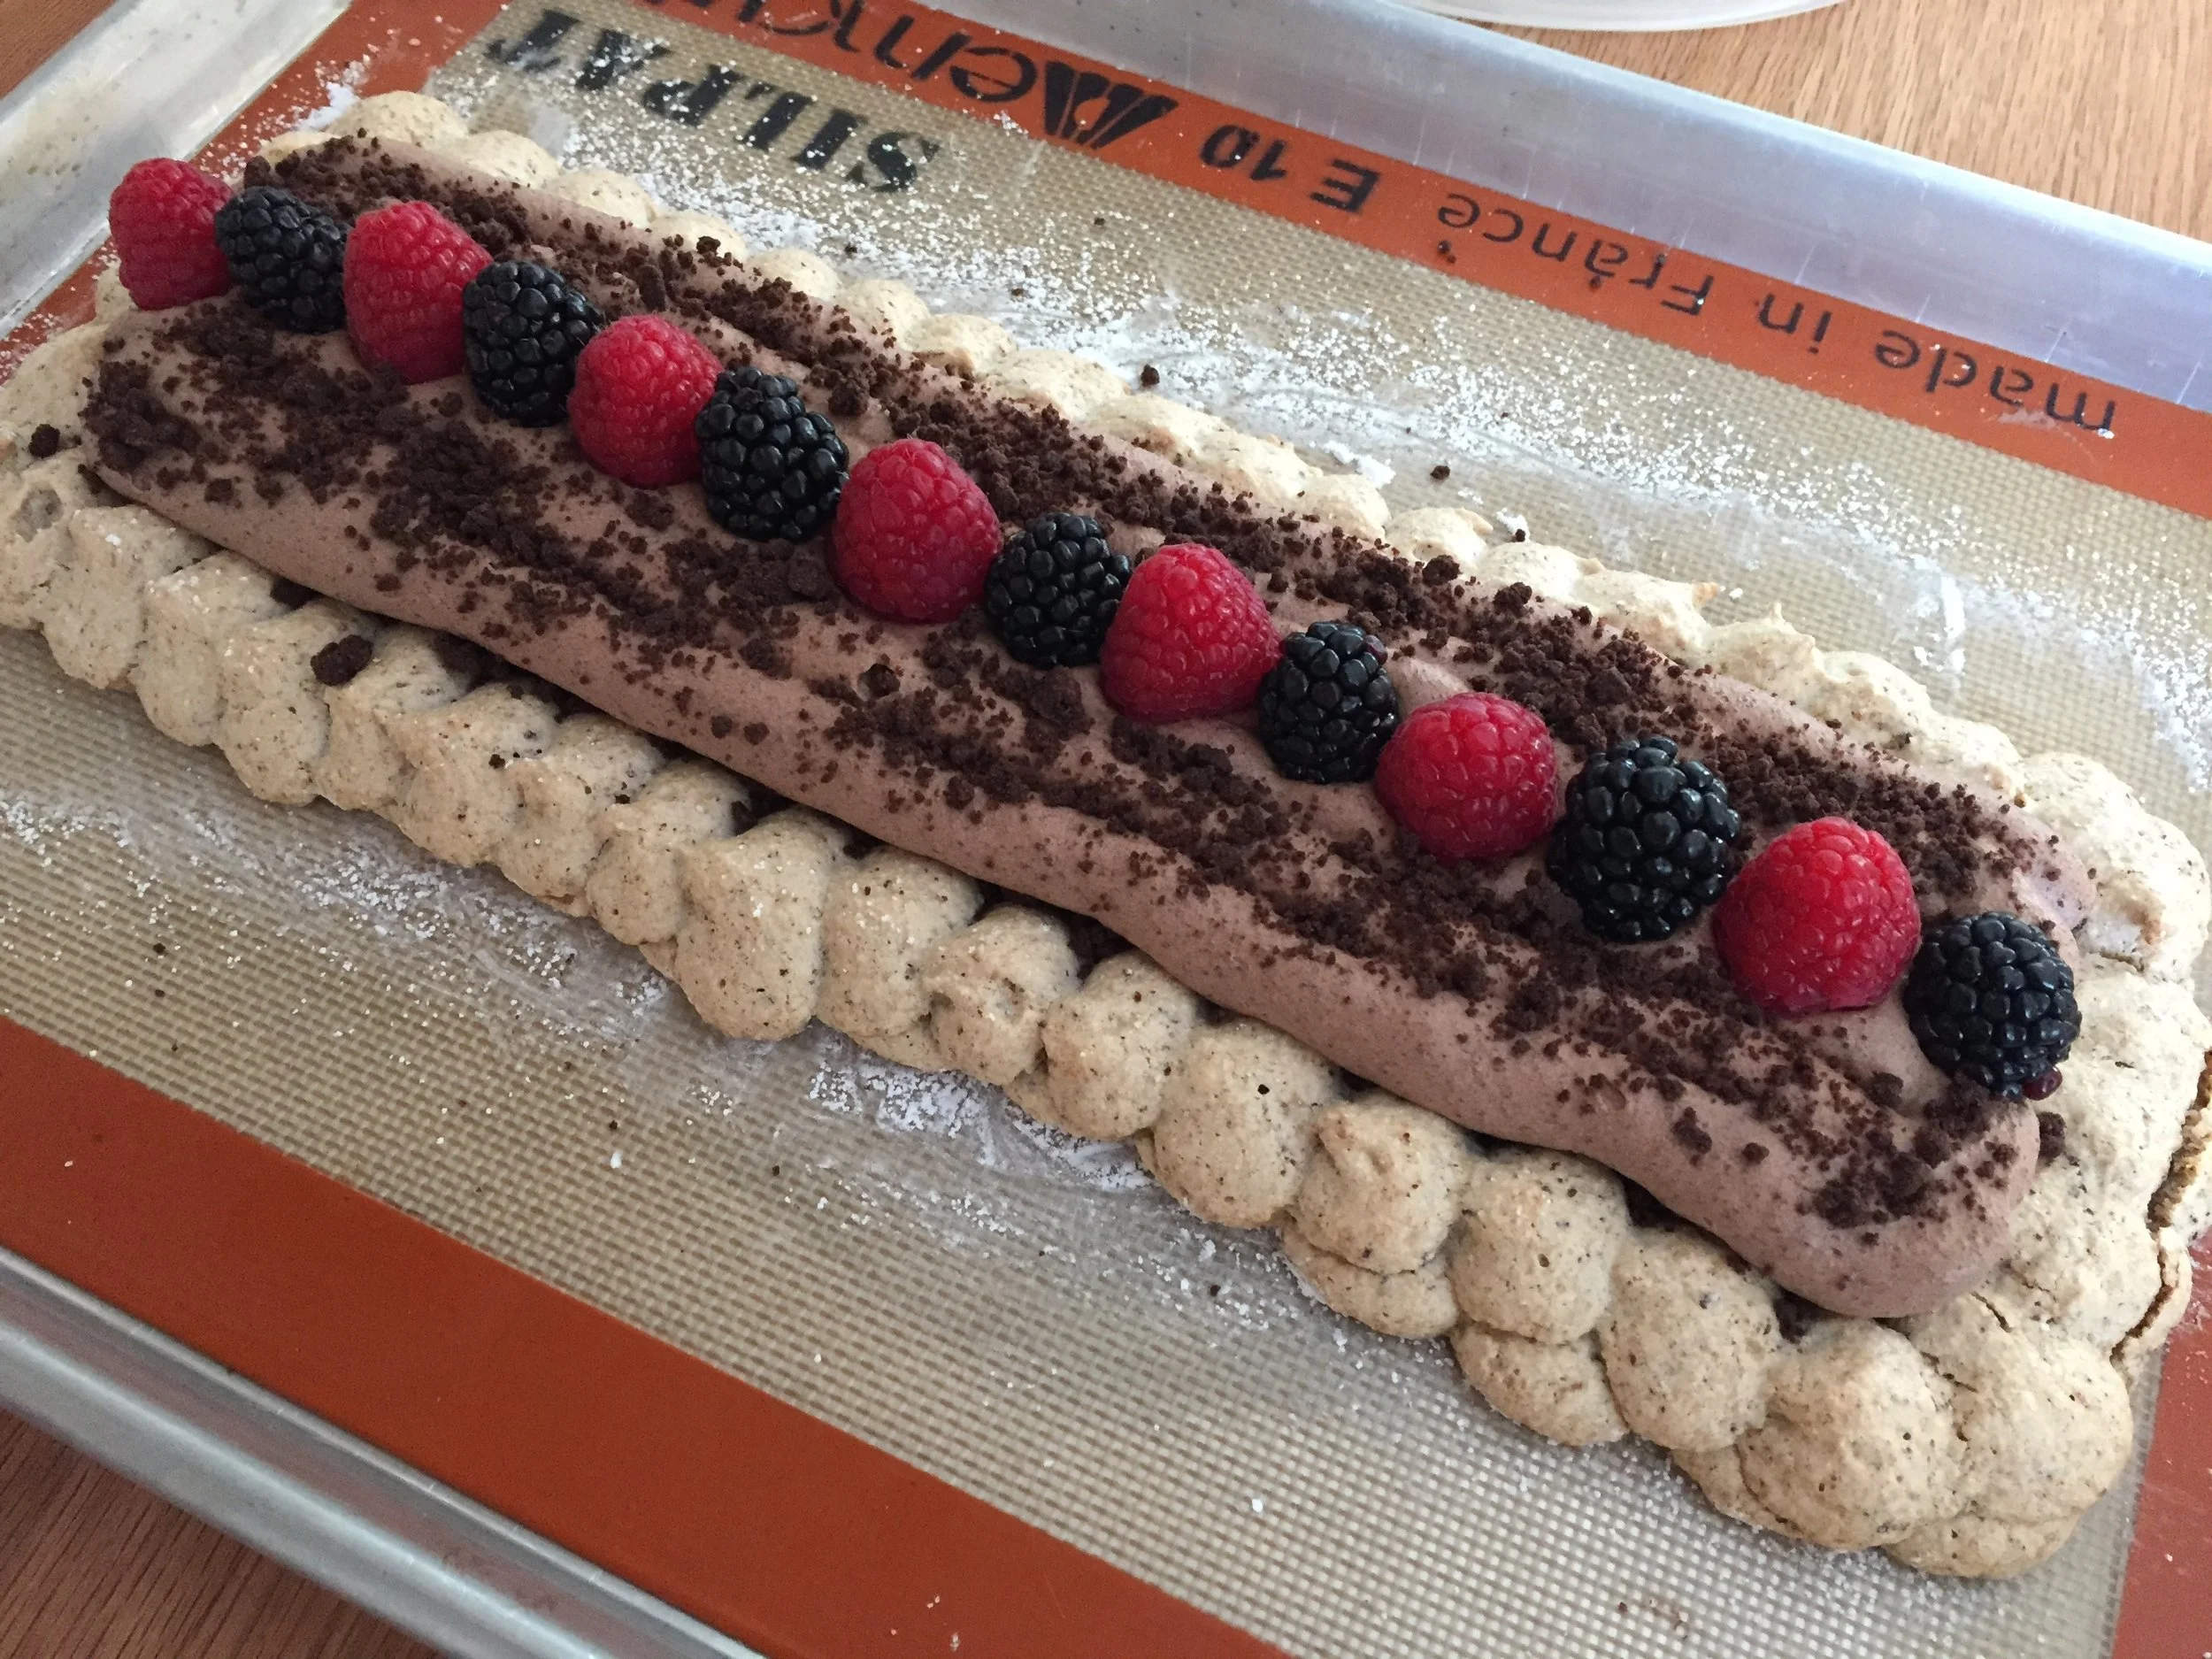
To top it off I piped some Chantilly cream “pearls” along the length with swirls of ganache down the center and popped some of the dacquoise kisses right down the middle.

All set!

All set!

IMG_3815.JPG

We enjoyed simple slices for the birthday dessert. Light, airy, delicious!

IMG_3814.JPG

Enjoy spring and here’s to lots of May flowers coming soon!

And as always - happy baking!

IMG_3832.JPG

Hazelnut dacquoise tarte

hazelmeringue

This little project came about as a way of creating a dessert for another recent family dinner at cousin Jen's house. Steve, as usual, requested something with chocolate, and since I wanted to keep it on the lighter side, I decided on a nutty meringue base (known as dacquoise) as the launch for what was to come. Cue in chocolate ganache, chocolate crunchy crumbs and fresh berries. Not a bad way to go.

I used my rectangular tart form to outline the shape in which I wanted to pipe my meringue. The pics below give you a nifty technique with which to create the area you'd like to fill.

Place your desired form/shape on your lined sheet pan (I'm using silpat here since it's my fave for baking meringues), dust around the edges with powdered sugar . . . 

tartform

then simply lift off the form and your outline is staring you right in the face. How cool is that?!

tartform

Now pipe away!! The powdered sugar won't hurt a thing since the meringue receives a dusting anyway before going in the oven.

All piped out

All piped out

The meringue bakes at 350ºF for about 20 minutes until nicely browned.

dacq

The beauty of meringue is its make-ahead-ability. Do it several days ahead and freeze it or, if doing it the day before, just lightly wrap it at room temperature until you're ready for the next step.

Time to assemble. For this one I poured a thin layer of a standard 1:1 ganache made with 61% Guittard chocolate over the base, inside the raised edge. I let it set a bit.

dacq

Then a light layer of chocolate shortbread crunchy crumbs . . .

dacq

and to finish off a whipped chocolate ganache made with the same Guittard chocolate in a 3:1 cream to chocolate ratio, more crunchies and some lovely fresh berries.

hazelmeringue

And just to show you another version, here's a small round base I made with the same hazelnut meringue. This one got a sprinkle of chopped hazelnuts too. Create your own and top it with whatever your little heart desires!

dacq

Here's the PDF of the recipe for the hazelnut meringue, also listed below. It makes just the right amount to create both the 11"x4" rectangle and the 6"-ish/16 cm round forms you see here. Play around with your own shapes and sizes.

  • 198 g egg whites (about 6 large) at room temperature

  • 50 g cane sugar (many use superfine sugar for meringues - sometimes I do, sometimes I don't)

  • 198 g hazelnut flour or meal

  • 150 g powdered sugar

  1. Heat the oven to 350ºF (or 325º convection)

  2. Whisk the hazelnut flour and powdered sugar together in a medium bowl.

  3. Place the egg whites in the bowl of a stand mixer fitted with the whisk attachment. Whisk on low for several minutes until a nice foam starts developing, then shower in the granulated sugar on medium-low speed until it's all added.

  4. Up the speed to high and whisk to medium stiff peaks.

  5. Fold in half of the hazelnut mixture, then add the second half and fold until nicely combined.

  6. Pipe or spread your meringue in the shape of your choice.

  7. Bake about 20 minutes until nicely browned. Pay attention to what's going on in that oven!!

Once your base is cool proceed with your choice of filling. The sky's the limit. And remember you can sub in pretty much any nut flour for the hazelnut in the meringue recipe. Even do half-and-half of two different nuts. Yes!

Here are just a few filling ideas: a simple lightly sweetened Chantilly cream topped with fresh berries; a tangy citrus curd lightened with whipped cream and topped with tropical fruits and maybe even a little toasted coconut; any whipped ganache using white, milk or dark chocolate topped with your own version of shortbread crumbs - how about chai or ginger - and your favorite nut, seed or sesame brittle; a standard pastry cream topped with lightly poached pear slices, some candied nuts and a drizzle of caramel.

It's up to you!

Pistachio berry dacquoise

I'm a bit behind the curve on this one but welcome to 2017!

During the Christmas-New Year's week we had a lovely dinner at friend Margaret's cozy and festively decorated home. She rustled up a Viennese beef stew with noodles, as a reminder of her recent trip to Austria in early December. Her friend Kate brought a delicious and full-of-good-stuff green salad, and I, of course, brought dessert.

Creamy custard, lightly sweetened berry compote, candied pistachios - all nestled on a dacquoise base.  Sounds pretty good!

Dacquoise is one of my favorite things to make (and to eat, yes sir!). It's basically a soft nut meringue with the same ingredients as the popular and trendy French macaron, but it is WAY less fussy and tastes great too.

Having egg whites in the fridge is often the impetus I need to make dacquoise, and so it was that I began to imagine a pistachio version for my dessert creation.

The recipe (this is half my typical base recipe): in a separate bowl whisk together 50 g almond flour, 50 g ground unsalted raw pistachios and 75 g confectioners sugar. In a mixer with the whisk attachment whip 3 egg whites with 25 g granulated sugar to stiff peaks.  Gently fold in the nut/confectioners sugar mixture just until blended.

NOTE:  you can use any ground nut, either by itself or as a mix - almond, pistachio, hazelnut, walnut or pecan - you decide.

Once the dacquoise is mixed you can pipe any shape you choose, depending on your dessert vision. You can see what I did below. I think of these as dacquoise rafts just waiting to float down a dessert river, and, in this case, destined to carry a creamy ricotta custard ingot.

ready for the oven

all baked up!

Dacquoise is one of the few things for which I use silicone baking mats. The softly baked meringue lifts off the Silpat so easily. It's a beautiful thing. And another plus is you can make these ahead and freeze them until ready to go.

Candied pistachios are next. Adjust the recipe depending on the quantities you need, but a typical base recipe calls for 2 cups raw nuts, about 1/2 an egg white, some sugar as well as spices of choice if that's what you're after - cinnamon, nutmeg, ginger, coriander, even a little cayenne pepper - it's up to you.

Just whisk up the egg white until foamy, whisk in about 1/4 cup sugar (and the optional spices) then stir in the nuts until coated. Spread out onto a parchment or Silpat lined pan and bake at 325ºF, stirring every 10 minutes or so, until the egg whites have dried and things look toasty. It usually takes about 20-25 minutes for me.

Good news - the nuts are another do-ahead component that will keep at room temperature in a covered container for many days.

crunchy goodness

The beauty of these is they aren't really very sweet, even though coated in sugar - just deliciously enjoyable!

The ricotta custard is a combo of 177 g ricotta, 354 g cream cheese, 112 g sugar, 2 eggs, 1 egg white, seeds from 1/2 scraped vanilla bean and 177 g heavy cream. Beat the cheeses, sugar, vanilla bean in the mixer until smooth, beat in the egg and white, then add the cream and blend.

Pour the custard into flexible silicone molds of choice. I used Silikomart's SF026 12-well ingot shaped mold. 

Place the molds on a sheet pan, pour some hot water in to bathe the lower half of the molds and bake at 275ºF until the custard is set. The time will vary depending on the size of your molds (for these it took 20-25 minutes). This recipe made about 20 custard ingots.

Once baked, let the custards cool to room temperature then put them, mold and all, into the freezer until firm. Then you can pop them out of the molds and store them frozen. Yay! Another do-ahead.

In the afternoon on your designated dessert day, just place the frozen shapes onto your chosen bases and refrigerate to thaw before serving. The custards hold their shape and are ready to garnish and enjoy!

I made a berry compote with a mixture of raspberries and blackberries (total 300 g) in a saucepan with 40 g of sugar and some lime zest. Heat 'em up until the berries break down a bit then stir in a cornstarch slurry (2 teaspoons cornstarch whisked in 1 tablespoon warm water) and simmer a few minutes until the mixture thickens.

Serve it a bit on the warm side or refrigerate it until ready to use. By now you know - do-ahead!!

What a luscious combination enjoyed by all! And a simple vanilla shortbread on the side added that extra special something.

Happy New Year from The French Tarte. Here's to all the baking and dessert creations to come!

Sportskage finale and then some!

I've been off the blog schedule for a bit, so today is the day for catching up. This past weekend Steve and I had an uneventful drive across the eastern US and Canada from Providence, Rhode Island to Grand Rapids, Michigan to spend the Christmas holiday with my mom. We enjoyed a night's stay at a B&B in Niagara-on-the-Lake, a lovely town on Lake Ontario at the mouth of the Niagara River.

Prior to our departure I had a busy week preparing goodies for a 50th birthday bash, including the final rendition of the Danish specialty sportskage (you can read about the trial preparation and assembly in my 12/7/14 post.) Early in the week I had prepared the various components (choux puffs, nougatine and dacquoise), and since I was making two of these creations, I opted to make one almond and one hazelnut.

The choux puffs are to be dipped in caramel which you see cooking on the stovetop below.

The whipped cream is the one component that has to be done just before assembly, so I made sure I had everything at the ready, including my well chilled cream.

The nougatine is folded into the whipped cream and then formed as a domed mound on top of the dacquoise base.

Next up is the part that was making me apprehensive - piping more whipped cream decoratively over the mound. I started with a small star tip and piped vertical lines around the base of the mound (reminded me of piping the collars of buttercream on the religiueses at Pascal Pinaud's à Paris!)

Then, using a petal tip, I finished it off . . . .

Hey, that actually went better than expected - hooray!!

Next I placed caramel-dipped choux puffs over the surface, pressing them in ever so slightly . . .

and the deed was done - whew!!  I will say this is one of the most interesting things I've made over the years.  Never let it be said that I won't accept a challenge, yessir, you betcha.

In addition to the Danish "cakes" and seven different flavors of shortbread (salted caramel, espresso, pistachio, orange hazelnut, honey herbes de provence, toasted coconut and lime ginger), I made three versions of moelleux chocolat - espresso . . . .

orange rosemary . . . . .

and raspberry.

Also several tarts:  chocolate ganache, caramel nut, pear almond and Breton pistachio-raspberry.

It was a busy, but organized and enjoyable week of planning and preparation - a lot of what the pastry world is all about!

Now it's time for some Christmas relaxation, being with family and friends and scheming about new projects for 2015!  Joyeux Noël, Buon Natale and Merry Christmas to all!

Sportskage trial

I'm on a pastry detour to Denmark!  Who woulda thunk it?!

I recently received a request to make a sportskage (sports cake), which, as I've come to learn, is a classic "cake" created back in the late 1800's by La Glace, a pastry shop in Copenhagen, for the opening of a play entitled "Sportsmen".  It's been around ever since and continues to be a popular offering at the conditori.

It is basically whipped cream with chopped caramelized nuts (nougatine) folded into it, domed on top of an almond macaron type base, then topped with more whipped cream and caramelized choux puffs.  When I first saw photos of this pile of cream, I was curious, not only as to how one approaches the assembly, but also the slicing and serving of such a thing.  How does it hold its shape, I asked myself?

What better way to find out than to jump right in and make it.  My trial was underway!

Unlike the recipes I reviewed on line which use almond paste, egg white and sugar for the "cake" base, I opted to substitute one of my (and Steve's) all time favorite components.  Dacquoise is in the meringue family, made with ground nuts (almonds or hazelnuts or pistachios or walnuts - you name it), egg whites and sugar, much like the ever-so-popular French macaron.  

For me the beauty of a dacquoise is how much easier it is to make than the fussy macaron.  In this case I wanted to know if the small version of my go-to recipe would be enough for a 9-10" diameter base for the sportskage.

I decided on a hazelnut version and proceeded with my mise en place.  Very straight forward, no muss, no fuss.  When making a meringue I typically weigh out my egg whites and let them sit at room temp for an hour or so, since they mount better when no longer refrigerator cold.

Here I have egg whites (99 gm or about three), confectioner's sugar (75 gm), ground hazelnuts (99 gm) and granulated sugar (25 gm) at the ready.


Whisk the ground hazelnuts and confectioners sugar together . . .


Start the egg whites on low speed, using the whisk attachment, and, once they start to look foamy, add the granulated sugar . . . .

foaming up!

adding the sugar

then continue beating on high speed to firm peaks.


look at these peaks!

Now gently fold in the hazelnut/confectioners sugar mixture just until incorporated . . .


and pipe into a nice round!

ready for the oven
You can appreciate that my coil doesn't quite reach the periphery of my 240mm cake ring, so I might need a slightly larger recipe when it comes time for the real thing.  We'll see.

Out of the oven . . .


I was happy with the thickness, feeling it would nicely support the cream that would later be mounded on it.  But to give me a slightly larger base for the final dessert I'll consider a 15-20% increase in my base recipe.

Next I prepared the nougatine by making a standard caramel into which I stirred toasted hazelnuts. This mixture is poured immediately onto a Silpat and allowed to cool until hard.  BEWARE!  Hot caramel is dangerous!!  Wear protective oven gloves or hot mitts to prevent burns.  I know - I've been there.


I prefer blanched hazelnuts as a rule, but this time I used a mixture of blanched and natural hazelnuts. When I learned from my local nut vendor that blanched hazelnuts are currently very hard to come by and expensive due to a poor crop in Turkey, I opted for the skins-on version from Oregon to supplement the small supply of blanched nuts that I had in my freezer from earlier in the year.   I initially tried the toasting-in-the-oven/rubbing-the-skins-off technique, but boy-oh-boy, those skins did NOT want to come off, try as I might.  I just had to go with the flow and move forward, skins and all.

Once the nut/caramel mixture was cooled I ground it up to a coarse texture.  I want a nice crunch to the final dessert but am careful to avoid caramel pieces that are too big since they can be quite hard and difficult to chew.  No broken teeth allowed!


coarsely ground hazelnut nougatine

The next component is pâte à choux for the small profiterole style puffs that will be dipped in caramel (another CAUTION HOT!) and placed on the surface of the sportskage.  I used my usual base recipe (à la Michel Roux) which calls for 125 ml water, 125 ml milk, 100 gm butter, 1/2 tsp salt, 3/4 tsp sugar, 150 gm flour and 4 eggs.

I've found a number of recipes that use only water as the liquid, but I find the combo of water AND milk gives the puff a nicer flavor and more golden hue.  Granted the choux isn't really there to provide much flavor but serves primarily as the vehicle, whether for sweet or savory applications. Yet, it's good to have a puff with a bit of character, if you ask me!

mise en place for choux

The water, milk, butter, salt and sugar go into a saucepan on the cooktop and heated to melt the butter and bring to a boil.  Take it off the heat, stir in the flour in one fell swoop, then place it back onto the heat to dry the mixture out briefly.

You can mix the eggs in either by hand or in the mixer.  I opt for the mixer since it's easier.  Dump your hot panada (what it's called before the eggs are added) into the bowl and, using the paddle attachment, add the eggs one-by-one until each is incorporated.

This part of the choux making process is fascinating - with each egg addition the mixture looks all clumpy and lumpy, but it magically comes together, becoming a silky, shiny paste.

finished choux paste
OK, so mine looks a little lumpy, but it piped out beautifully and baked up just right!

piping choux

out of the oven, looking good

Most of the work is done!  As is the case with soooooo many baking projects, it's all about planning. The three components I've made so far can all be made ahead.  The dacquoise freezes beautifully, the nougatine will keep well in a closed container at dry room temp conditions for days, and the choux puffs can also be frozen. Now all I have to do is whip the cream and assemble.

For my test case I decided on a smaller version, so I cut my base down to 16 cm size.

ready to assemble
 I folded the nougatine into the whipped cream and mounded it on the dacquoise with nary a hitch.  It was much easier than I anticipated and certainly held its shape.

interesting, eh?

My puff garnishes were way out of proportion, since they rather dwarfed this smaller base version.  I popped a few on anyway and attempted piping "petals" of whipped cream. 

just think of them as profiterole "tumors"

kind of like weird layered growths on the bark of a tree
 
Yikes!!  Needs work.

Let's just say I have to practice this part for the final - kind of like studying for a test.  Decorative piping has never been a big interest of mine - I think of a piping bag as a practical tool for dispensing, since it gives one control and direction to get the product exactly were you want it.  But I'm game for some decor - just need the right tip!

At any rate I put the whole thing in the fridge and, several hours later, Steve and I did a mini tasting.  I was delighted that it sliced very easily and held its shape to boot.  And it tasted good - yes!

we had already popped all the choux puffs off and eaten them

This test run taught me a few things - make a slightly larger base to achieve my 9-10" diameter; make sure the nougatine isn't too coarse or caramel pieces too big; make the choux puffs smaller; practice "petal piping".  Shouldn't be too hard, right??

I hope to share pictures of the final finished product with you in a couple of weeks.  Stay tuned!

In the meantime stay warm, enjoy December and may visions of sugarplums dance in your heads.